Welcome to our community

Be a part of something great, join today!

  • Hey all, just changed over the backend after 15 years I figured time to give it a bit of an update, its probably gonna be a bit weird for most of you and i am sure there is a few bugs to work out but it should kinda work the same as before... hopefully :)

RED V-Raptor vs Alexa 35

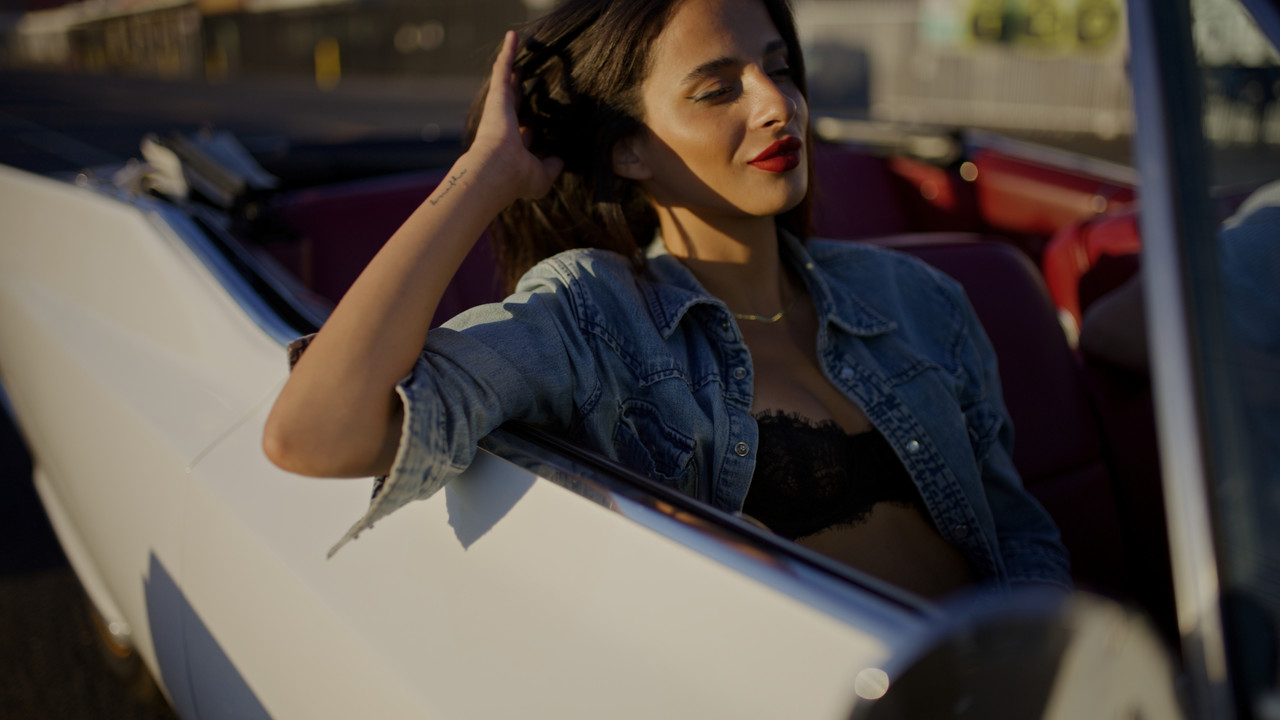
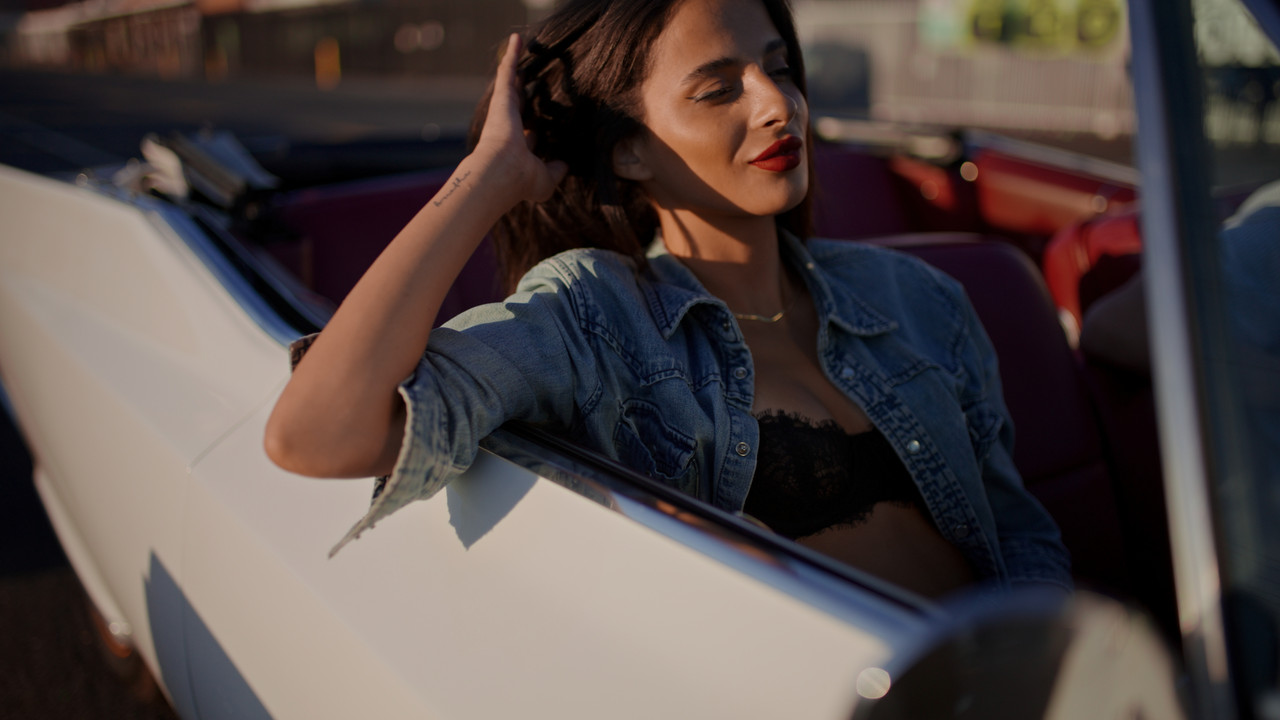
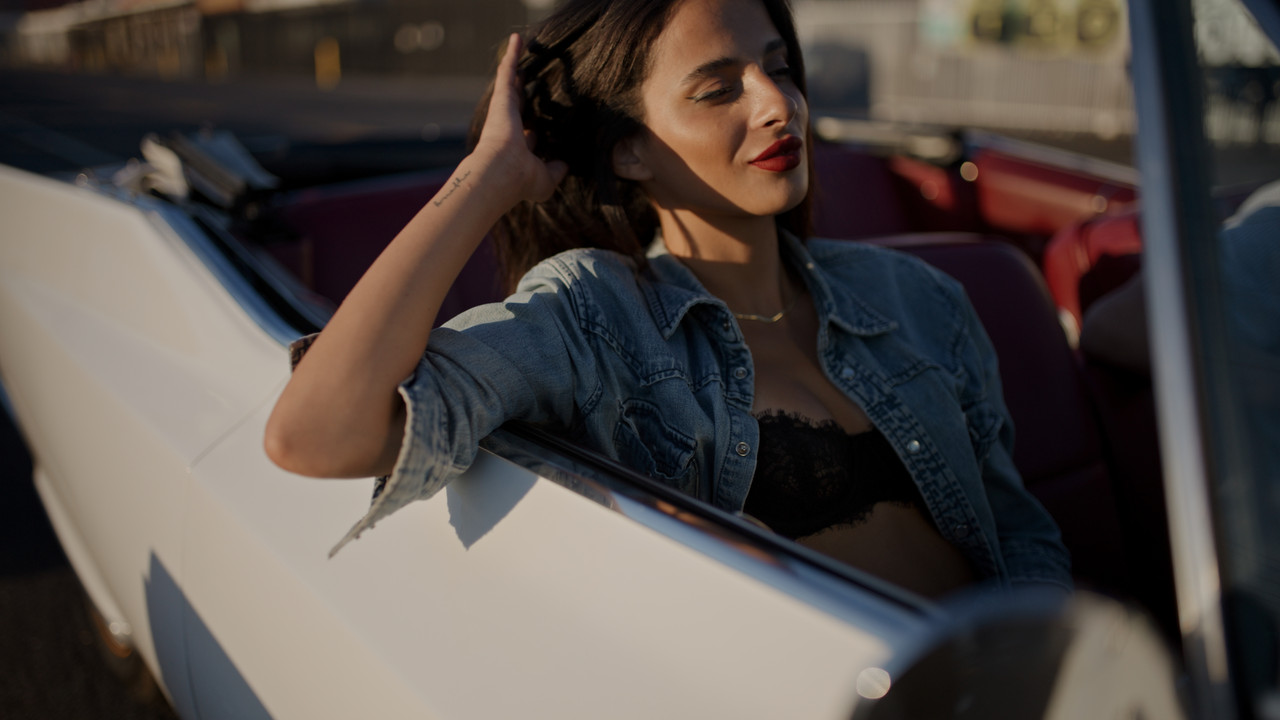
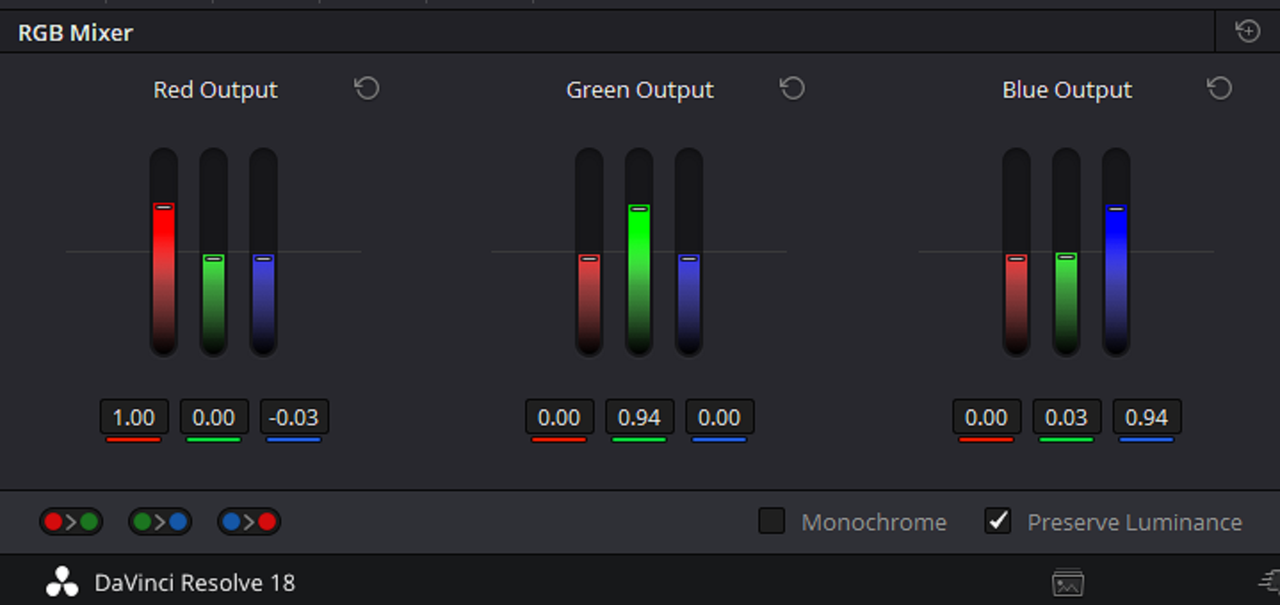
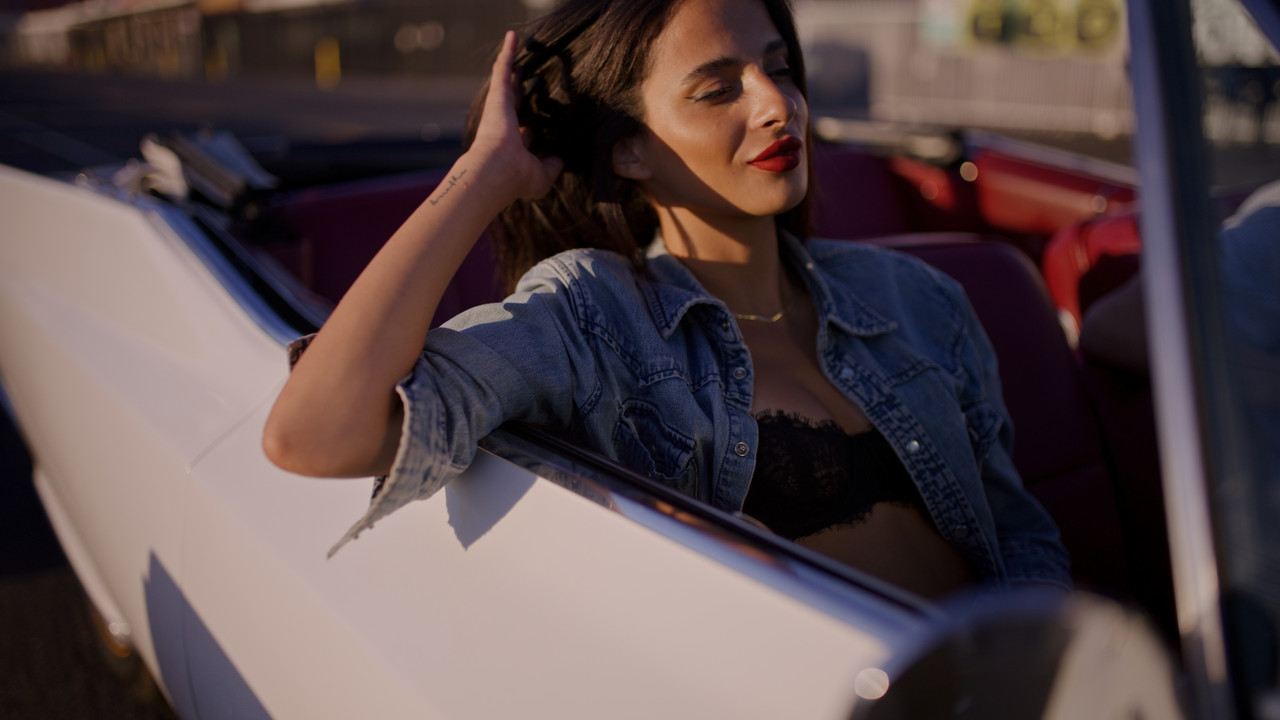
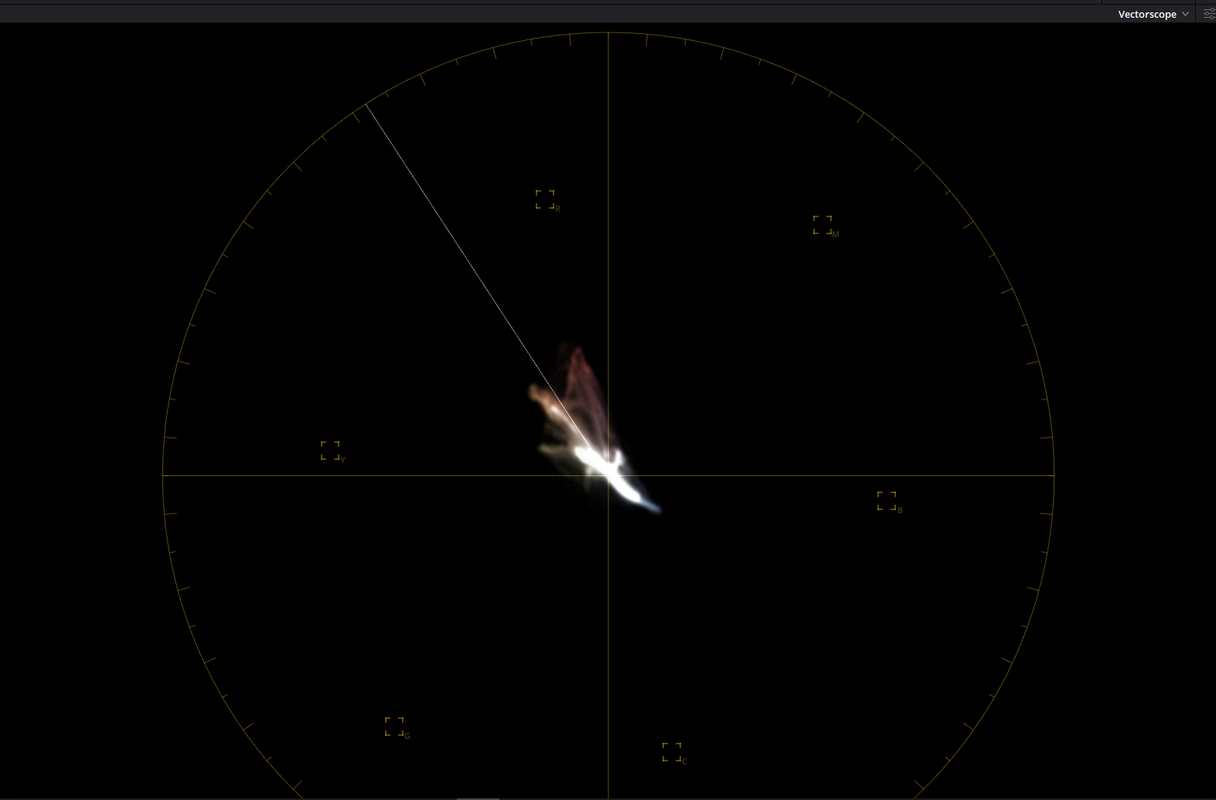
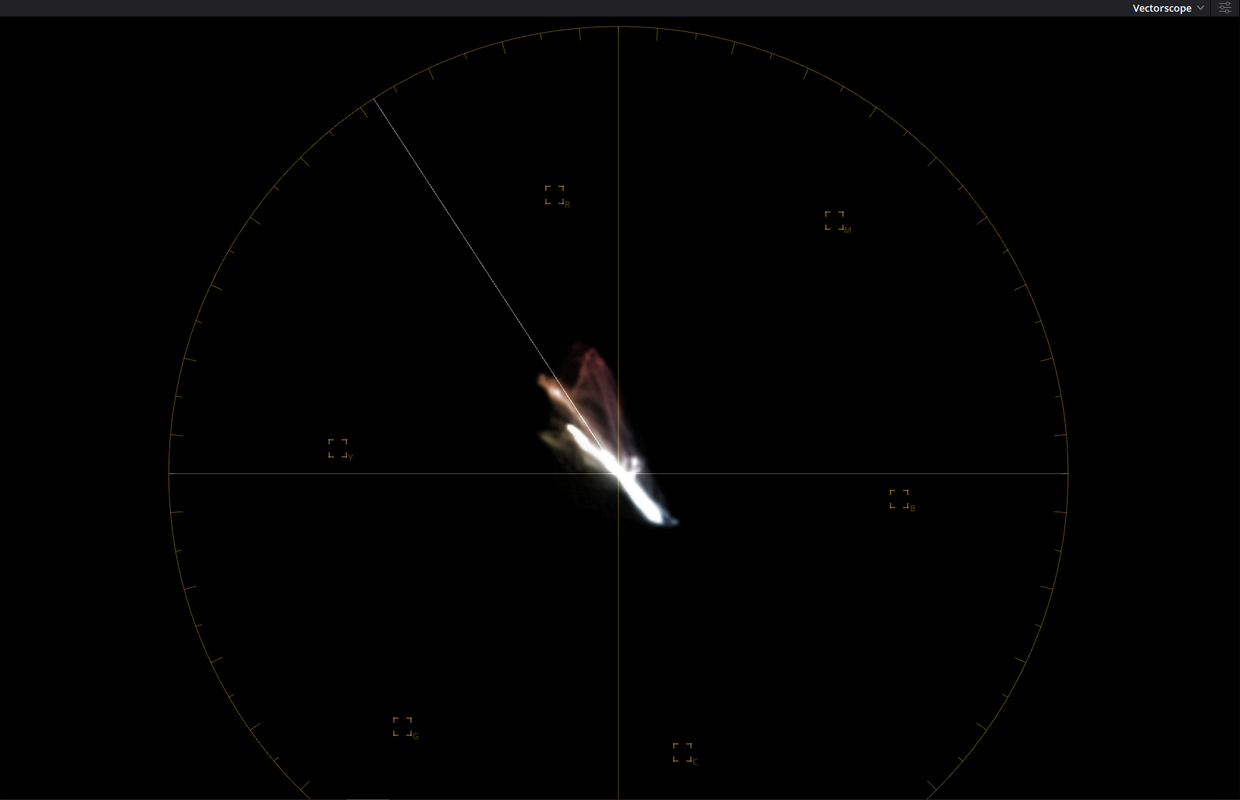
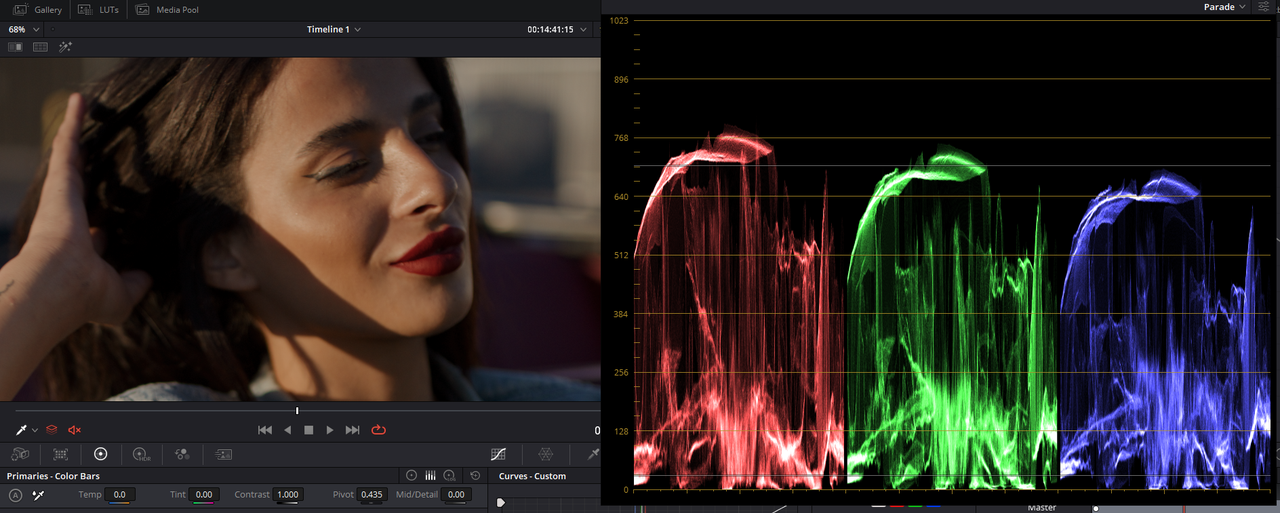
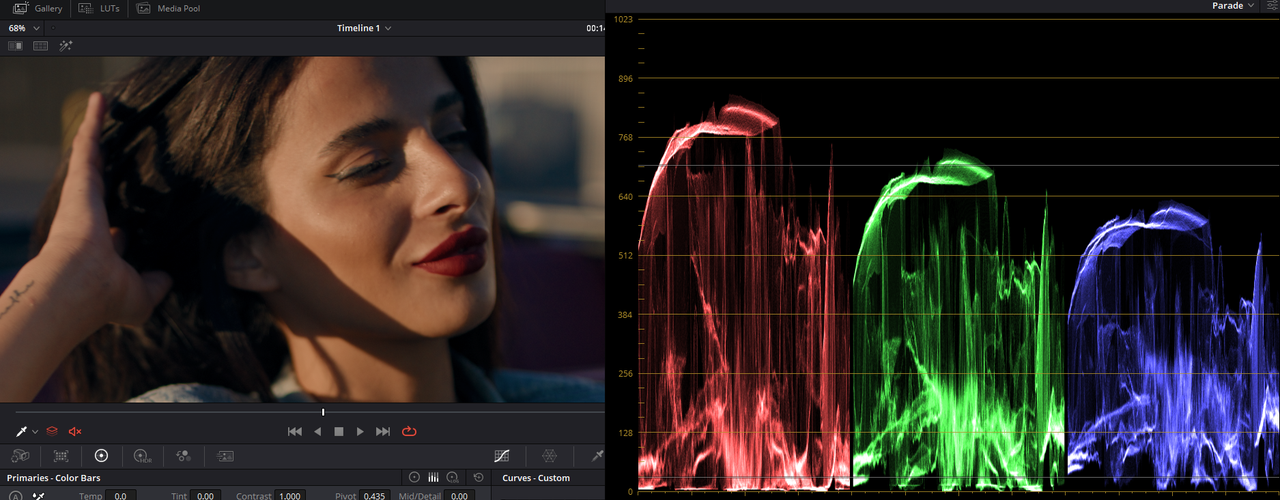
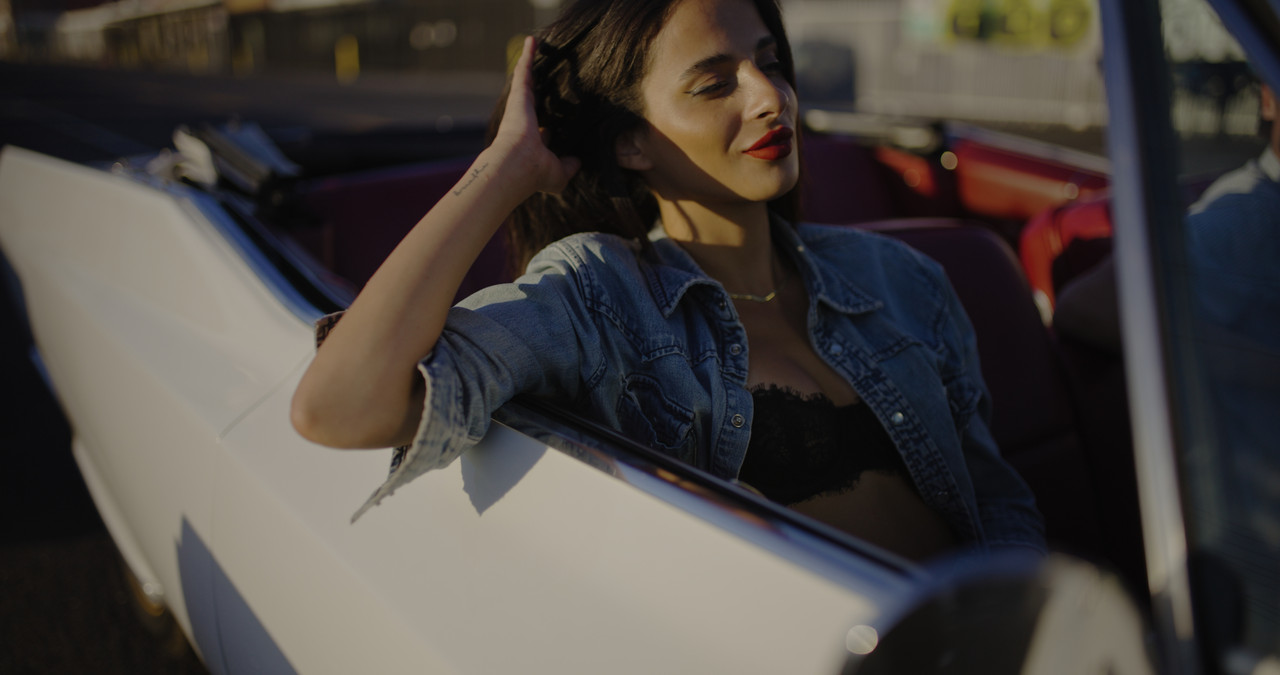
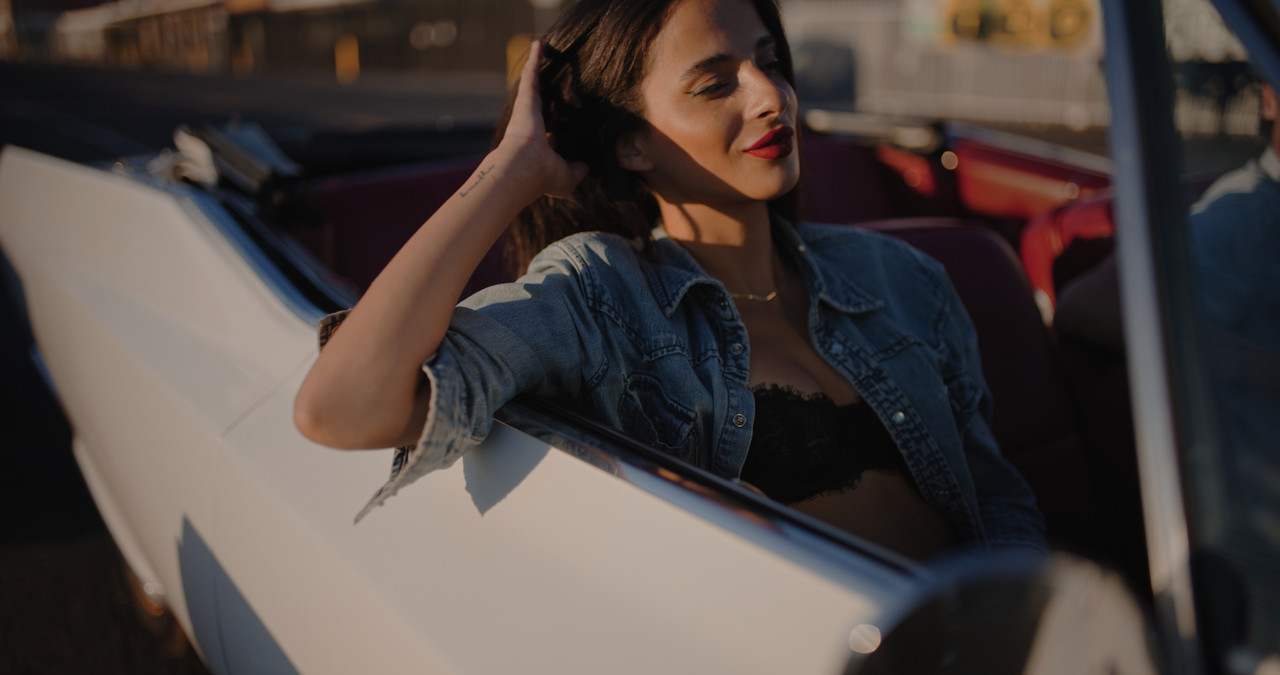
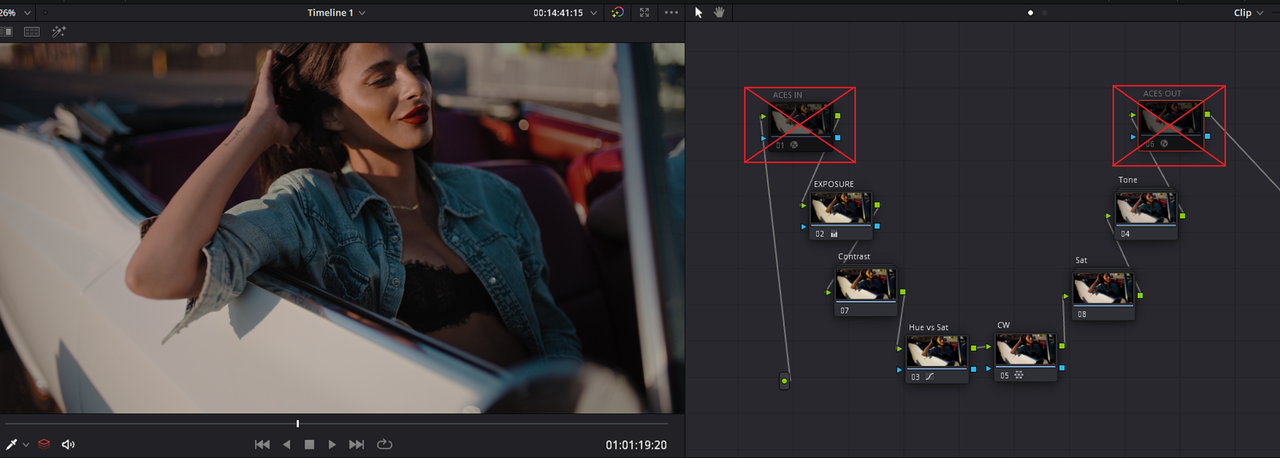
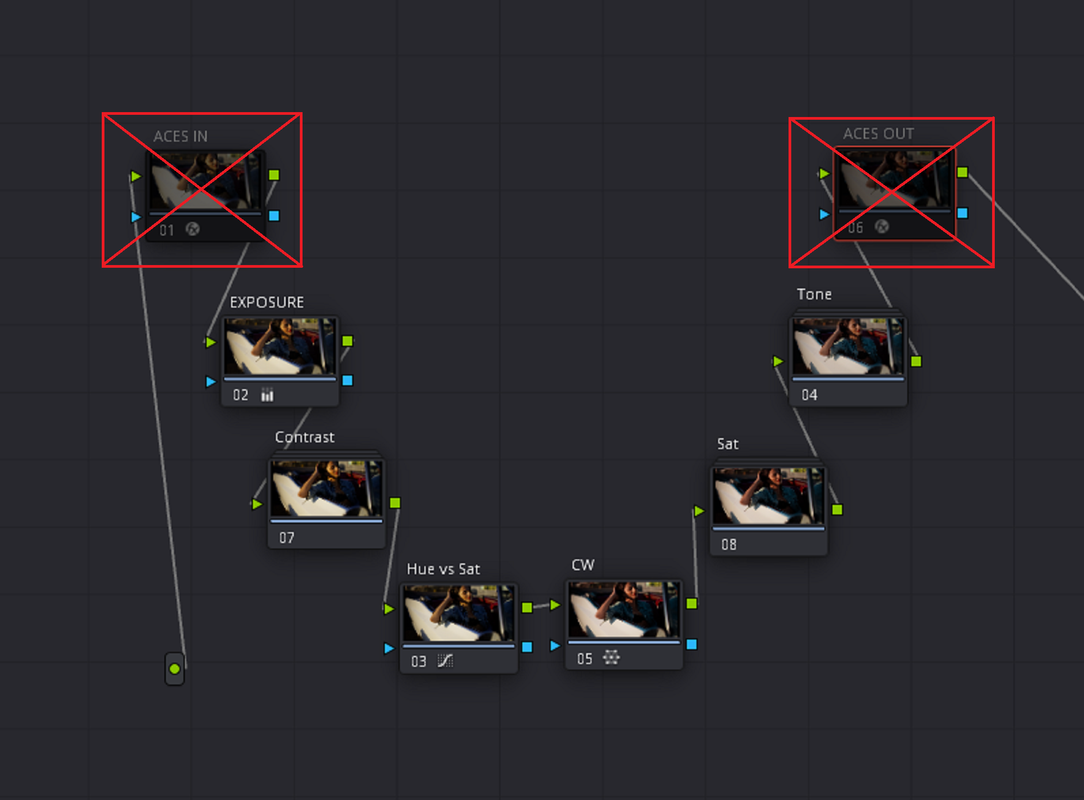
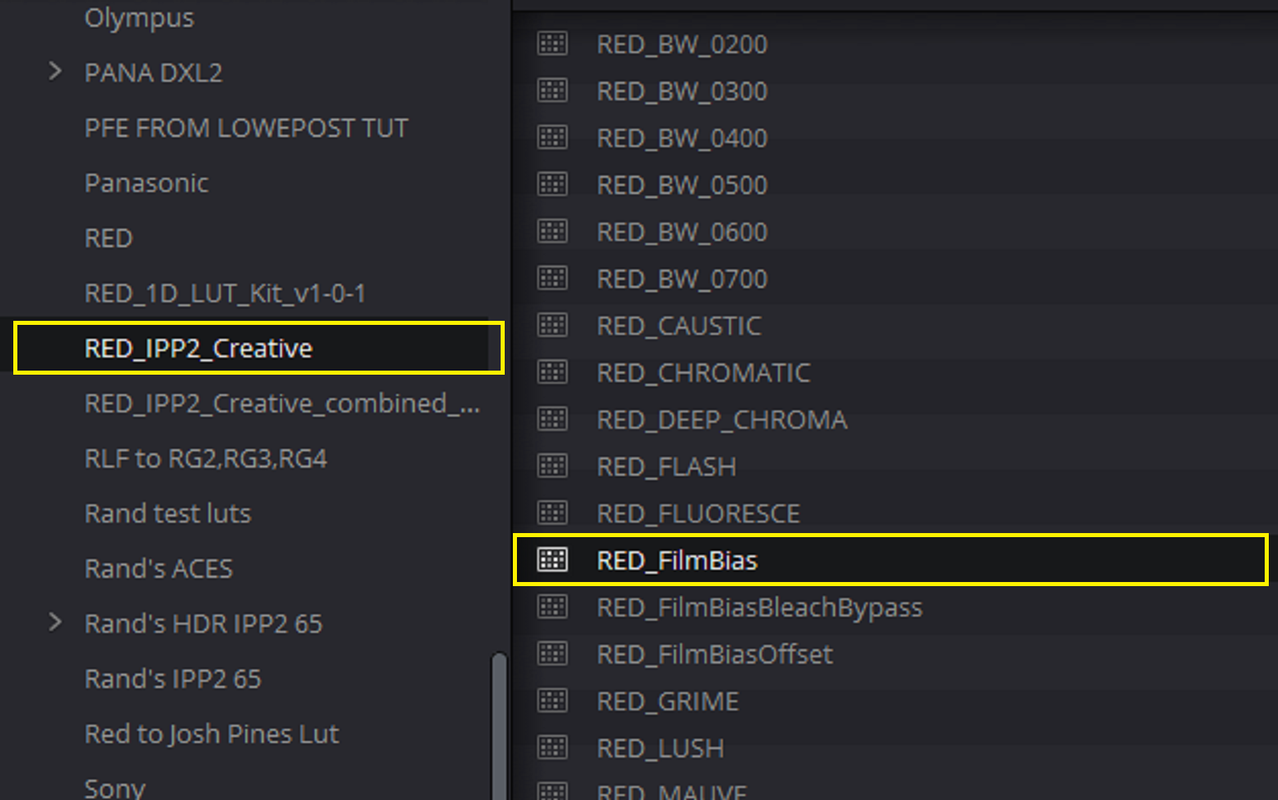
I thought of three more easy ways to remove yellow from skin tone in red Camera footage (1) THE COLOR WARPER (2) the "FILMBIAS" Red Creative Lut (3) RGB MIXER


The COLOR WARPER


You can find the COLOR WARPER here on the "COLOR" page.
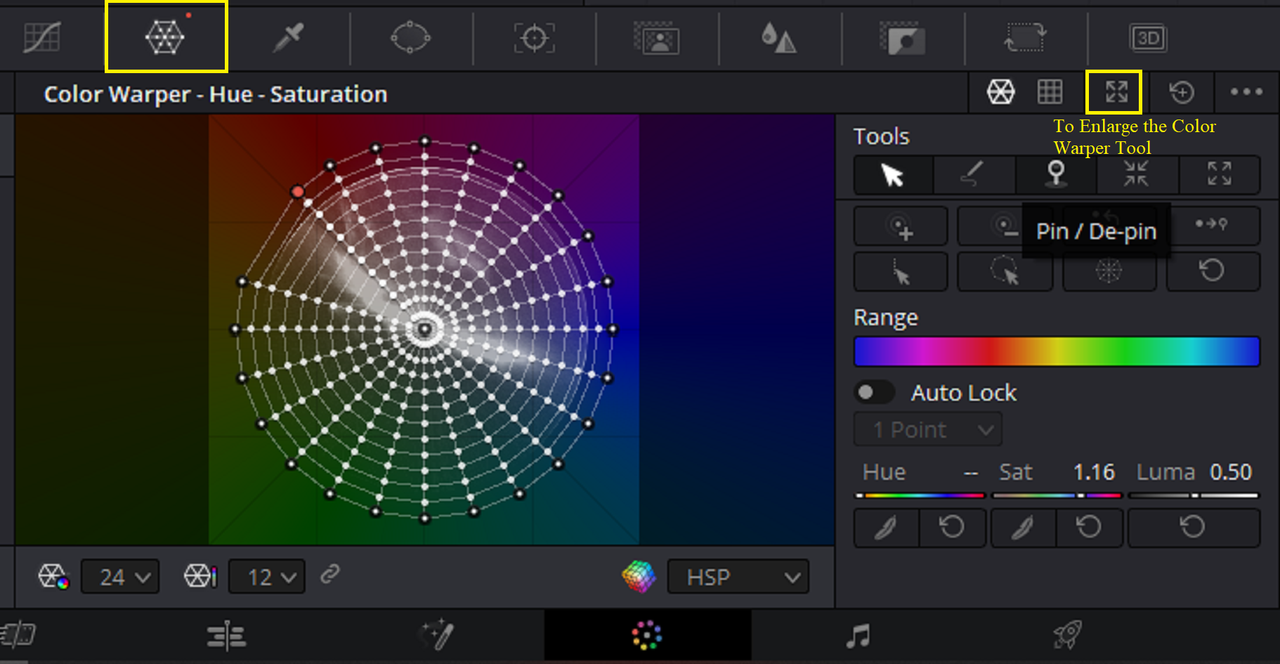
1.png


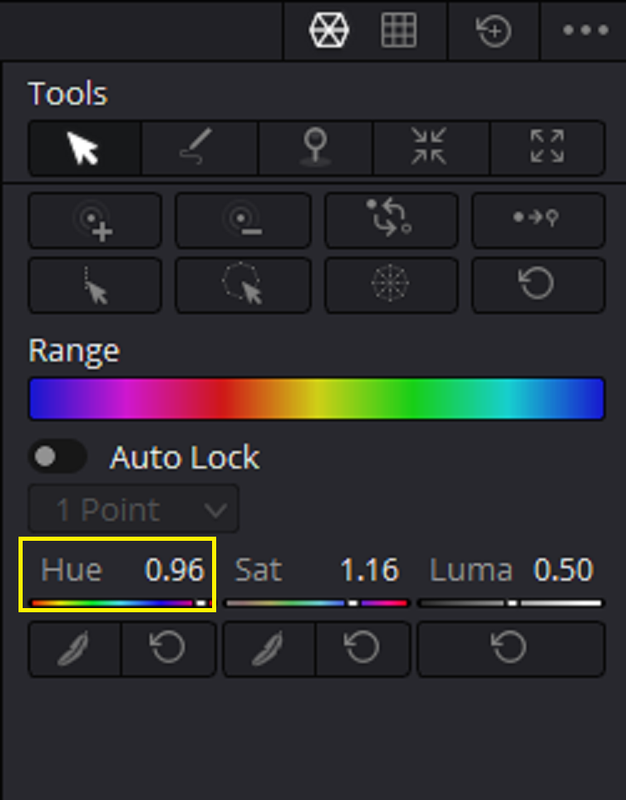
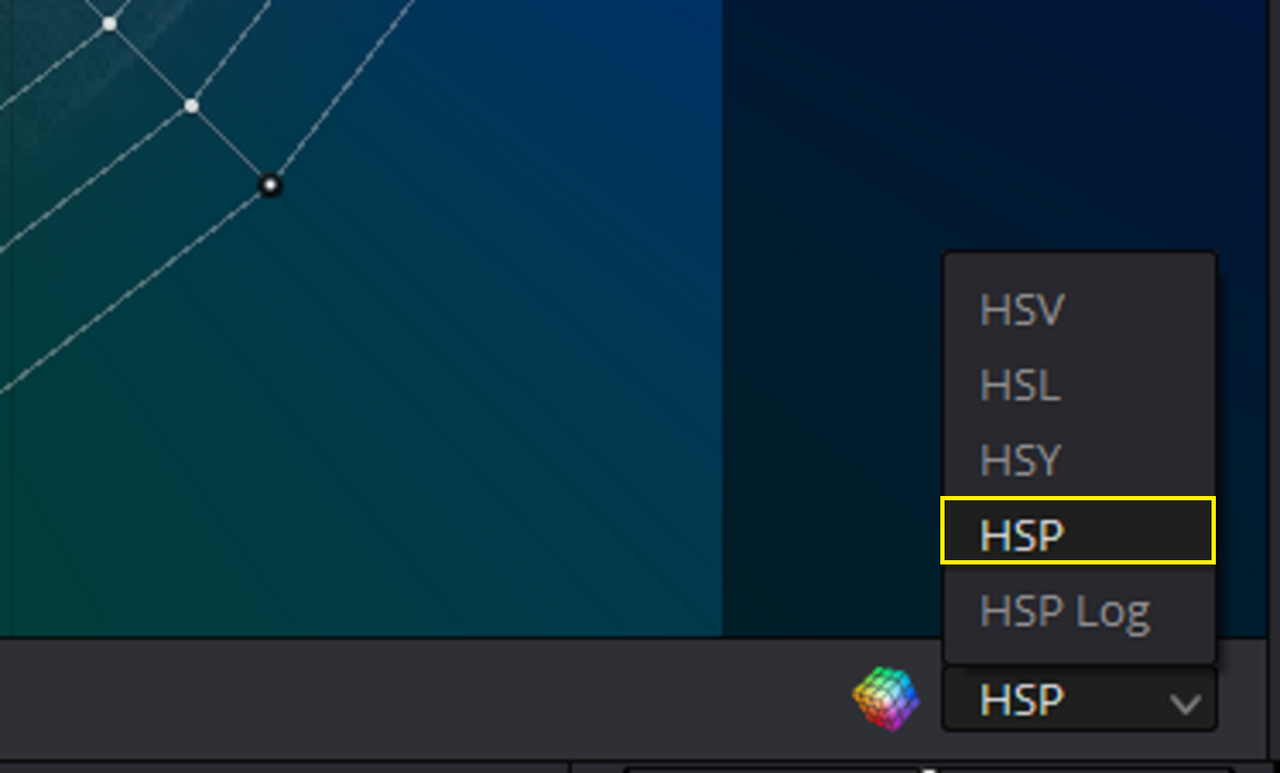
Max out the "HUE RESOLUTION" to "24" and "SATURATION RESOLUTION" to either "12" or "16". And use preferably the "HSP" Color Model.
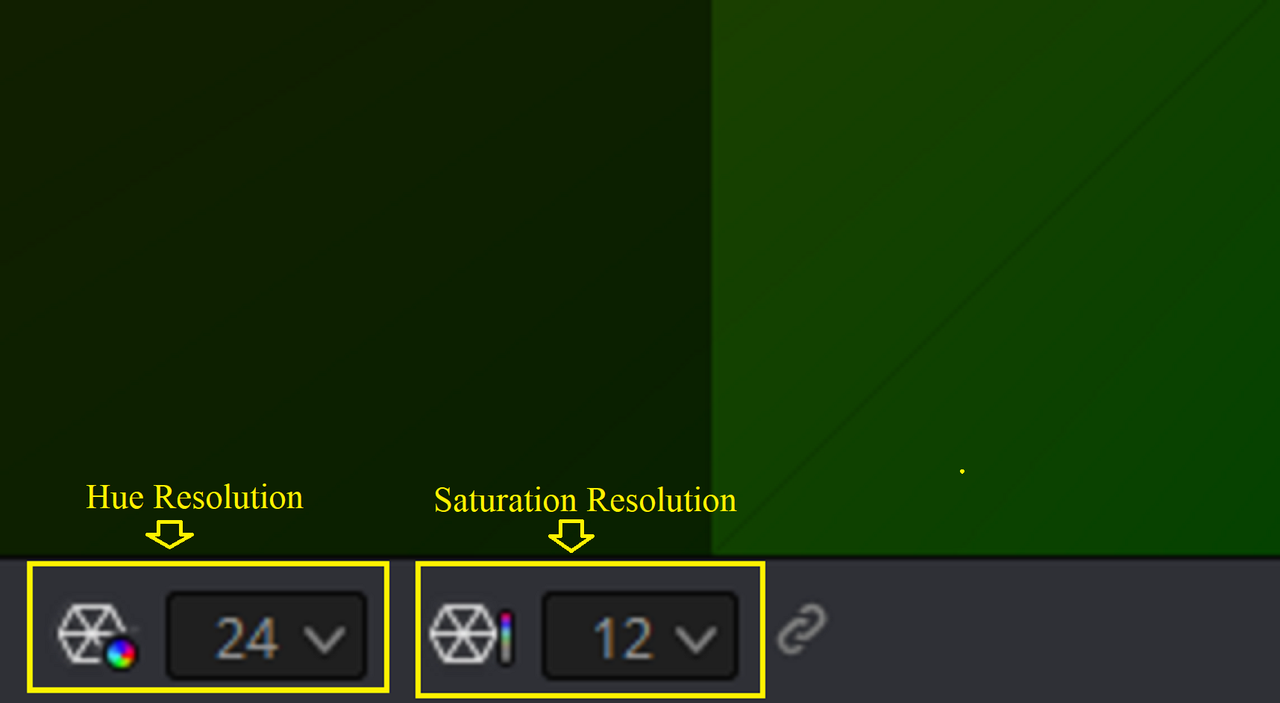
2.png


3.png


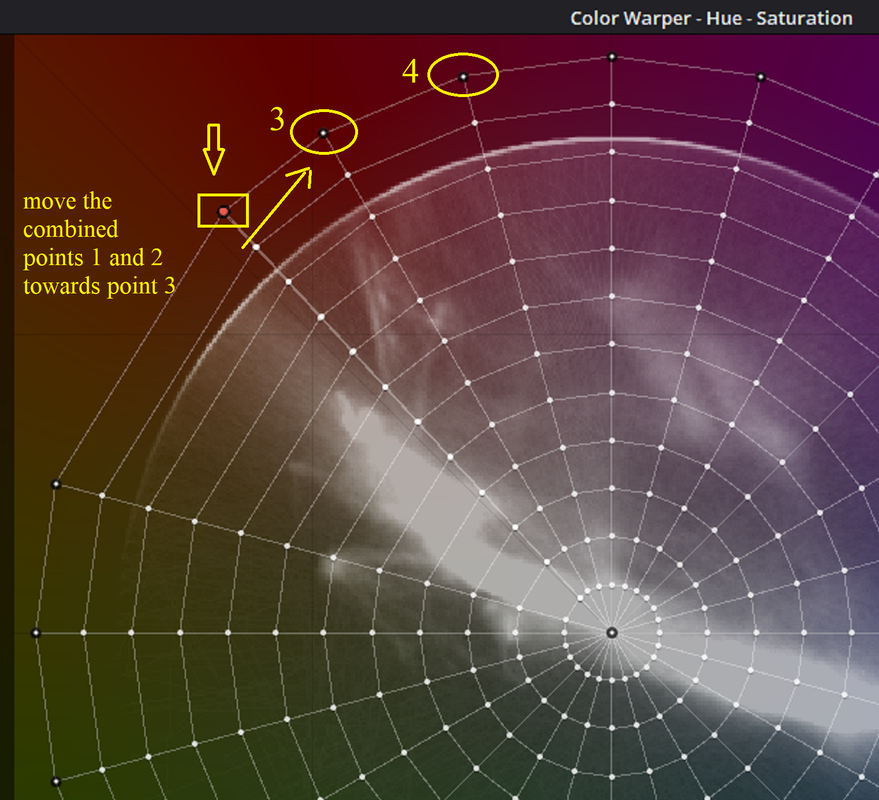
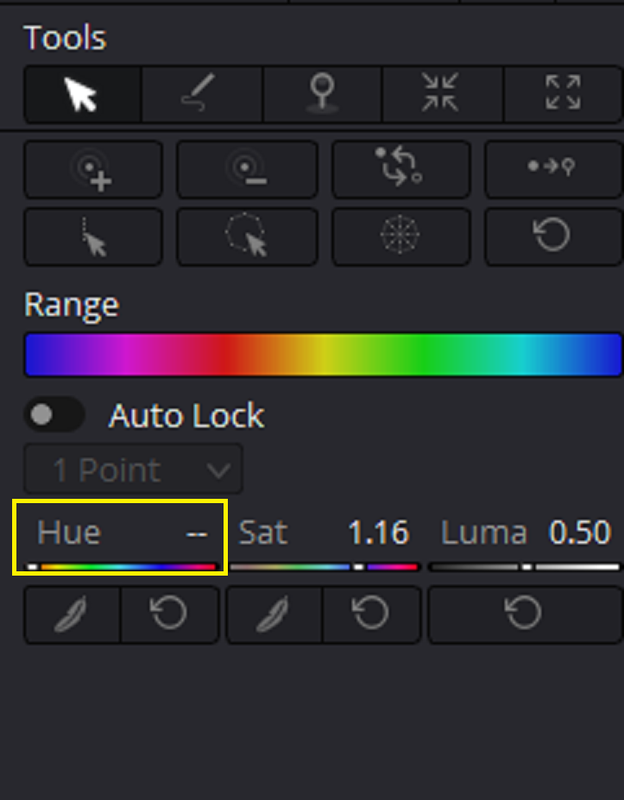
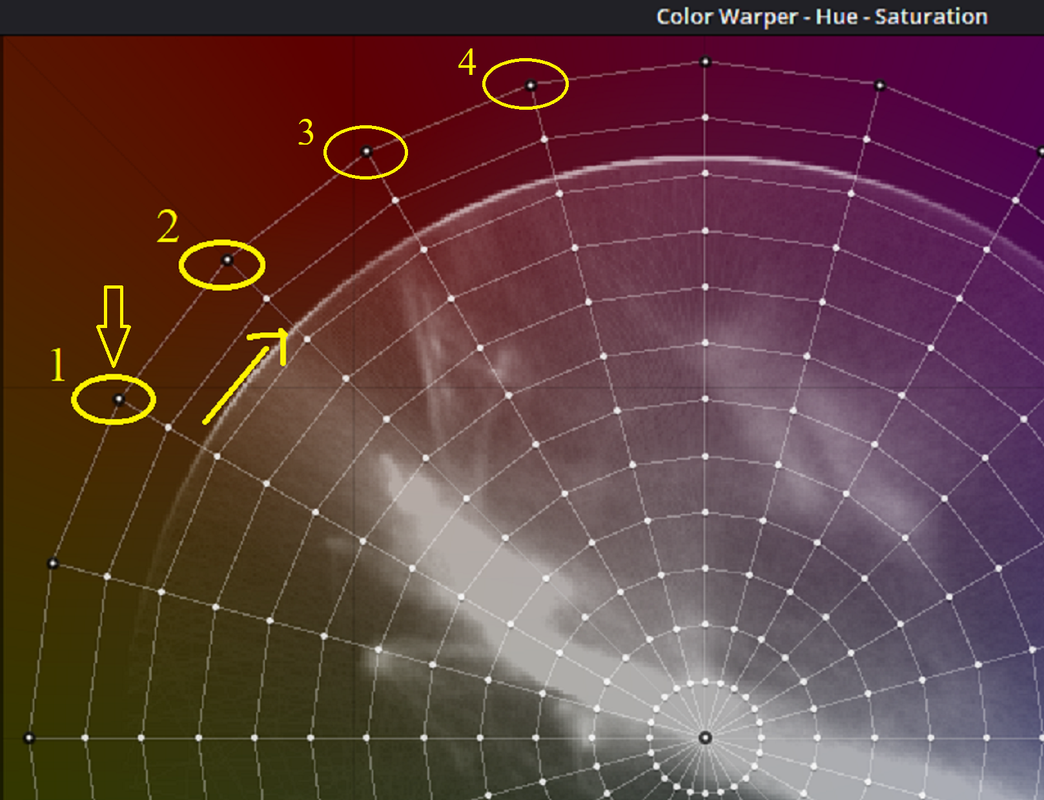
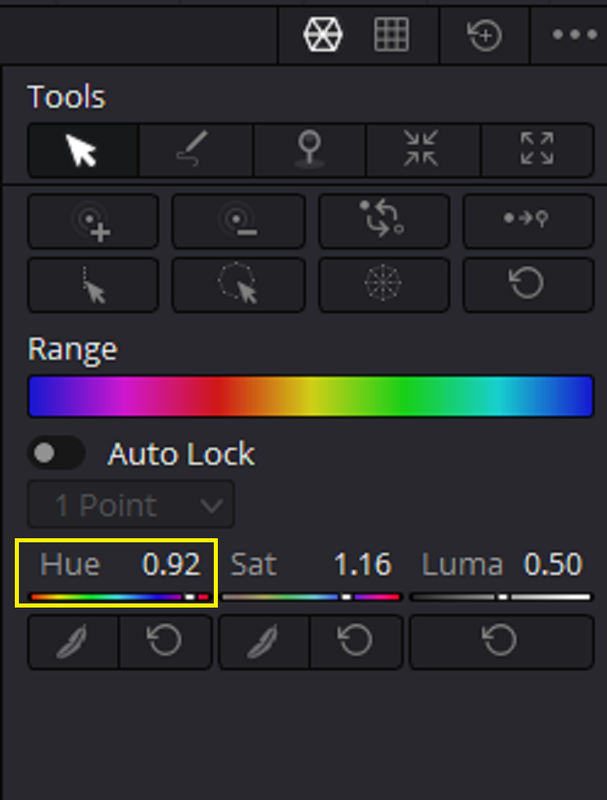
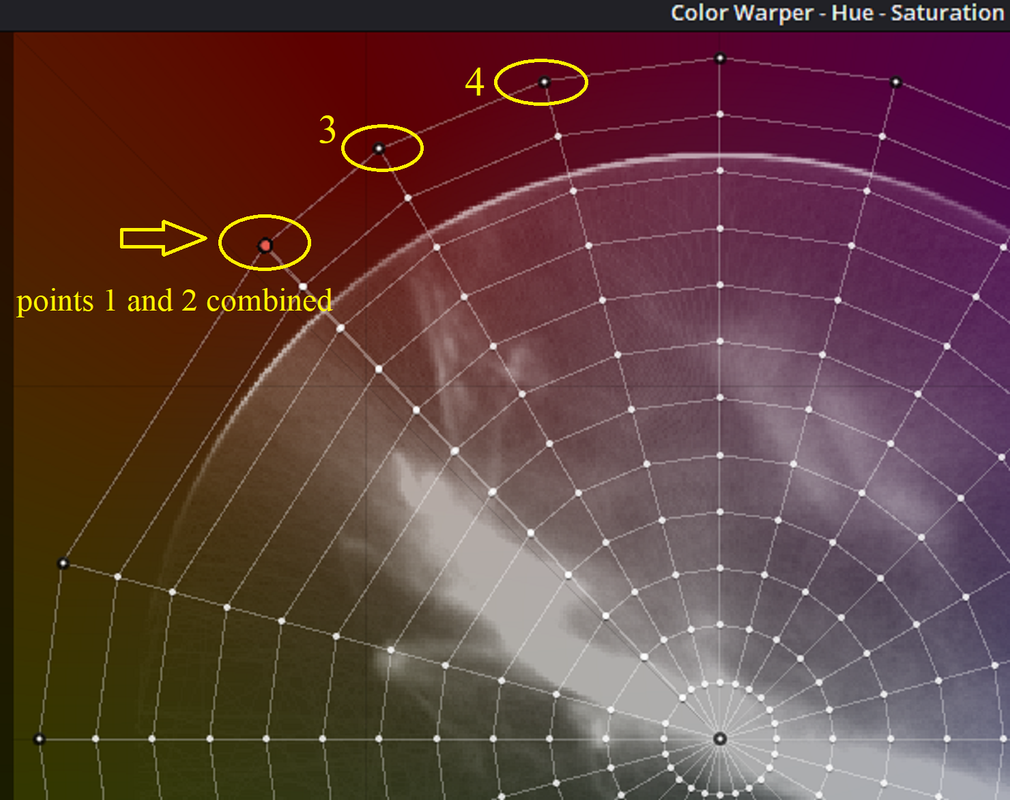
Draw a "BOX" with your mouse around "POINT 1" which should have a "HUE" value of "0.92" and use the "HUE" function by dragging inside of the HUE BOX AREA to the right to rotate it to combine with "POINT 2" which should have a "HUE" value of "0.96". Use your Mouse again to draw a "BOX" around the outer points of the combined Point 1 and 2 to lock them together. Now use the "HUE" again which now will have no numerical value inside of the HUE BOX AREA to drag the combined Point 1 and 2 to the right to rotate it towards "POINT 3" until you get a skin tone that is less yellow and more accurate.
4.png


4a.png


5.png


5a.png


dfzdfz-2.png


dfzdfz-11.png


Before

dfzdfz-1.jpg


After

cw-1-10-2.jpg


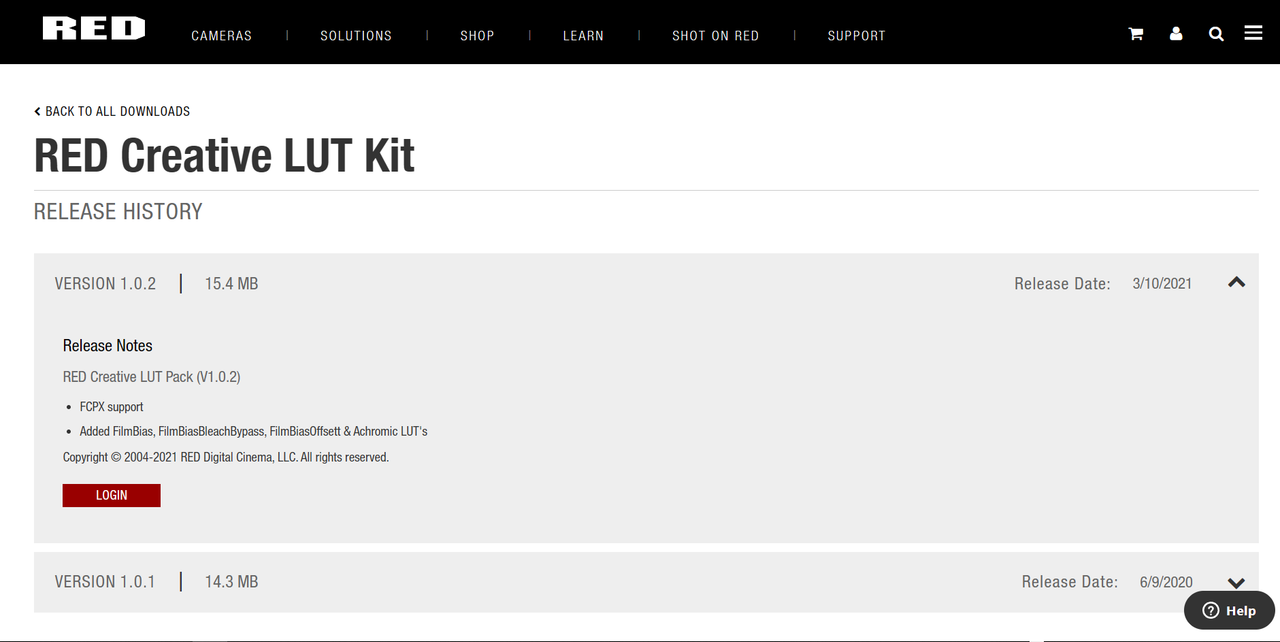
FILMBIAS-Creative LUT(I believe was designed by Phil Holland)

Web link
Downloads Details (red.com)


Before


After


R036-W007-0628-WV-001-1-10-1.jpg


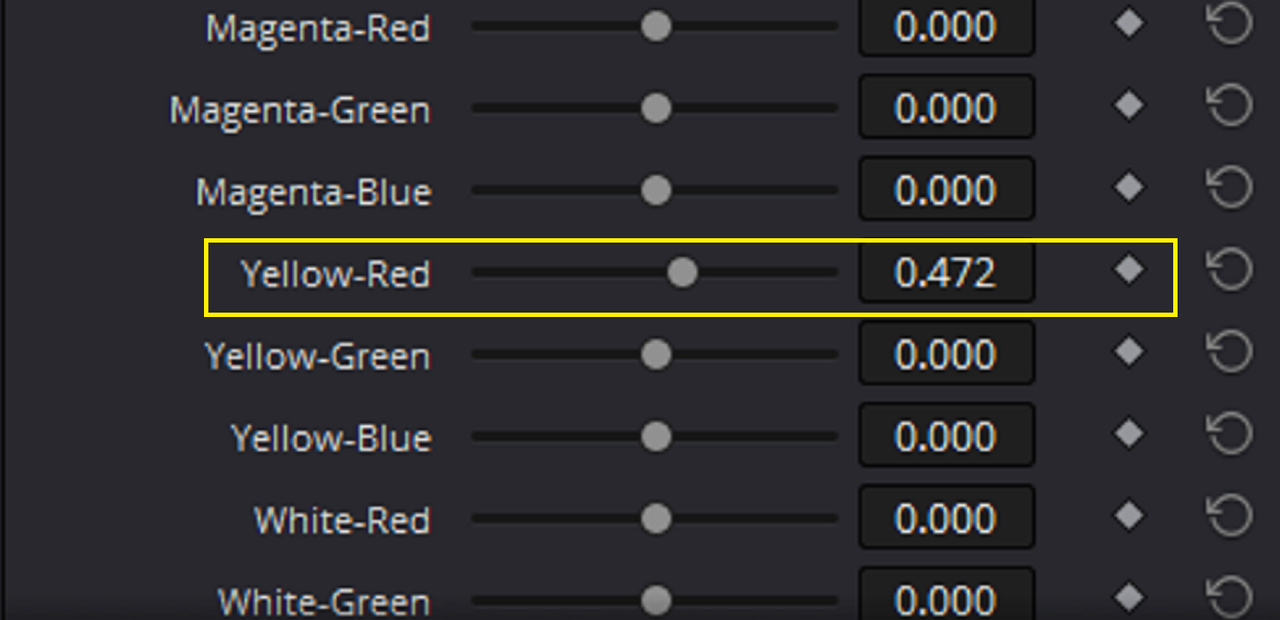
THE RGB MIXER


Before

dfzdfz-1.jpg


After

Screenshot-8444.png


rgb-mixer-1-10-13.jpg
 
Last edited:
Was checking out another contrasty and cool-toned 'normal' look, applied it to that V-Raptor Sample R3D -


The more I dabble with this stuff the more obvious it is how things still need to be adjusted shot to shot, or even within a shot, regardless of whatever LUT or Powergrade gets used as a starting point. Sensors. lenses, filters. lighting, the subject-matter itself, all needing to be accounted for in order to get and keep the image looking how you want it. With how you want it to look being subject to change as well. Still amazed sometimes how well the RED-originated images handle all those variables
 
Last edited:
I roll with film bias and film bias offset as starting points for anything with people. Then come at it from log and see which I like more.
 
Josh,

Yeah, they both are good simple well thought out solutions to the excessive yellow that can appear sometimes in Red footage. The reason I would personally use FilmBias over FilmBiasoffset if I wasn't using ACES is because I think Although Filmbias may have a slight more yellow in it against the more RED dominant slightly more saturated FilmBiasOffset, I think FilmBias has a slightly more appealing Tone-Curve. But to each their own.


FilmBias

Screenshot-8480.png


FilmBiasOffset

Screenshot-8481.png


FilmBias

Screenshot-8478.png


FilmBiasOffset

Screenshot-8479.png
 
Last edited:
For the curious it took a few months of a lot of feedback from filmmakers, studios, and RED to nail down the filmBias and filmBiasOffset LUTs. They are very much based on about 2/3rds of film influence with about 1/3rd preference. I've since gone well beyond that in terms of the philmColor R3 release.

Main difference between filmBias and filmBiasOffset is the offset takes into account a very common split tone used in print film emulation. Some people like that, some don't. Which is why I included both.

Generally yes, it takes the edge off of yellow and does subtle things to the rest of the palette. I'm leaning into a specific hue of blue as well.
 
For the curious it took a few months of a lot of feedback from filmmakers, studios, and RED to nail down the filmBias and filmBiasOffset LUTs. They are very much based on about 2/3rds of film influence with about 1/3rd preference. I've since gone well beyond that in terms of the philmColor R3 release.

Main difference between filmBias and filmBiasOffset is the offset takes into account a very common split tone used in print film emulation. Some people like that, some don't. Which is why I included both.

Generally yes, it takes the edge off of yellow and does subtle things to the rest of the palette. I'm leaning into a specific hue of blue as well.

Thanks Phil for your input on this! I knew I remember you mentioning that this was designed by you. I can image your PhilmColor 3 Luts has taken this to a new level.
 
Thanks Phil for your input on this! I knew I remember you mentioning that this was designed by you. I can image your PhilmColor 3 Luts has taken this to a new level.

The key thing for me is separating things so people can really create what they want. I have made the mistake by providing too many options however, but for those who understand the workflow it's very cool to see how they have integrating them on their projects. Just the concept of my polychrome and adding (or not) split tones is a cool thing in my mind. Each one of those polychrome LUTs basically is a different film stock when it comes to colorimetry.

I have new things I've been working on and tweaking since R3s release. Using a lot of it on my current shoot and it's even what inspired the creation of some things. I suspect my R4 release will be "tidy".
 
4-1-1-1.jpg

Thought this might help, here's the image with look from the last test, so you get an idea on how different the image is.
 
The key thing for me is separating things so people can really create what they want. I have made the mistake by providing too many options however, but for those who understand the workflow it's very cool to see how they have integrating them on their projects. Just the concept of my polychrome and adding (or not) split tones is a cool thing in my mind. Each one of those polychrome LUTs basically is a different film stock when it comes to colorimetry.

I have new things I've been working on and tweaking since R3s release. Using a lot of it on my current shoot and it's even what inspired the creation of some things. I suspect my R4 release will be "tidy".

I'm still hanging in there with ACES and for waiting the ACES 2.0 official release. I'm trying out all of their ACES 2.0 Candidates until then. But as I mentioned before whenever you could throw a few LMTs or DCTLs my way my money is already waiting!:thumbsup:


Thought this might help, here's the image with look from the last test, so you get an idea on how different the image is.

Nick,

It looks good . What workflow did you use If I may ask?
 
RED wide Gamut - Log3G10, adapted look I had from before, and then made tiny edits
 
Nice grade Nick, I like how warm and saturated you've made everything look without pushing it too far into a 'golden hour' type effect. Interesting that it's derived from the same grade in your own test footage

Here's a warmer version of the previous grade I posted.


It's kind of dull by comparison, but that's the kind of thing it is, was just curious how far I could push it without changing its fundamental look.
 
Last edited:
For the curious it took a few months of a lot of feedback from filmmakers, studios, and RED to nail down the filmBias and filmBiasOffset LUTs. They are very much based on about 2/3rds of film influence with about 1/3rd preference. I've since gone well beyond that in terms of the philmColor R3 release.

Main difference between filmBias and filmBiasOffset is the offset takes into account a very common split tone used in print film emulation. Some people like that, some don't. Which is why I included both.

Generally yes, it takes the edge off of yellow and does subtle things to the rest of the palette. I'm leaning into a specific hue of blue as well.


I knew that the Offset was split tone (from the description file), and I guess I like the subtle push to blue in the shadows.

I didn't know you made those particular luts, but I love them. I've used FilmBias Bleached to nice effect by pushing a ton of saturation back in, and it can really help separate colors nicely on flat or overcast days.

I like flicking through the other Red IPP2 luts, but most of them just don't have the same magic. BW400 is great though for the super contrasty B&W Film look, especially for pulling stills.


Honestly, I was pretty intimidated looking at all the options for PhilmColor3, but if they are an extension of FilmBias, then I'll give it another serious look.

Thanks!

Edit to say: Did Phil make all the red creative luts for the cameras?
 
Last edited:
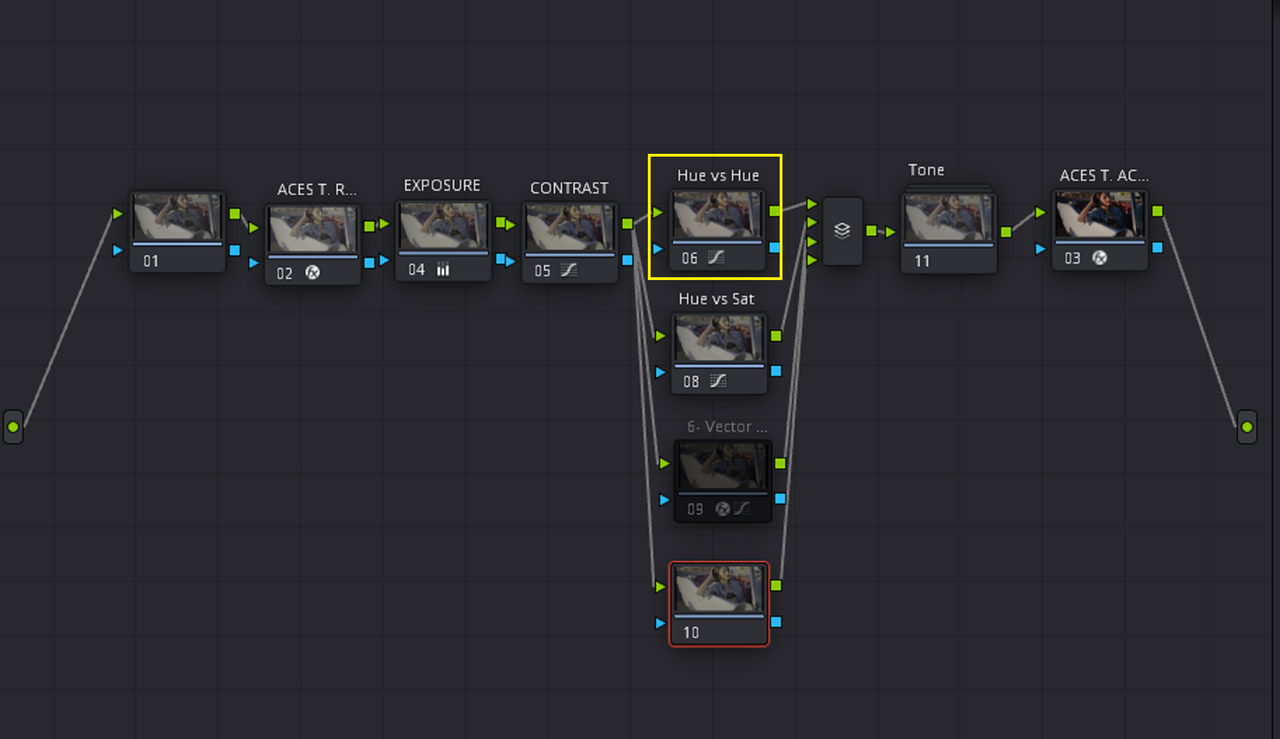
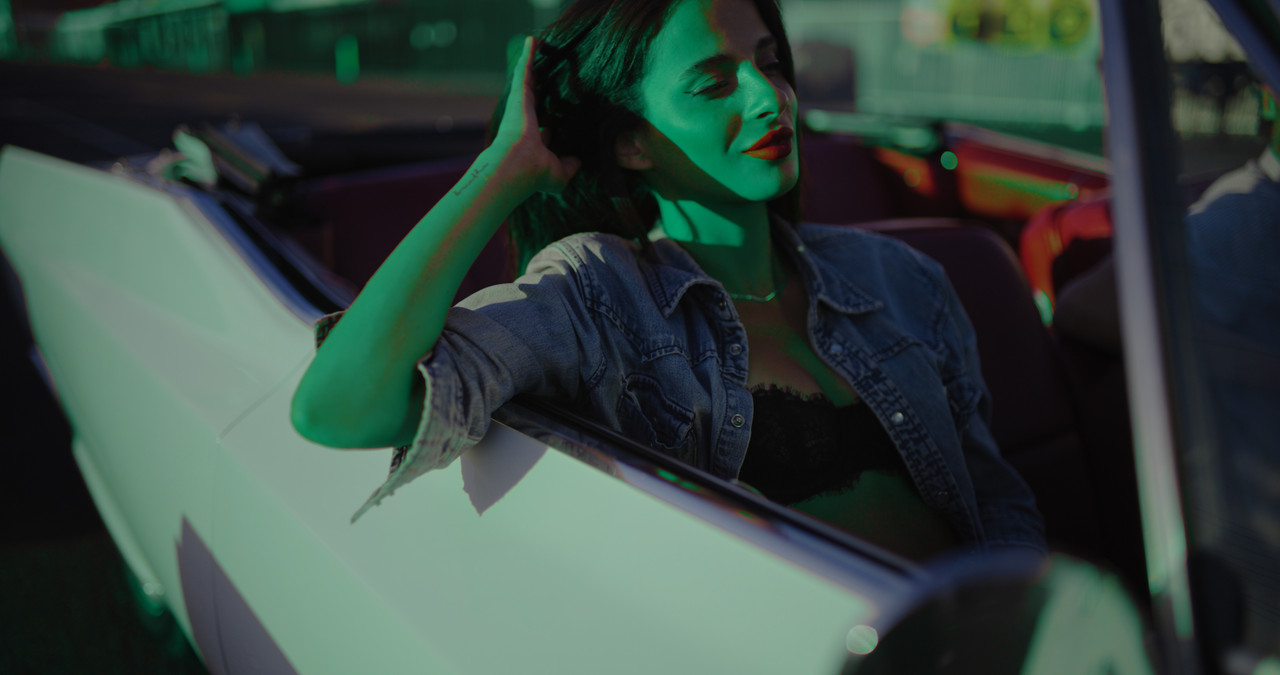
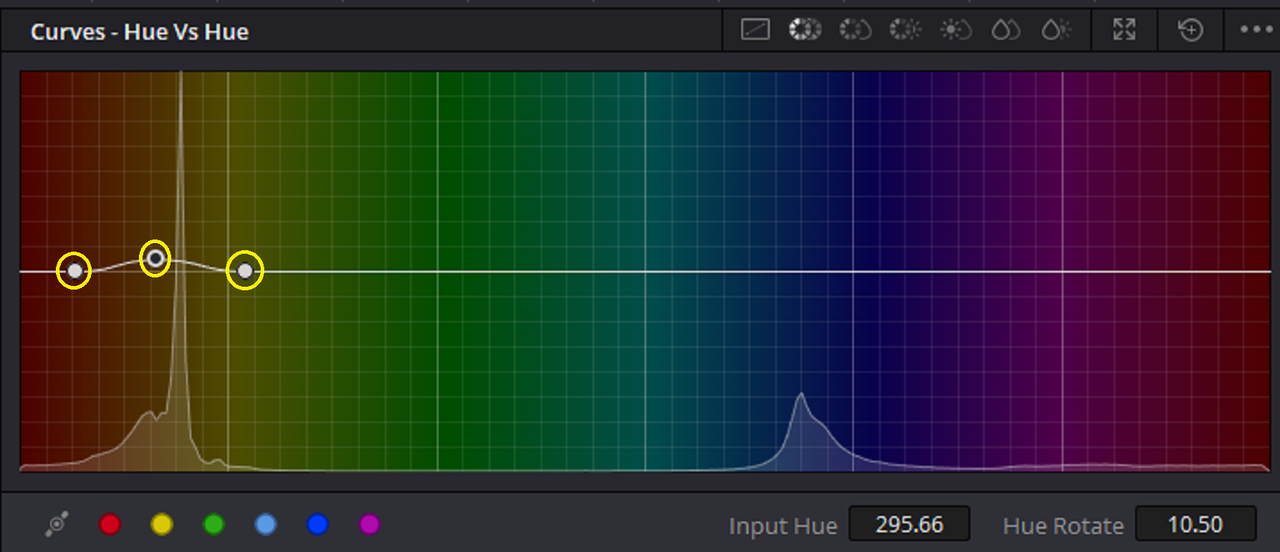
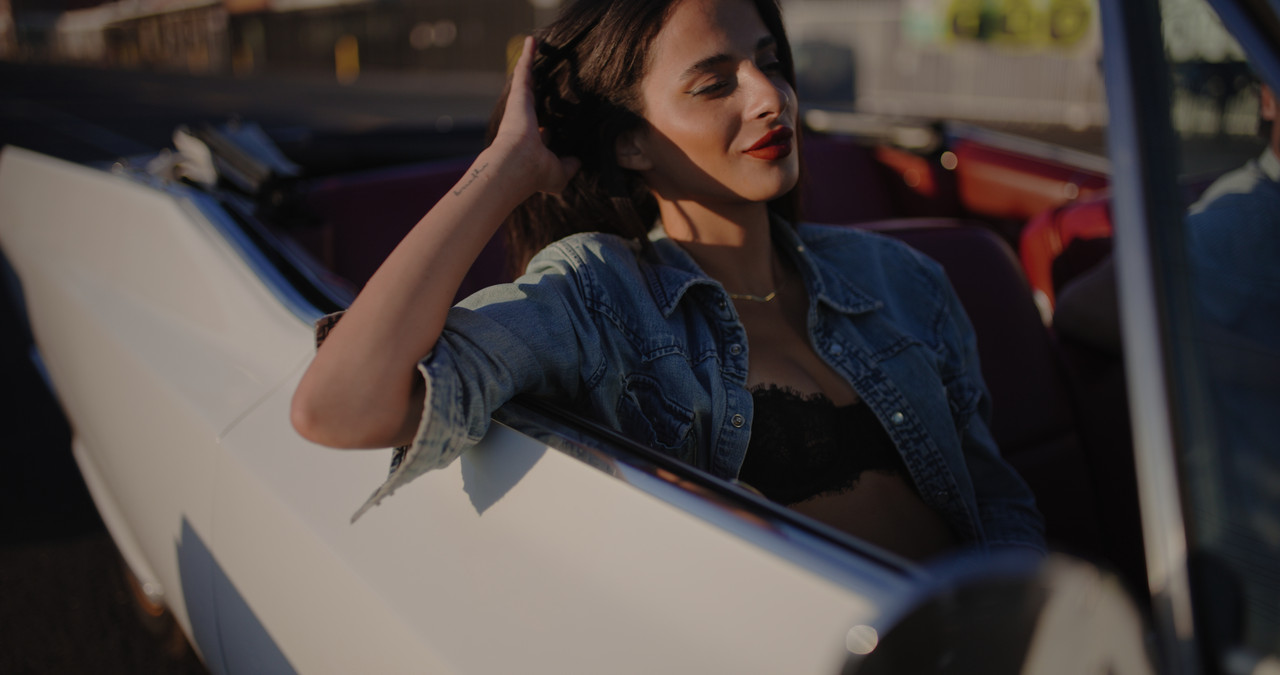
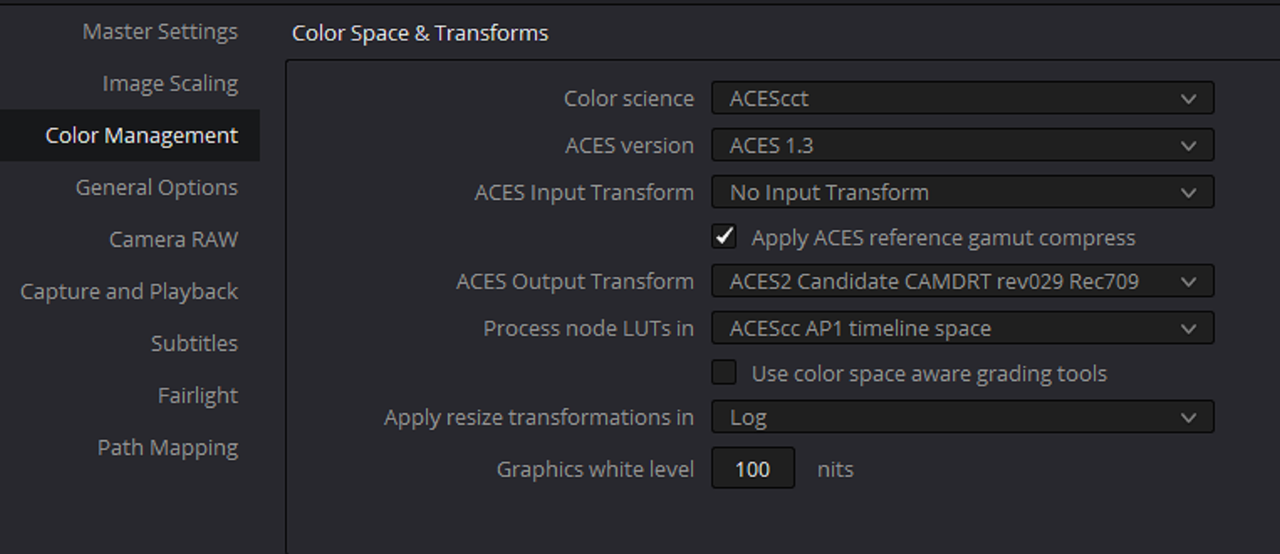
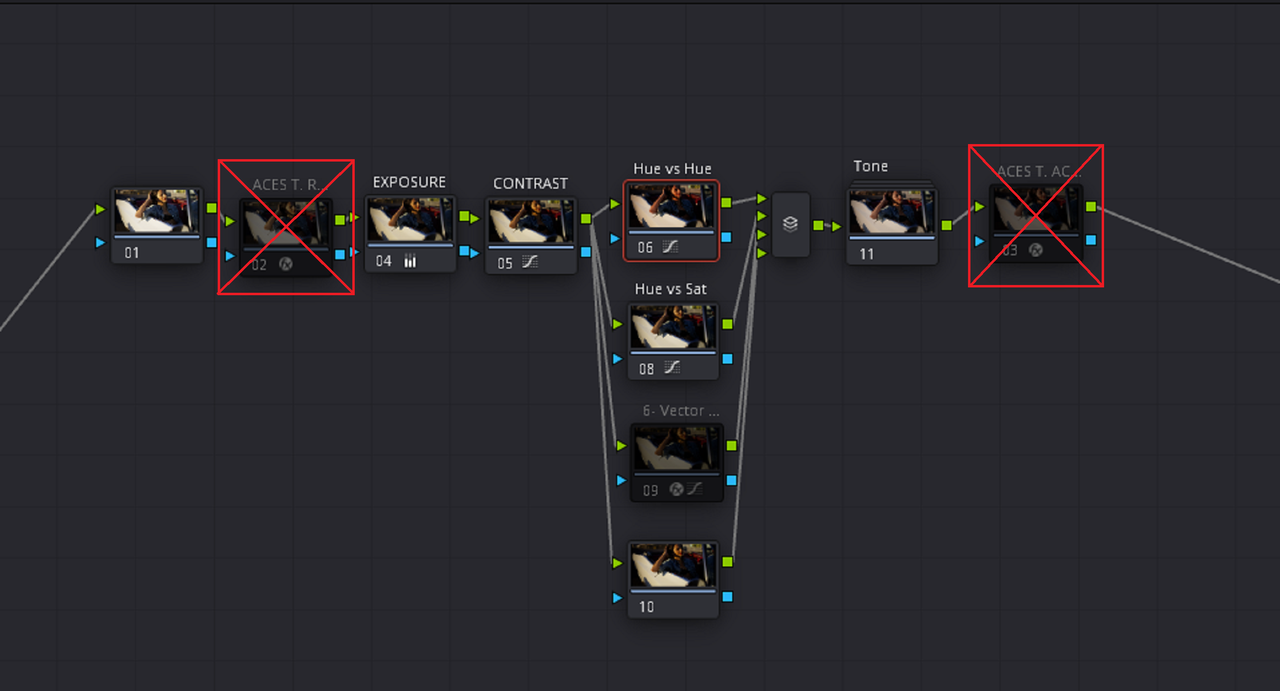
ACES Node Based and ACES Project Based Hue vs Hue and Six-Vector Hue DCTL


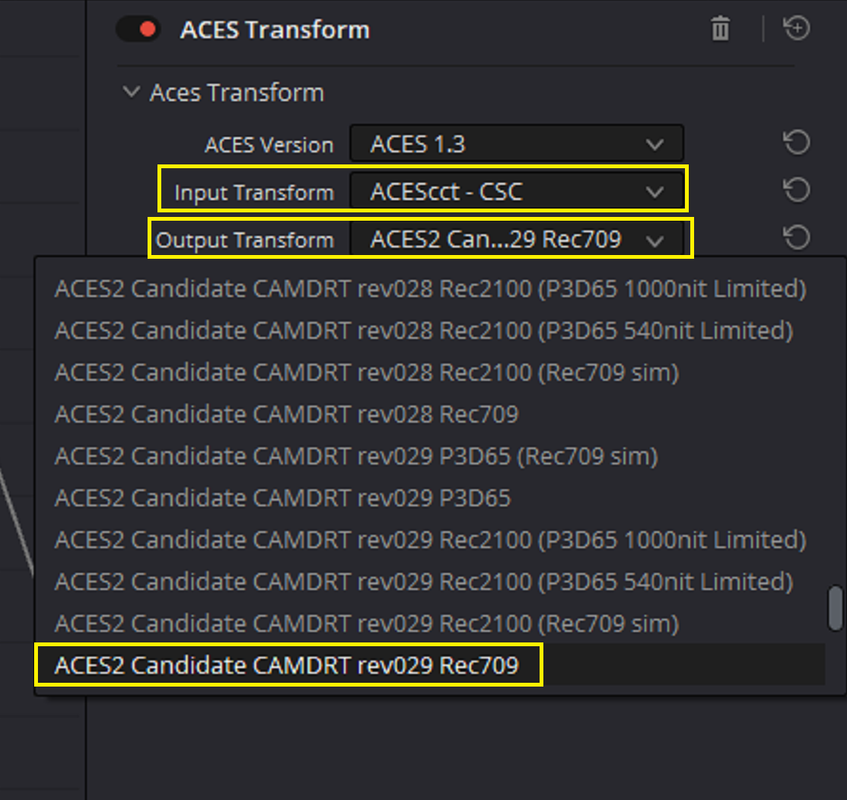
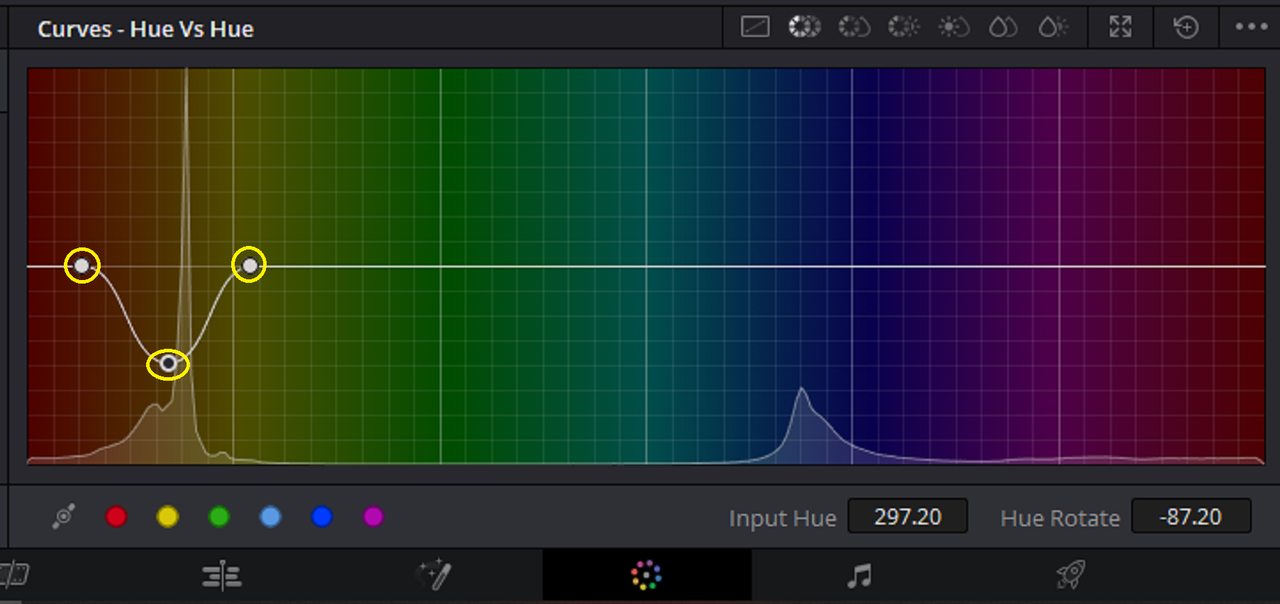
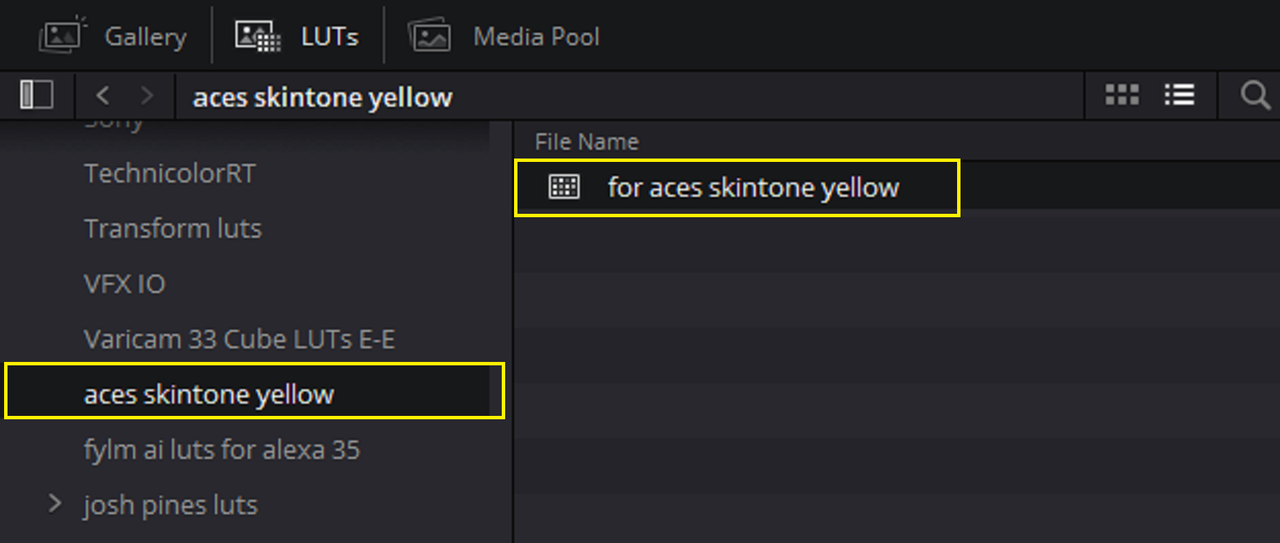
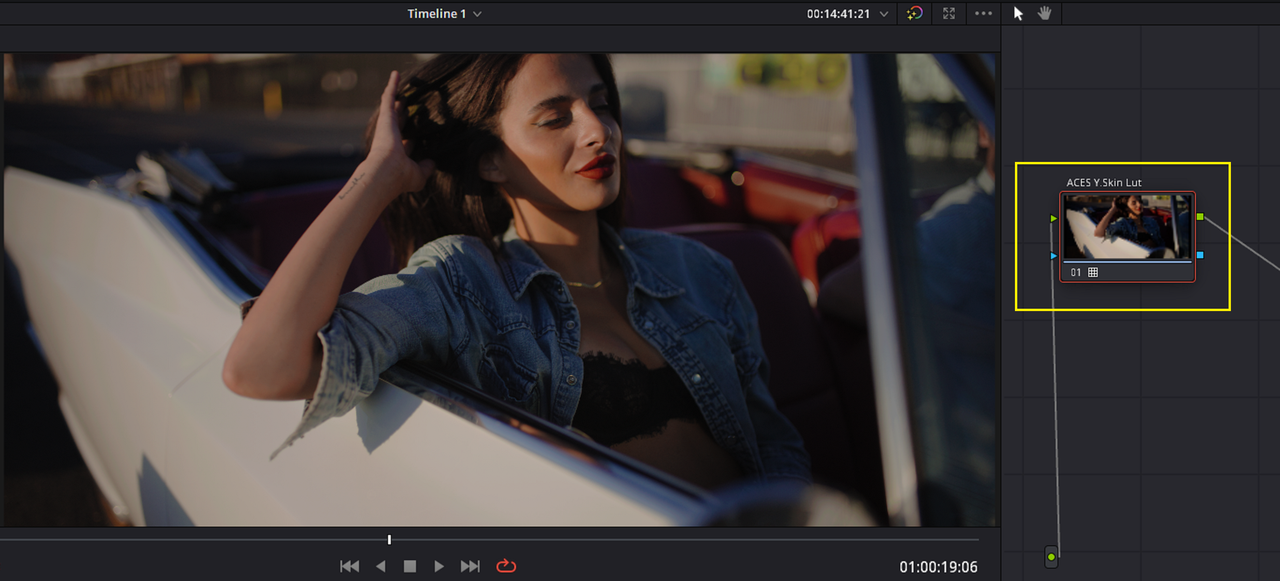
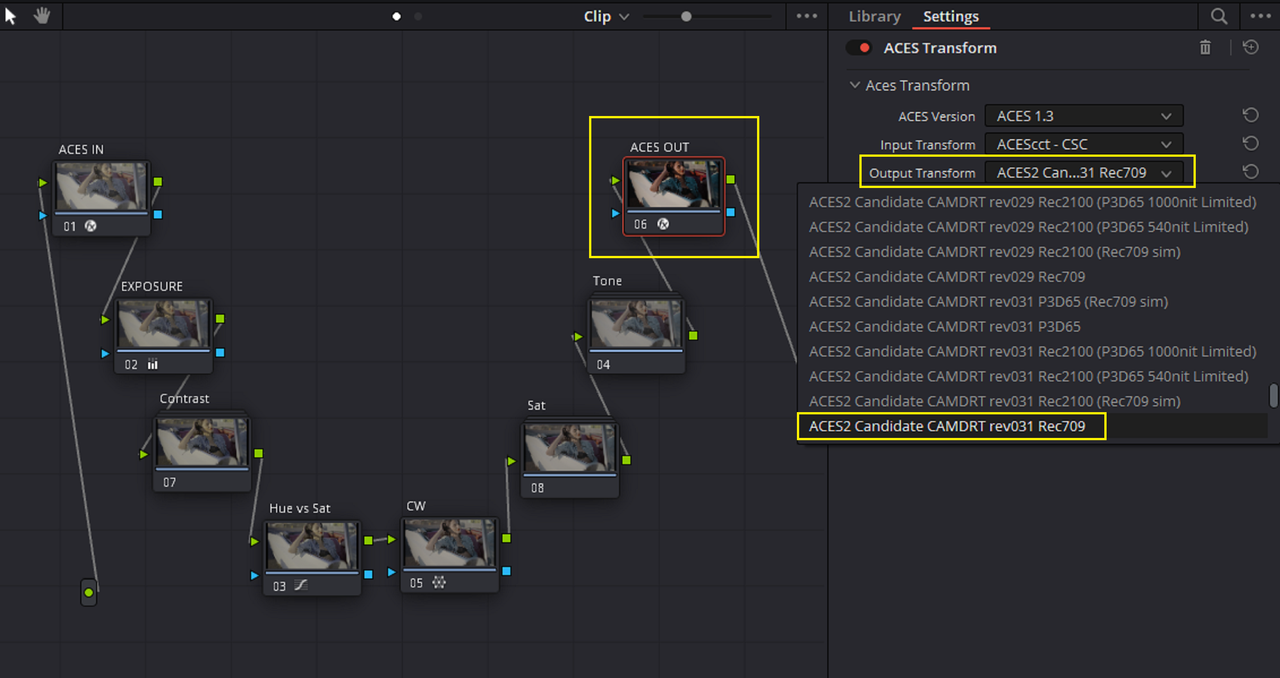
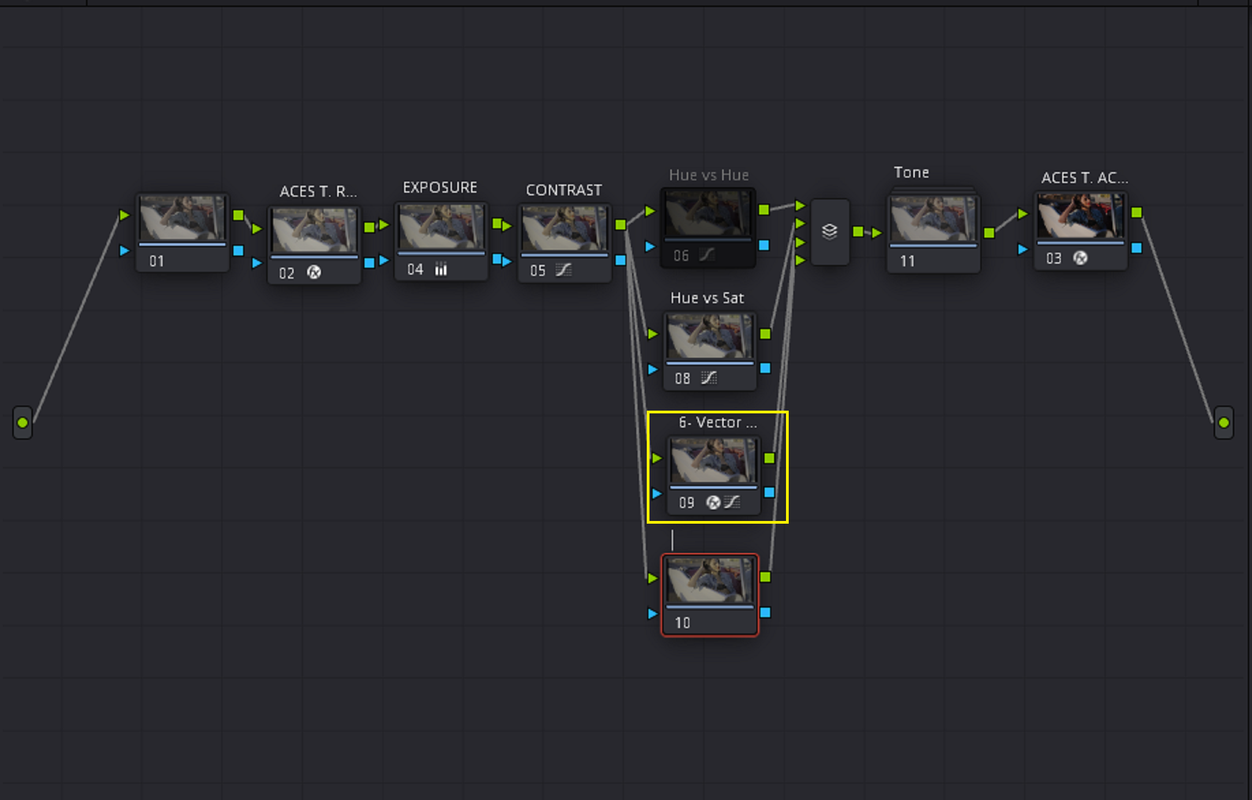
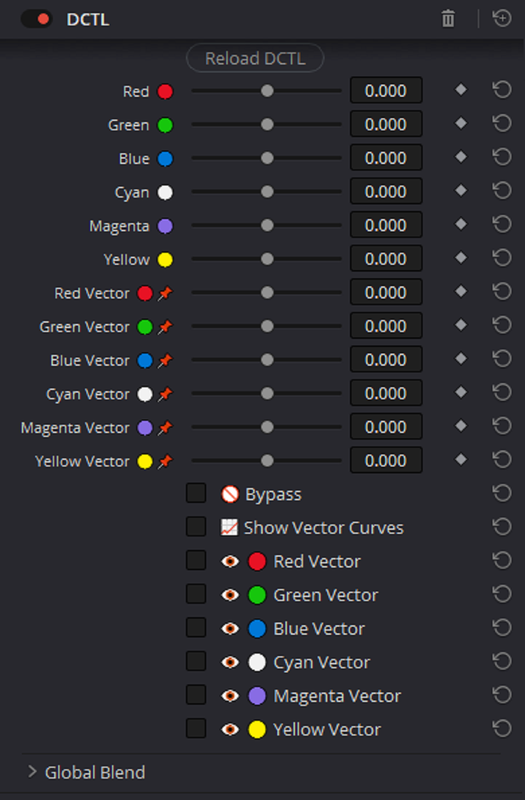
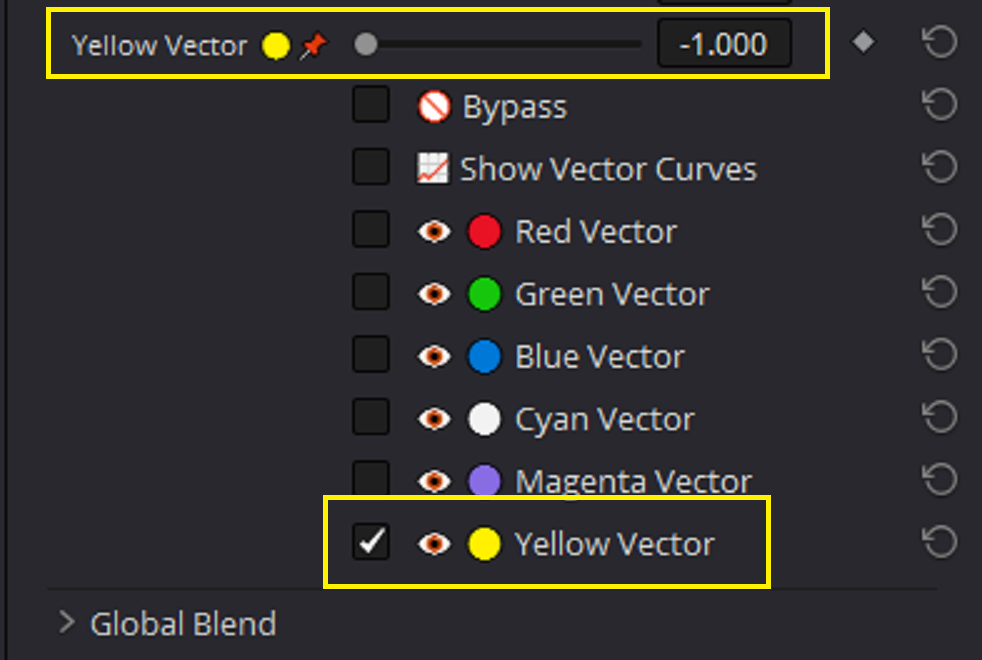
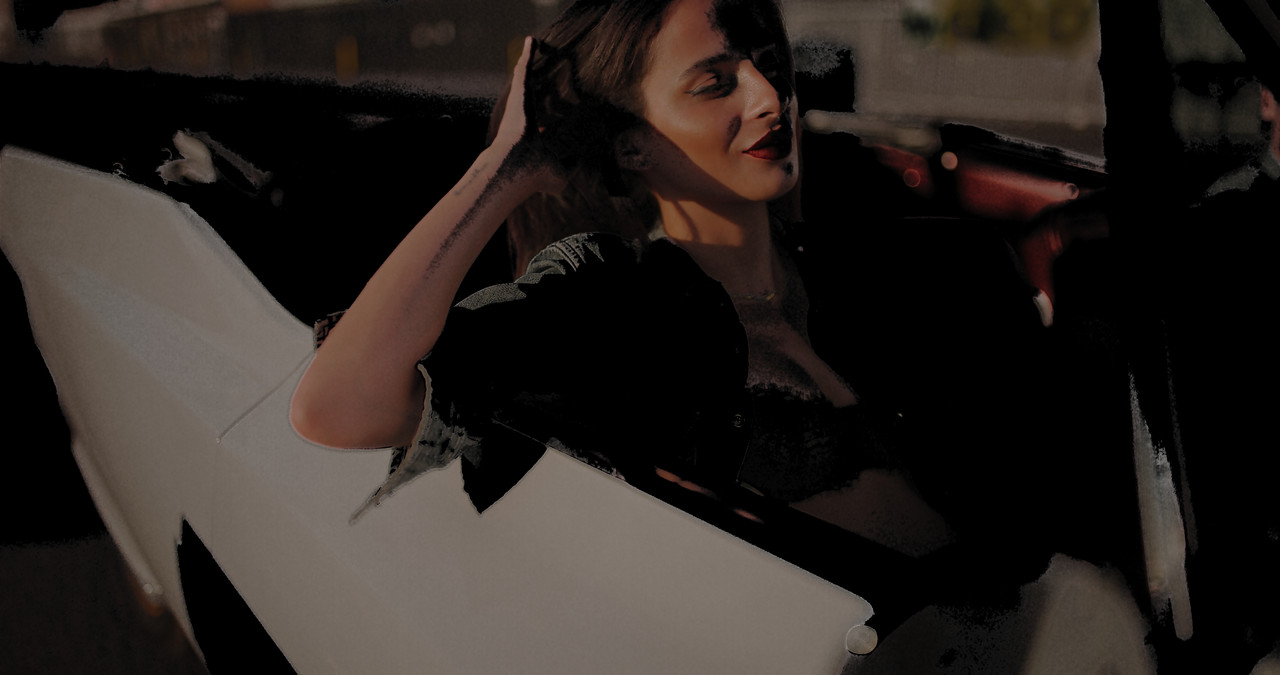
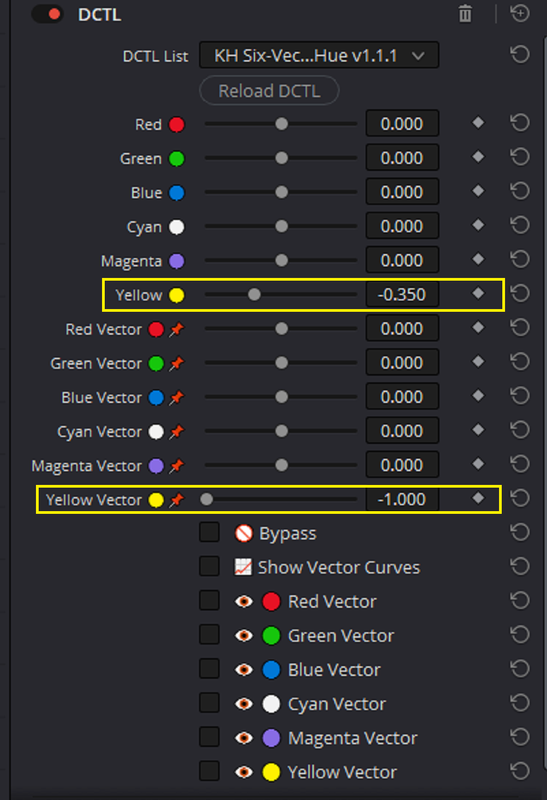
Since I'm using ACES, I can't really take advantage of Phil Holland's Great "FilmBias" Lut. So I have to use a "HUE" shift, or mostly the "Hue vs Hue" Curve or a Six-Vector Hue DCTL I recently started using.


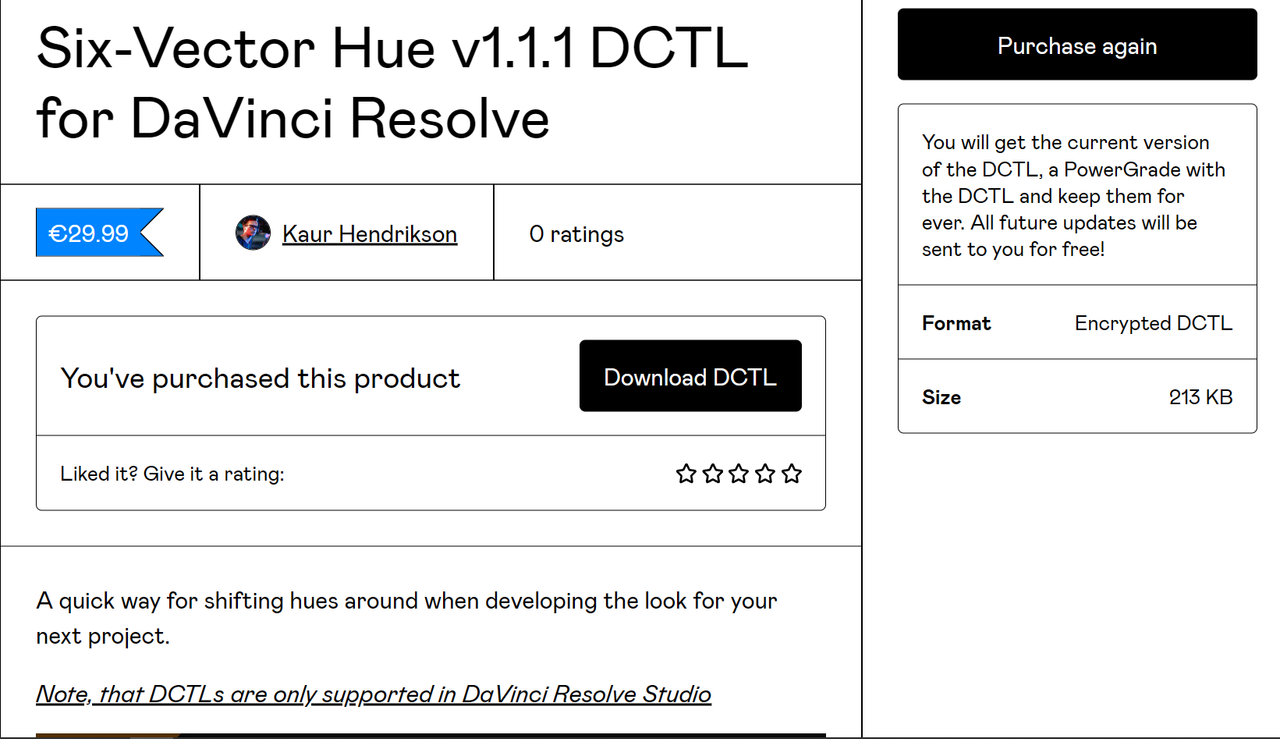
Six-Vector Hue by Kaur Hendrikson
Six-Vector Hue v1.1.1 DCTL for DaVinci Resolve (gumroad.com)


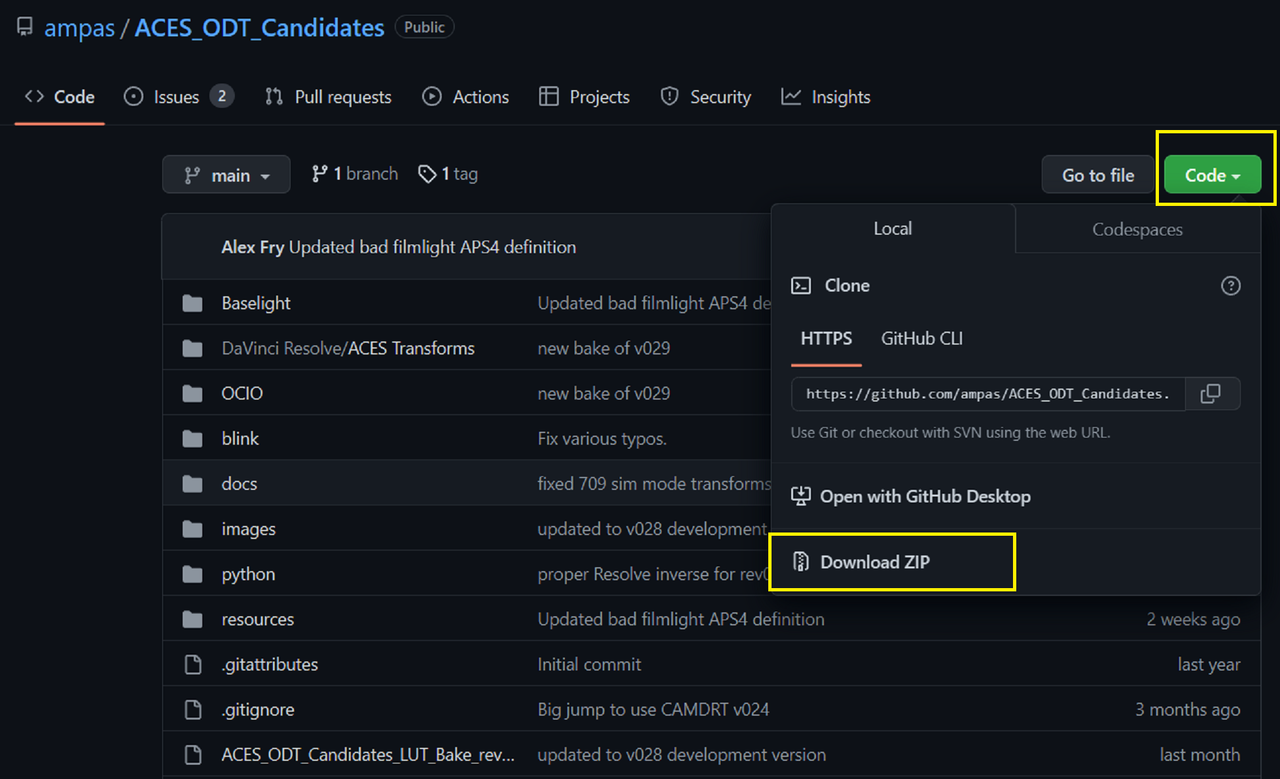
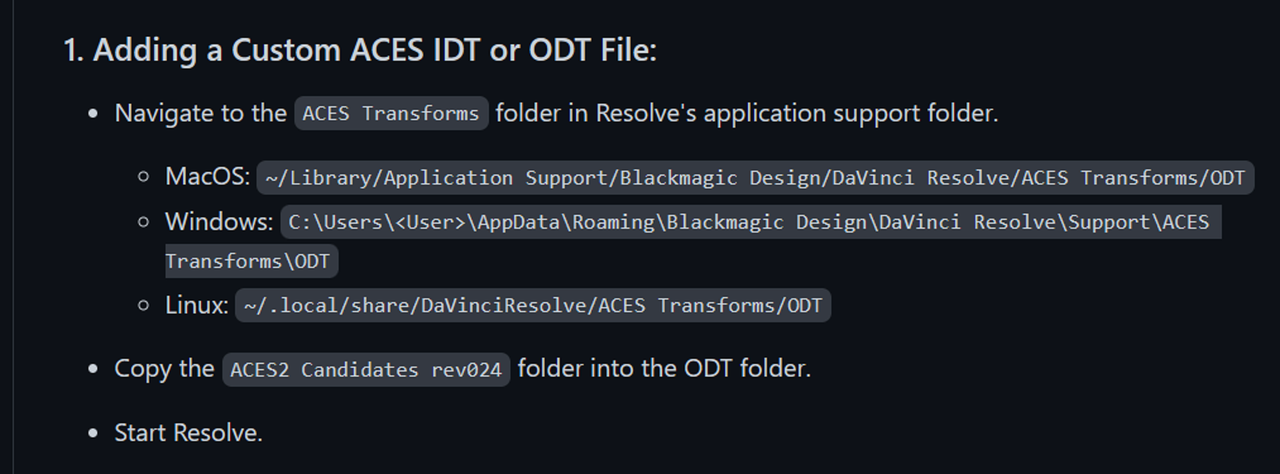
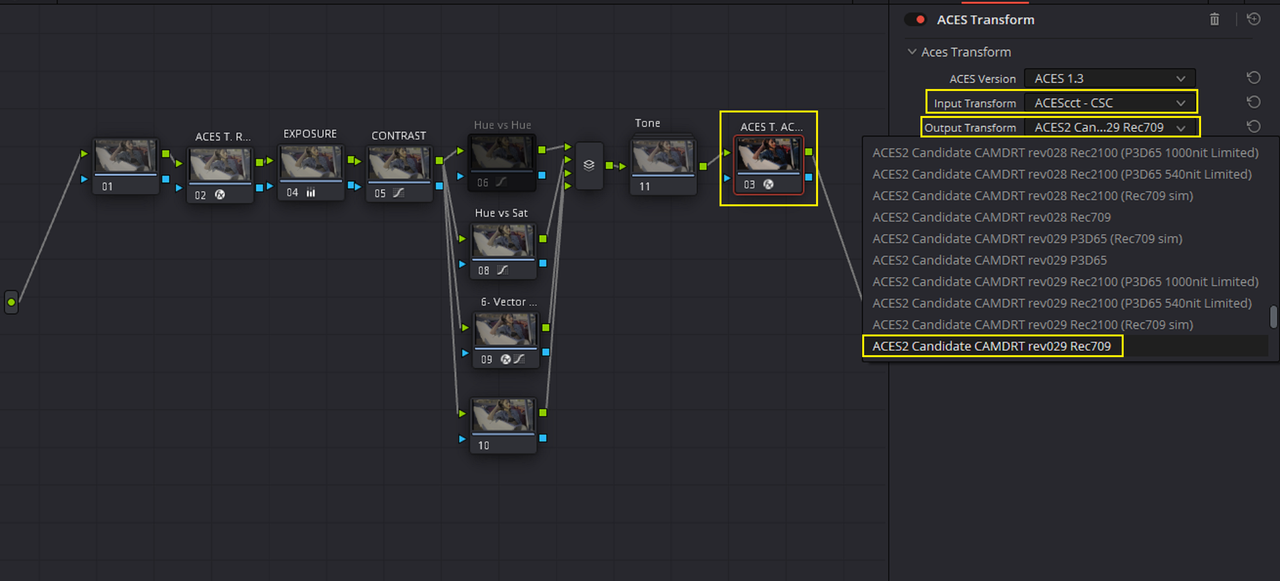
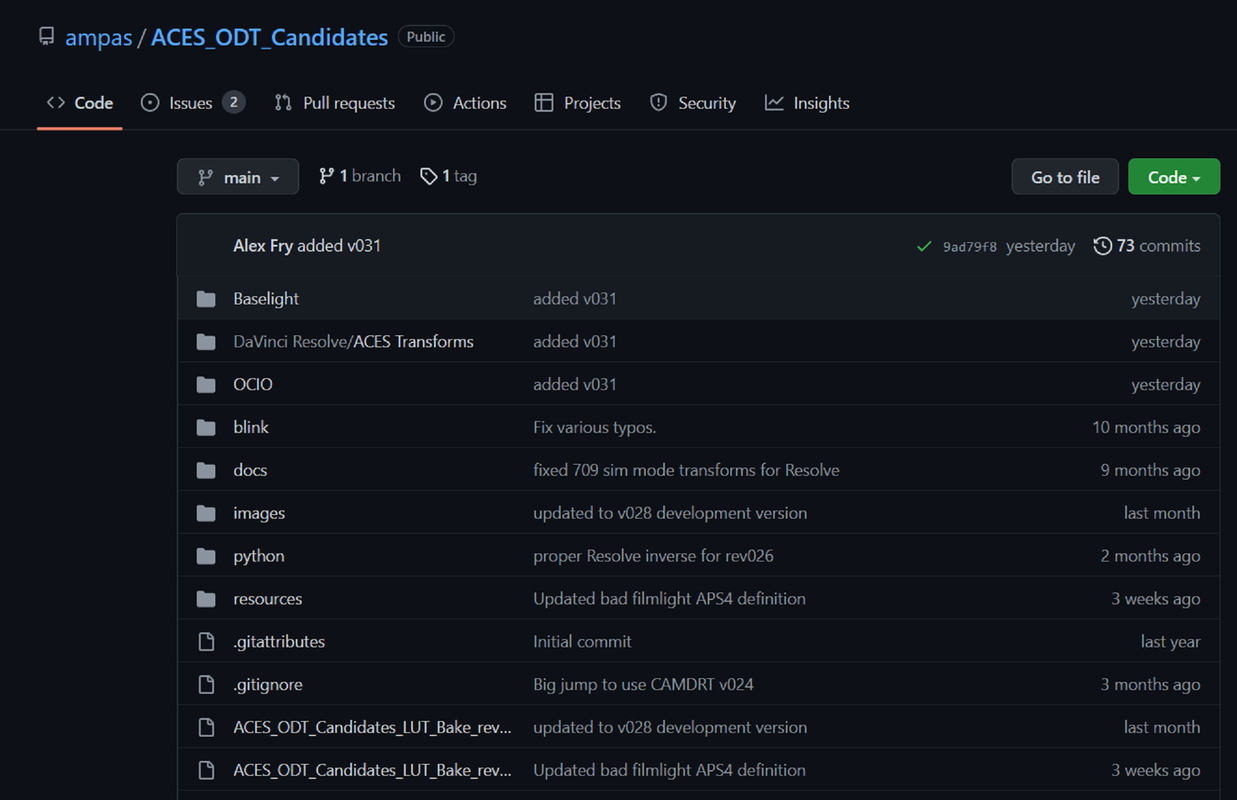
Aces 2.0 ODT Candidates

Web link
GitHub - ampas/ACES_ODT_Candidates


15.png


ACES Node Based "Hue vs Hue" Curve

1.png

1a.png

1a1.png

1b.png

1b1.png


2.png


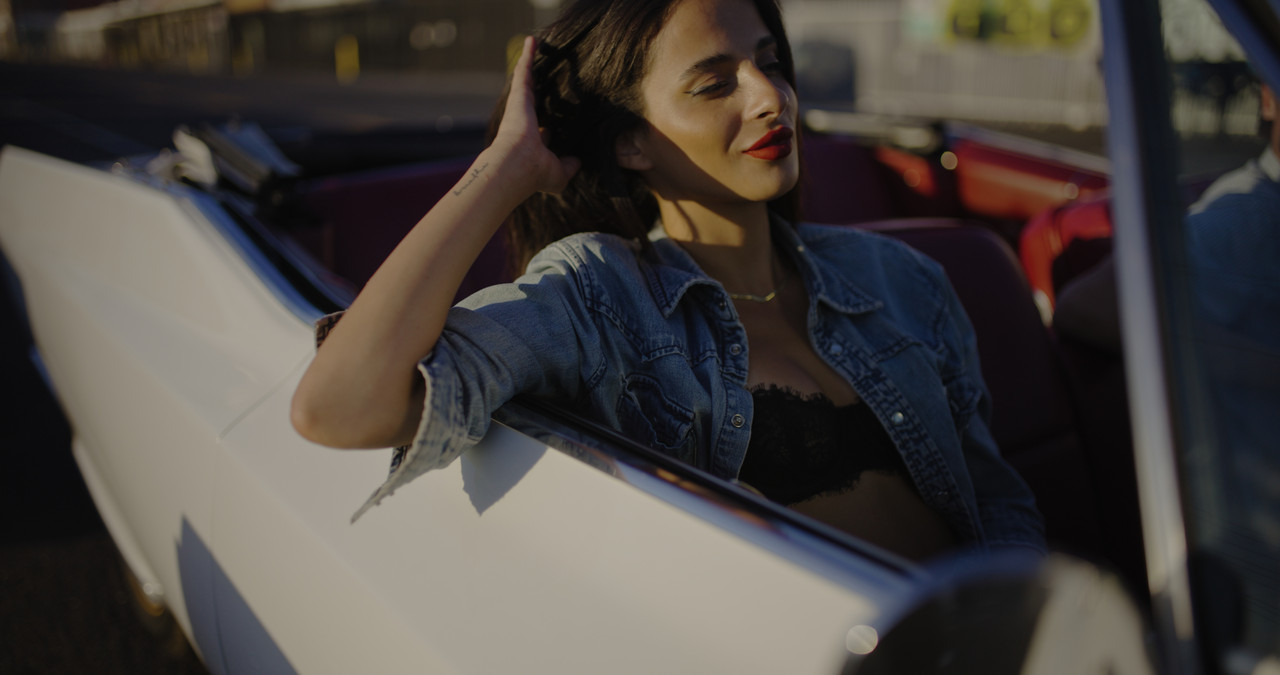
ORIGINAL IMAGE

original-image-1-1-7.jpg


2a.png


2b.jpg


3.png


4.jpg


ACES Node Based "Six-Vector Hue DCTL"


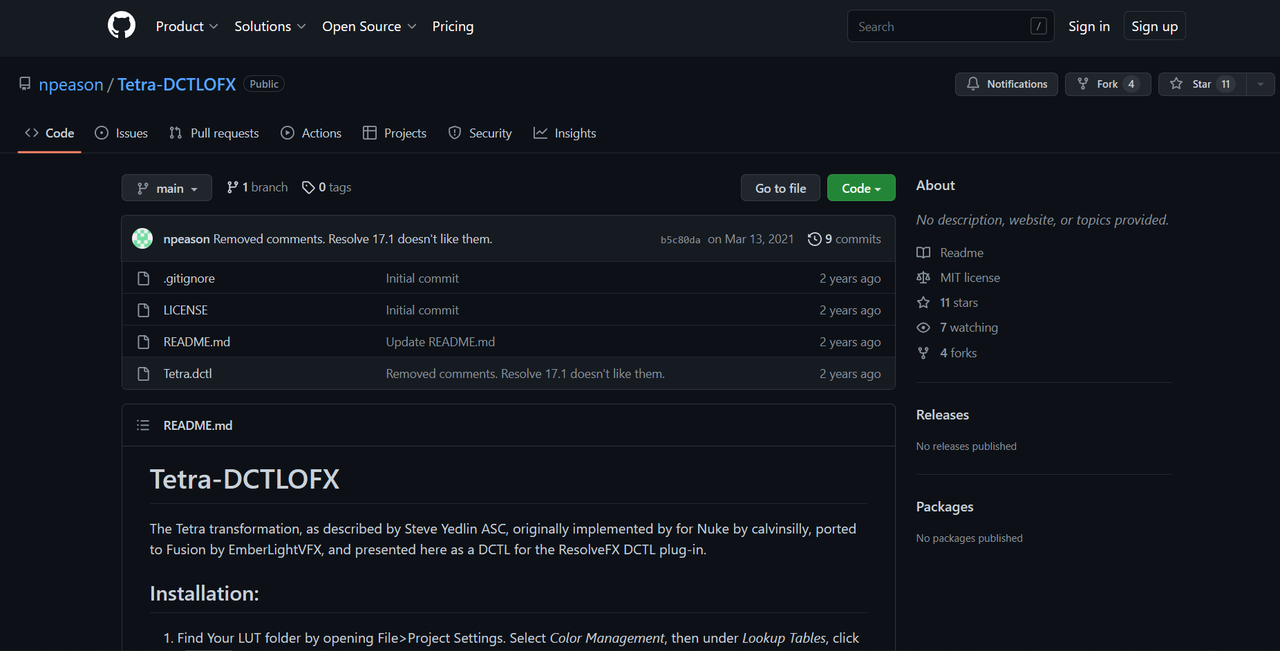
Here's a DCTL from Kaur Hendrikson that allows you to Change the Hues of RED, GREEN, BLUE, CYAN, MAGENTA and YELLOW

5.png

5b.png


6.png


7.jpg


8.png


9.jpg


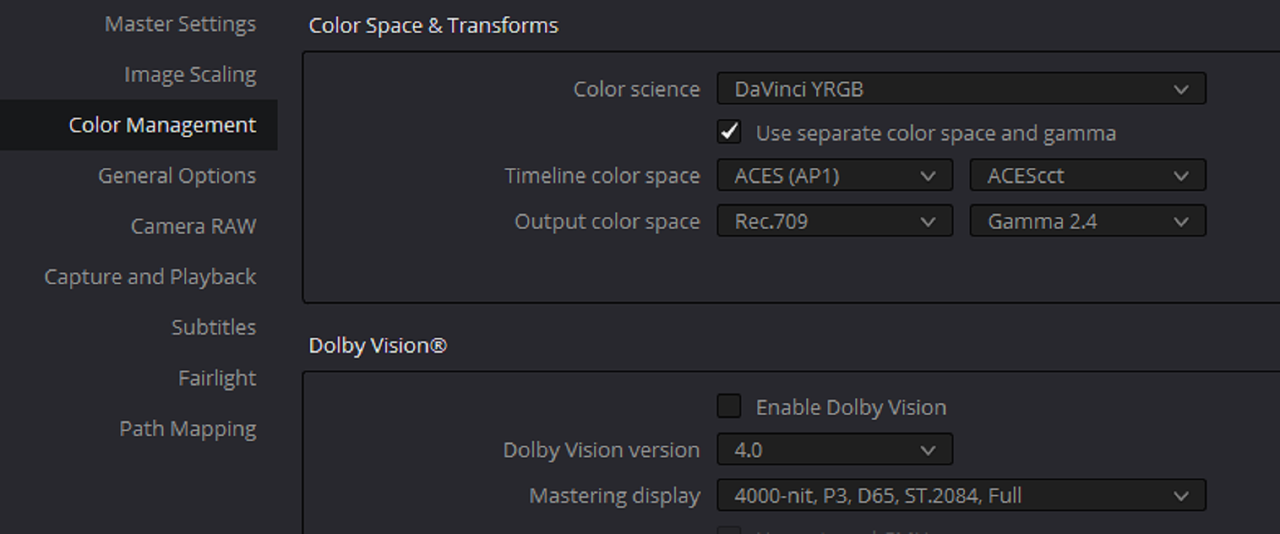
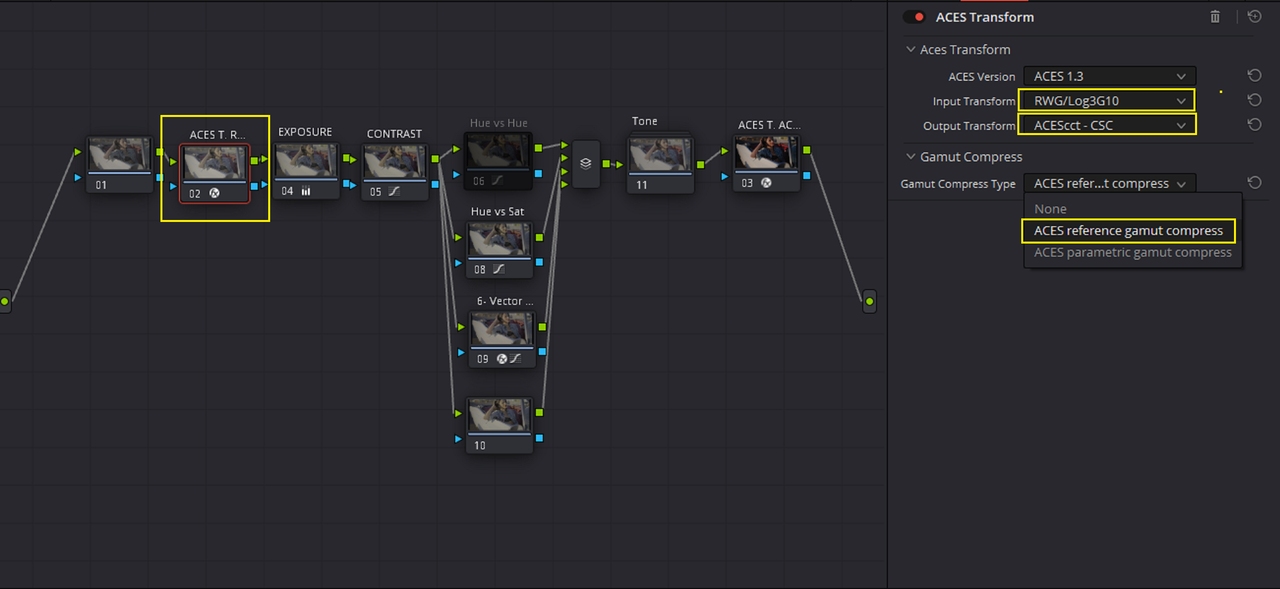
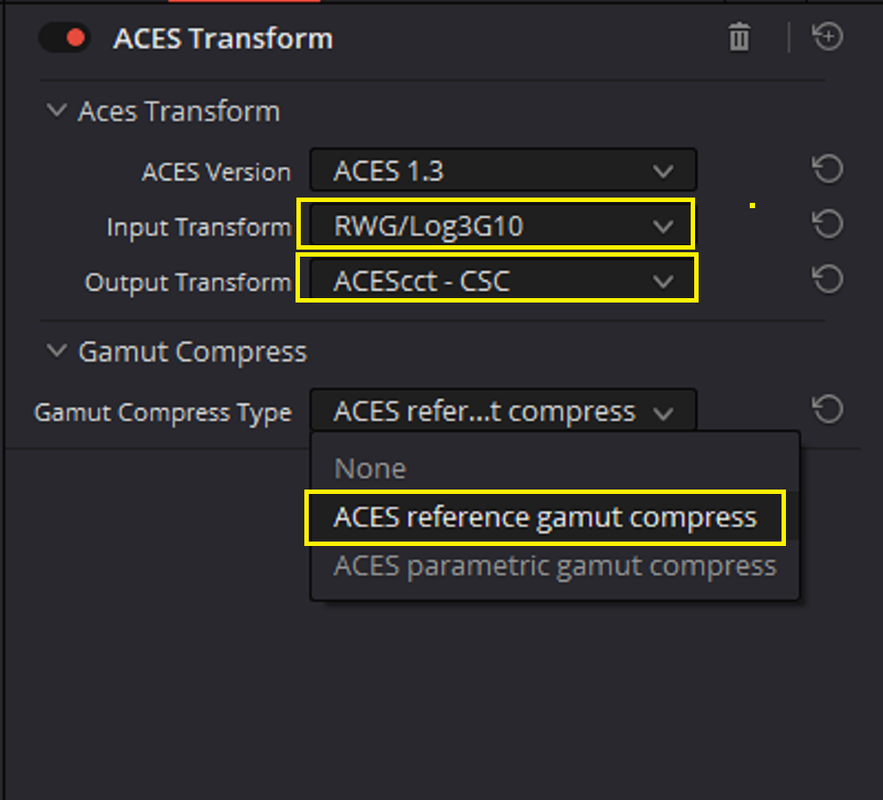
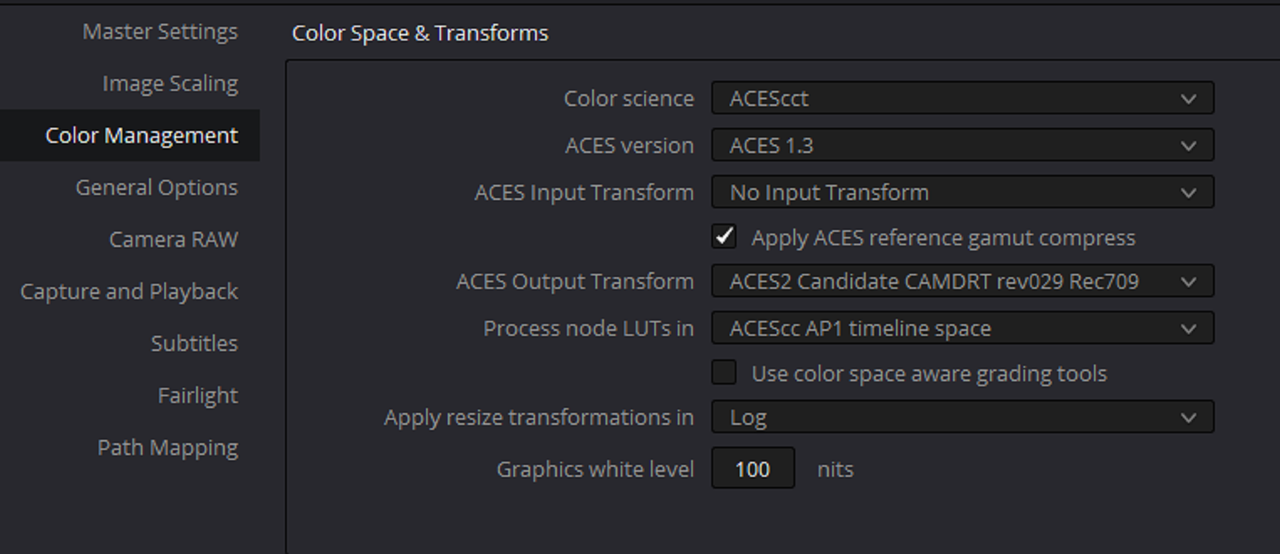
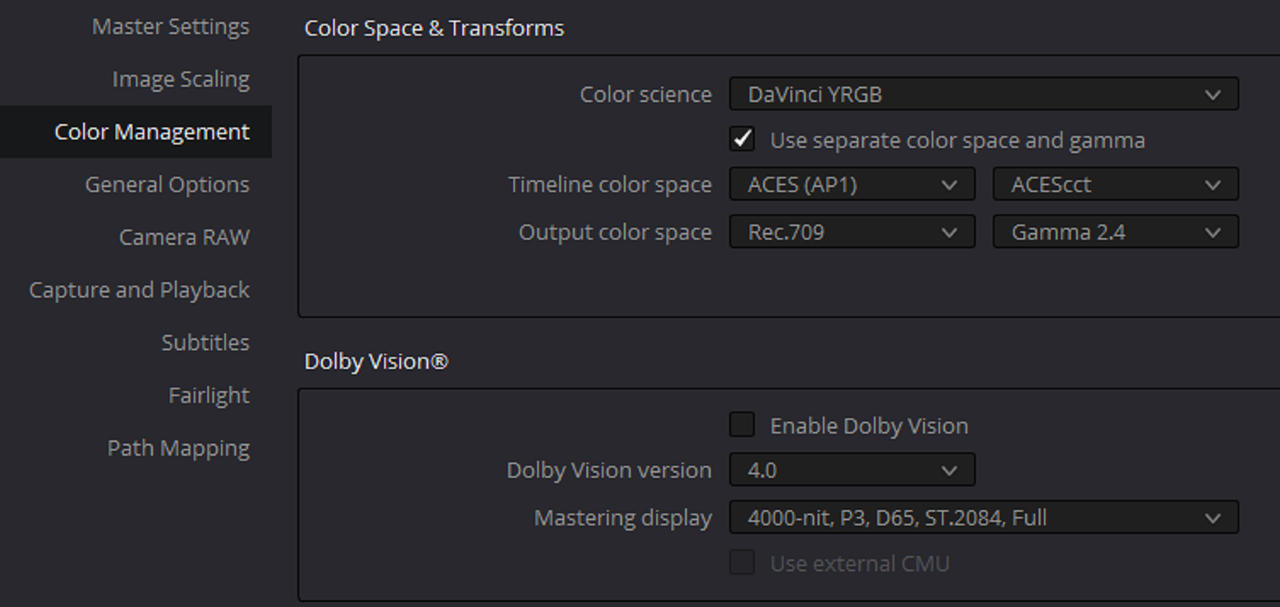
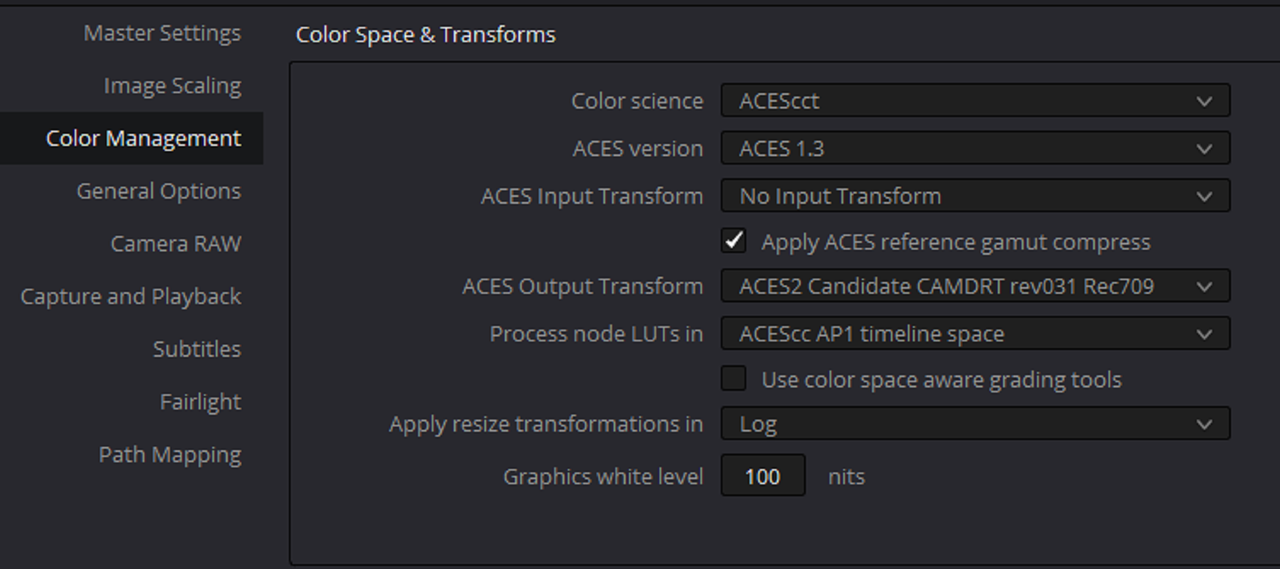
ACES PROJECT SETTINGS with HUE vs HUE

10.png


11.png

12.jpg


I made a quick Lut with a Hald File of the Grade above in Aces.

10.png

Screenshot-8489.png


Screenshot-8490.png


aces-lut-grade-1-1-10.jpg
 
Last edited:
Last edited:
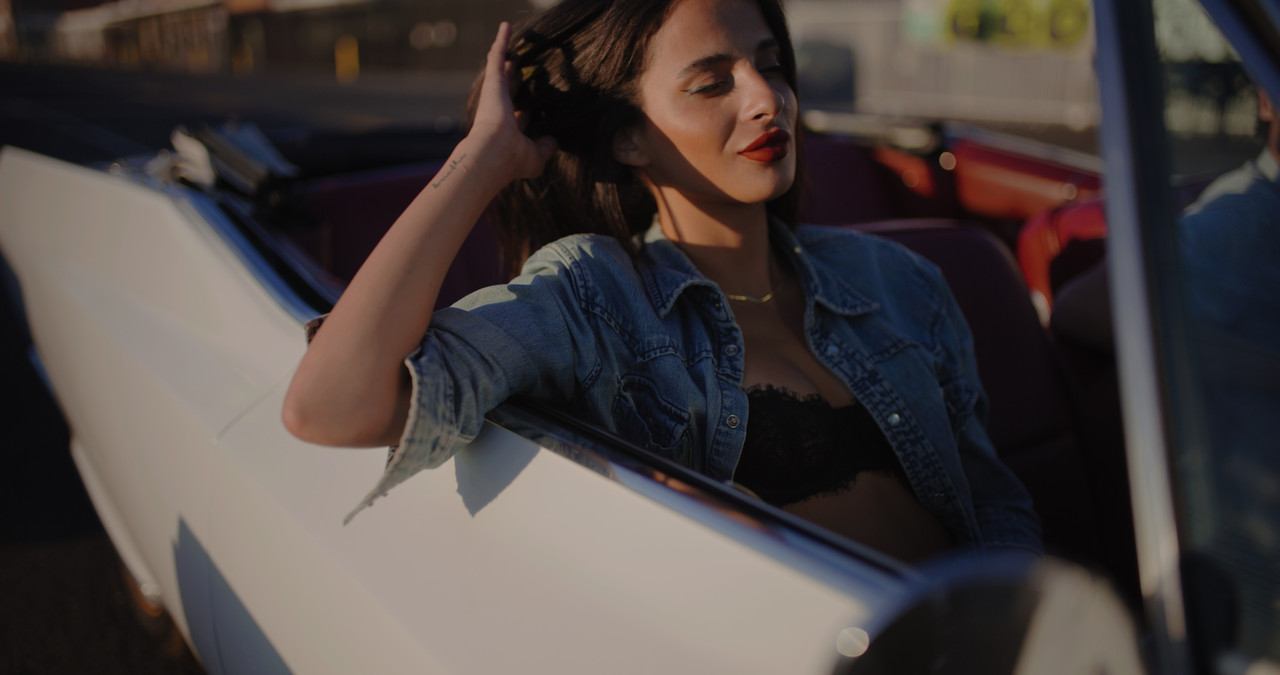
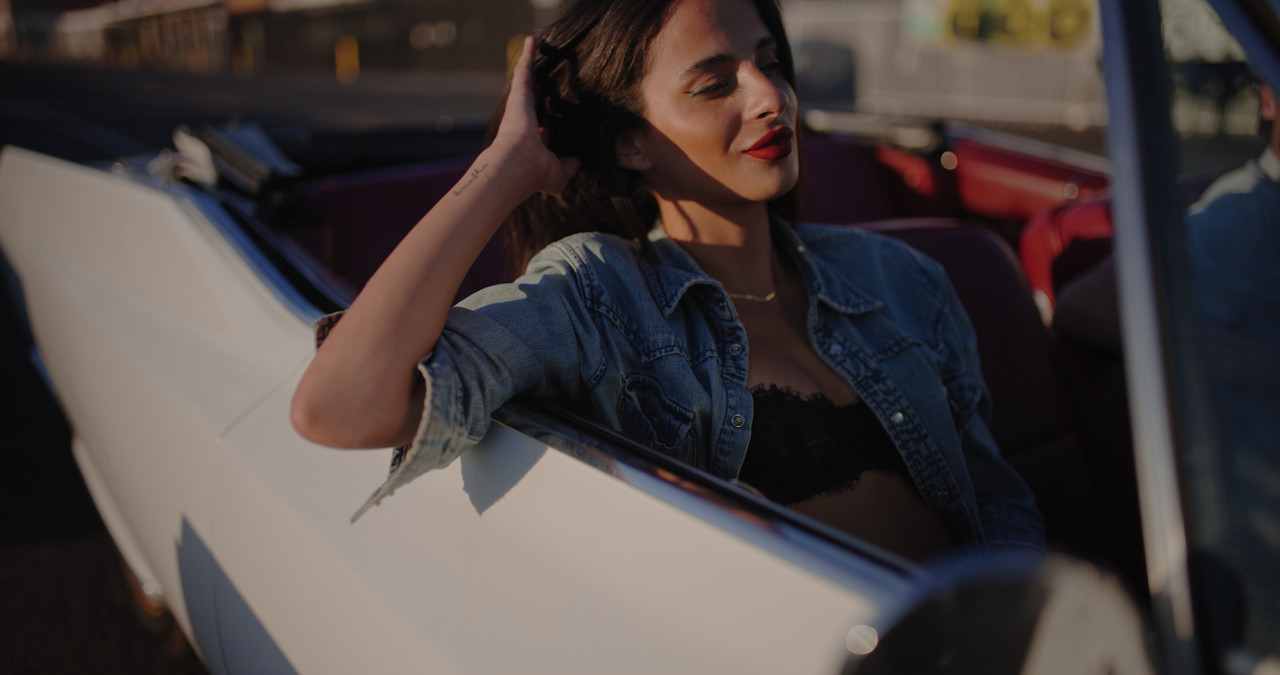
With all of the Stills I posted, I thought I would make a video of the before and After of both the Yellow removal from the Skintones and the Purple/Magenta removal from the blue jacket.

EDIT: I thought this was V-Raptor XL footage but it's Just V-Raptor footage Sorry!!

Red V raptor XL Yellow Magenta fix

By rand thompson


Last edited:
Since I'm up and working on color, just some quick exports with some of my philmColor LUTs and straight IPP2 output:
phfx_REDVRaptor_cadillac_philmColorSamples.jpg


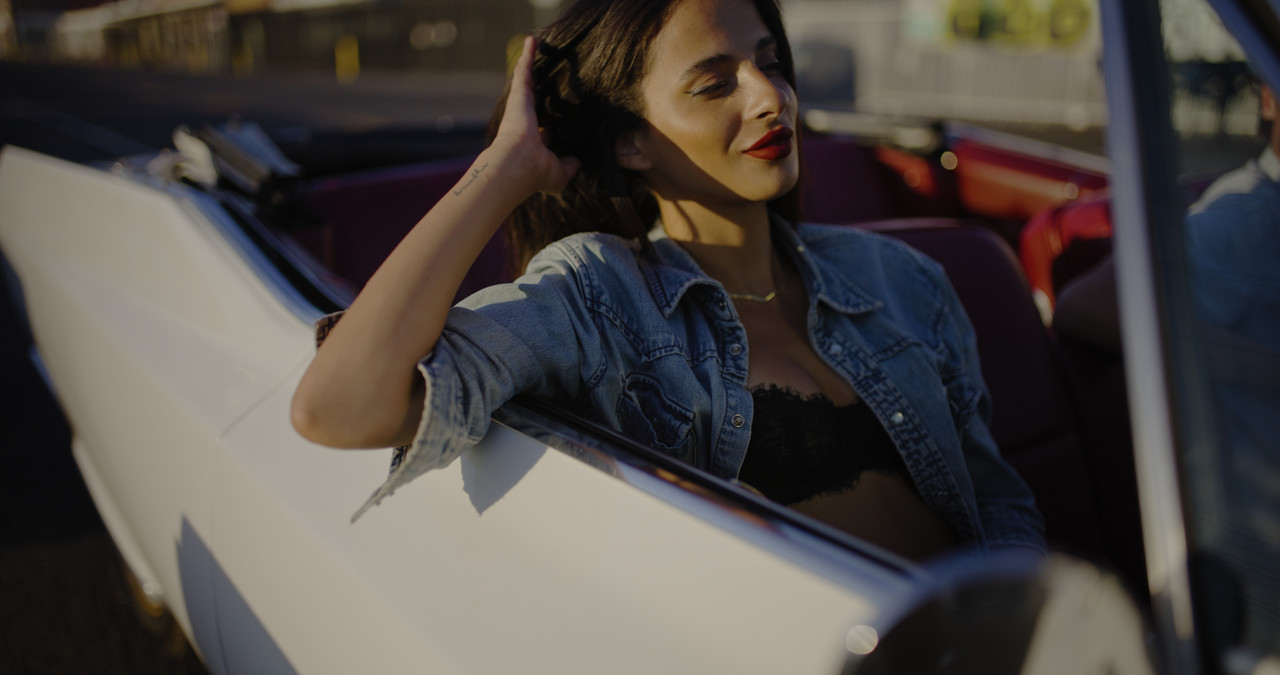
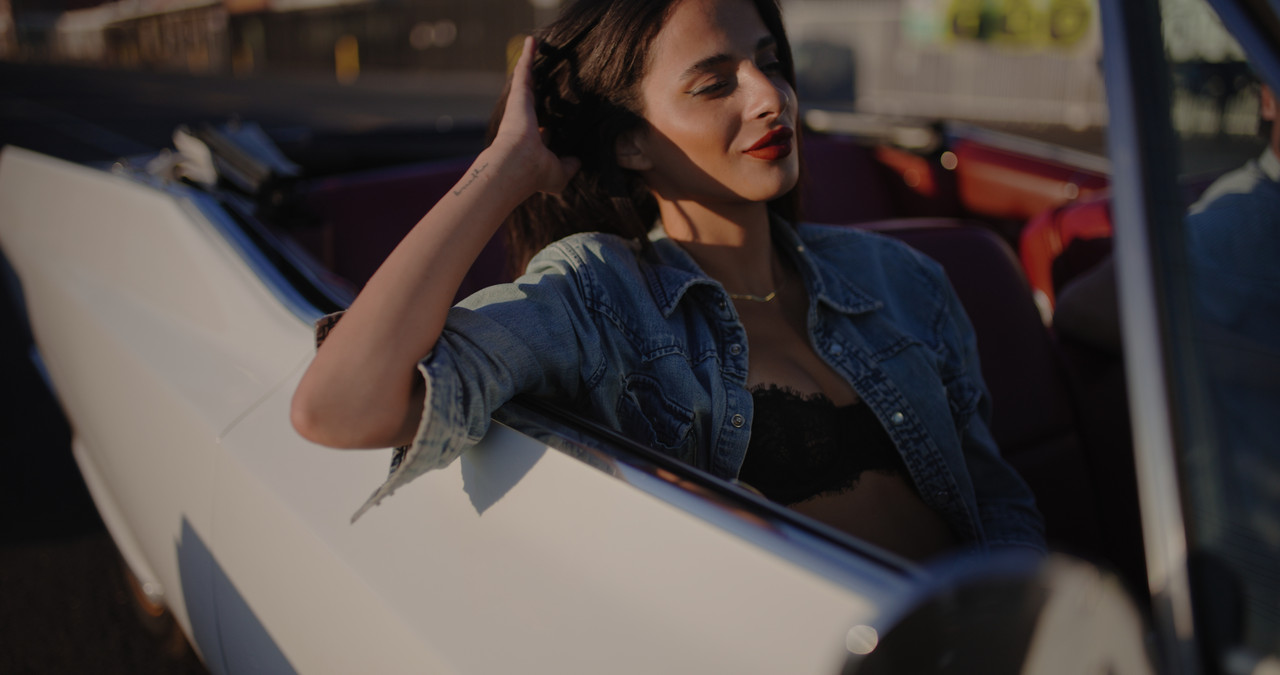
One of those is Kaimera and one is my Vision 250D chromatic profile. Other is more creative spin. Generally what is going on here is the yellow/green from the DTLA sunset, which could be left in or not. I'm using Graeme's IPP2 Color Science here and not straight Rec.709. Straight Rec.709 makes the yellow/green a bit more intense than I think most would prefer.
 

Attachments

  • phfx_REDVRaptor_cadillac_philmColorSamples.jpg
    phfx_REDVRaptor_cadillac_philmColorSamples.jpg
    102.4 KB · Views: 0
Here's my approach to it, using several different methods. The simplest is a Raw WB adjustment. As this clip is shot at 5600 with no tint adjustment, that's really the simplest approach. On my raptor, my tint is typically always set to -4 while I never particularly took note of the yellow skin in particular, I guess instinctively I adjusted the tint because the camera leaned just a tad bit greener. On Gemini I had my tint typically to -11, so raptor was definitely a huge improvement in that regard.
wAAACH5BAEKAAAALAAAAAABAAEAAAICRAEAOw==

But there are a ton of ways to make this adjustment. And I definitely don't think its something that needs anything more than a little nudge.
 

Attachments

  • Red 709.jpg
    Red 709.jpg
    84.5 KB · Views: 0
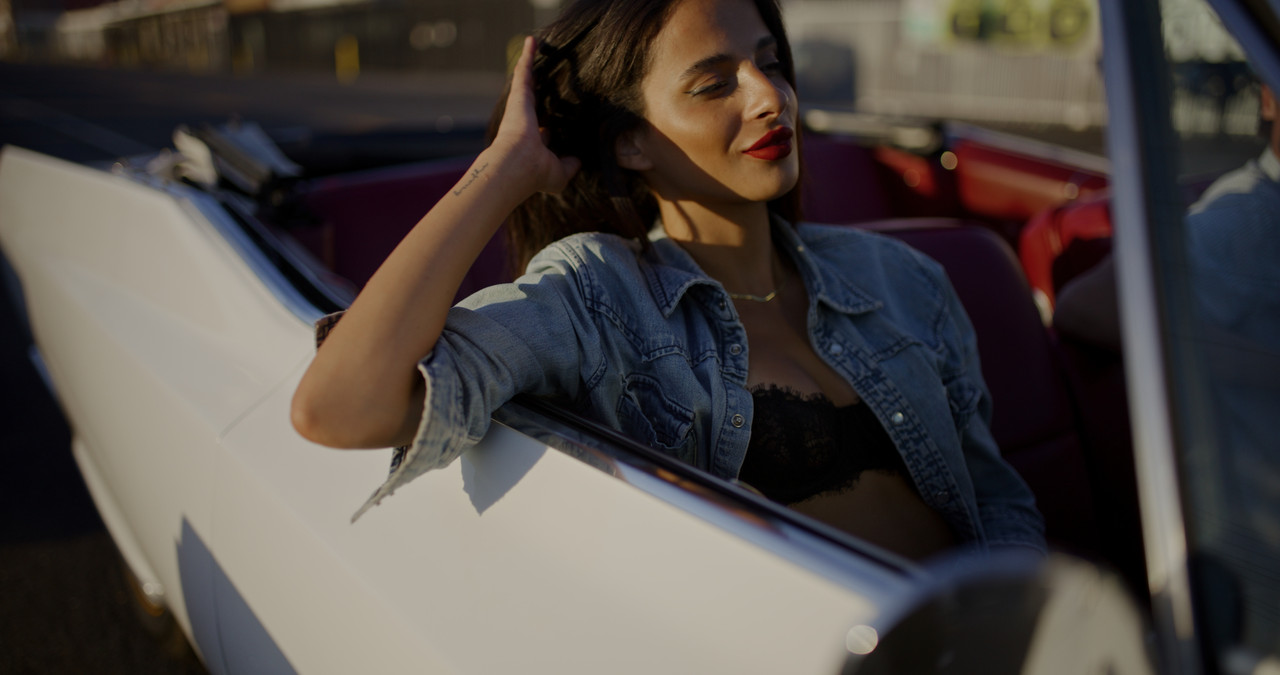
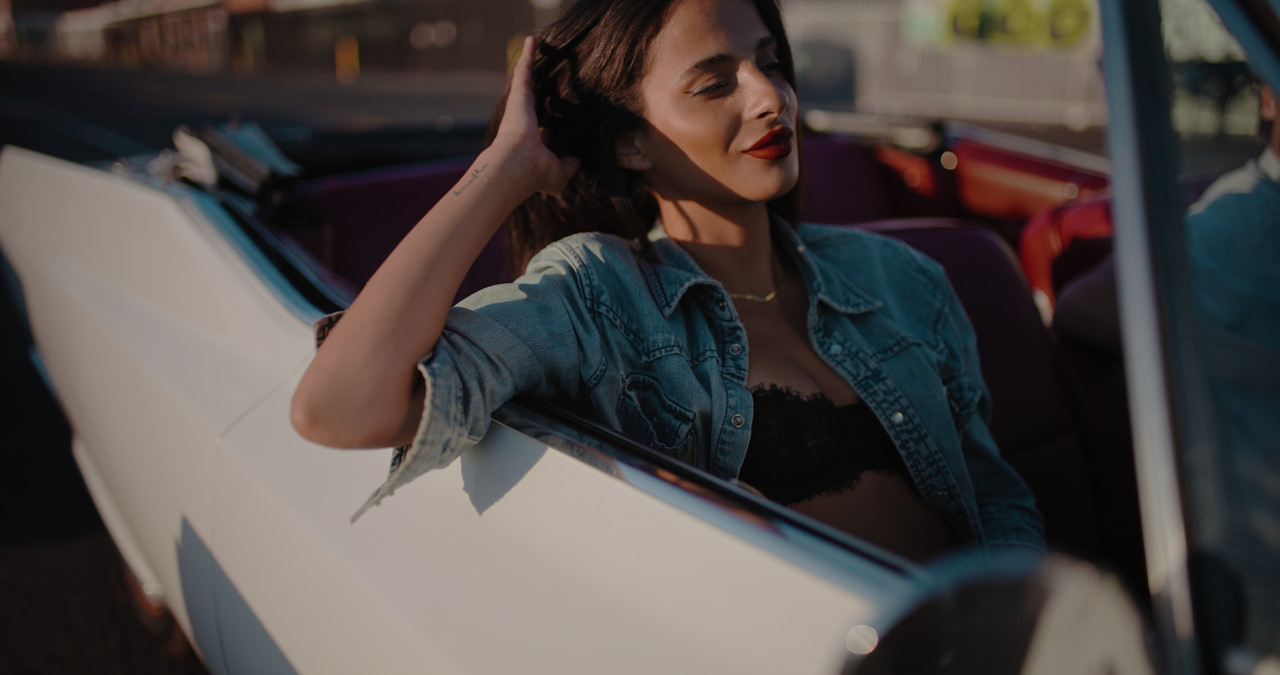
I used ACES in the video above and I use ACES all the time now. Aces can sometimes Exacerbate Yellow in Images as Compared to other Workflows like IPP2. Also the more you slightly overexposed the female in the Cadillac the less yellow is present on her face.

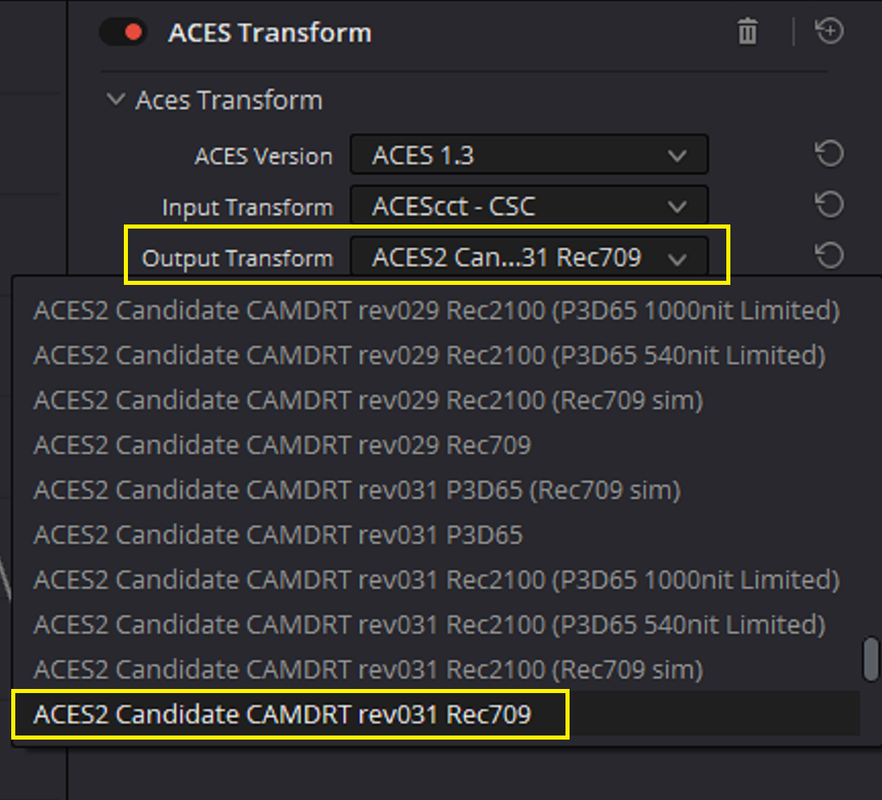
ACES with New ACES 2.0 REV31 ODT Candidate before Yellow Correction

ACES-1-3-2.jpg


GitHub link-ACES 2.0 REV-031 ODT Candidate
GitHub - ampas/ACES_ODT_Candidates


IPP2 Medium Very Soft before Yellow Correction

Red-IPP2-1-3-3.jpg


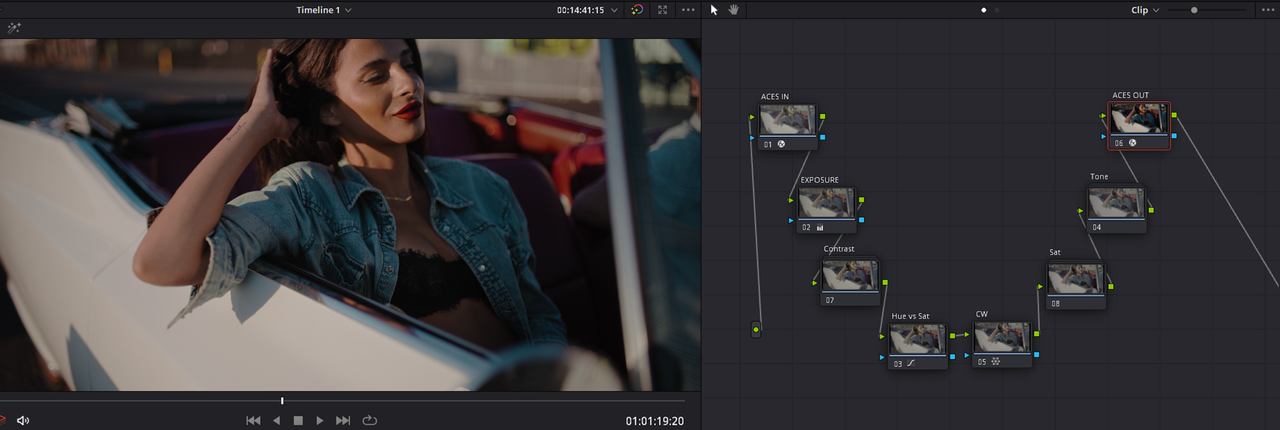
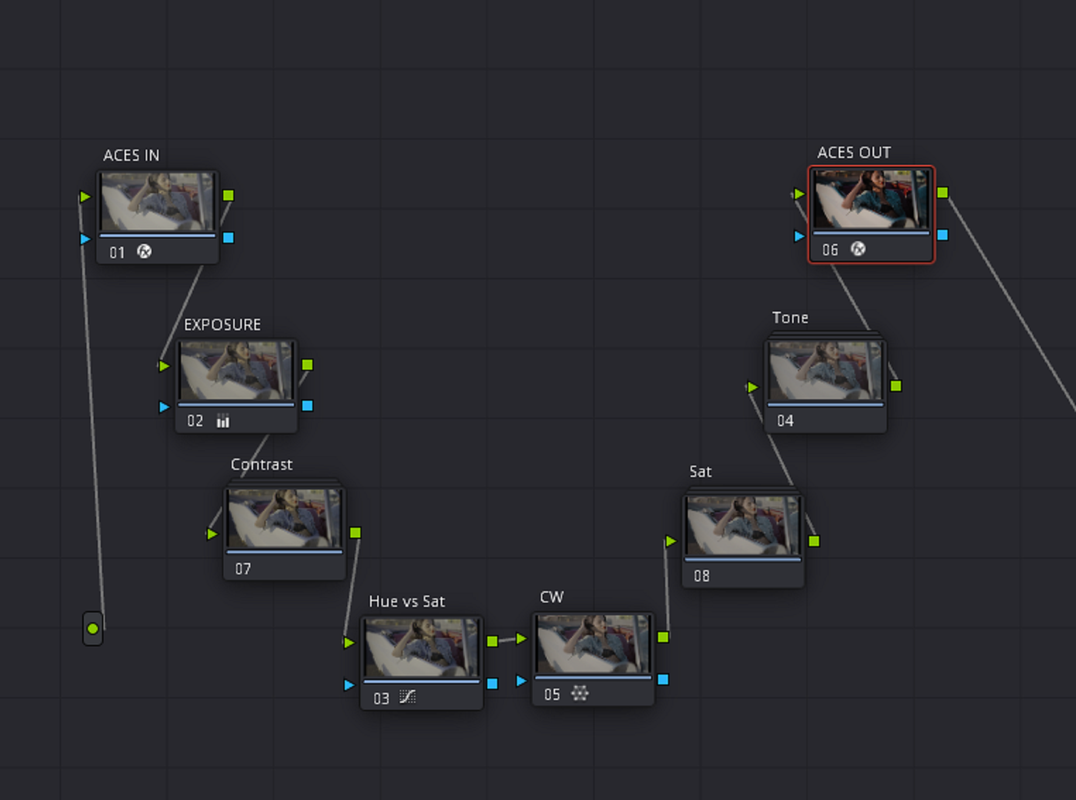
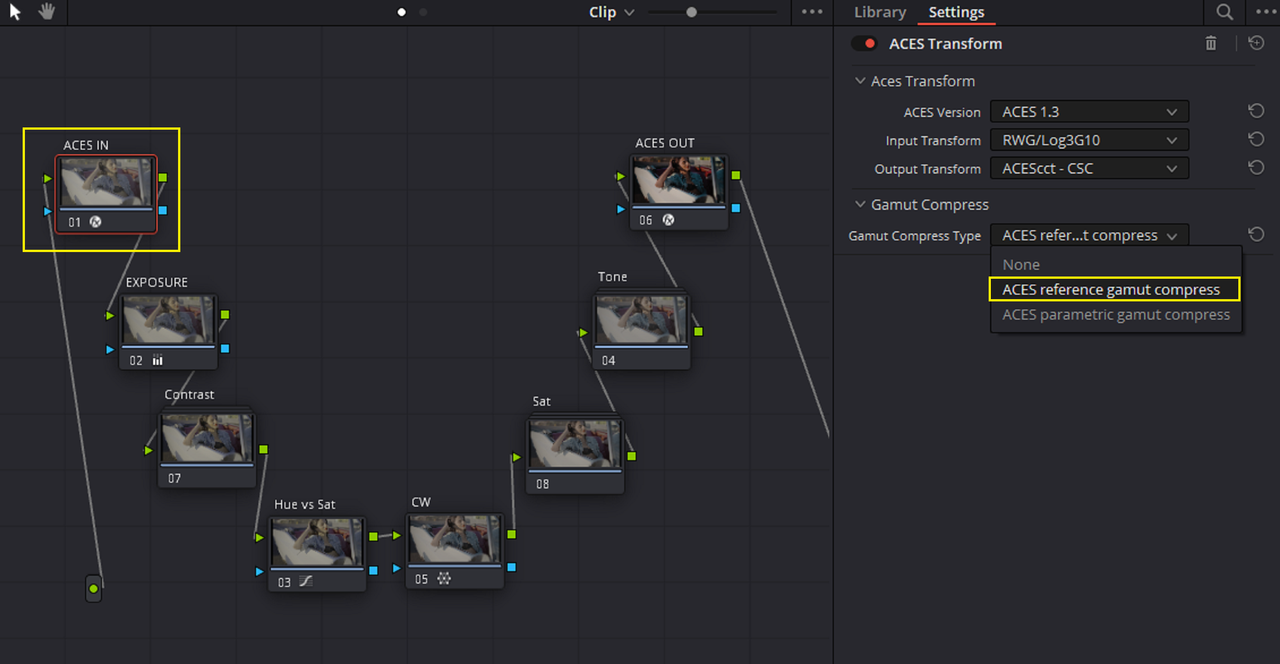
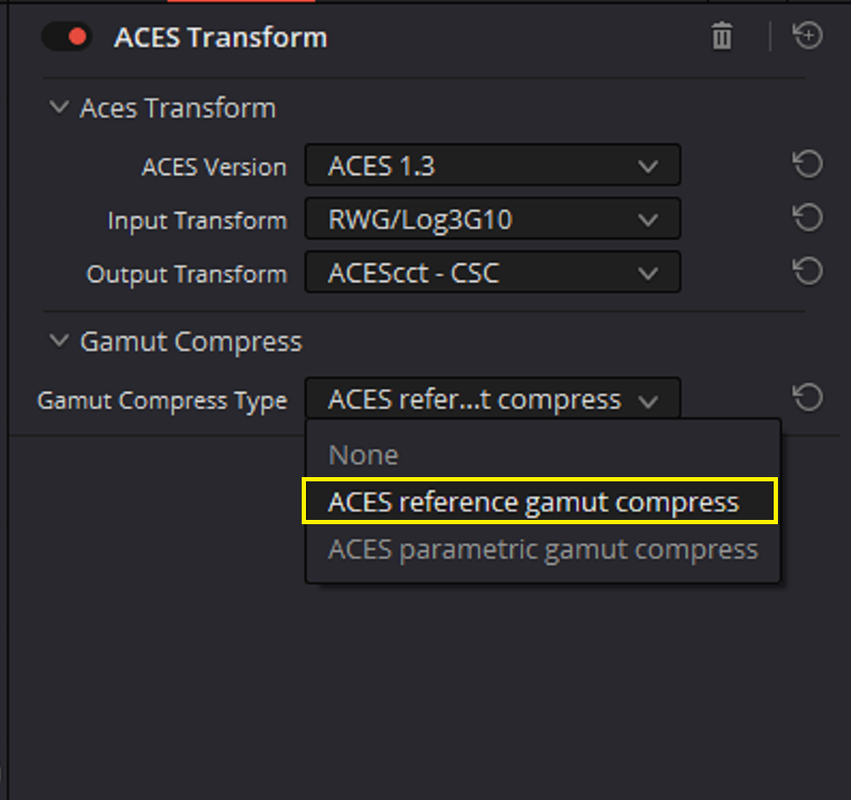
ACES Node Based

Screenshot-8519.png

wq.png


wq2.png


Screenshot-8523.png


Screenshot-8523-2.png


Screenshot-8524.png


Screenshot-8524-2.png


graded-1-3-4.jpg


Aces Project Based

Screenshot-8521.png

Screenshot-8525-wqew.png

Screenshot-8525.png

graded-1-3-4.jpg
 
Last edited:
Back
Top