Welcome to our community

Be a part of something great, join today!

  • Hey all, just changed over the backend after 15 years I figured time to give it a bit of an update, its probably gonna be a bit weird for most of you and i am sure there is a few bugs to work out but it should kinda work the same as before... hopefully :)

RED V-Raptor vs Alexa 35

As it relates to my personal taste, I'm the only colorist here in the Bahamas doing work for people other than themselves.

There are difficult topics to get into between the technical, correct/accurate, and perceptually pleasing concepts that manufacturers put forth with their baseline calibration as well as their output transforms.

And perhaps the hottest take I have is that this is a good thing as that gives you a reason to go with systems x, y, or z.

On the flipside, particularly if you know what you're doing, is asking why this or that and what you want out a system.

Weirdly when there are all standards as it actually pertains to color representation/reproduction the even bigger question set forth is what looks good or better from there. That's where the fire is white hot.

That said, there's also things that some systems don't capture well that have begun to haunt the minds of technical colorists and color scientists. Even with a well crafted IDT or transform.

That nuance is again a good and bad thing as you can choose generally to do something about it or not.

Won't rant hard into it, but the most laughable thing to me is the existence of certain camera looks because people want camera X to look like camera Y. And in reality the footage that inspired their desire for that had little to do with what that is if at all.

There is merit in there for some aspects of all of this, but I think the general knowledge base needs more work. And perhaps something for me to tend to on the looks side of things, despite my awareness of providing too many options, is to provide far less and much more specific ones. I'll take that note in earnest from all of that.
 
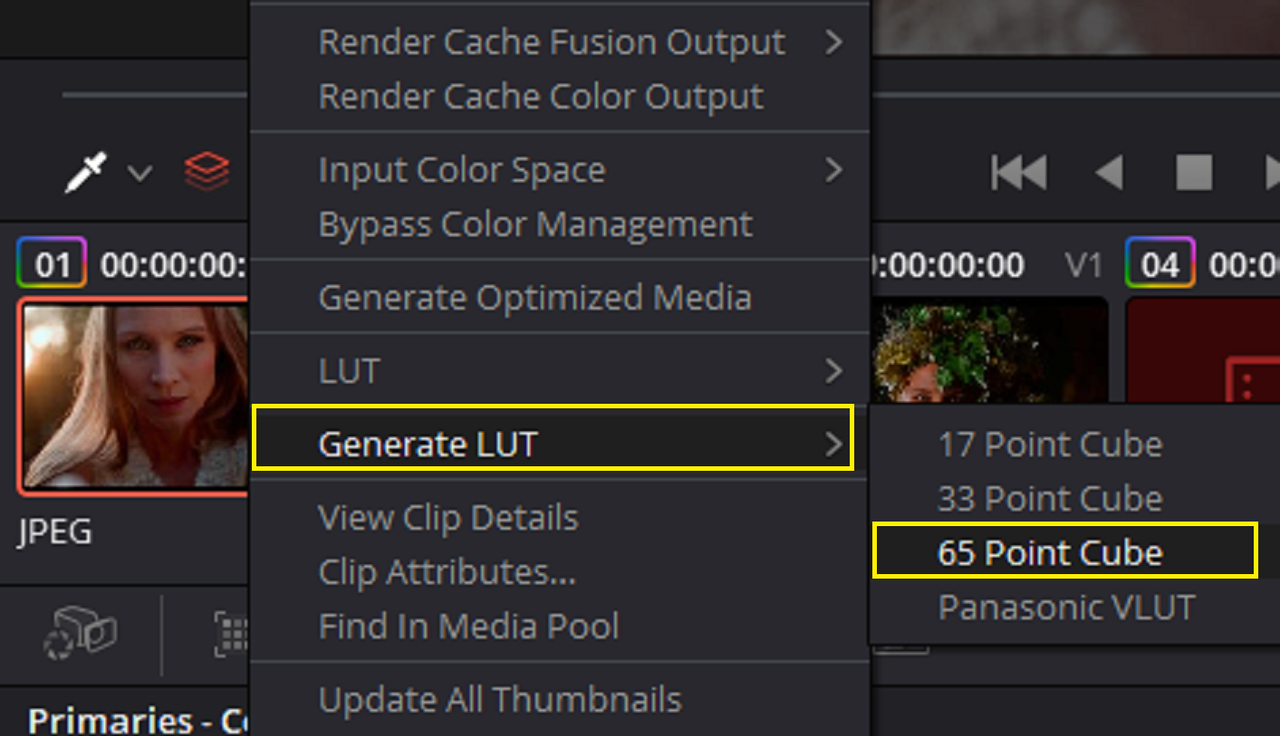
I included and demonstrated a lot of DCTLs in this Thread so I thought I would share again how to turn a DCTL grade into a LUT since I didn't have shit to do tonight.


PART 1-The lutCreator.js website and the Davinci Resolve Initial Grade


LutCreator.js Website
lutCreator.js - Create Luts (sirserch.github.io)


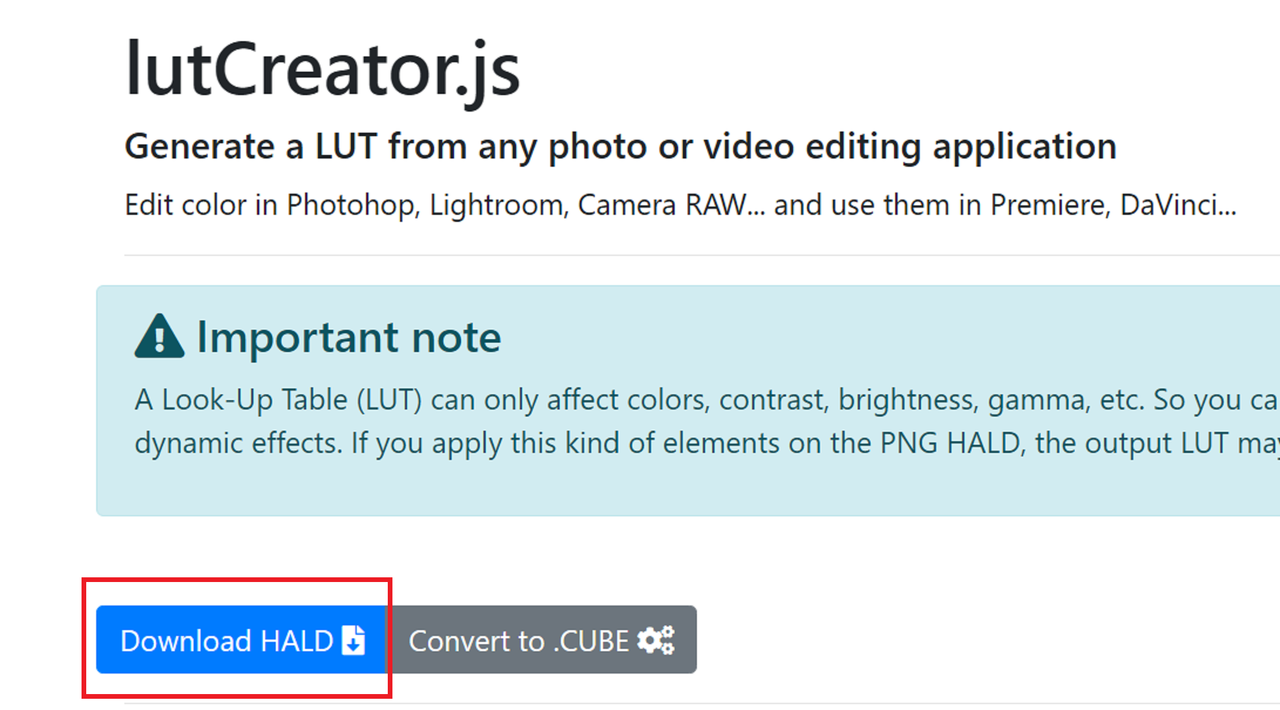
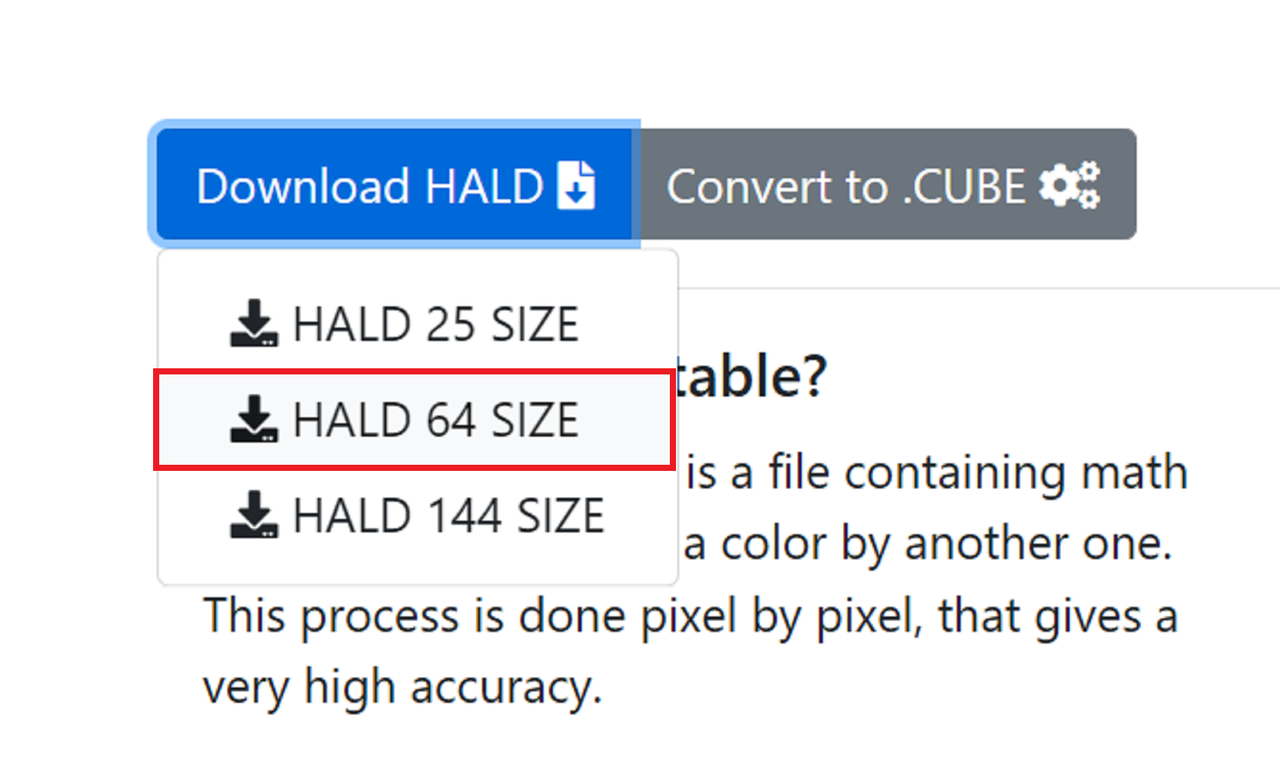
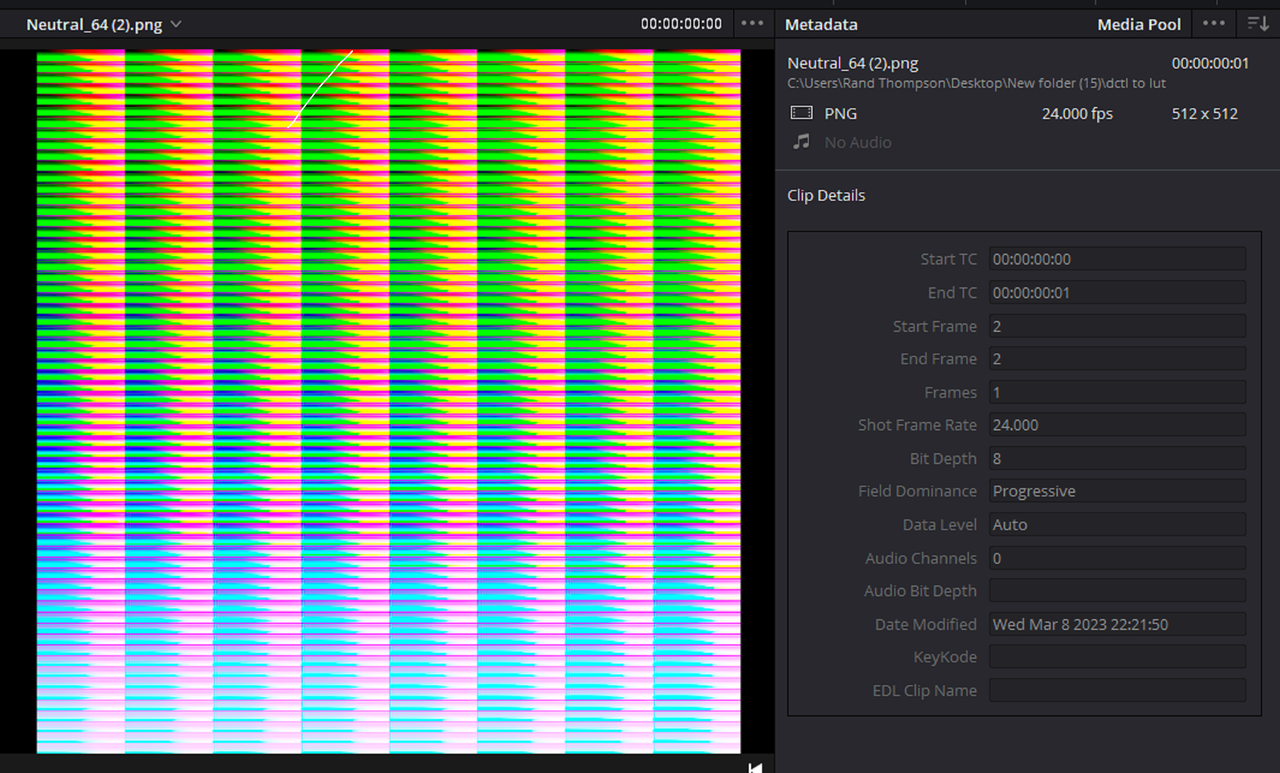
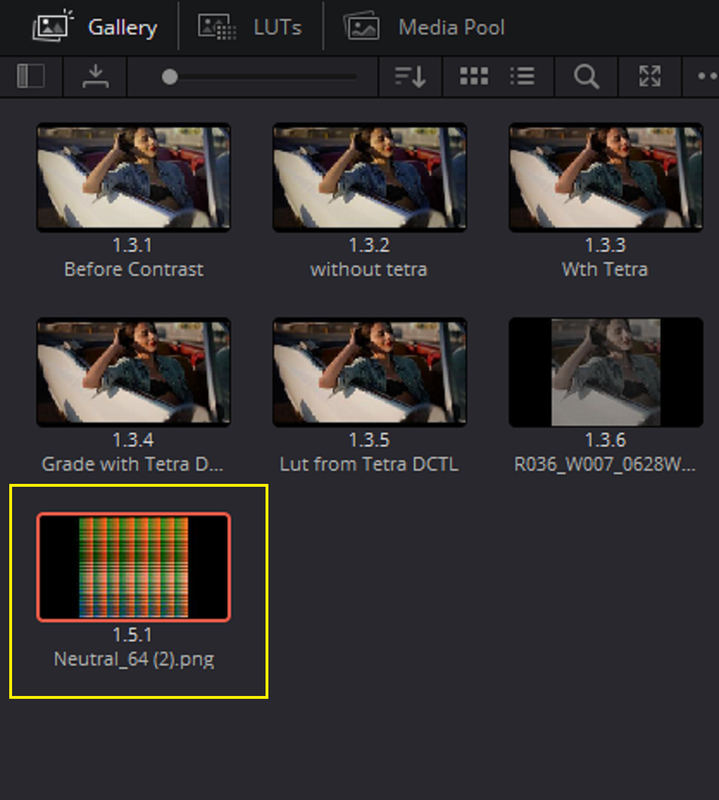
On the lutCreator.js Website, Click on the "DOWNLOAD HALD" button and select a "HALD 64 SIZE" HALD File. It will generate the HALD file and download it to your download folder. Save it for later.


0b.png


0c.png


0d.png


In Davinci Resolve


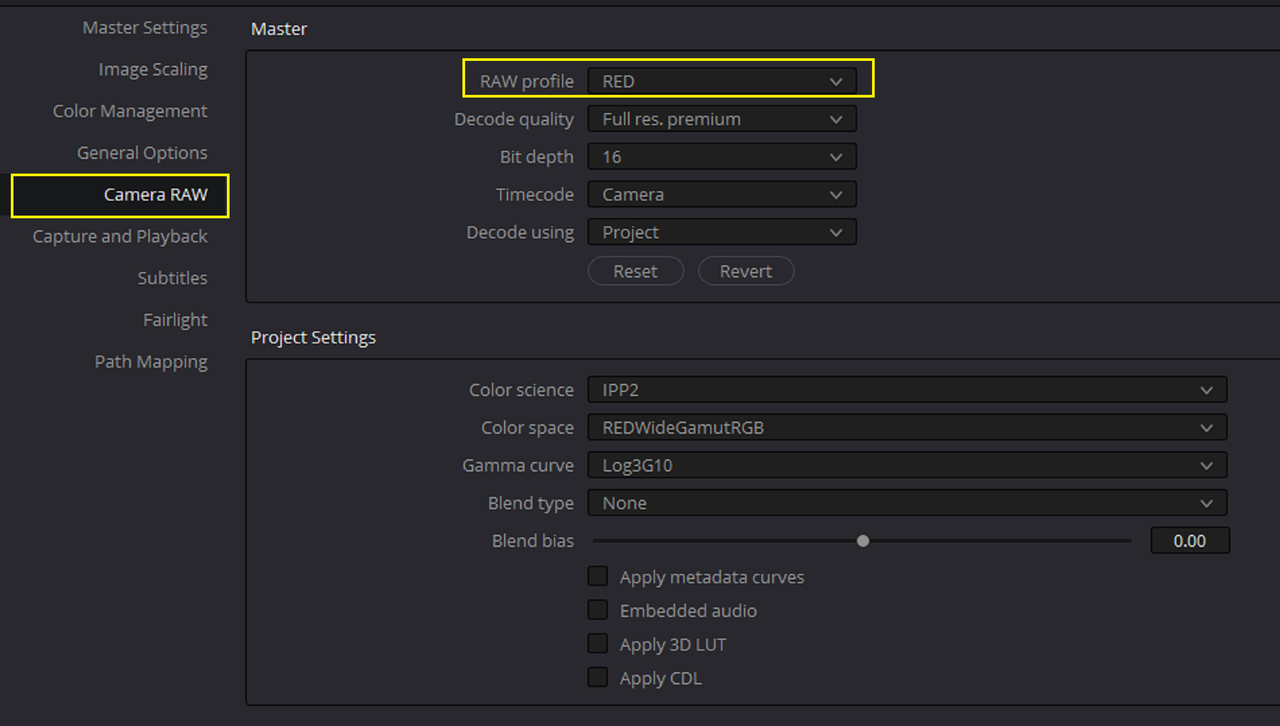
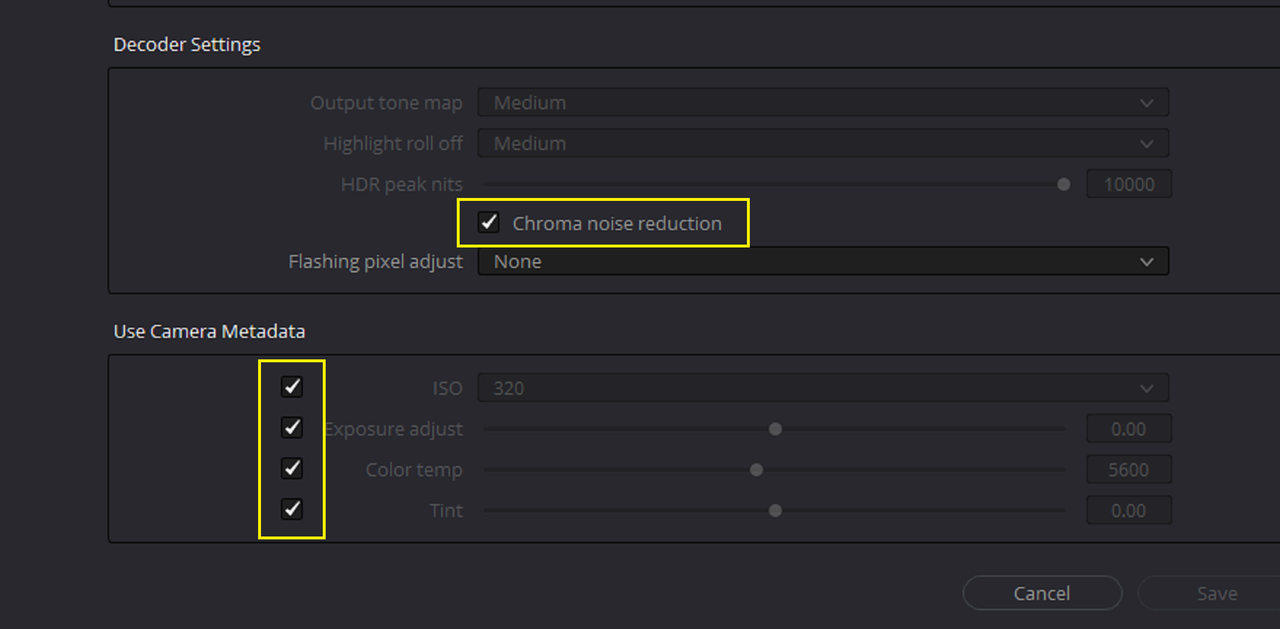
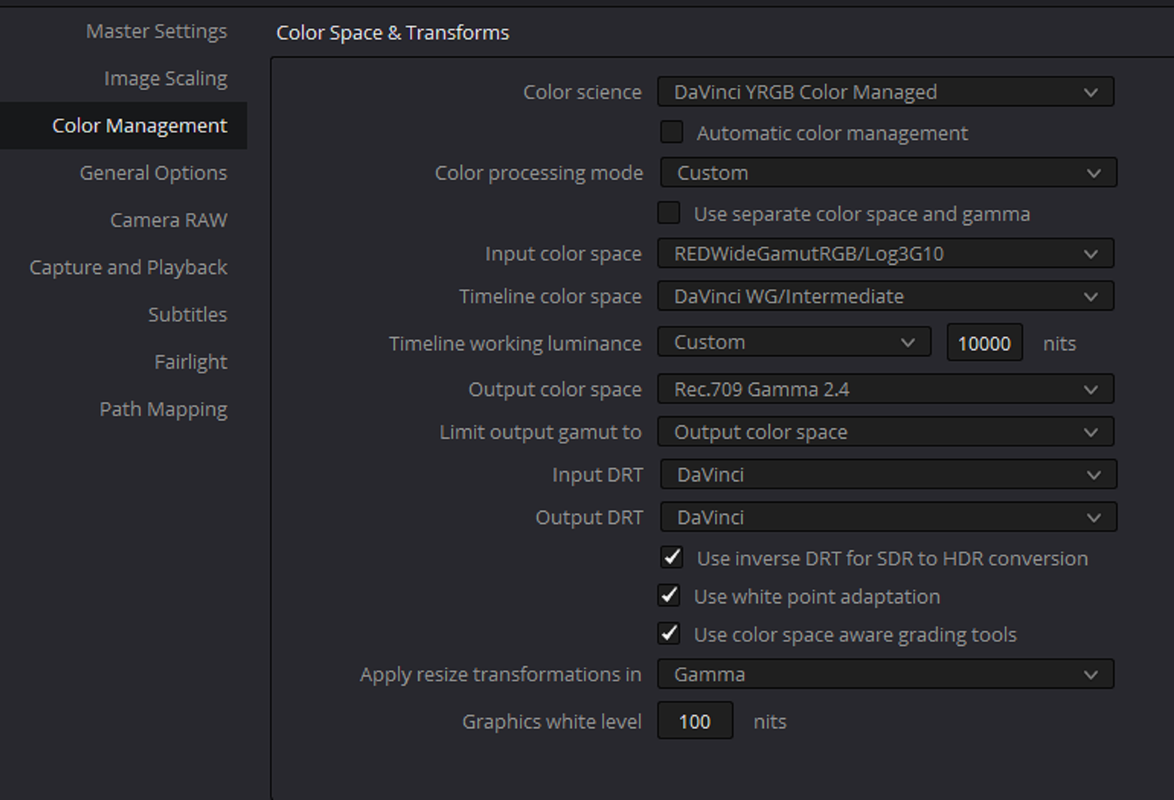
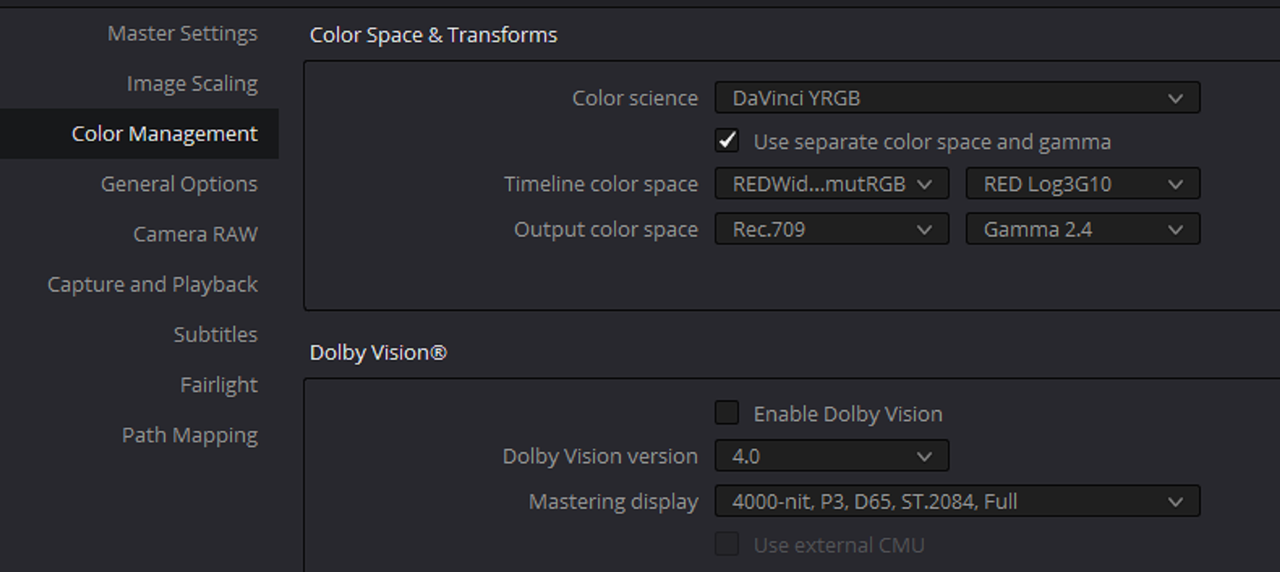
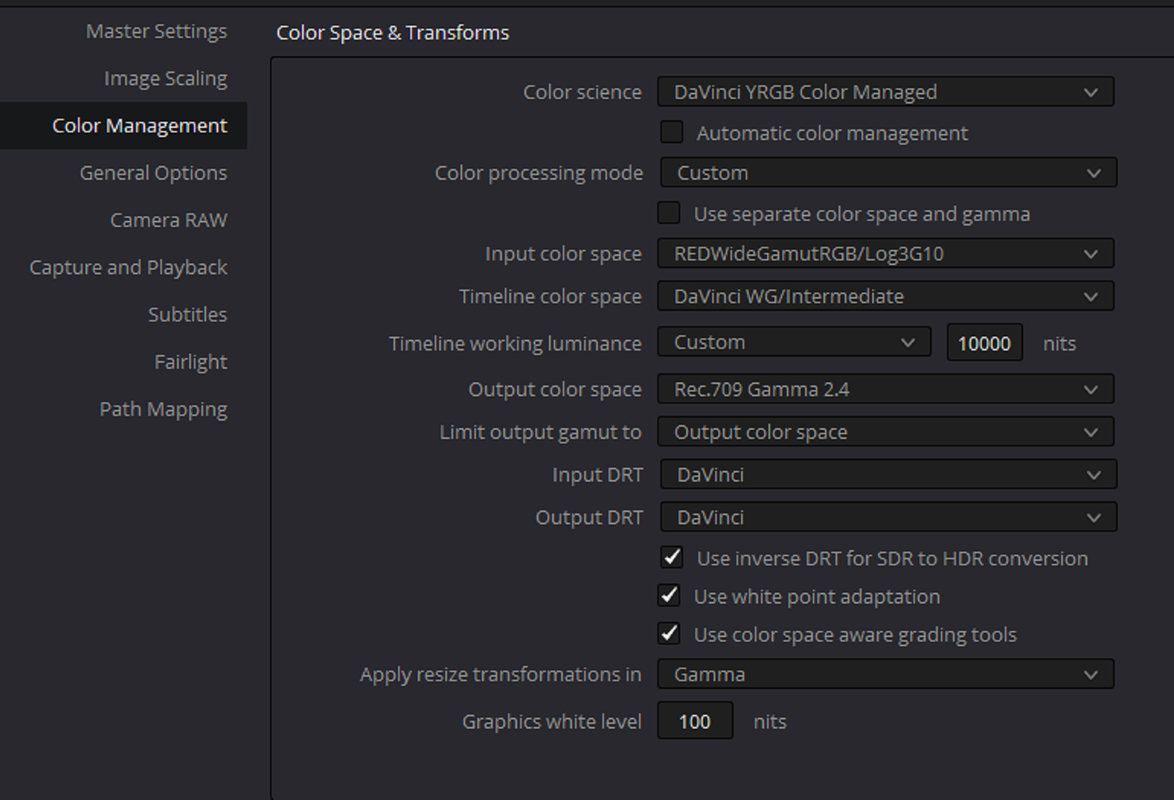
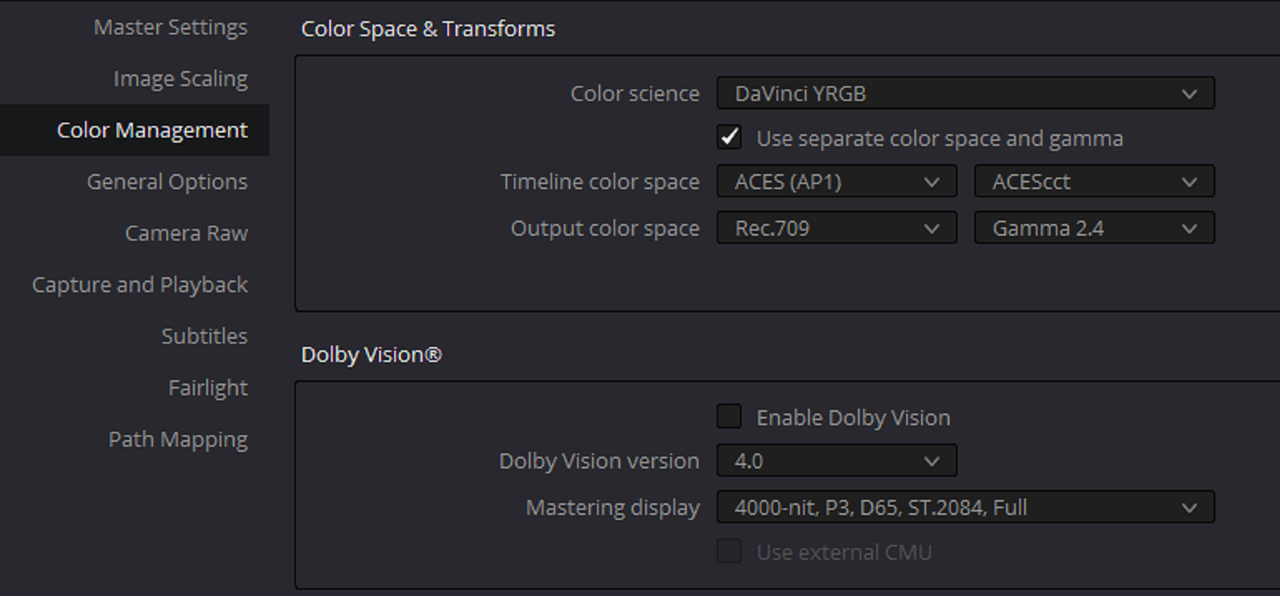
Here are the Settings in Resolve

1a.png

Screenshot-8696.png


Screenshot-8695.png


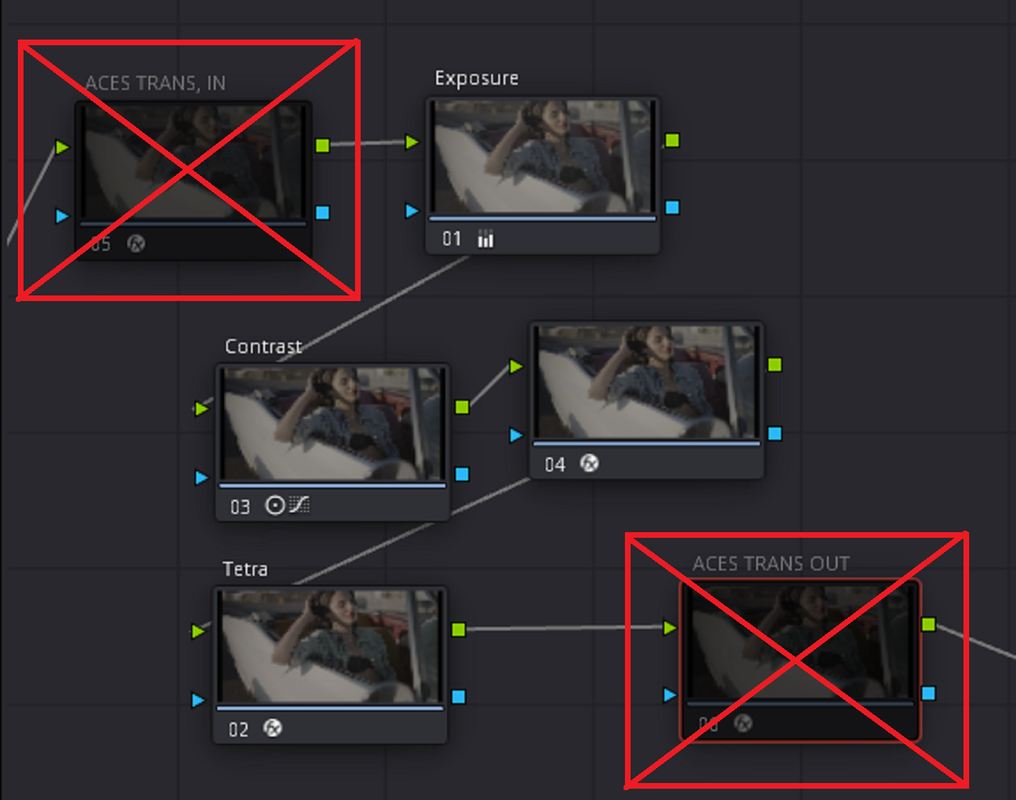
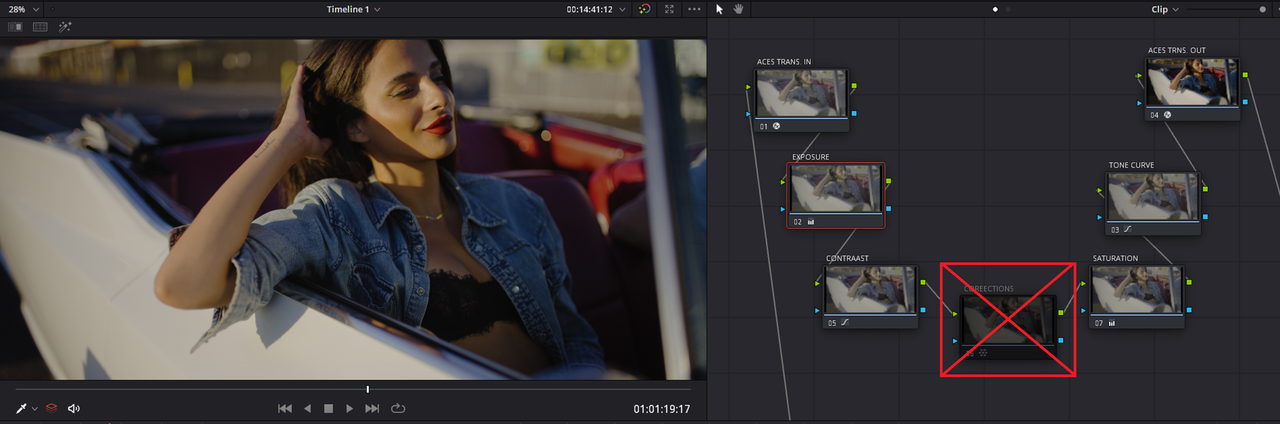
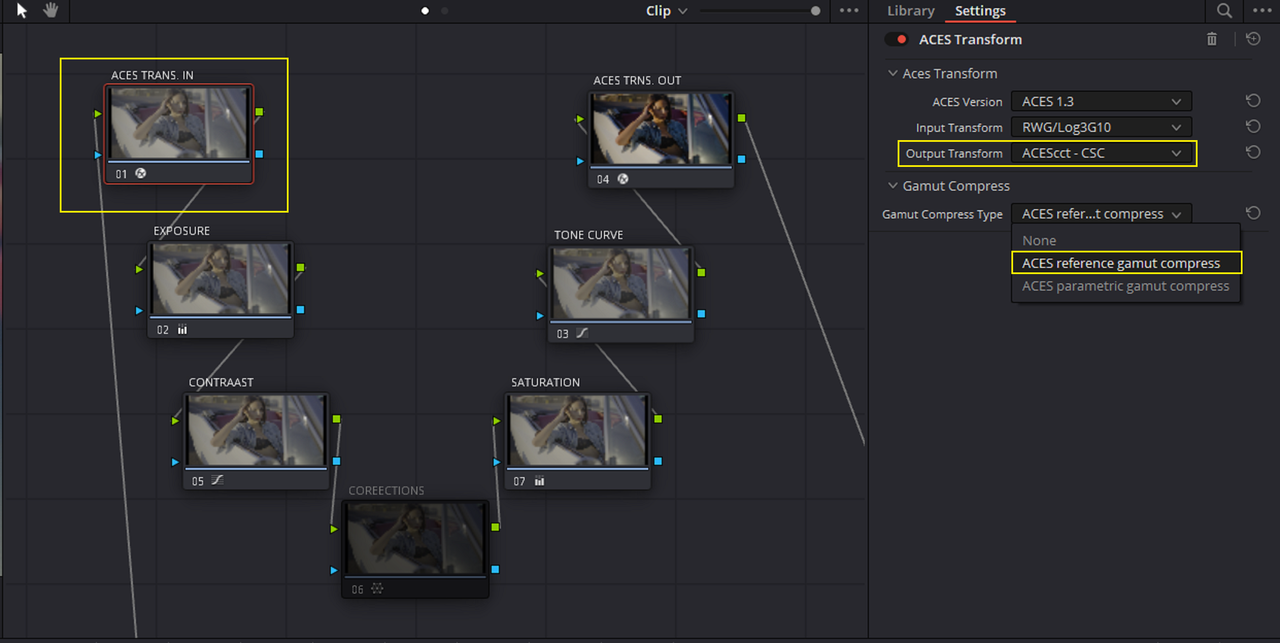
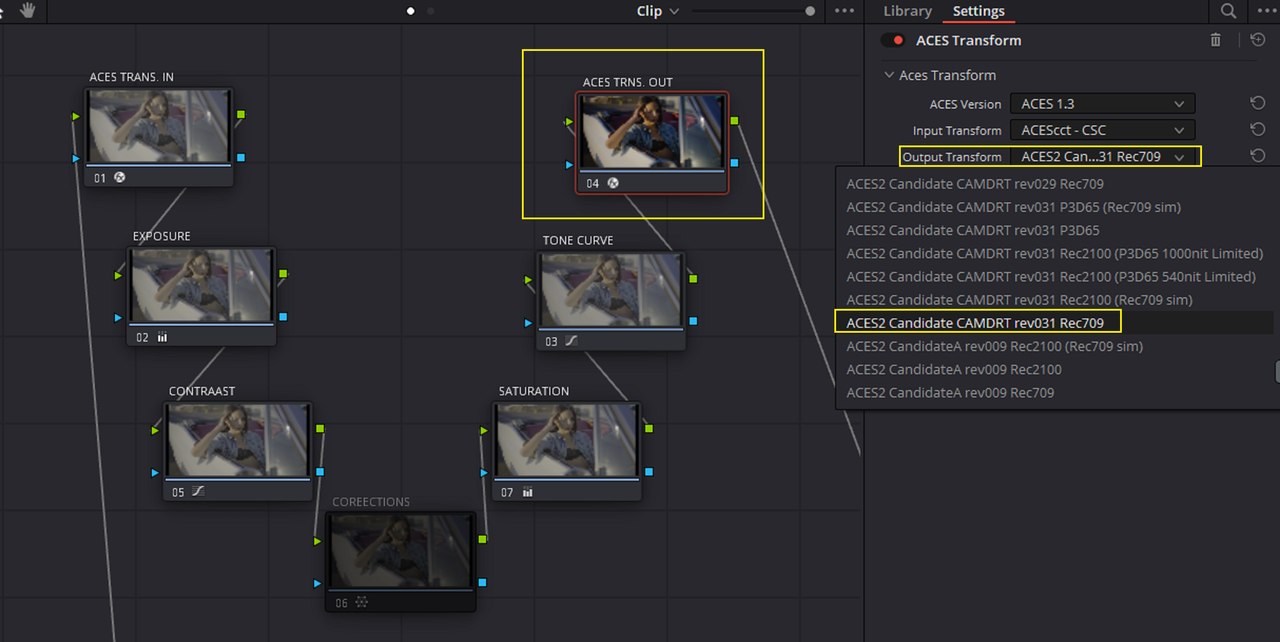
I was showing a friend how to do this in a DAVINCI WIDE GAMUT/ DAVINCI INTERMEDIATE Workflow but this can be applied to ACES or IPP2 as well.

1.png


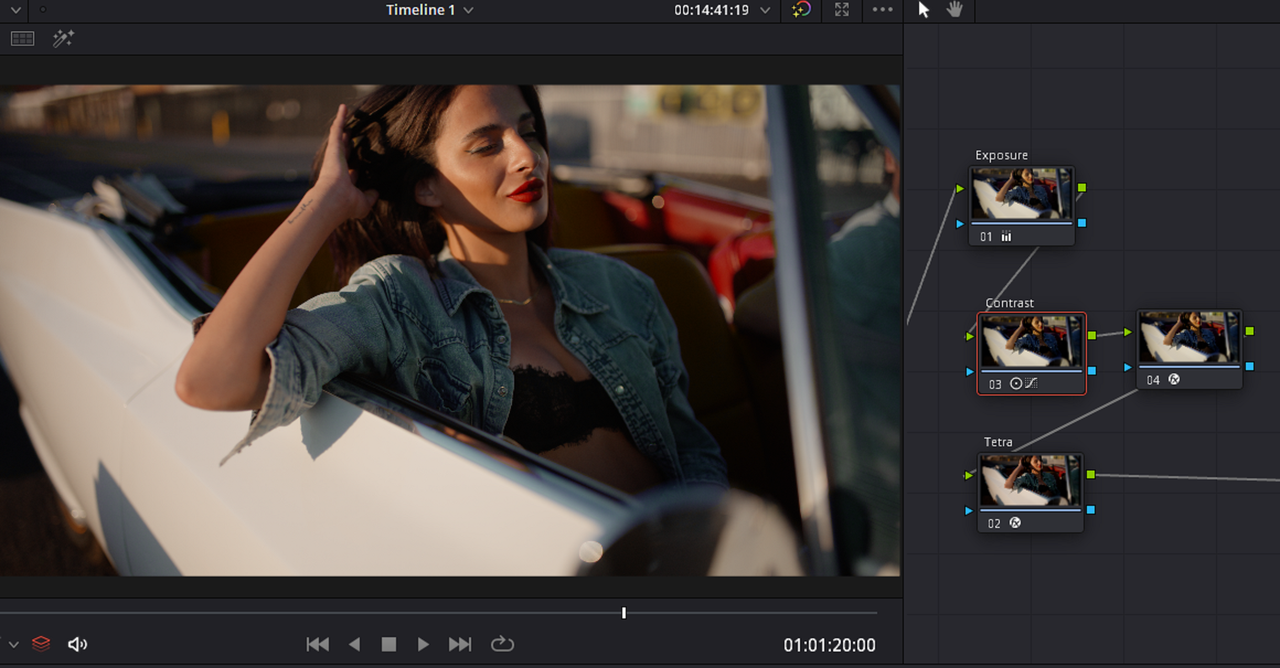
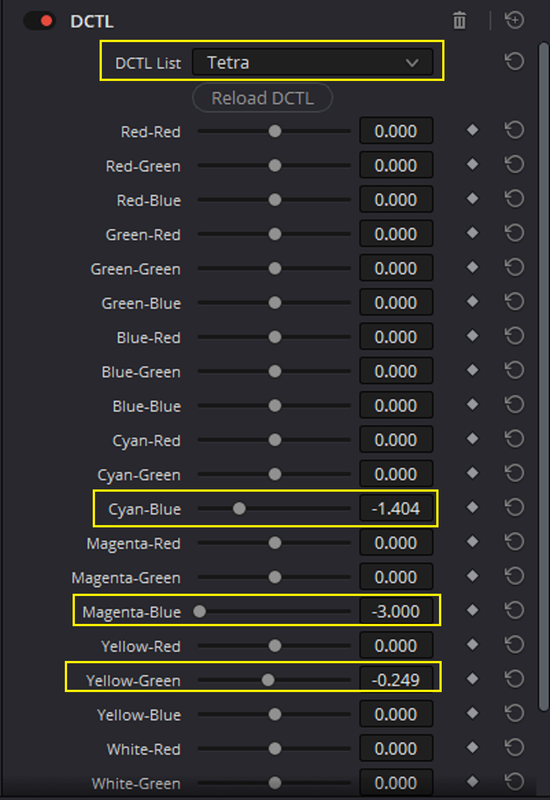
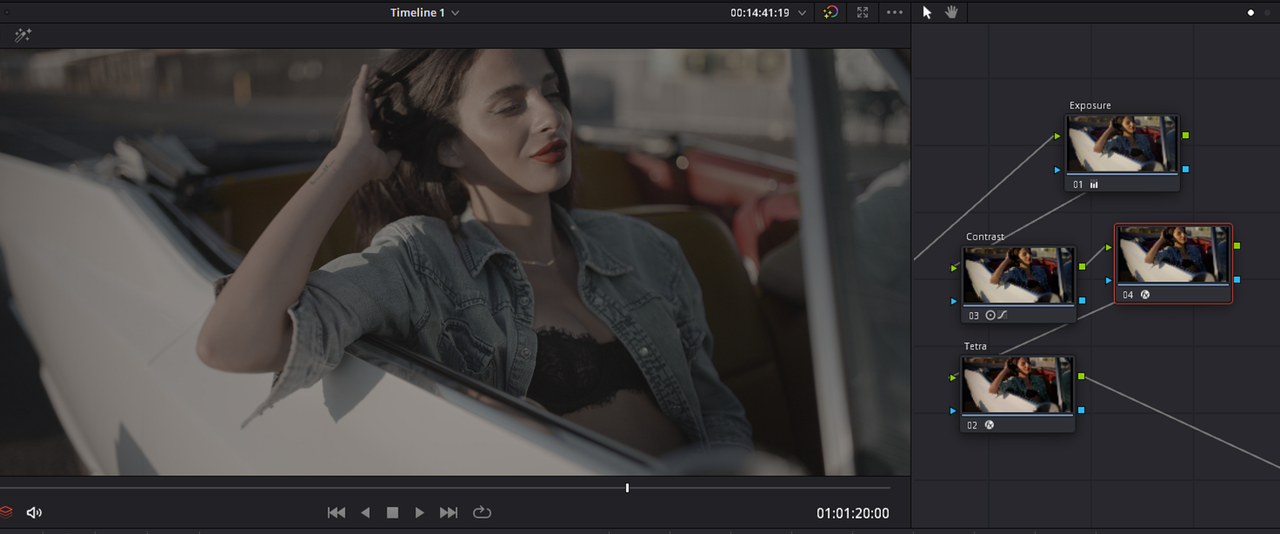
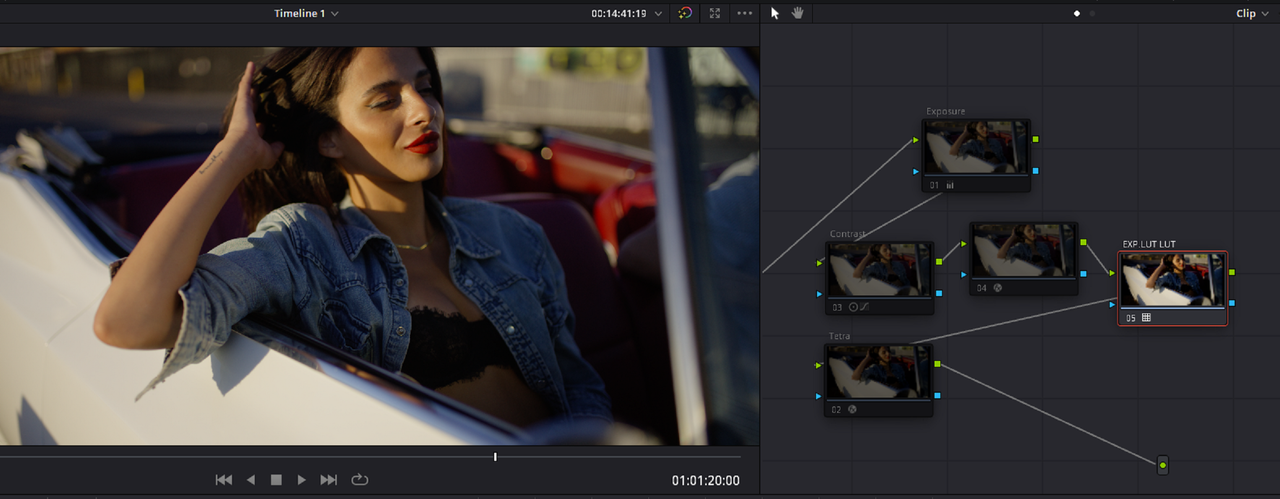
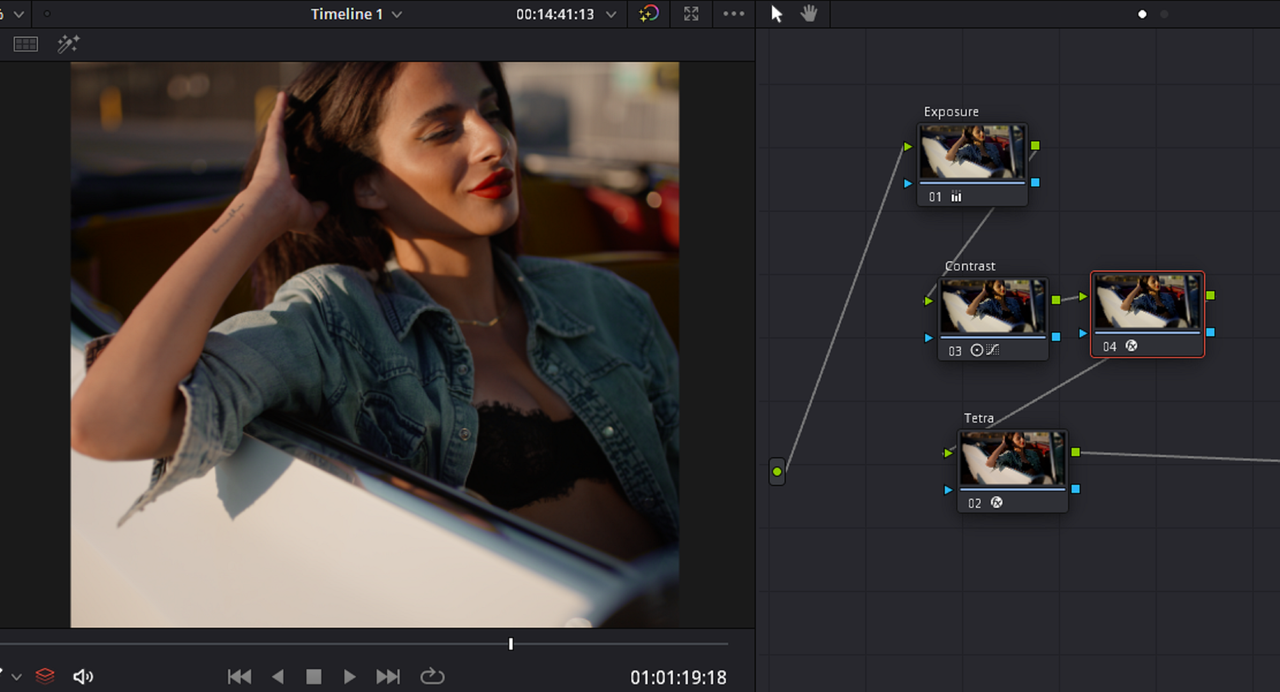
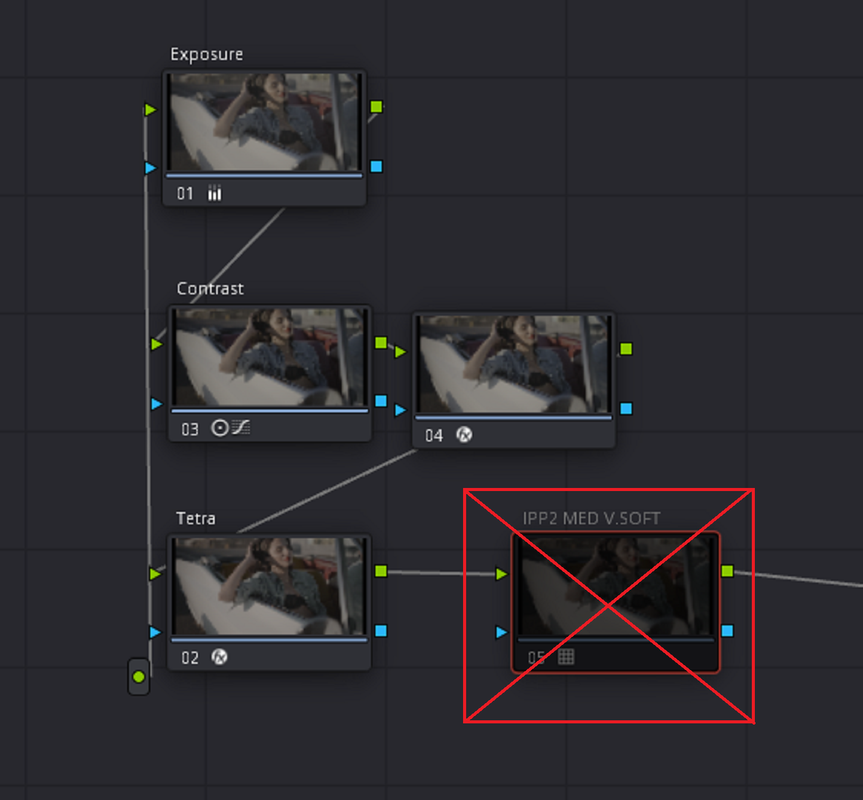
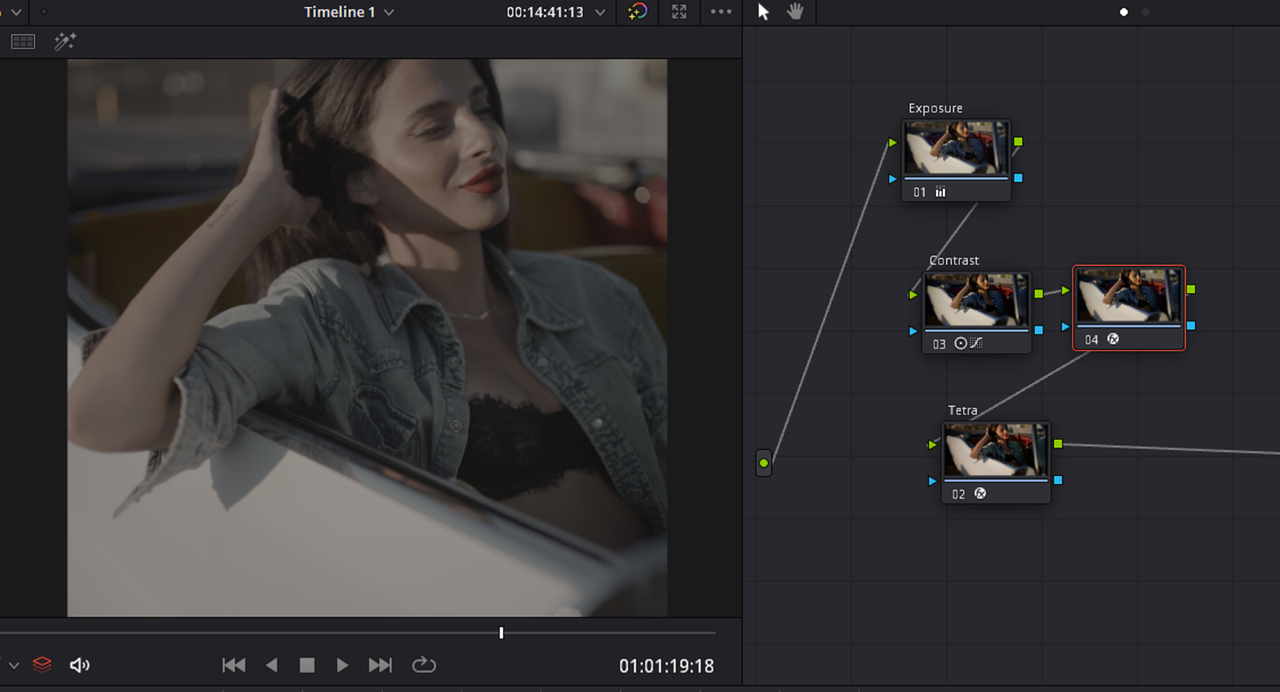
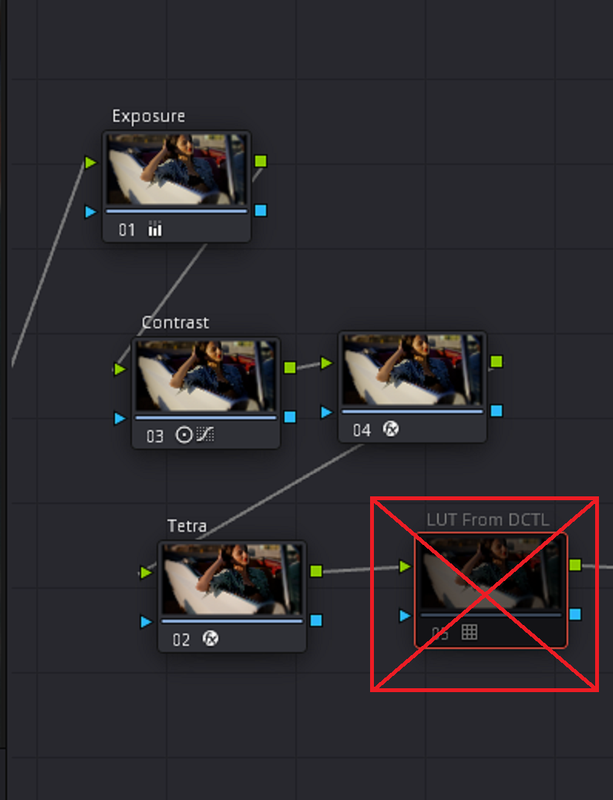
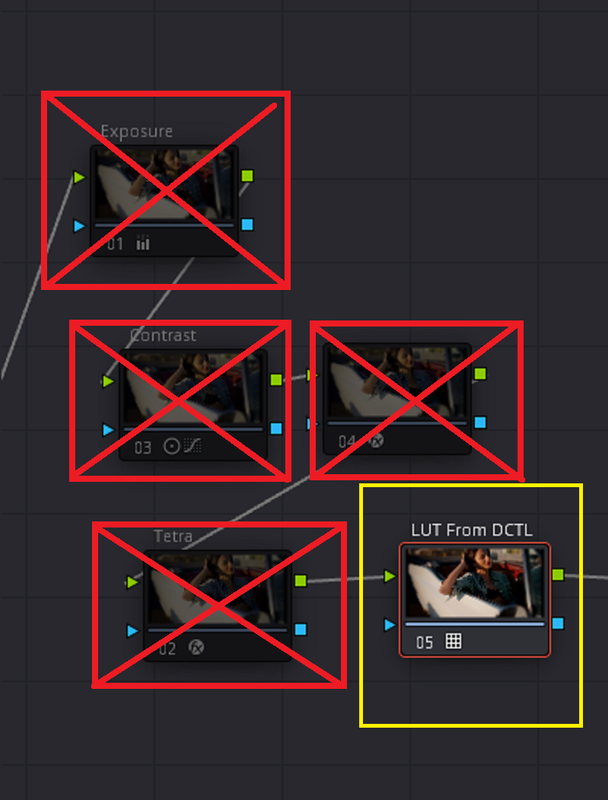
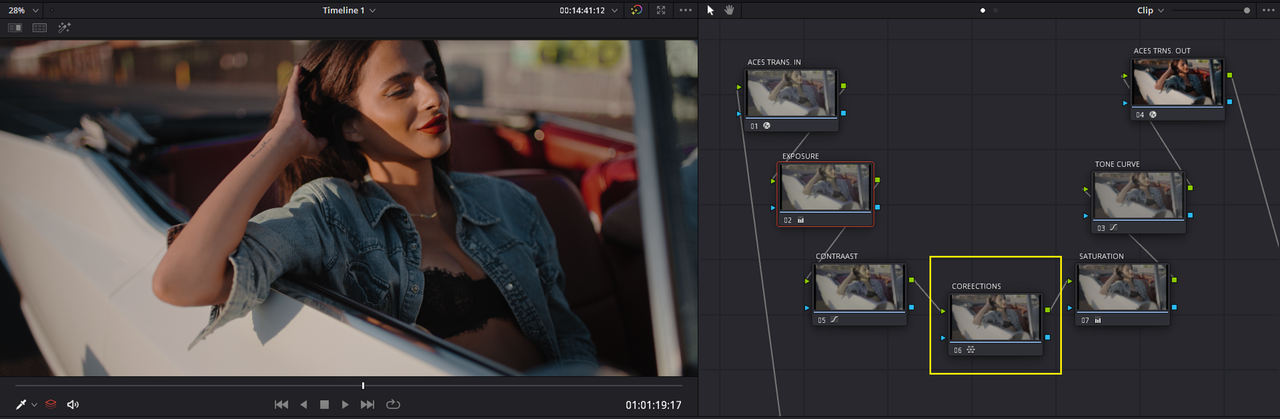
The Initial Grade with the "Tetra" DCTL

2.png

3.png


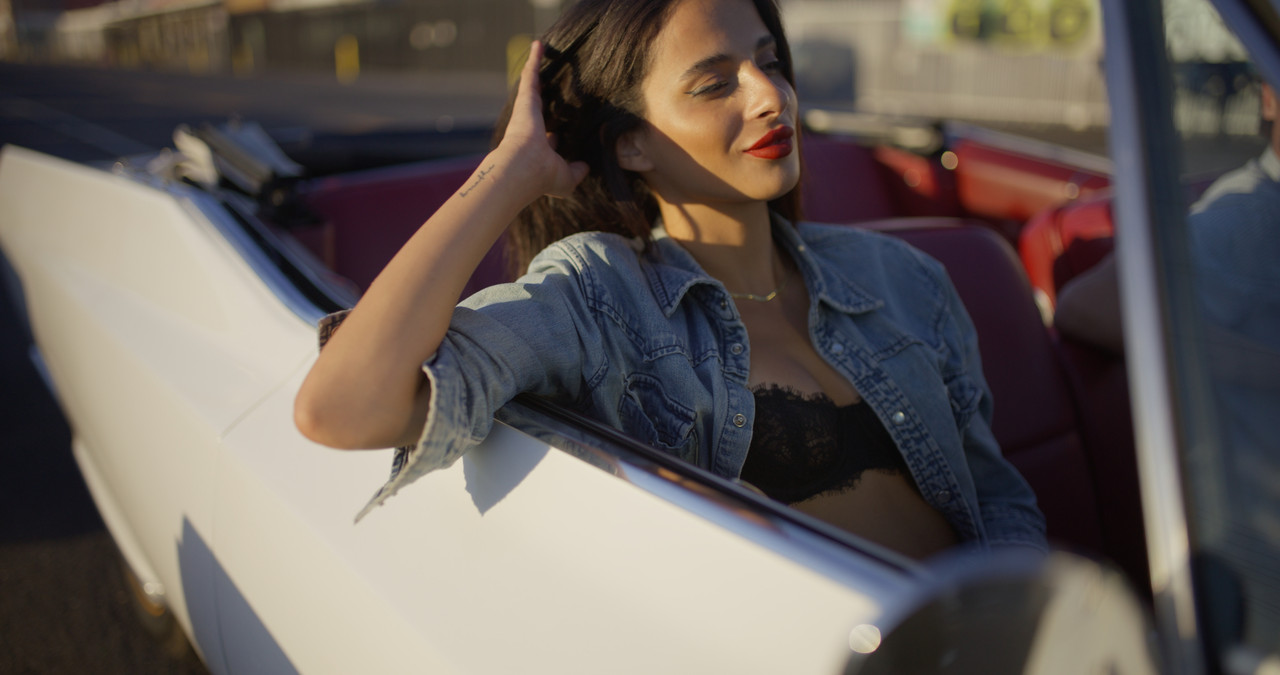
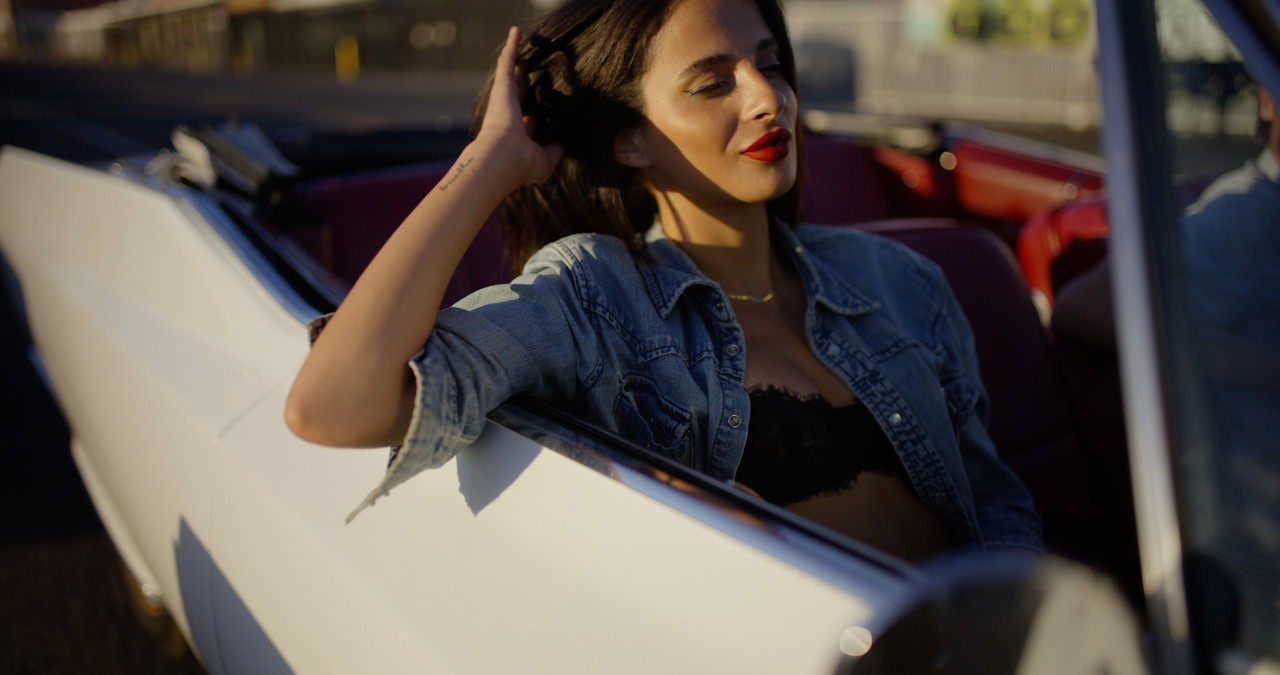
Before Contrast and Tetra DCTL Grade were added

4.jpg


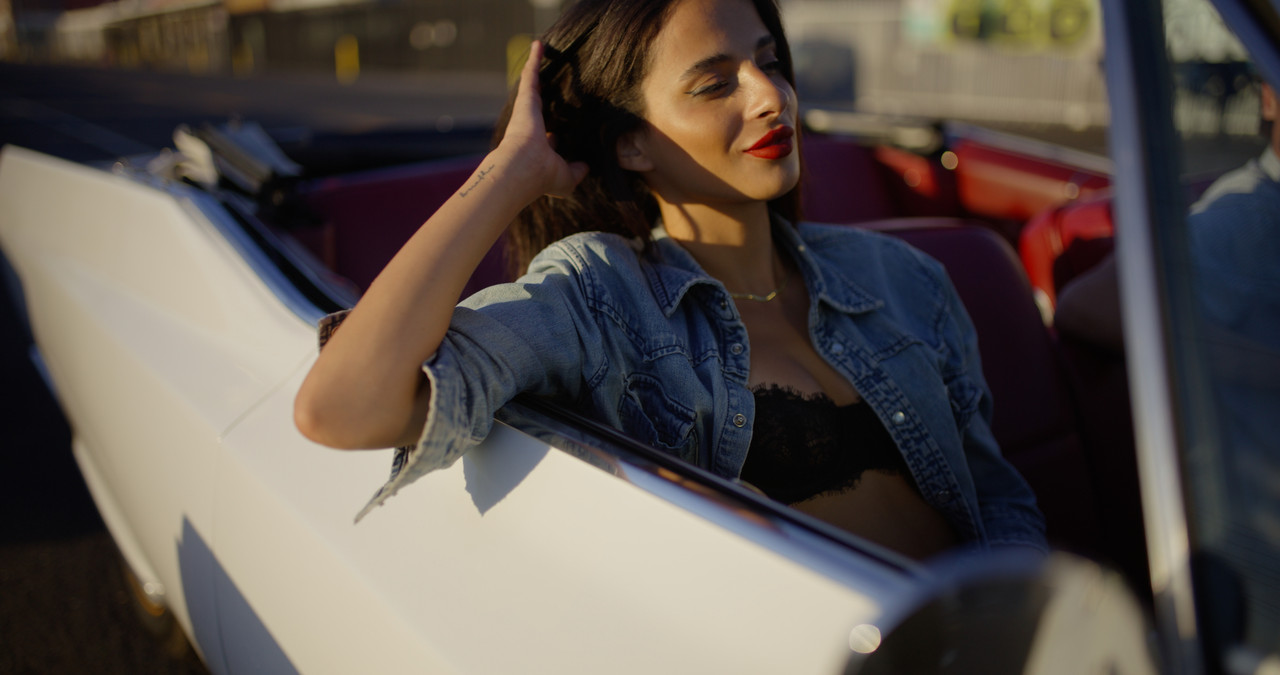
After Contrast was added without Tetra DCTL Grade

5.jpg


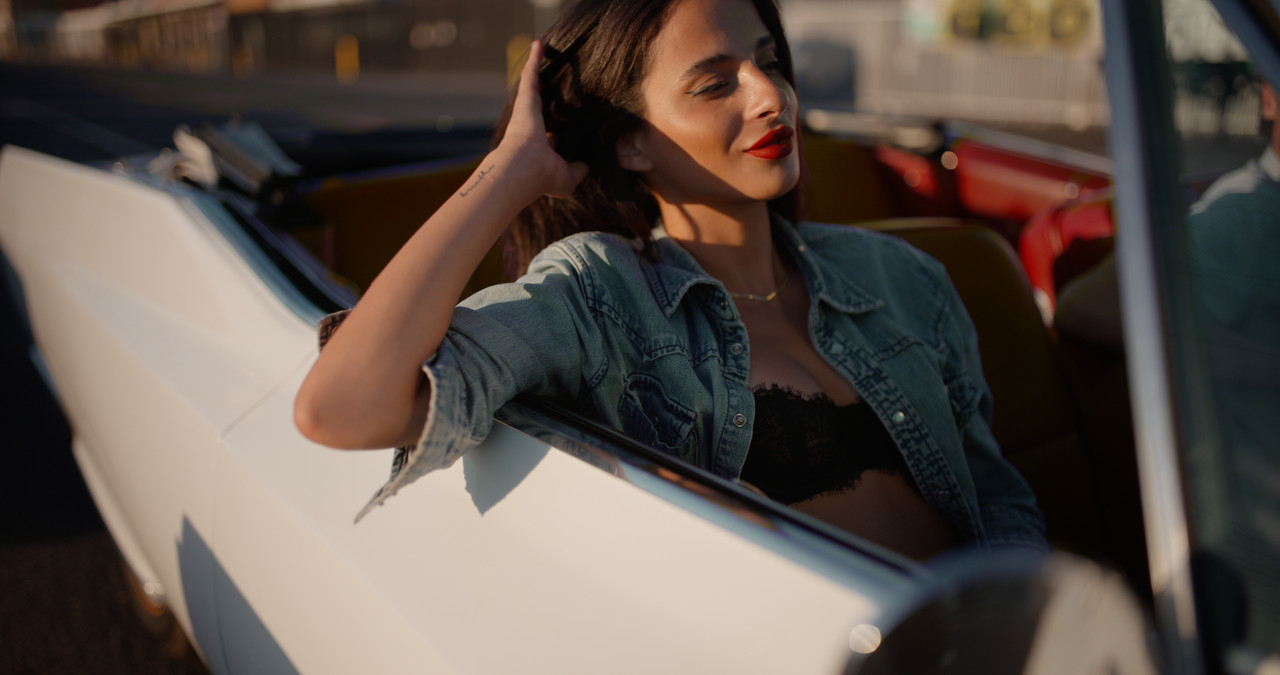
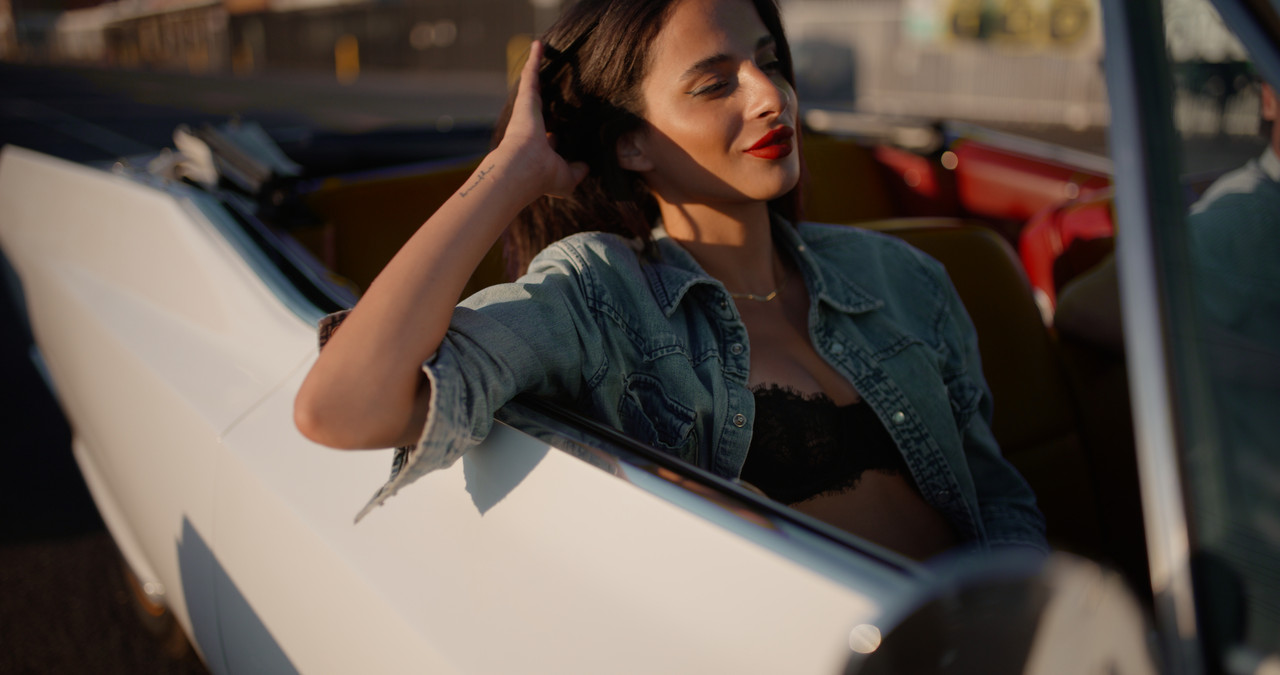
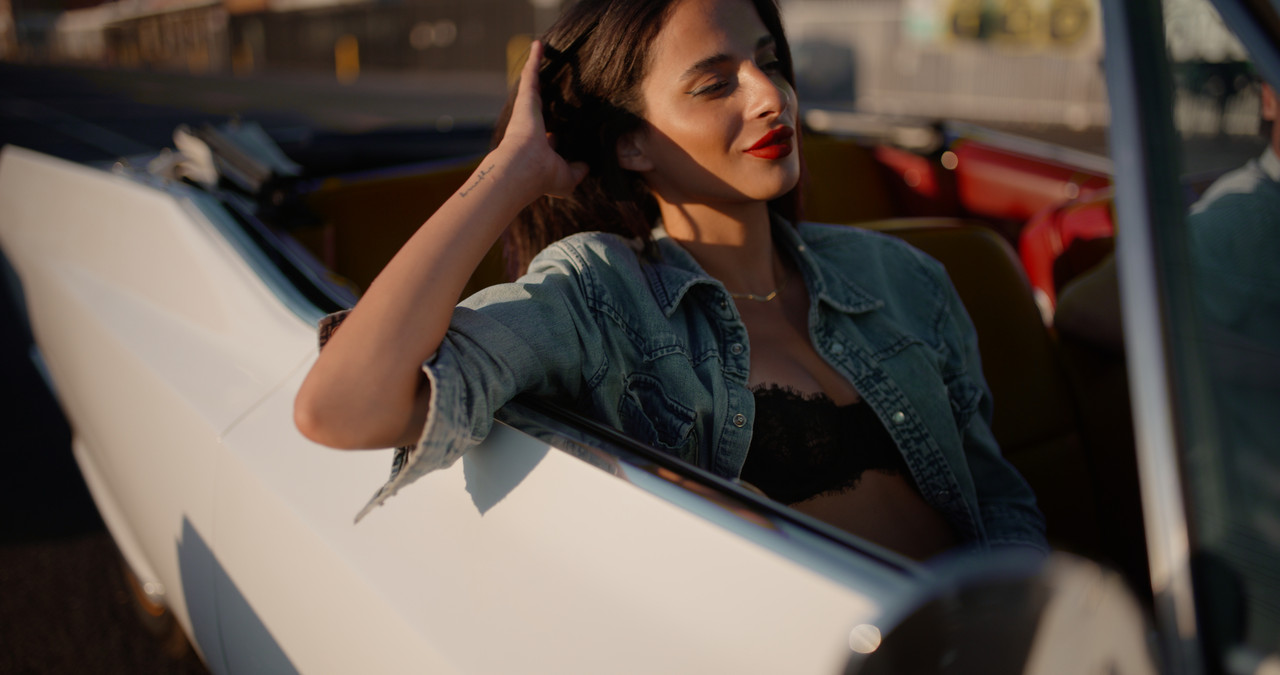
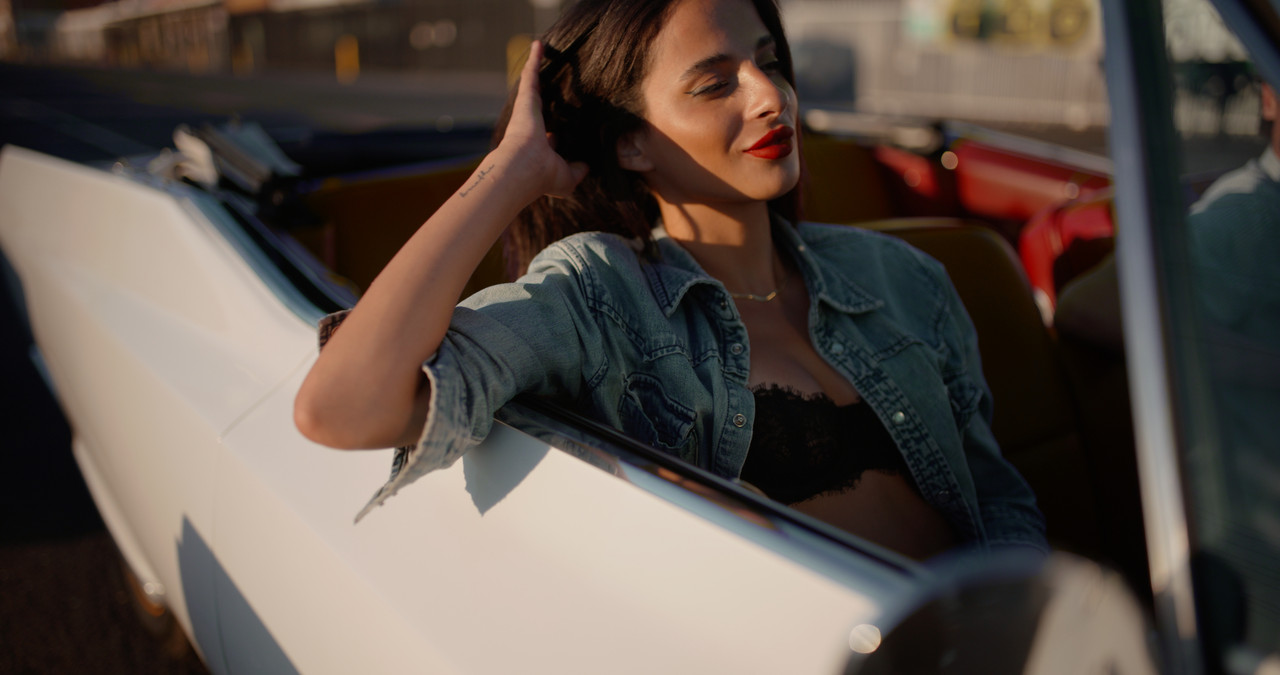
Final Grade

6.jpg


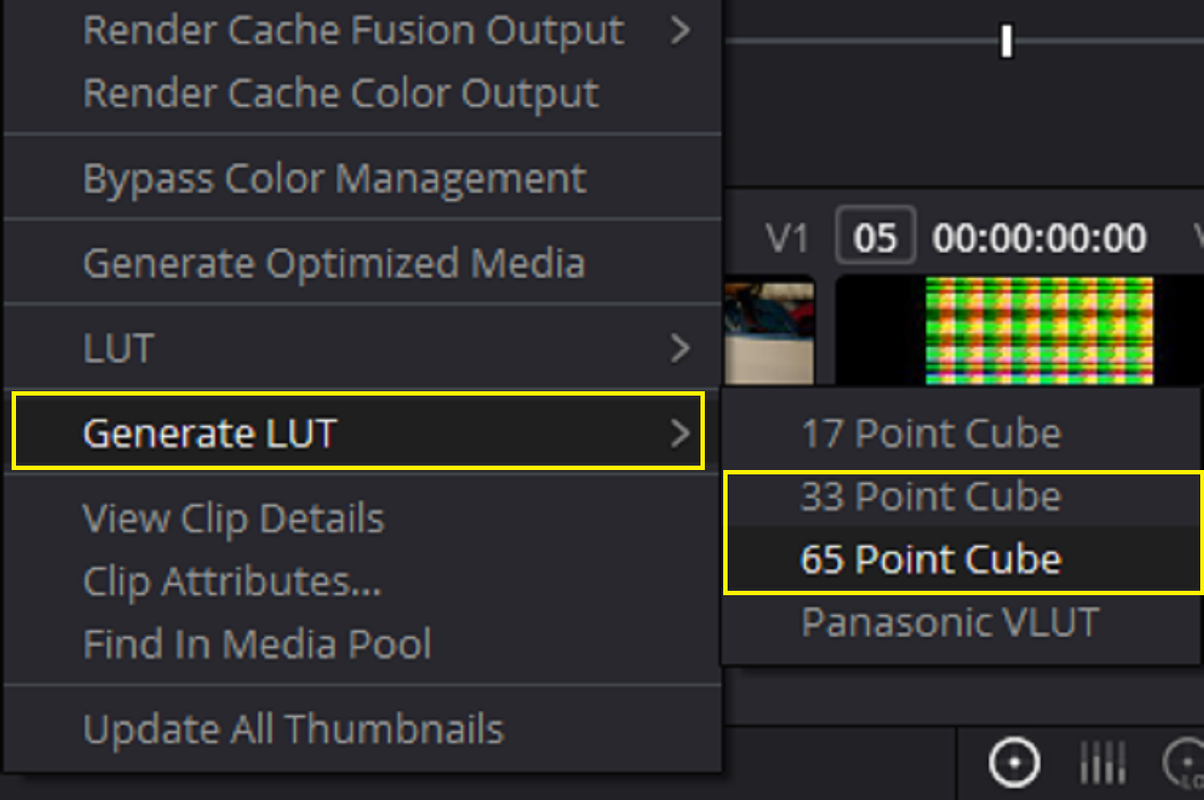
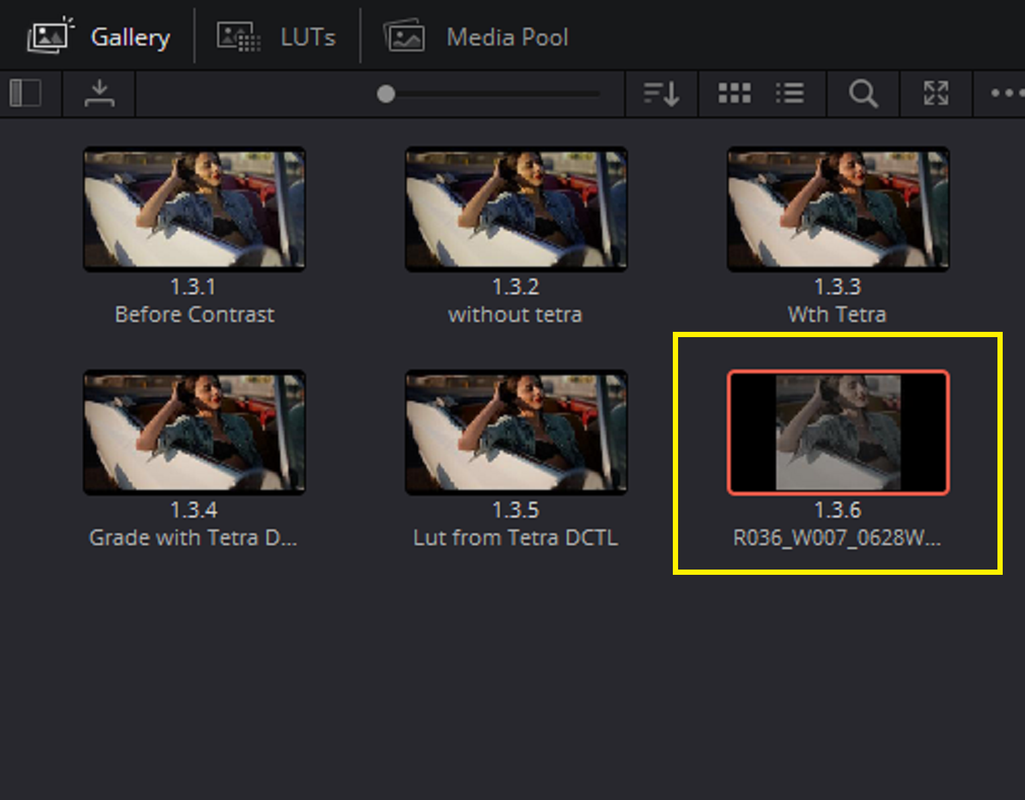
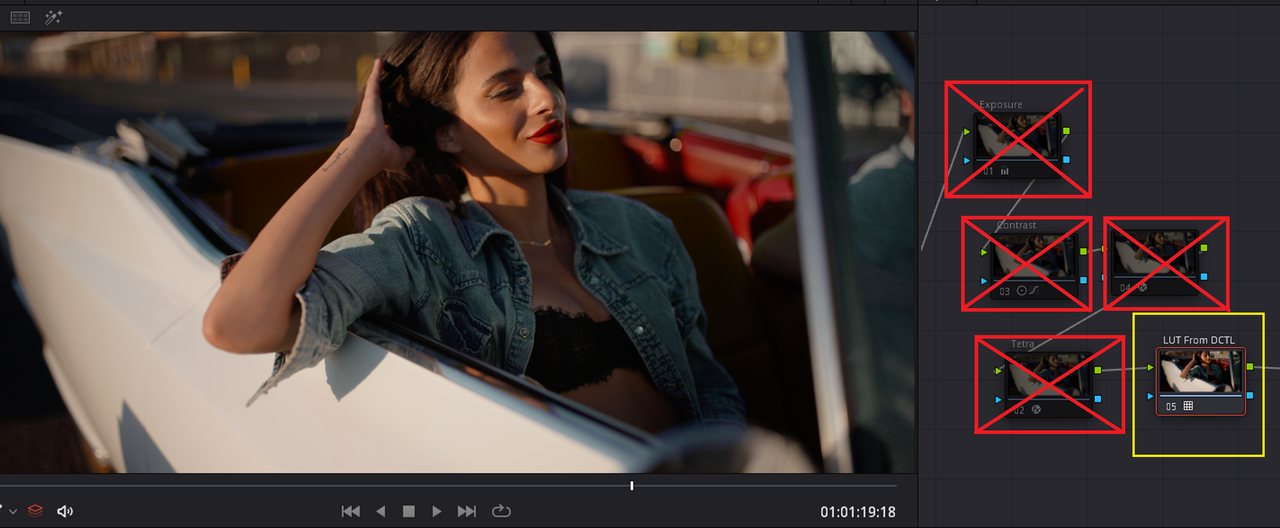
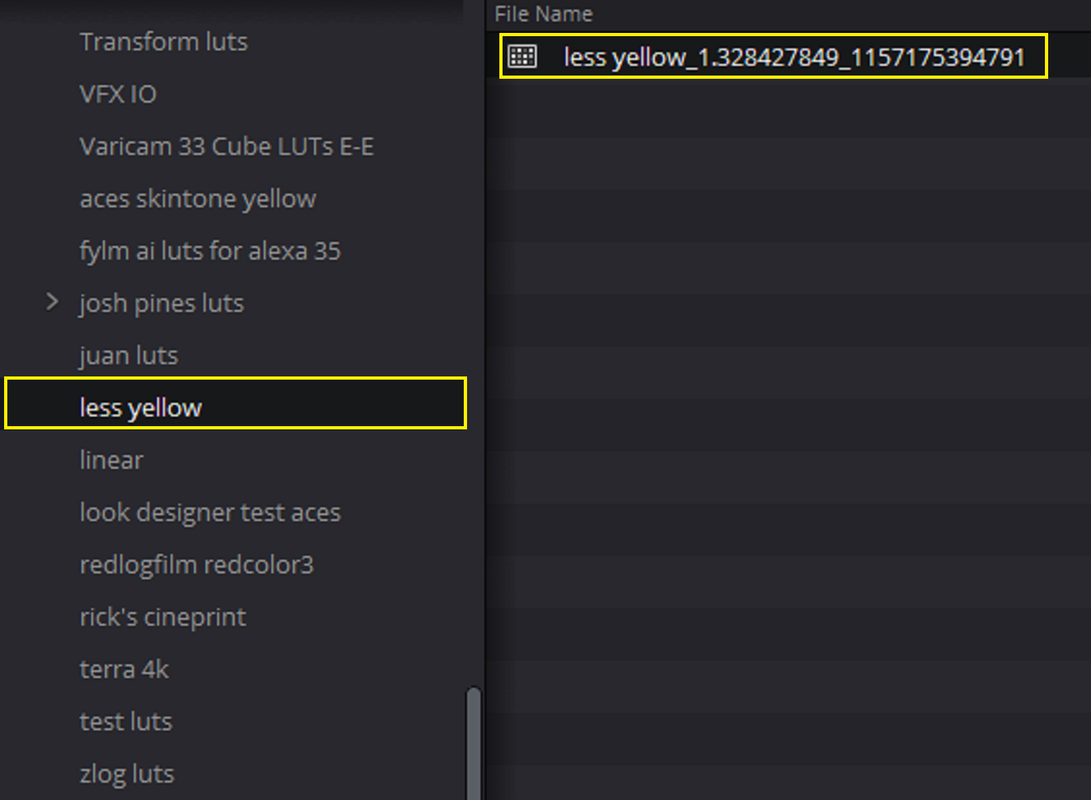
Lut Created from the "GENERATE LUT" function

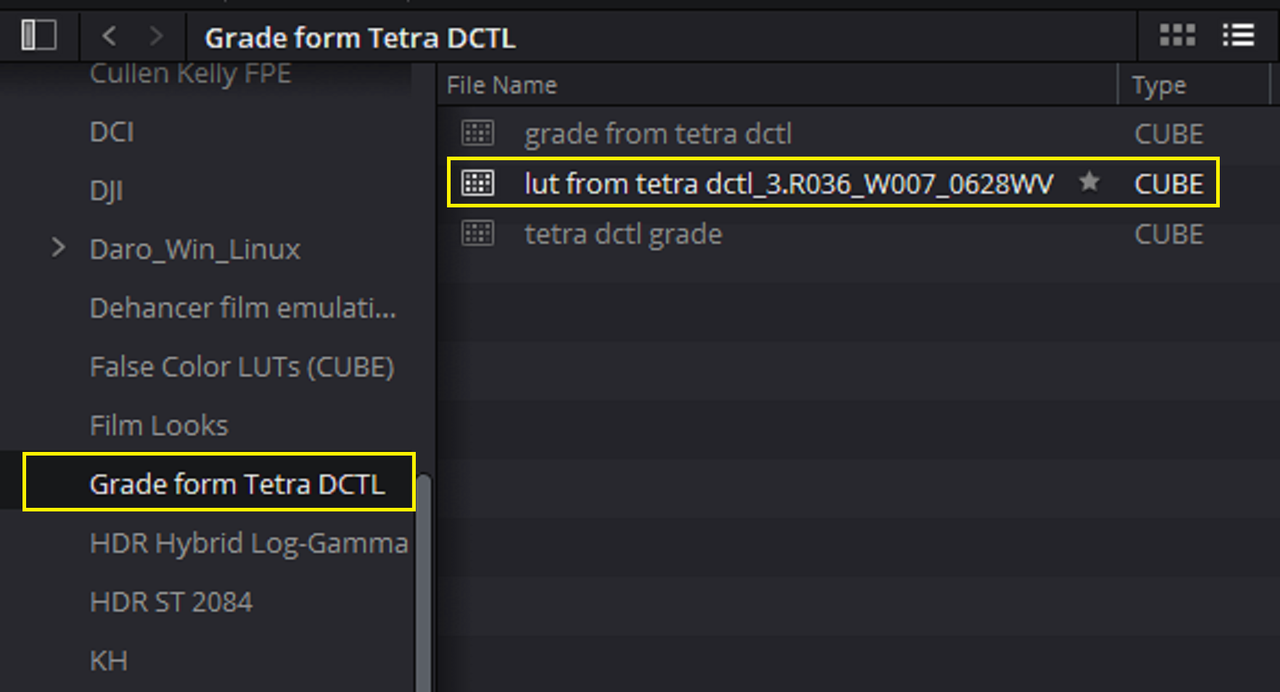
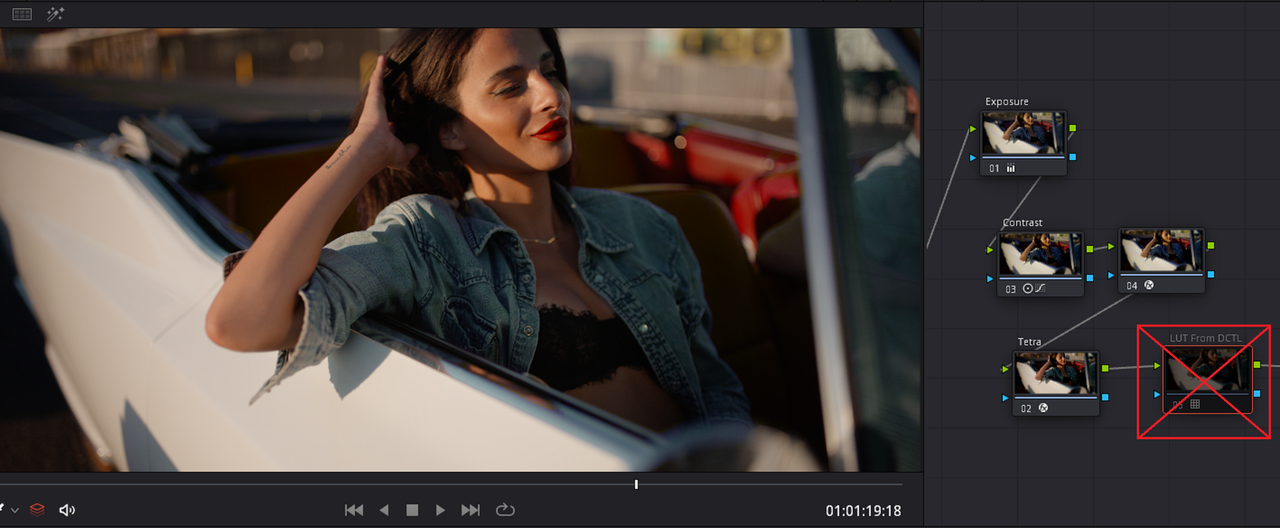
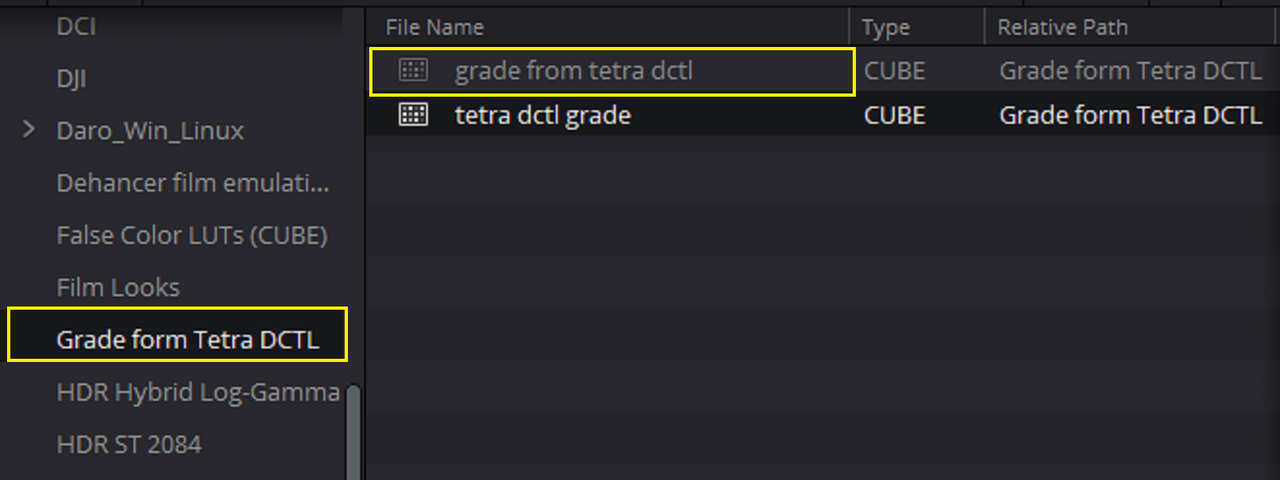
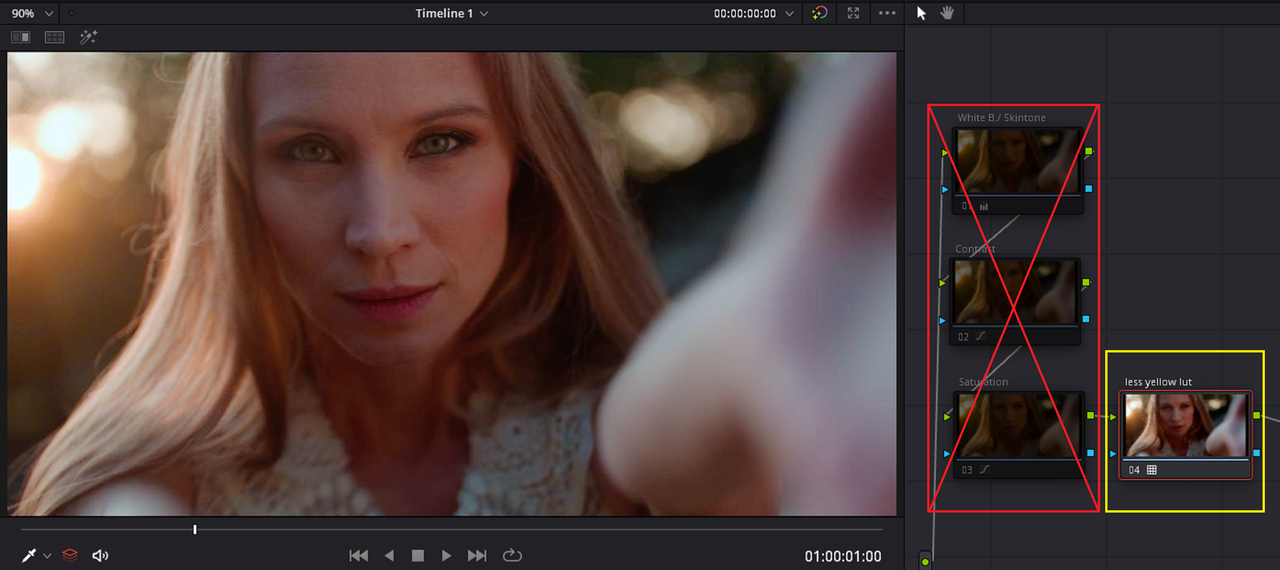
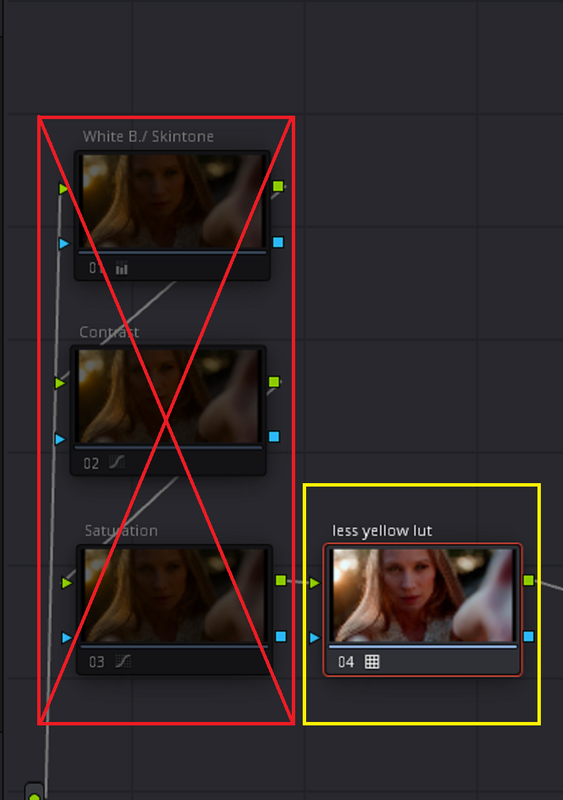
When I try to create a Lut from the "Tetra" DCTL with the "Generate Lut" function in Resolve, The Lut completely ignored the Grade from the Tetra DCTL. So I will have to use another method to Imbed the "Tetra" DCTL Grade, a HALD FILE. Please excuse the Typo in the Lut Folder "FORM" should be "FROM".


11.png


Screenshot-8698.png


6a.png


6b.png


6c.png


6d.jpg


Grade with Tetra DCTL Grade

6.jpg


Grade from LUT from "GENERATE LUT"

6d.jpg


PART 2-THE HALD FILE.............................................. ....
 
Last edited:
PART 2- THE HALD FILE

Hald File info
What Are Hald Images and Why Are They Useful? (makeuseof.com)


In DAVINCI RESOLVE


7.png
wAAACH5BAEKAAAALAAAAAABAAEAAAICRAEAOw==


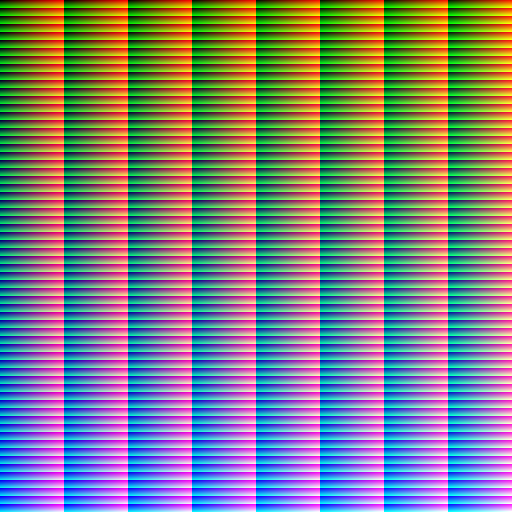
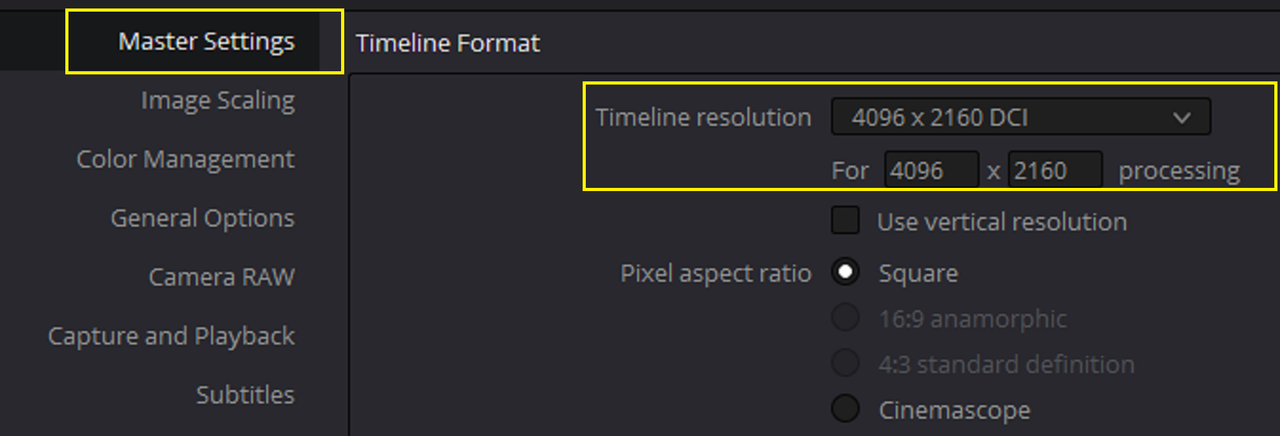
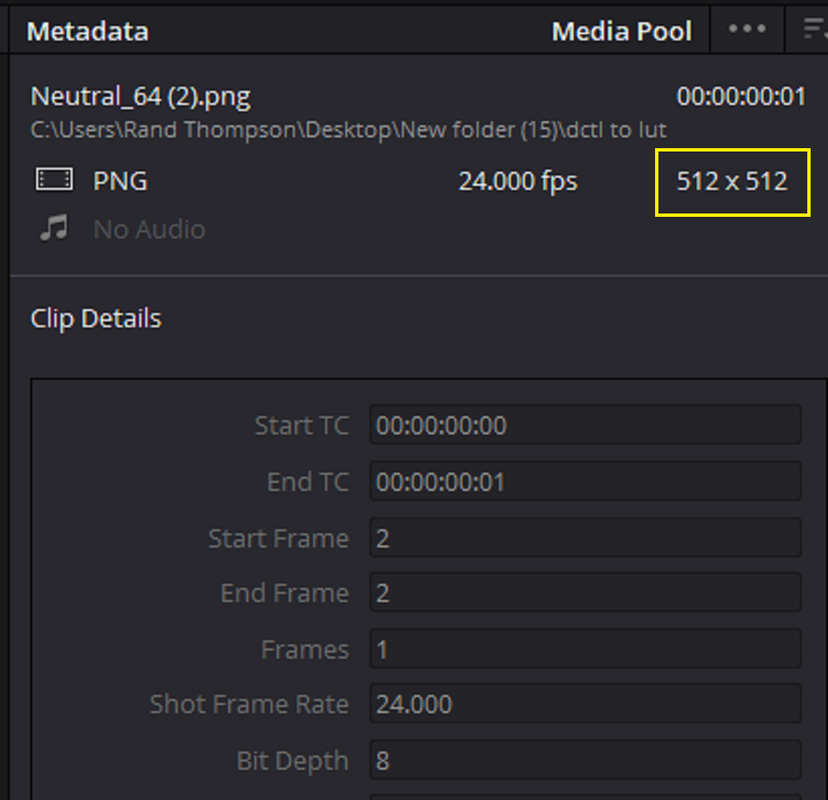
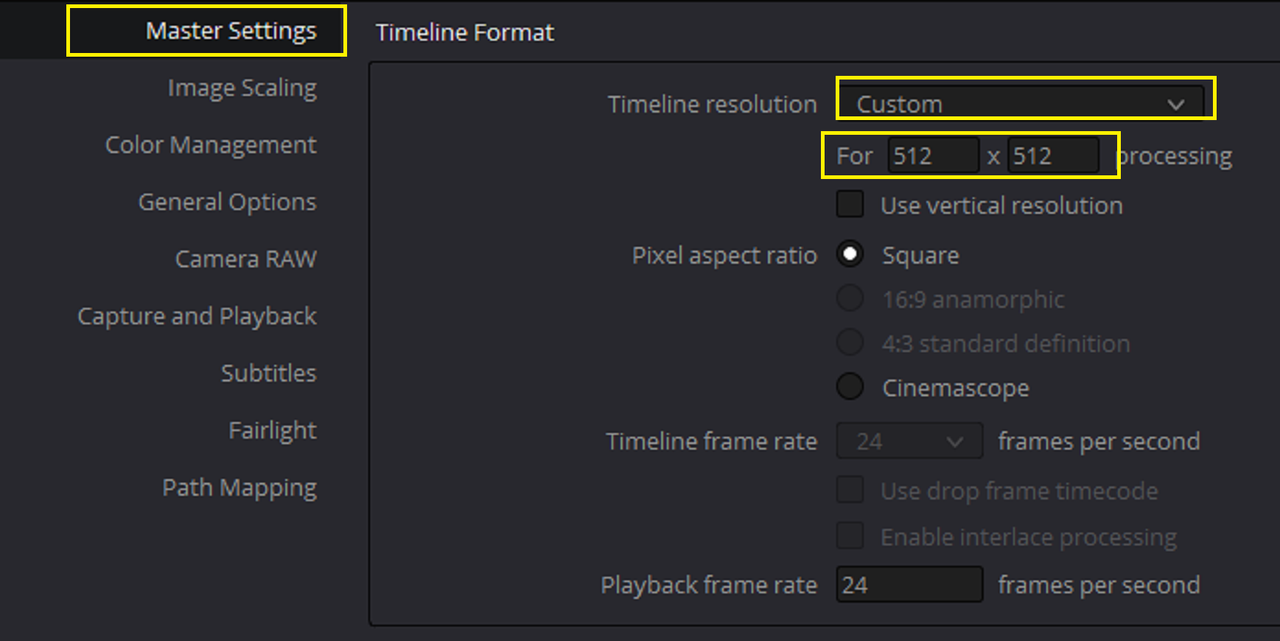
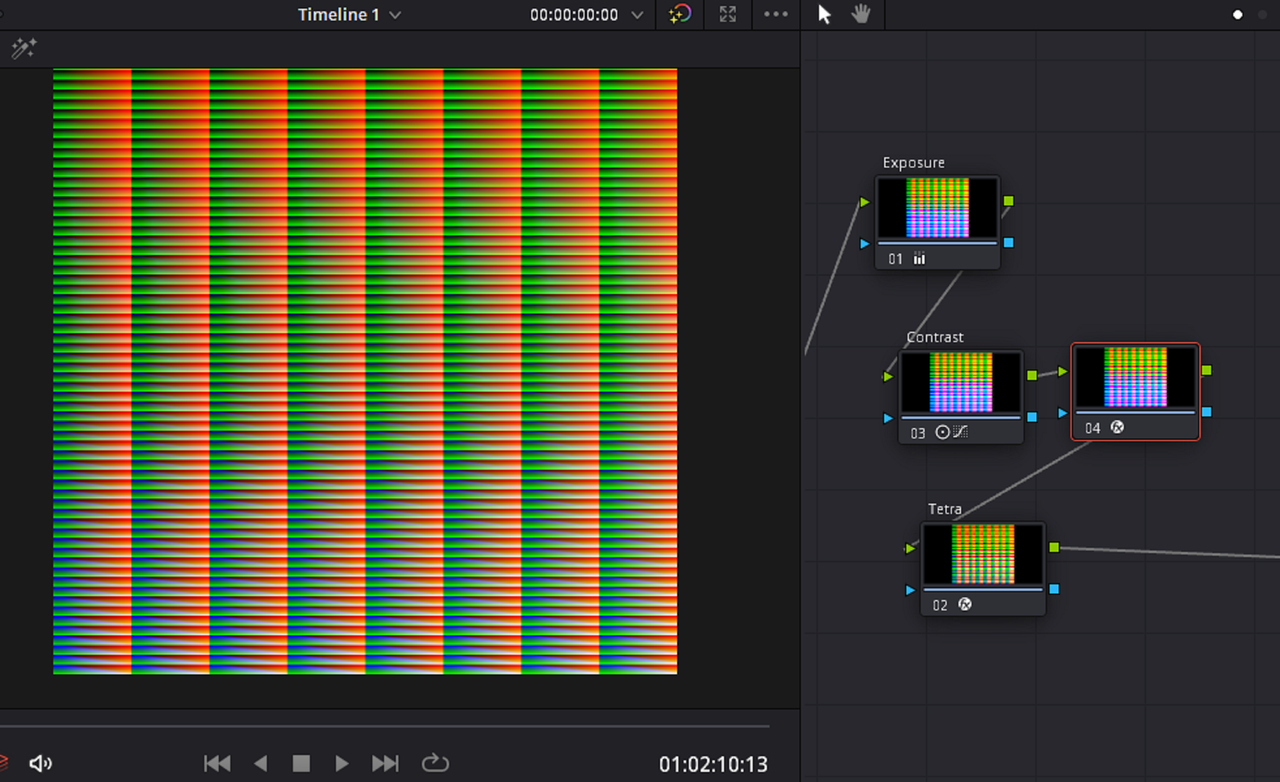
To Apply the grade from before with the "Tetra DCTL", you will have to change the dimensions of the project to the exact size of the HALD File which is 512 x 512


8.png
wAAACH5BAEKAAAALAAAAAABAAEAAAICRAEAOw==


9.png
wAAACH5BAEKAAAALAAAAAABAAEAAAICRAEAOw==


10.png
wAAACH5BAEKAAAALAAAAAABAAEAAAICRAEAOw==


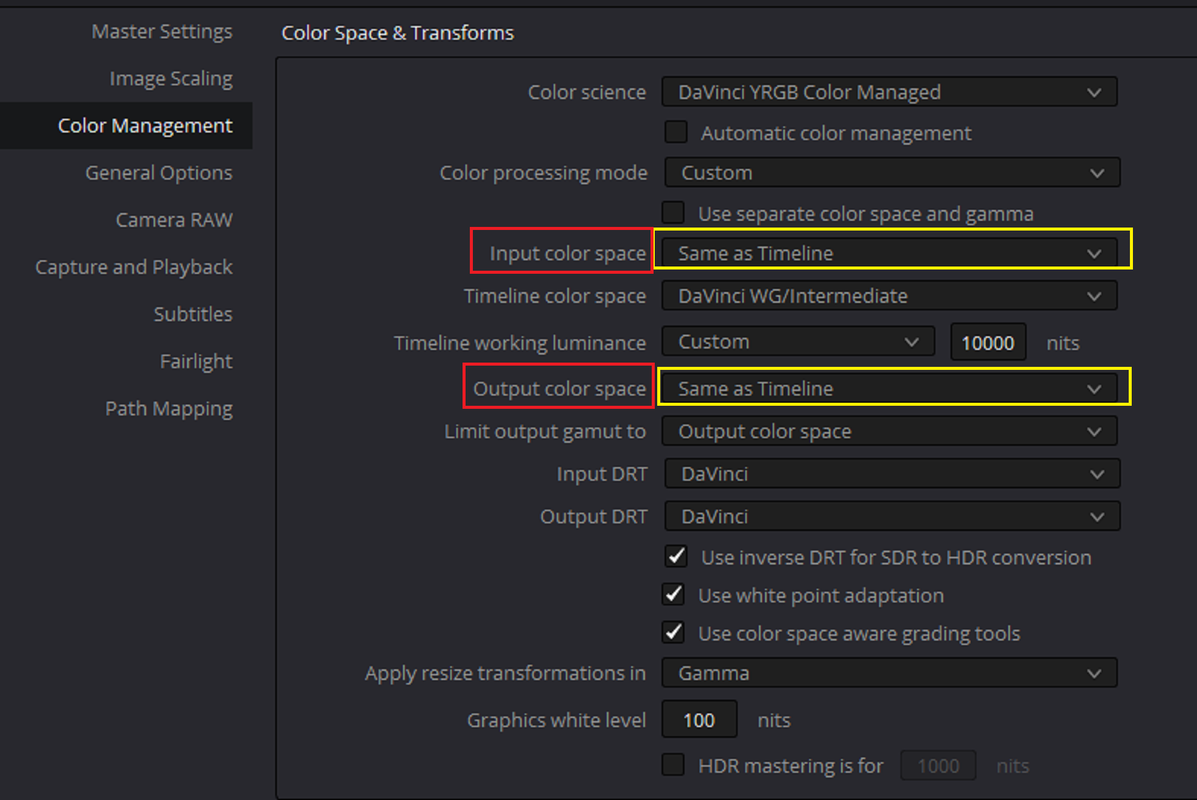
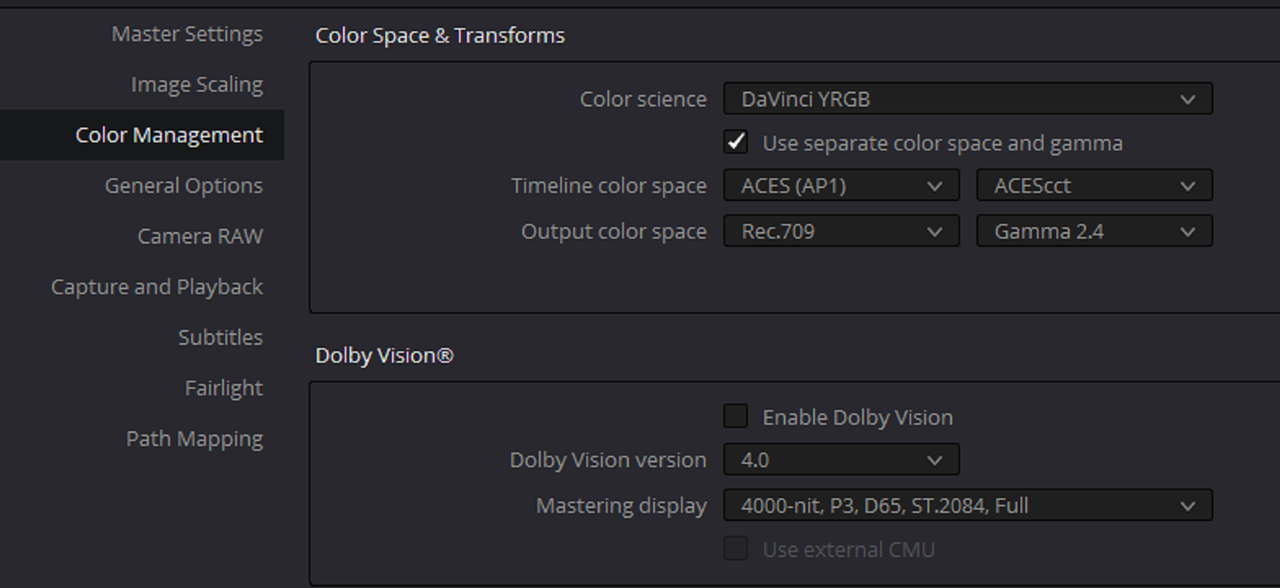
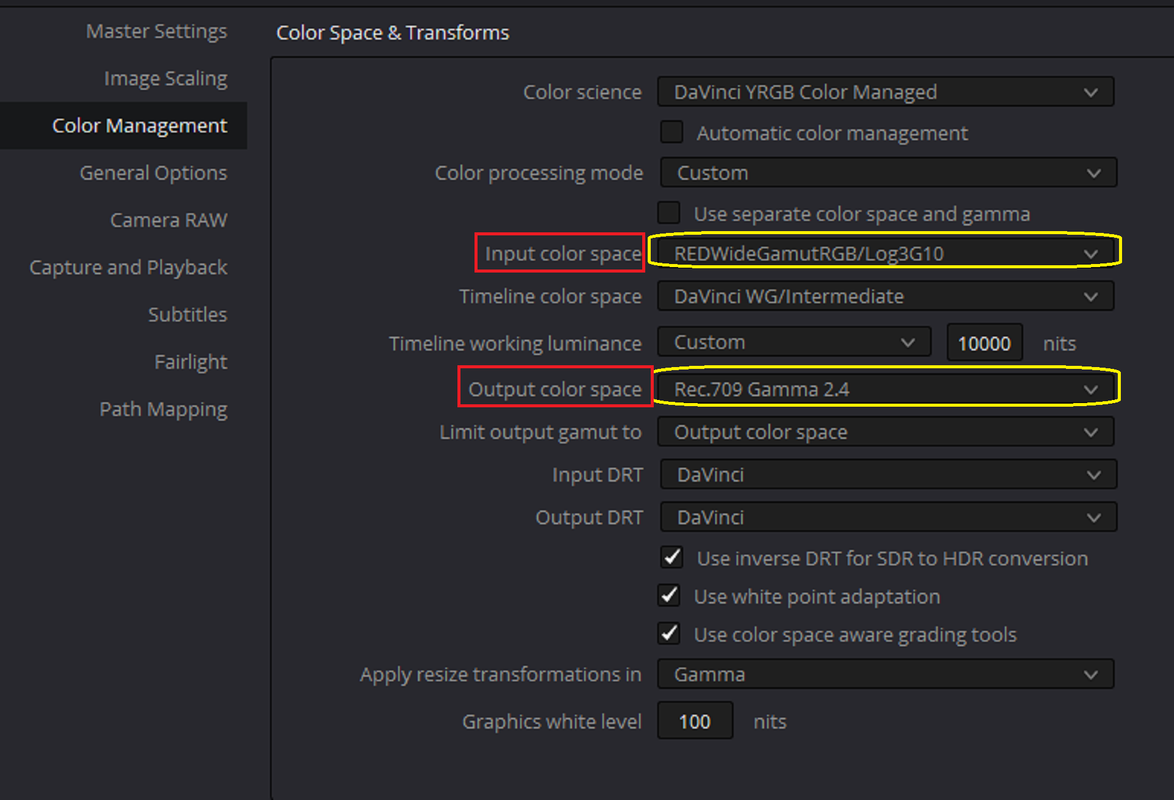
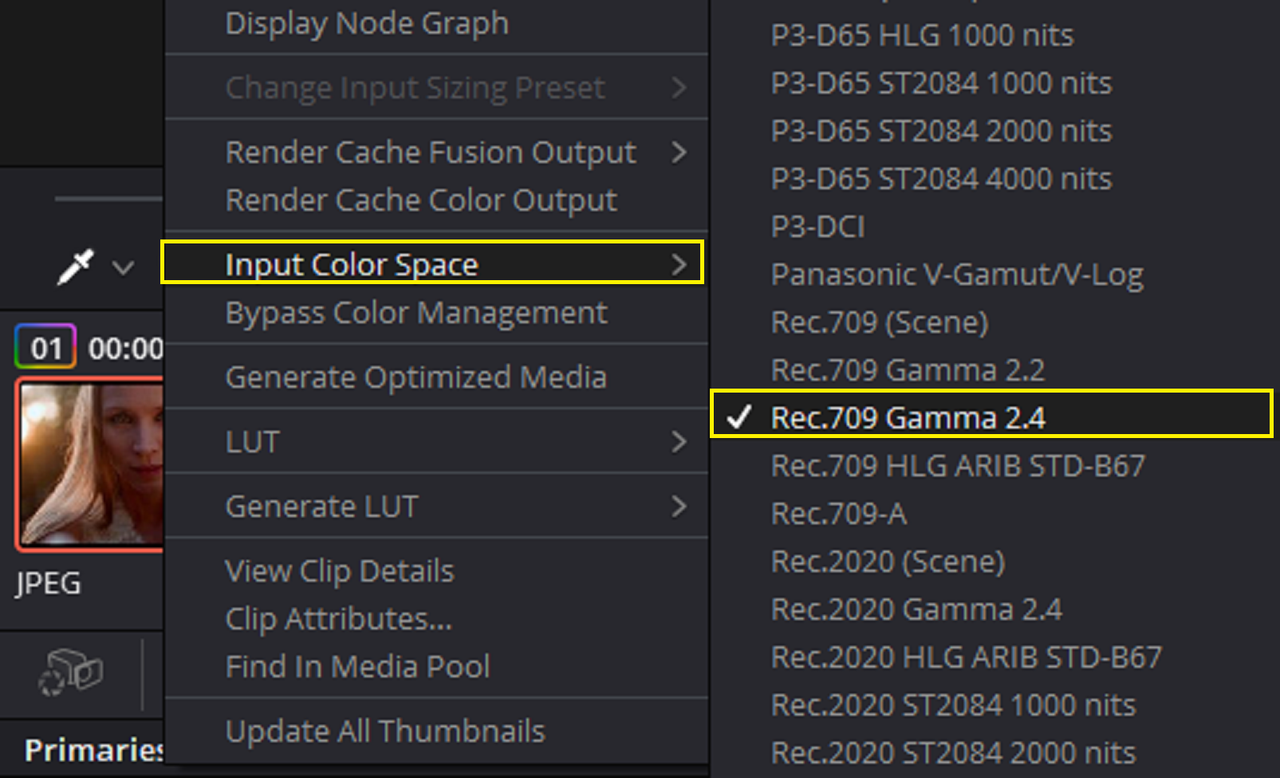
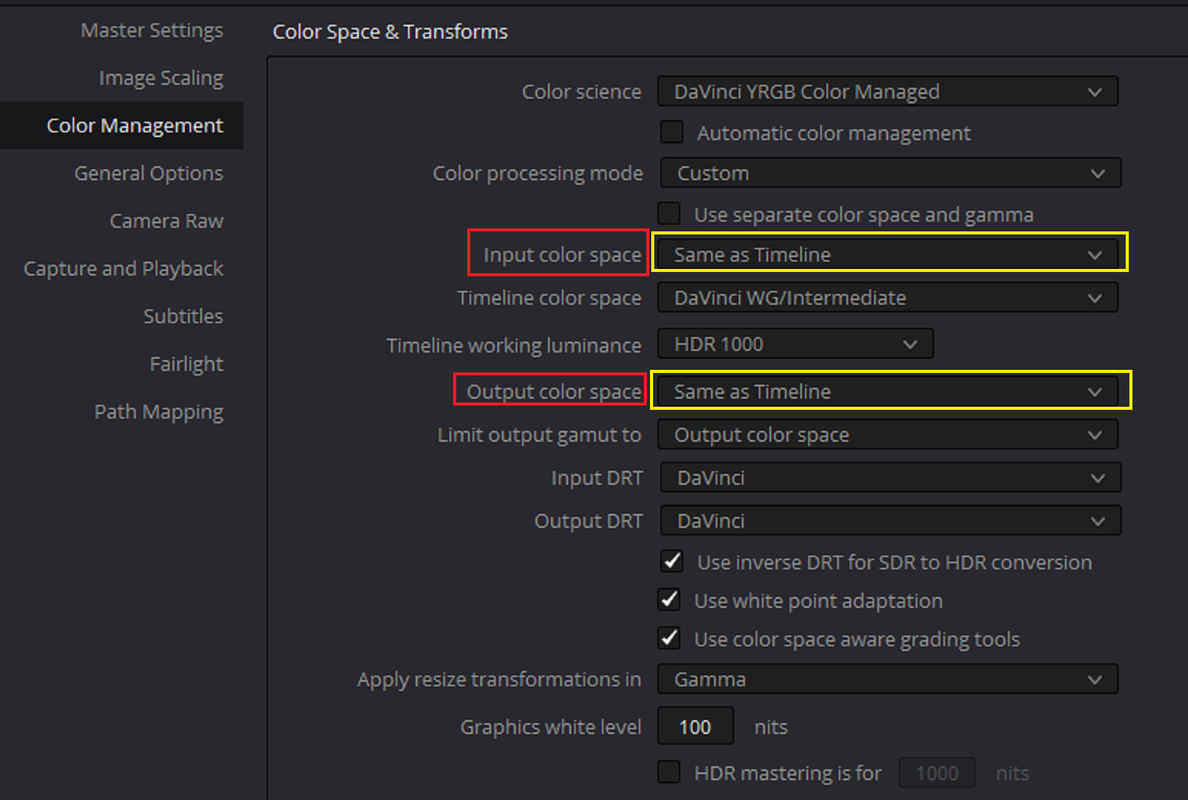
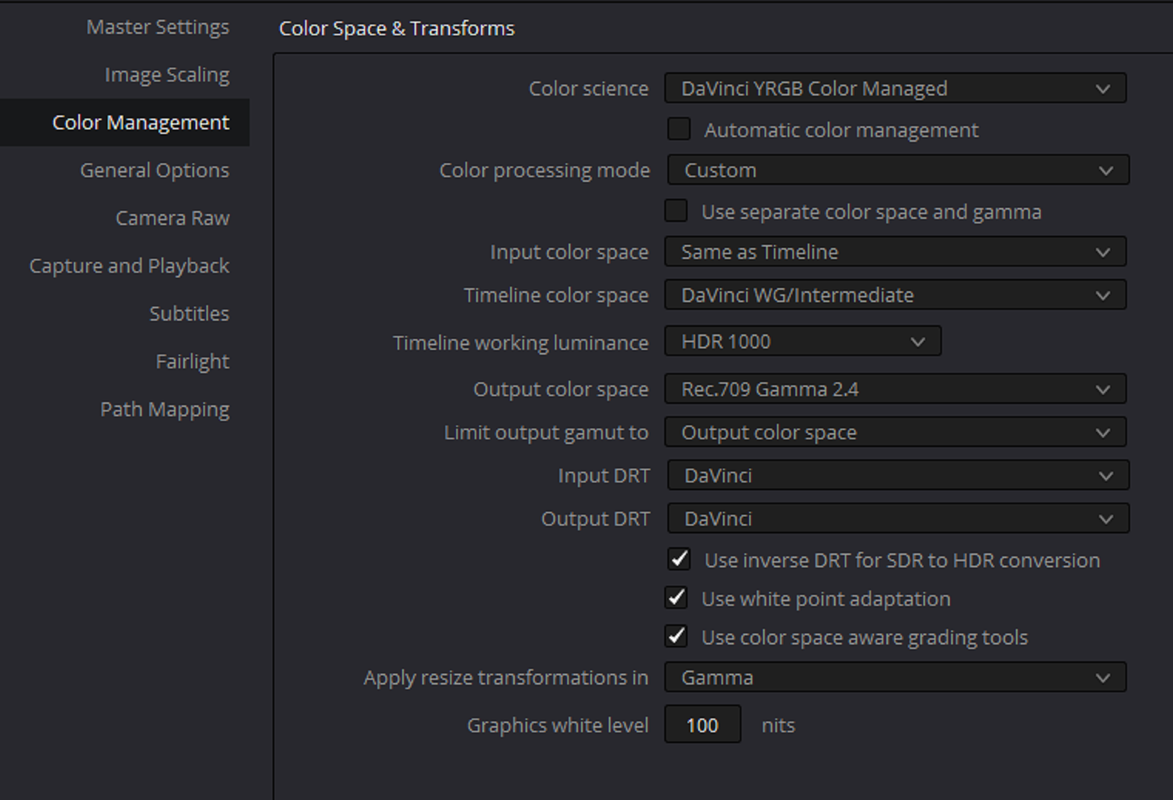
Before you can apply the grade from the image to the HALD File, In the "Project Settings" for the "DAVINCI YRGB COLOR MANAGED" workflow, you will have to change both the "INPUT COLOR SPACE" and "OUTPUT COLOR SPACE" to "SAME AS TIMELINE". This will leave only the grade with no IDT or ODT. Example of How you would do this in both ACES and IPP2 are shown below.


11.png
wAAACH5BAEKAAAALAAAAAABAAEAAAICRAEAOw==


ACES

11c.png
wAAACH5BAEKAAAALAAAAAABAAEAAAICRAEAOw==

11d.png
wAAACH5BAEKAAAALAAAAAABAAEAAAICRAEAOw==


IPP2

11a.png
wAAACH5BAEKAAAALAAAAAABAAEAAAICRAEAOw==

11b.png
wAAACH5BAEKAAAALAAAAAABAAEAAAICRAEAOw==


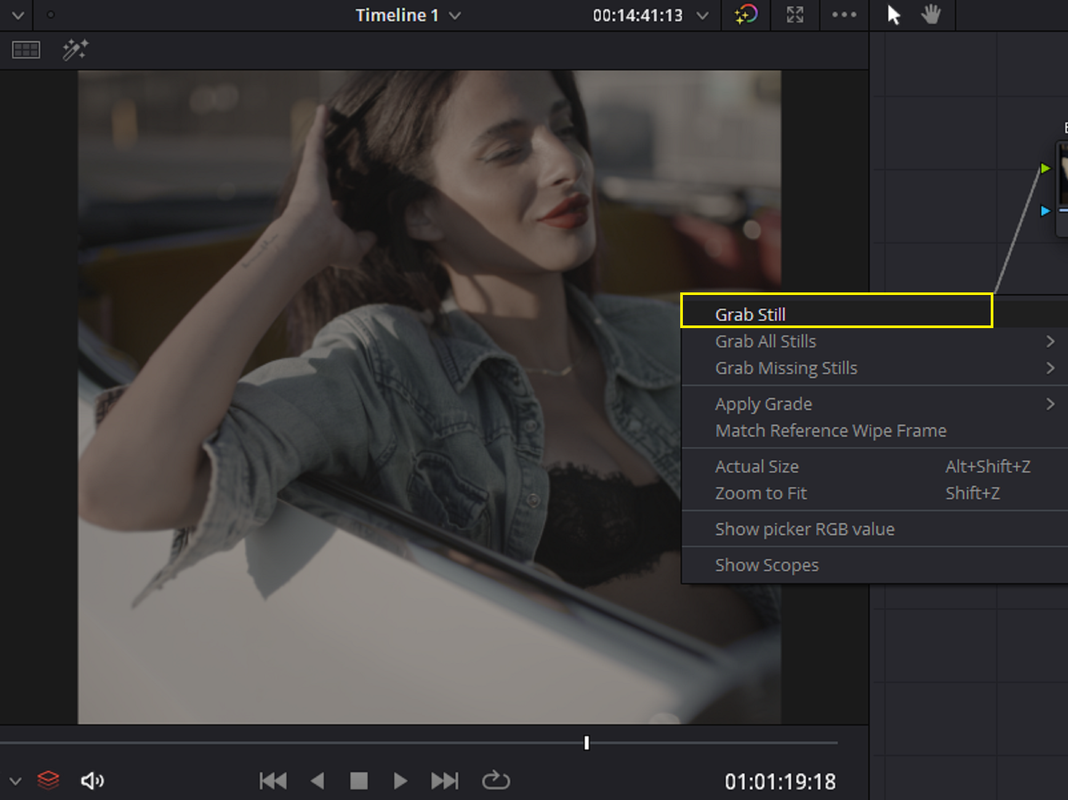
Now, with both the IDT and ODT disabled inside of the "DAVINCI YRGB COLOR MANAGED" workflow, "Grab Still" from the Image


12.png
wAAACH5BAEKAAAALAAAAAABAAEAAAICRAEAOw==


13.png
wAAACH5BAEKAAAALAAAAAABAAEAAAICRAEAOw==


14.png
wAAACH5BAEKAAAALAAAAAABAAEAAAICRAEAOw==


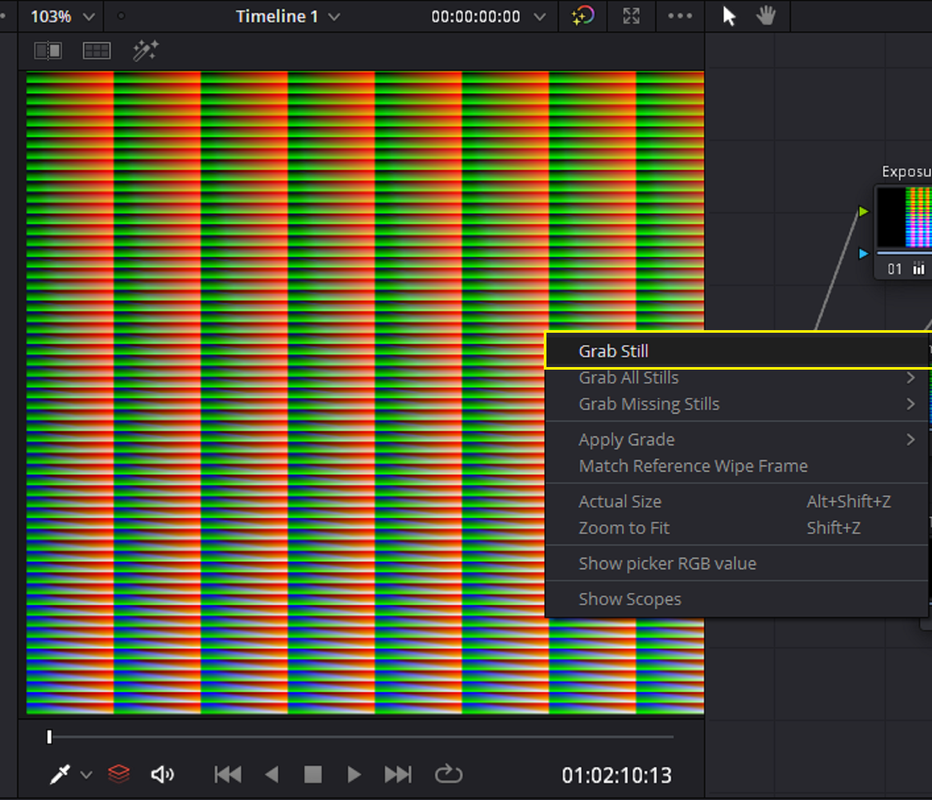
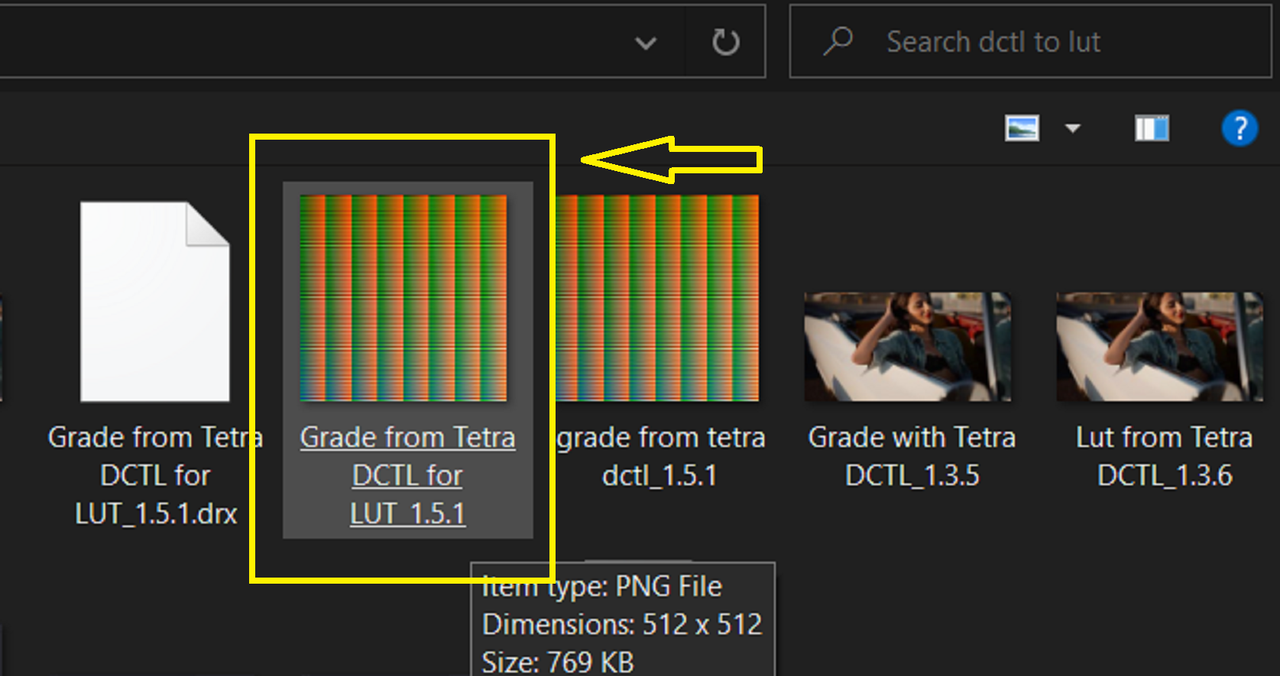
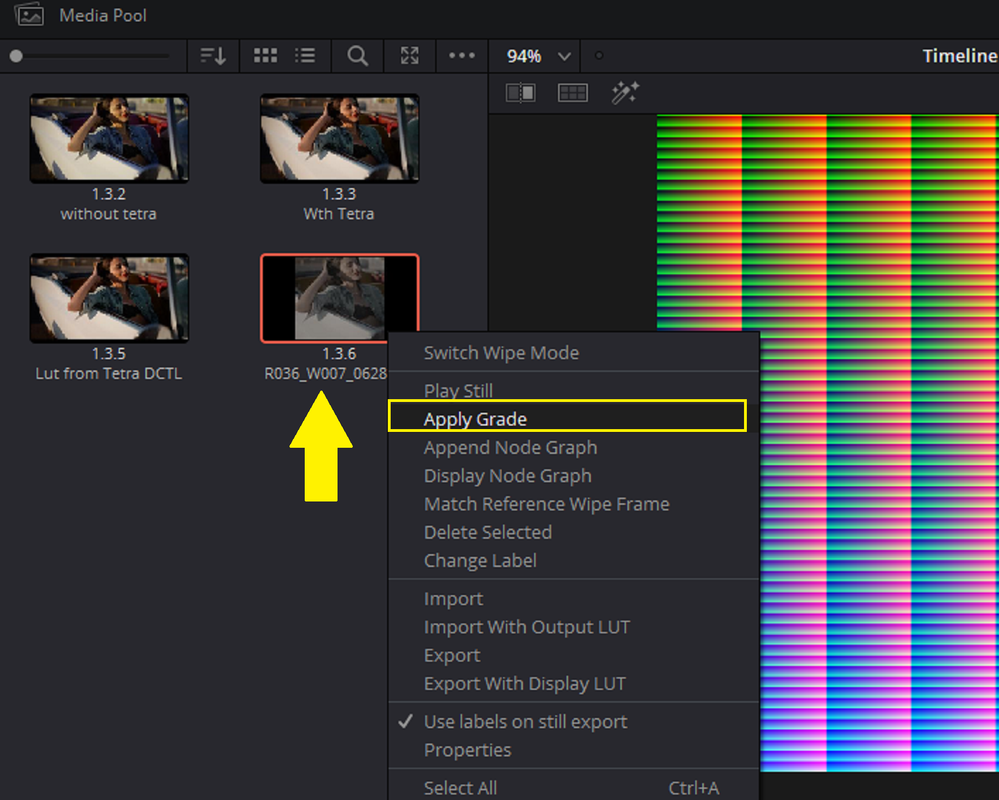
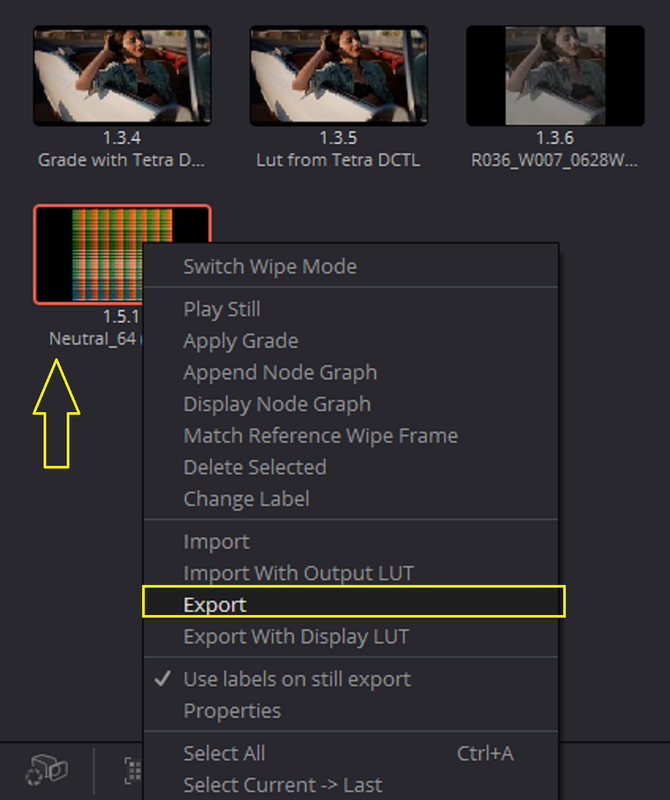
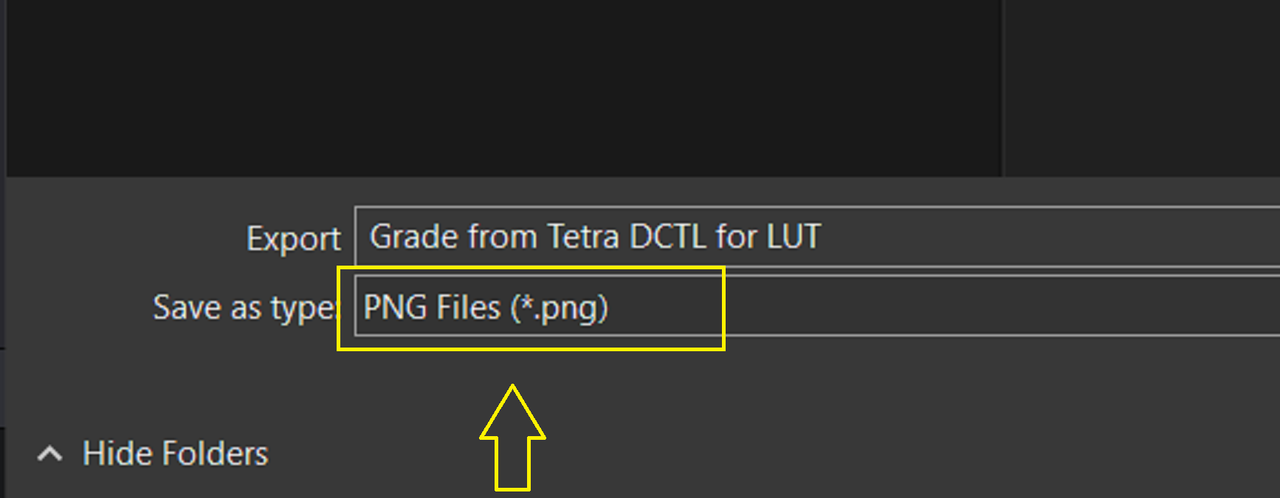
Now "APPLY GRADE" from the image you saved a Still from above and apply it to the HALD FILE. Next "GRAB STILL" from the HALD file with the Grade applied to it and "EXPORT" that still out as a "PNG" file and give the file a name.


15.png
wAAACH5BAEKAAAALAAAAAABAAEAAAICRAEAOw==


16.png
wAAACH5BAEKAAAALAAAAAABAAEAAAICRAEAOw==

17.png


18.png


19.png


20.png
 
Last edited:
PART 3- The Final LUT CREATION


PART 3 The Final LUT CREATION

Back to the lutCreator.js website


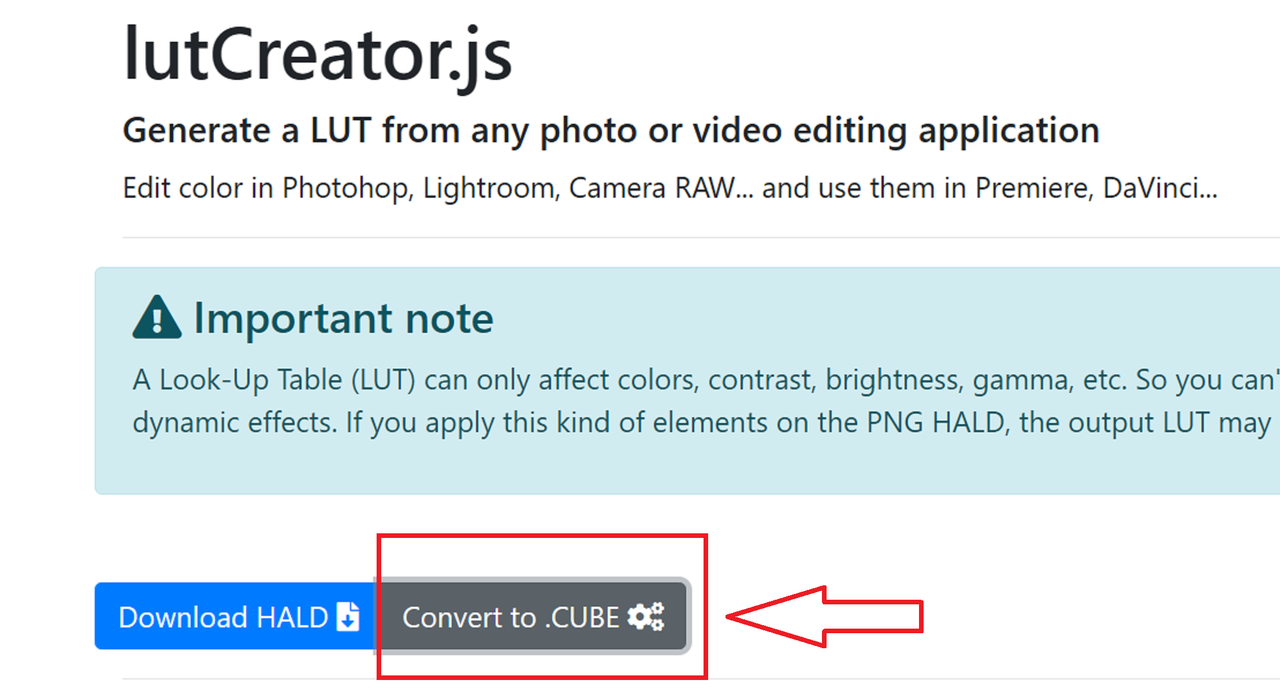
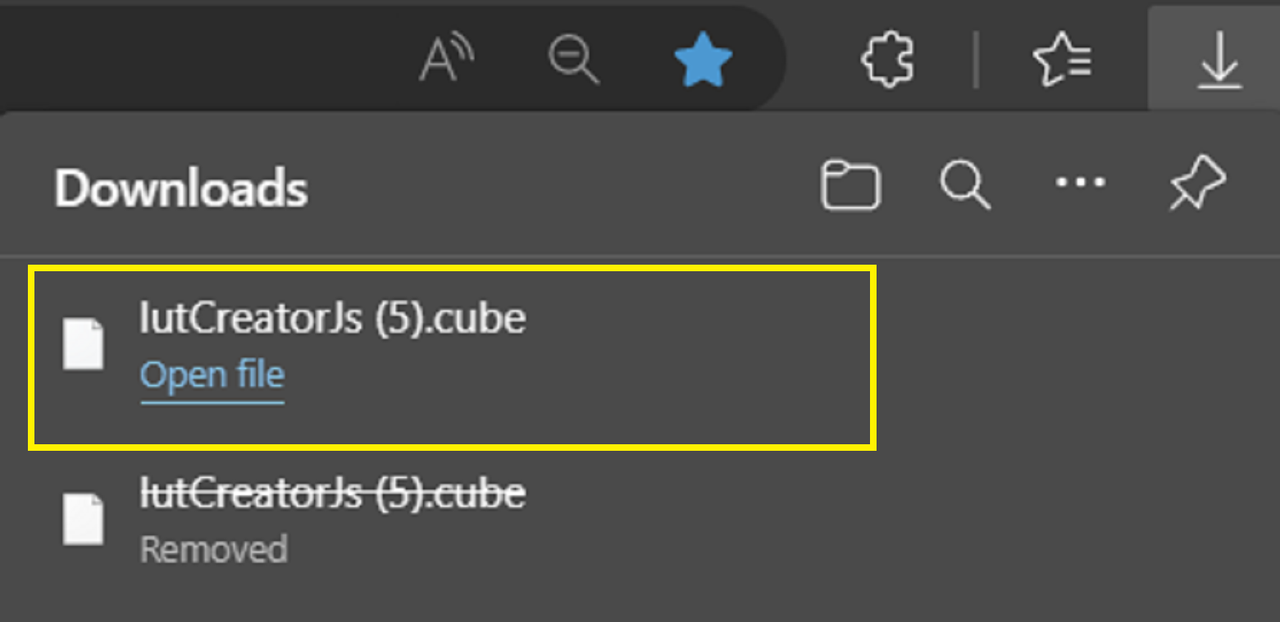
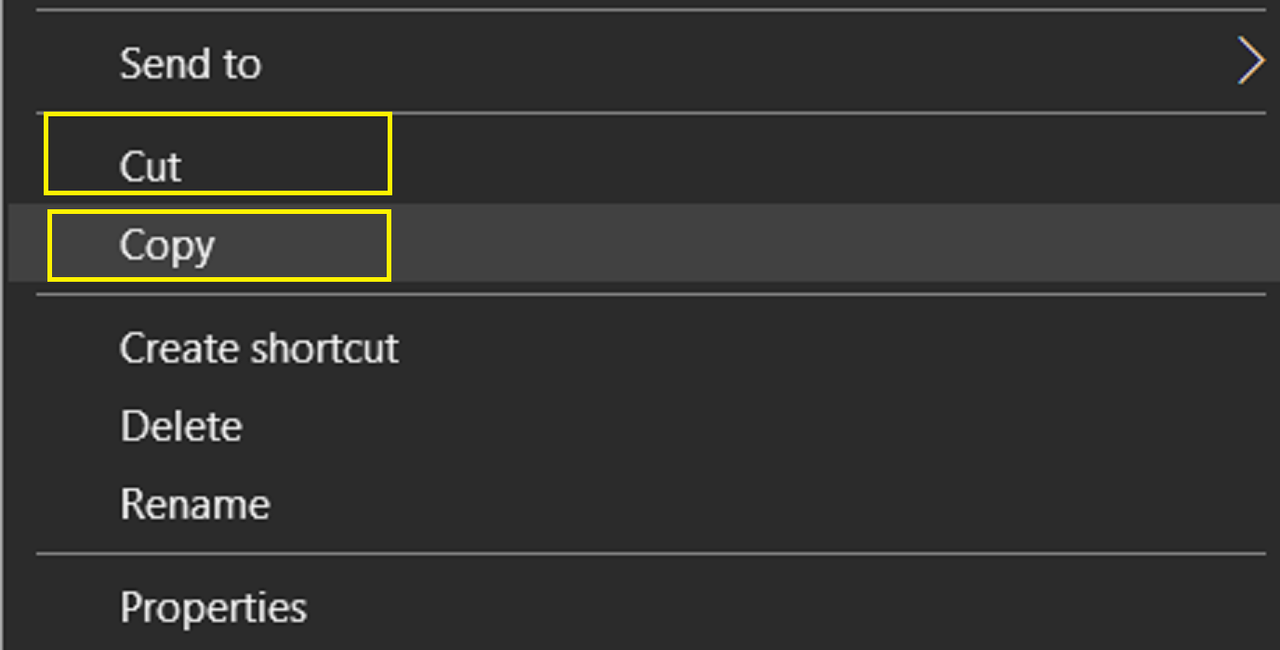
On the lutCreator.js website, select "Convert to .CUBE" button. Then find and select the .PNG Hald File you exported out of RESOLVE previously with the imbedded grade attached to it. The website will generate a Lut from that file that you can "COPY" or "Cut" and rename and import back into Resolve.

21.png


22.png


23.png

24.png

25.png
25a.png


Back In DAVINCI RESOLVE


First, Change the "MASTER SETTINGS" and change the "INPUT COLOR SPACE" and "OUTPUT COLOR SPACE" back the way they initially were.

1a.png


1-Copy.png


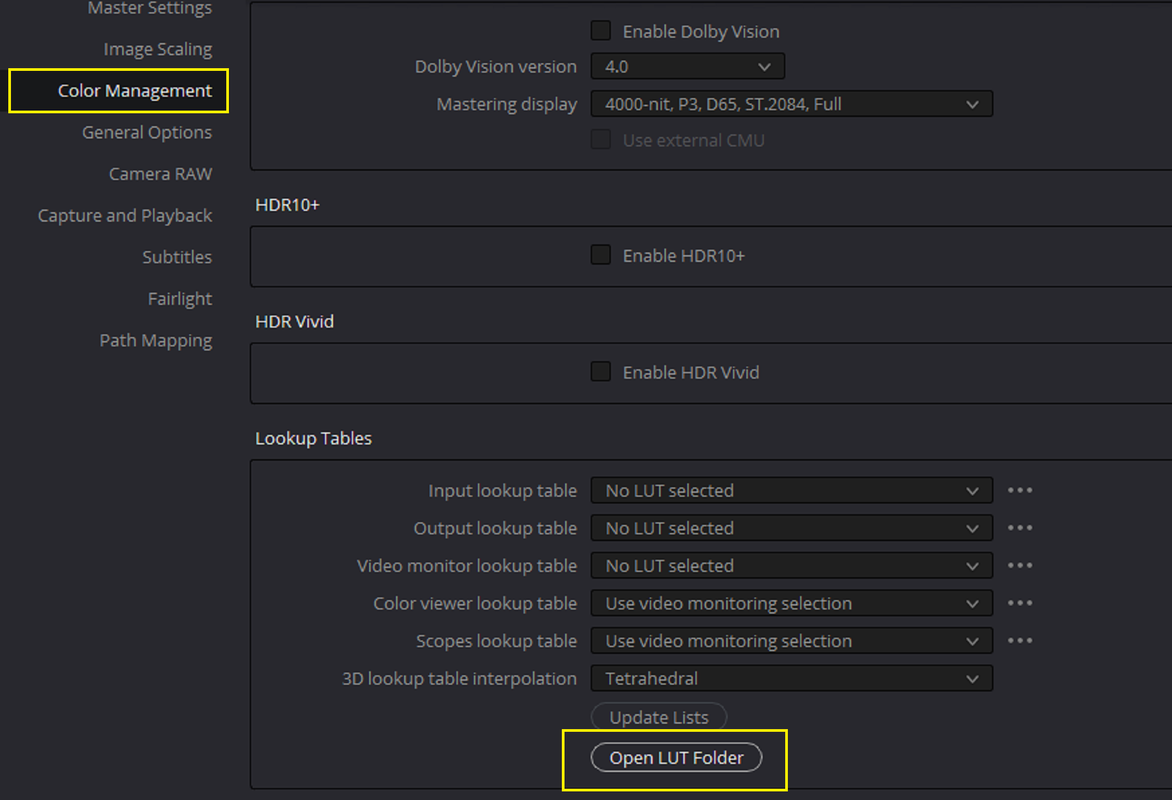
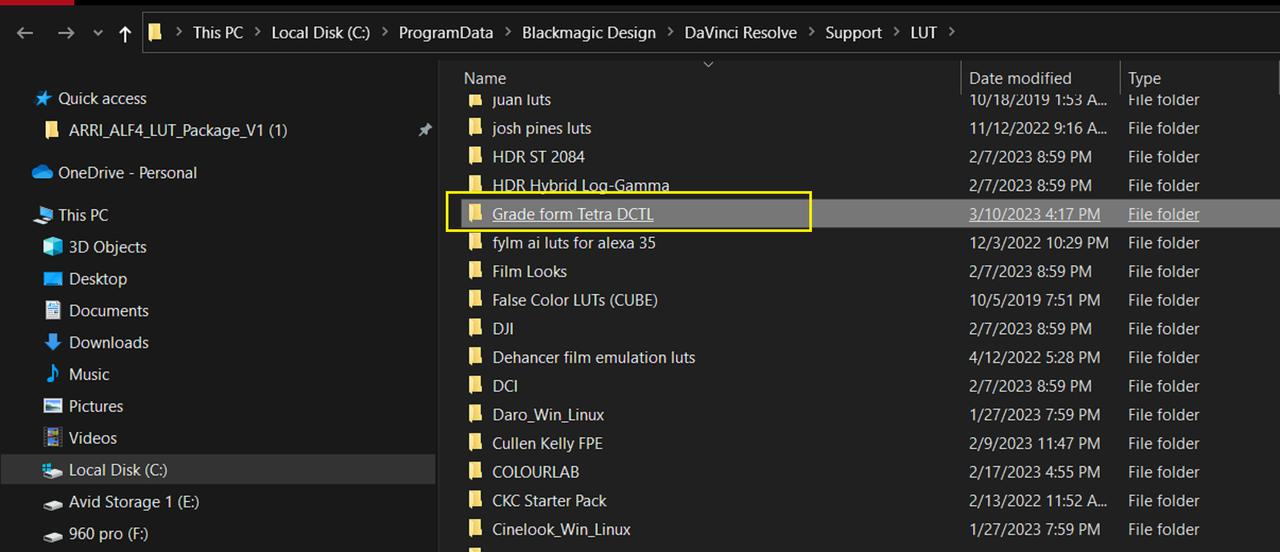
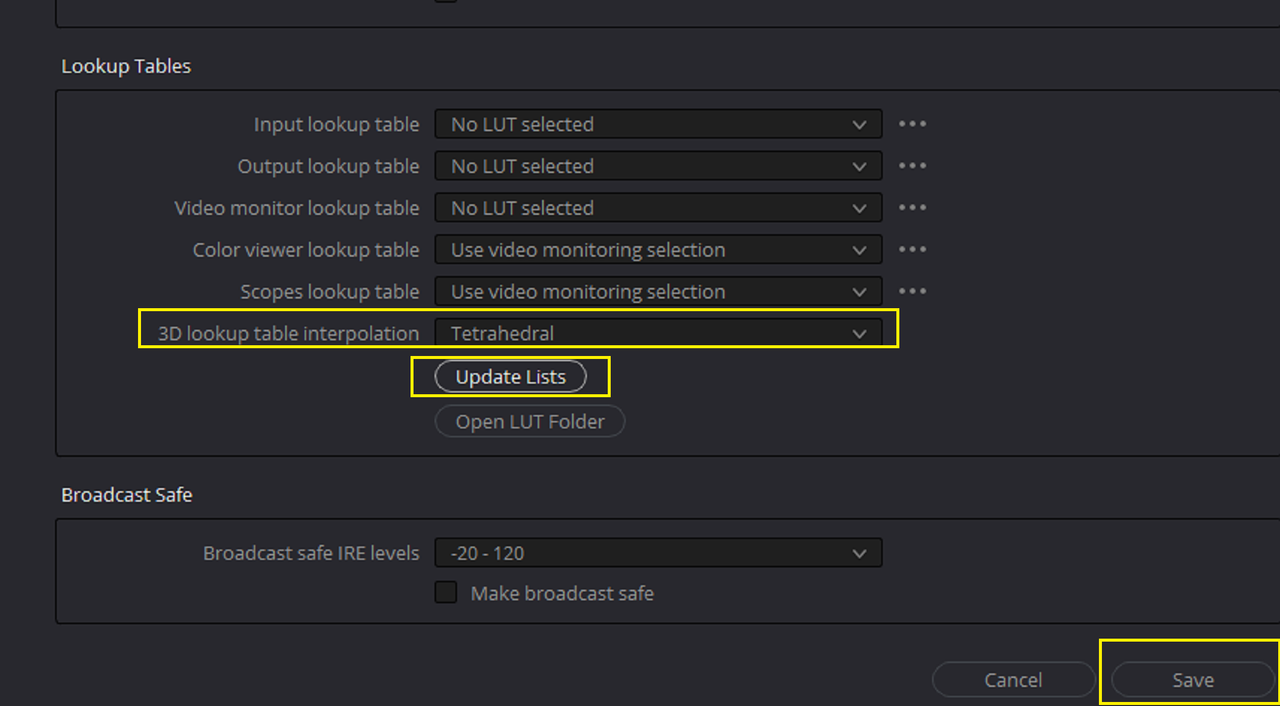
In the "COLOR MANAGEMENT" Area, Click on the "OPEN LUT FOLDER" button and save the LUT the lutCreator.js website generated into a Folder. Be sure to select "TETRAHEDRAL" next to "3D LOOKUP TABLE INTERPOLATION". Then press the "UPDATE LISTS" button and press the "SAVE" button when it is no longer Greyed out.


26.png


26a.png


26b.png


Original with TETRA DCTL GRADE

29.png


29-2.png


29-3-Grade-with-Tetra-DCTL-1-3-5.jpg


With Tetra DCTL LUT applied


28.png


30.png


30-2.png


30-3-Lut-from-Tetra-DCTL-1-3-6.jpg


TETRA GRADE
29.png


TETRA LUT
30.png


Grade

29-3-Grade-with-Tetra-DCTL-1-3-5.jpg


LUT

30-3-Lut-from-Tetra-DCTL-1-3-6.jpg


Thanks for staying with me this long and have a nice day!!!
 
Last edited:
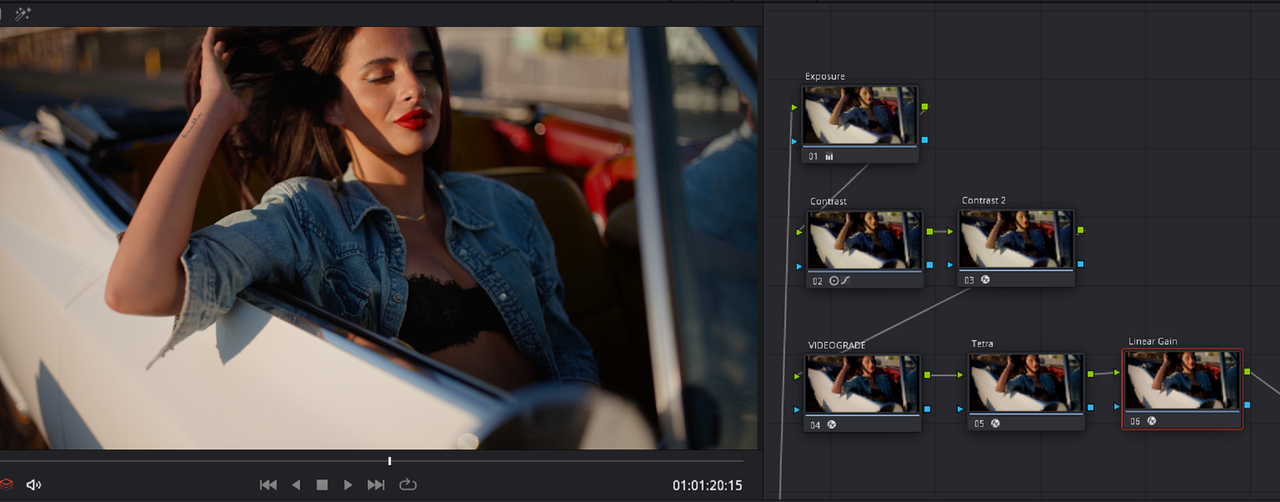
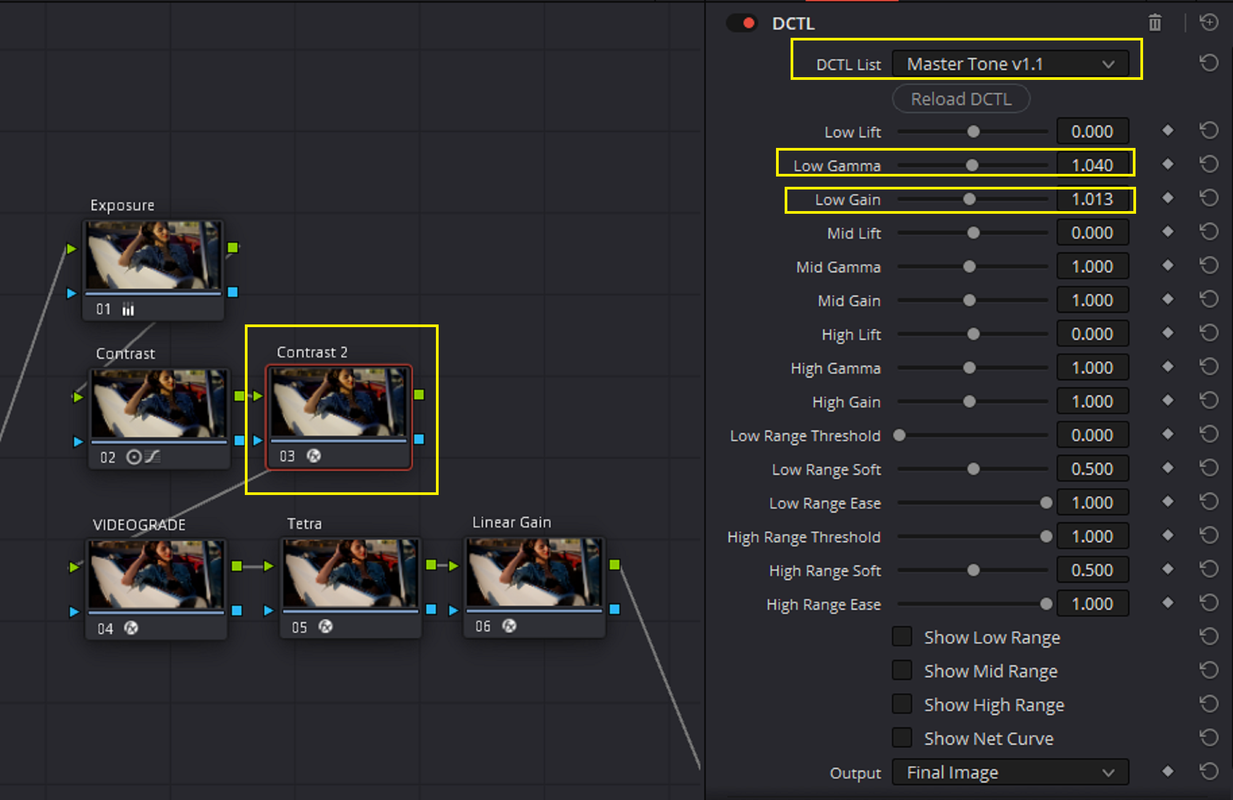
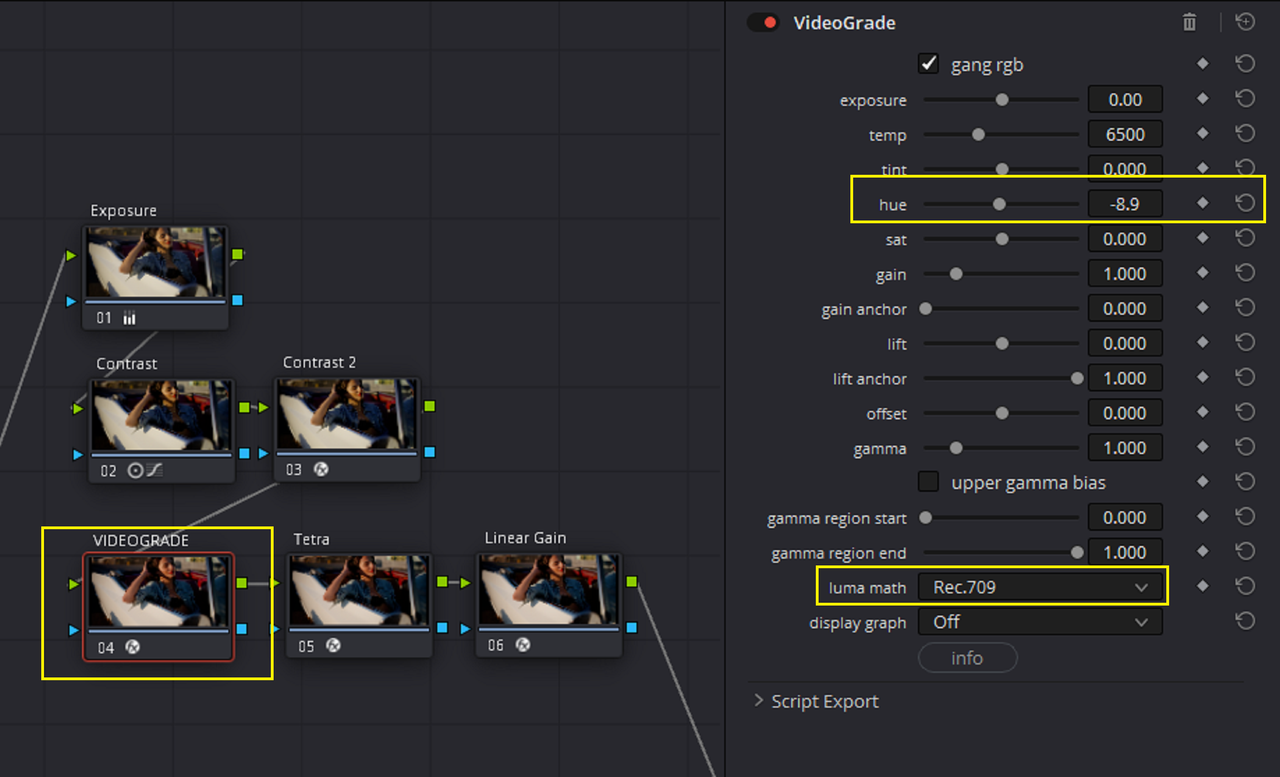
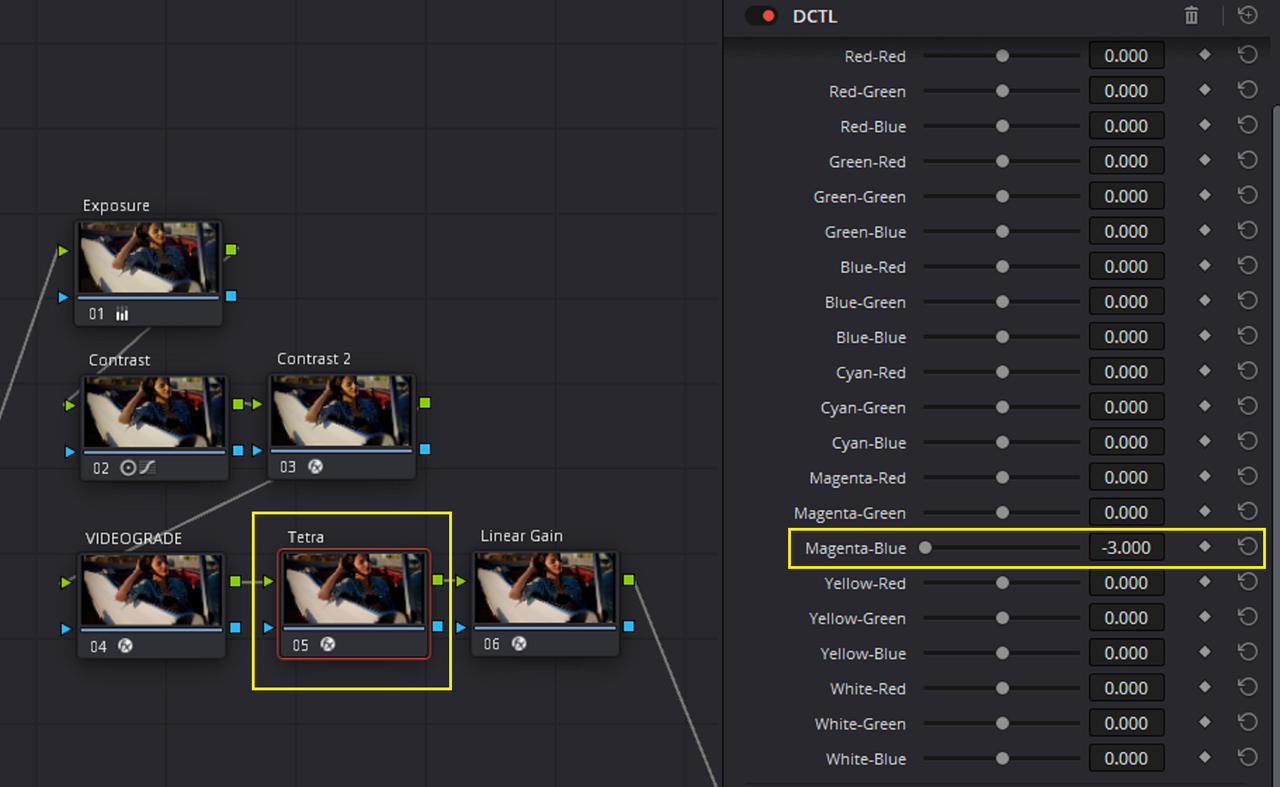
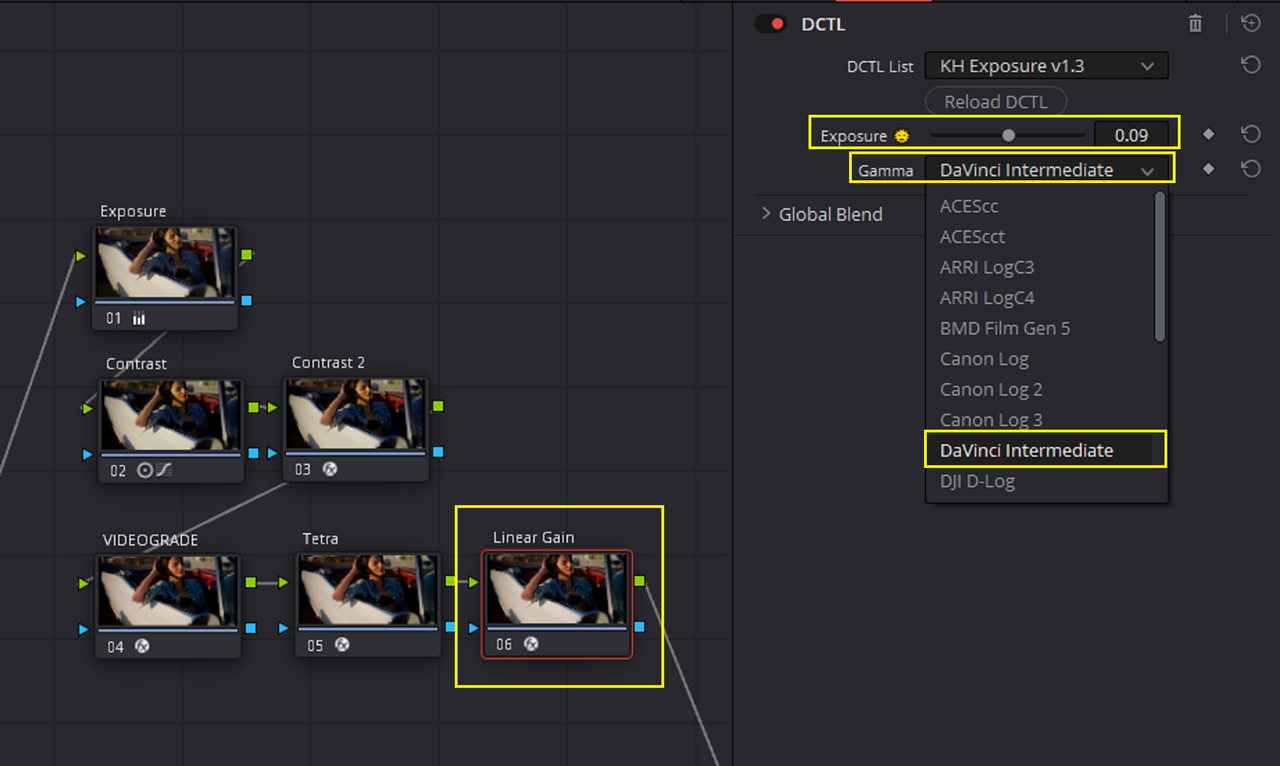
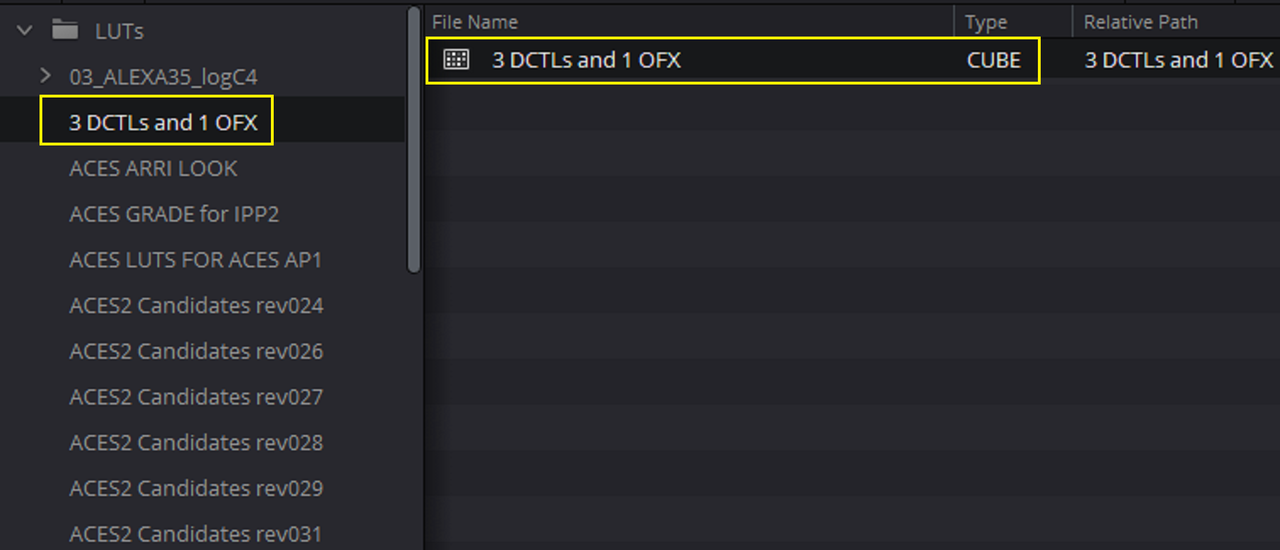
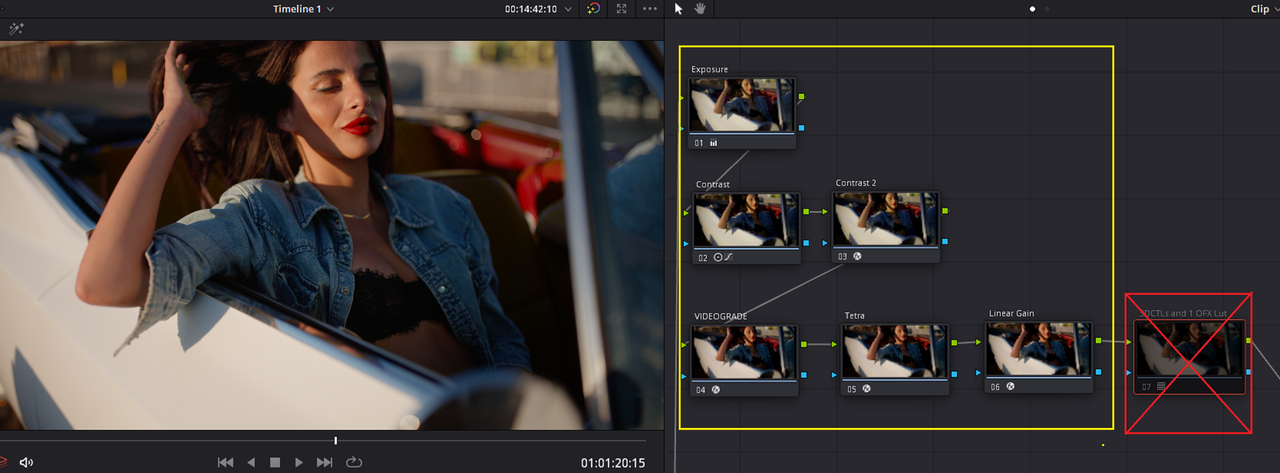
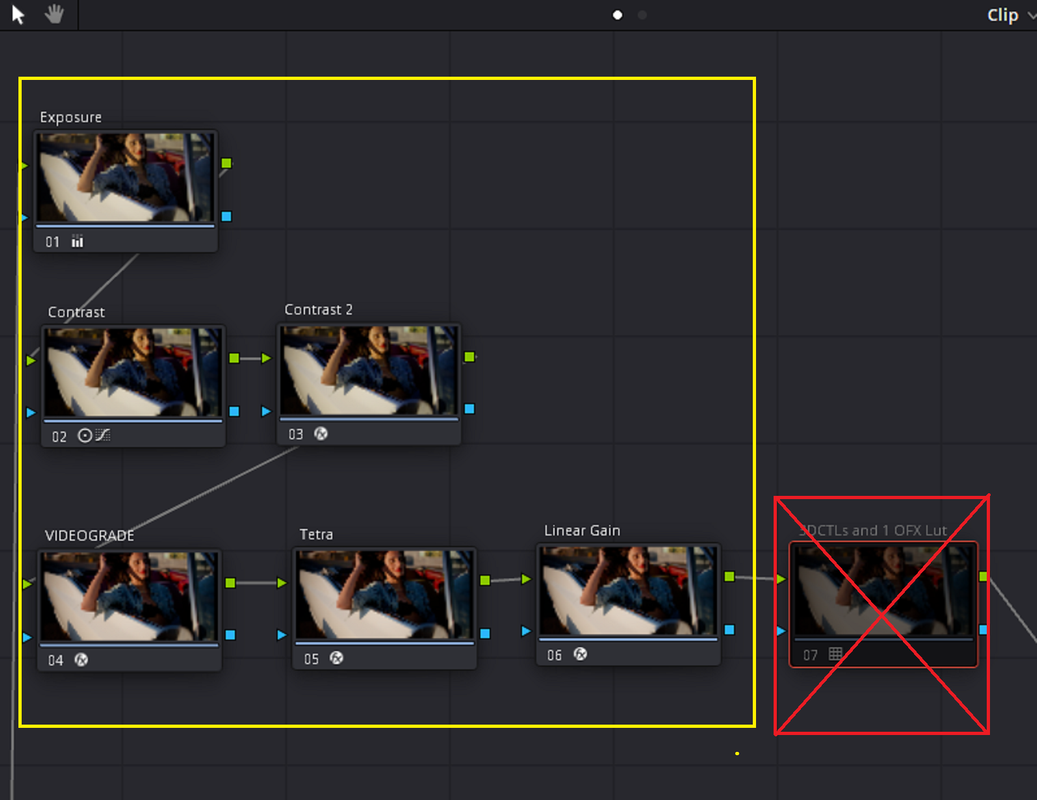
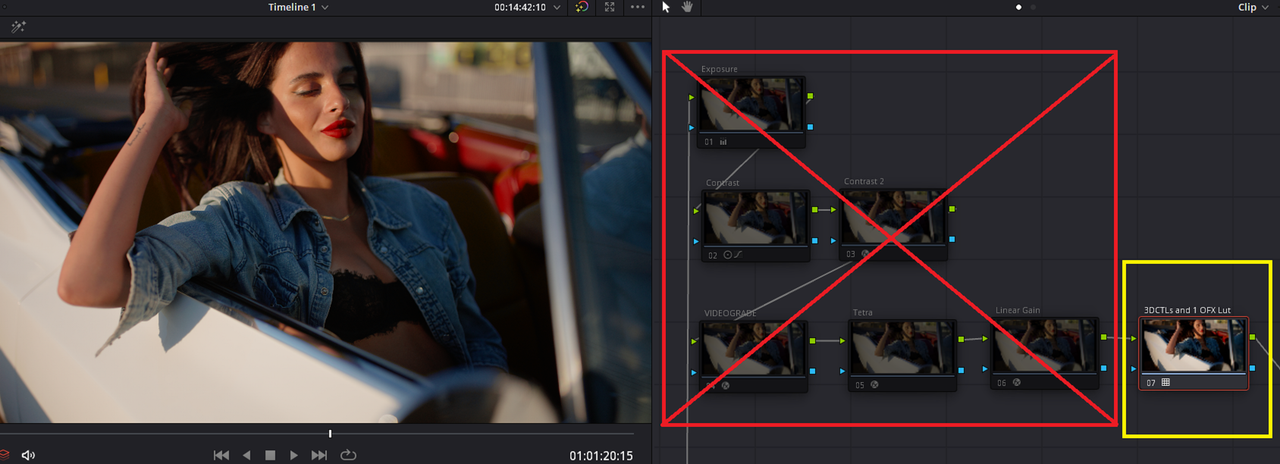
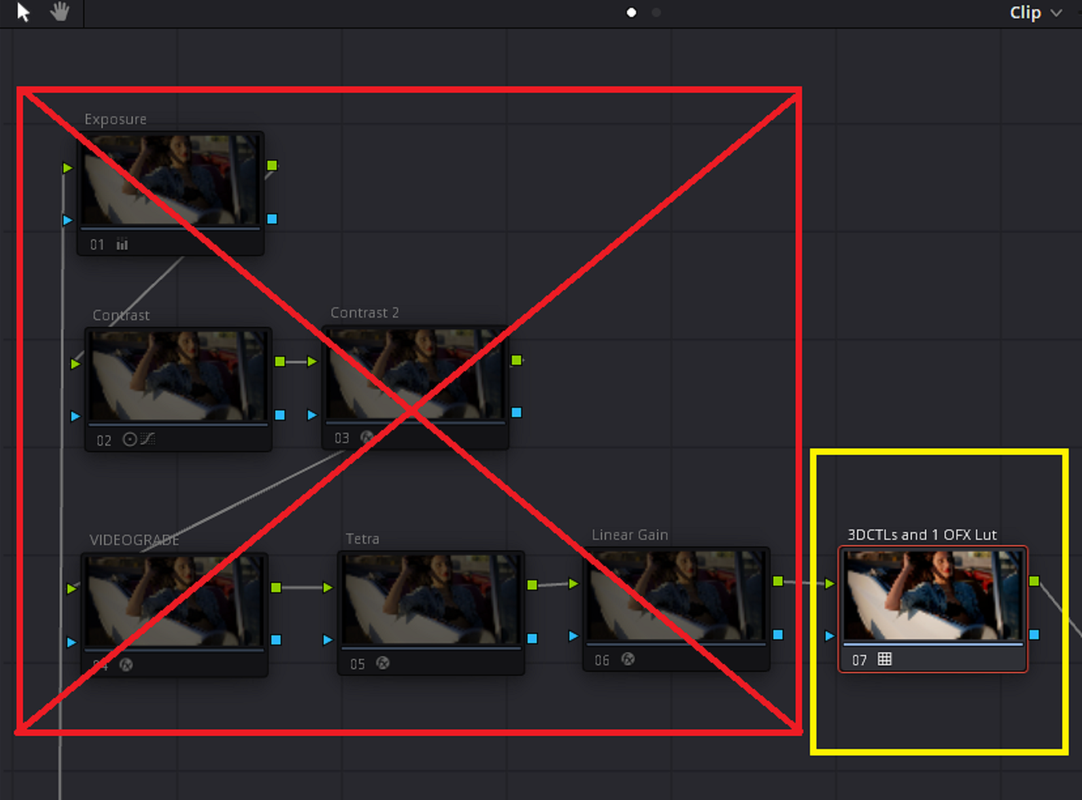
LUT from 3 DCTLs and 1 OFX plugin

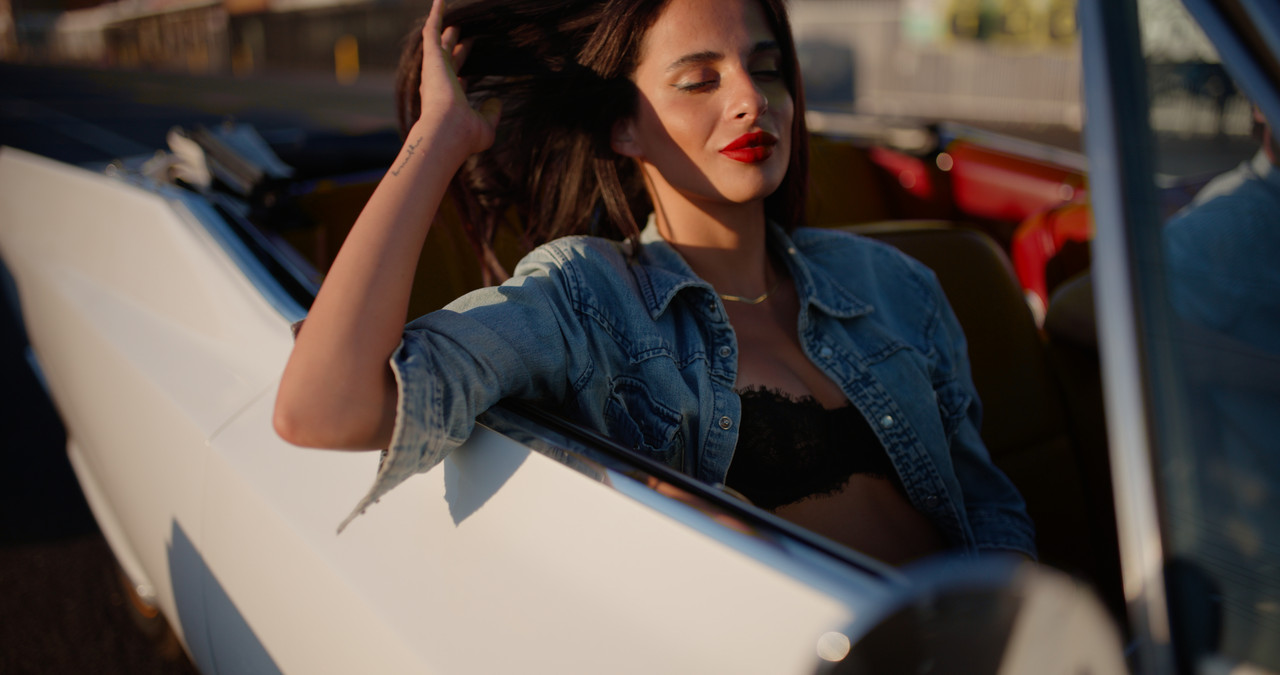
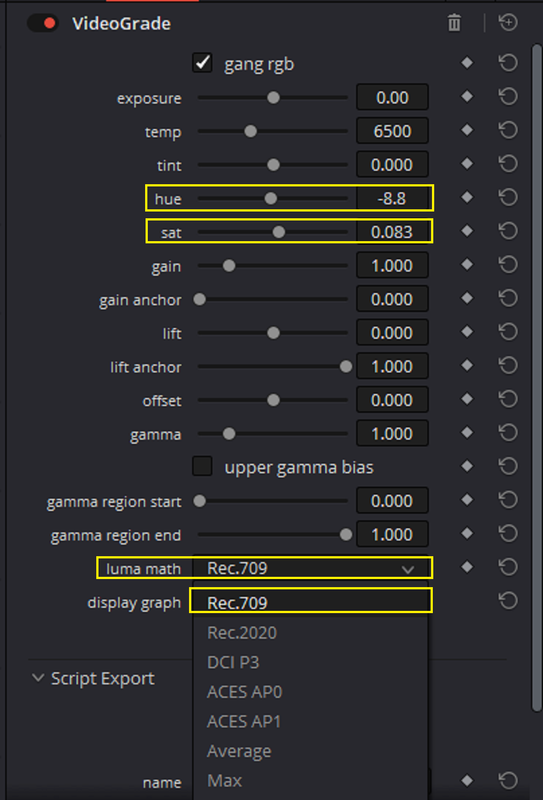
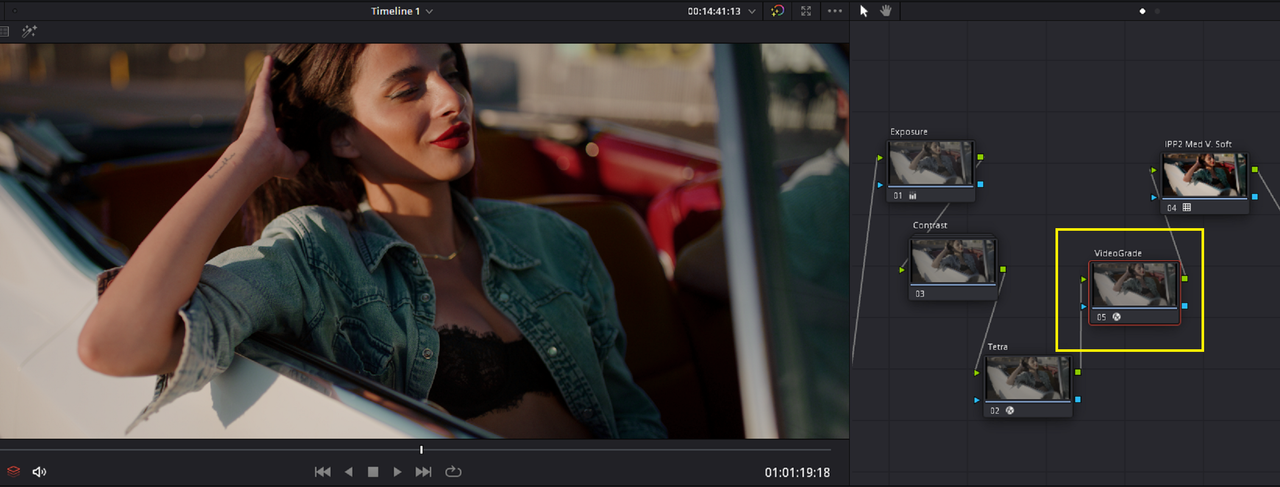
First, Obviously I didn't need to use all of these components to grade the Image below. This was done only to show the power of what a HALD File can imbed for a Lut creation. The OFX "VIDEOGRADE" could have been imbedded in a Lut using the "GENERATE LUT" Function in Resolve but the 3 DCTLs could not.

I won't go through the whole process above for this Lut just a brief overview.


Settings

1.png


2.png


DCTL "Master Tone"

Screenshot-8707.png


OFX PLUGIN " VideoGrade"

Screenshot-8708.png


DCTL" Tetra"

Screenshot-8709.png


DCTL " KH Exposure"

Screenshot-8710.png


LUT


Screenshot-8711.png


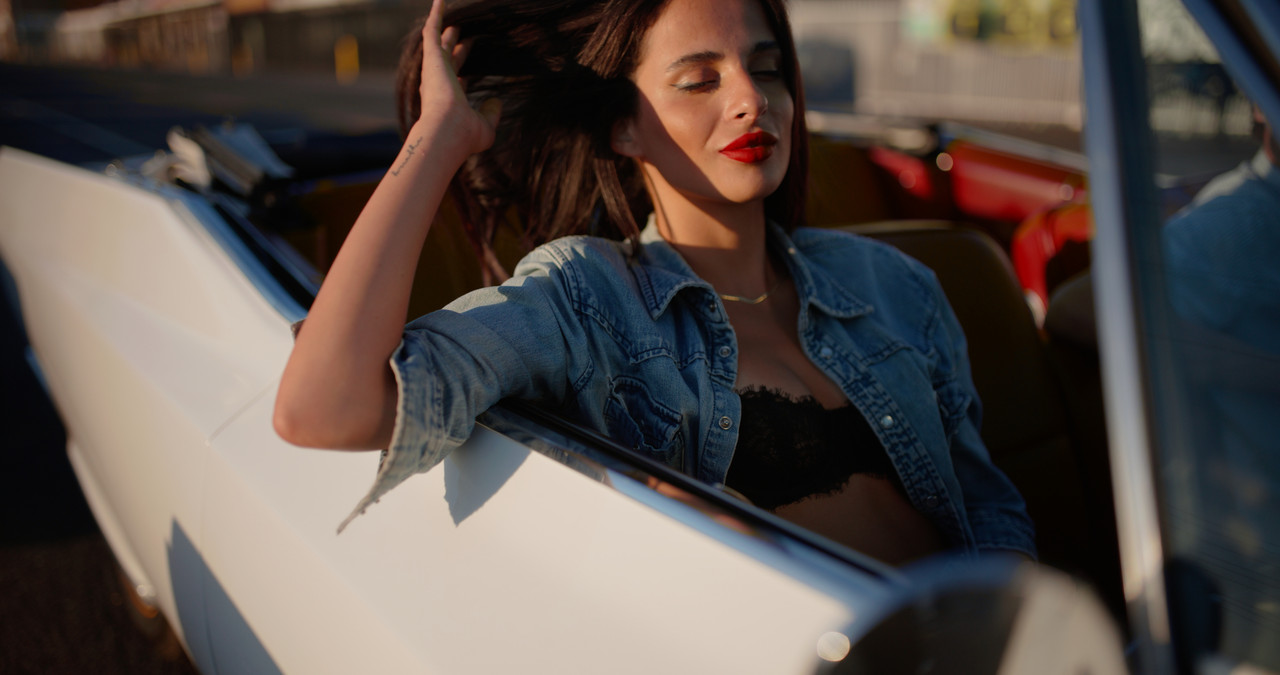
ORIGNAL GRADE

Screenshot-8713.png


Screenshot-8713-2.png


3-DCTL-1-OFX-Grade-1-3-9.jpg


GRADE FROM LUT

Screenshot-8712.png

Screenshot-8712-2.png


3-DCTLs-and-1-OFX-Lut-1-3-10.jpg


GRADE

Screenshot-8713.png


LUT

Screenshot-8712.png


GRADE

3-DCTL-1-OFX-Grade-1-3-9.jpg


LUT

3-DCTLs-and-1-OFX-Lut-1-3-10.jpg
 
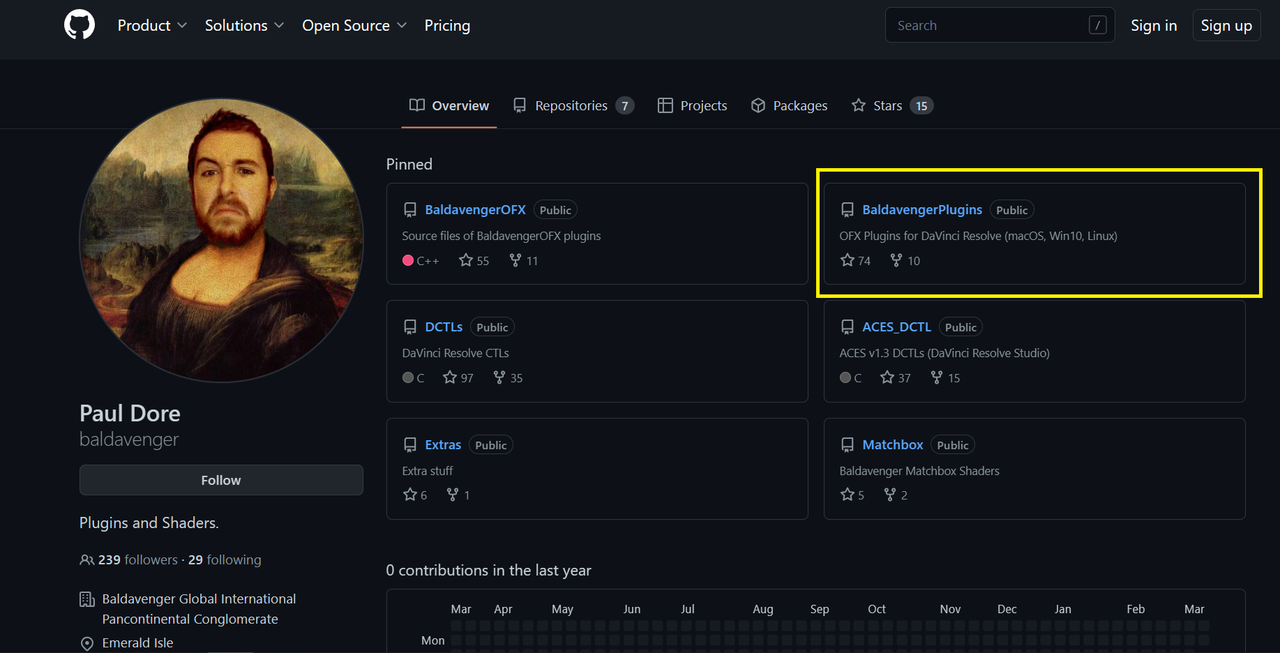
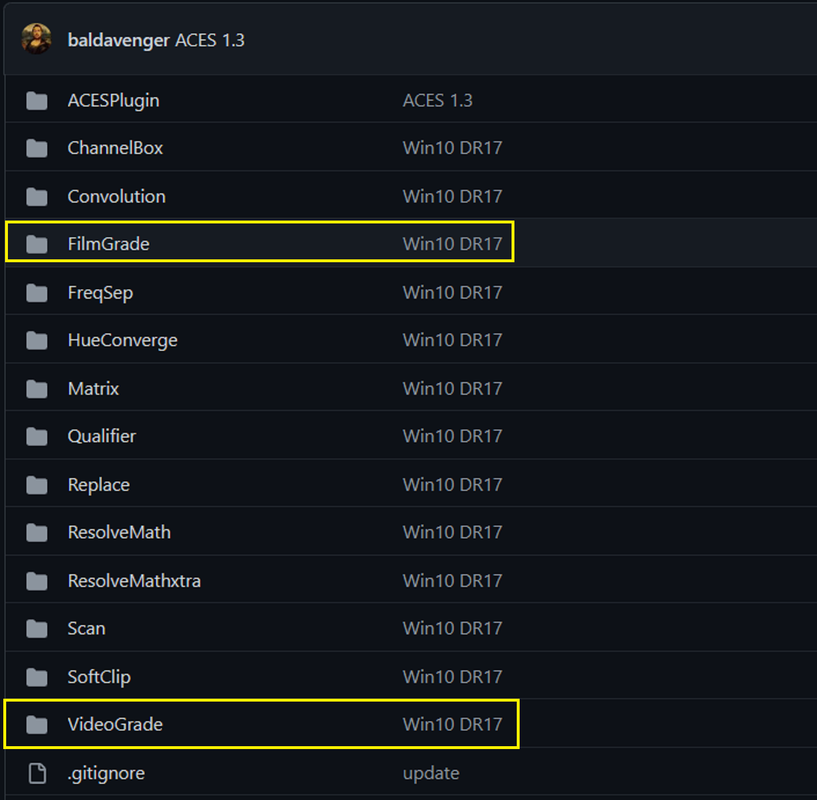
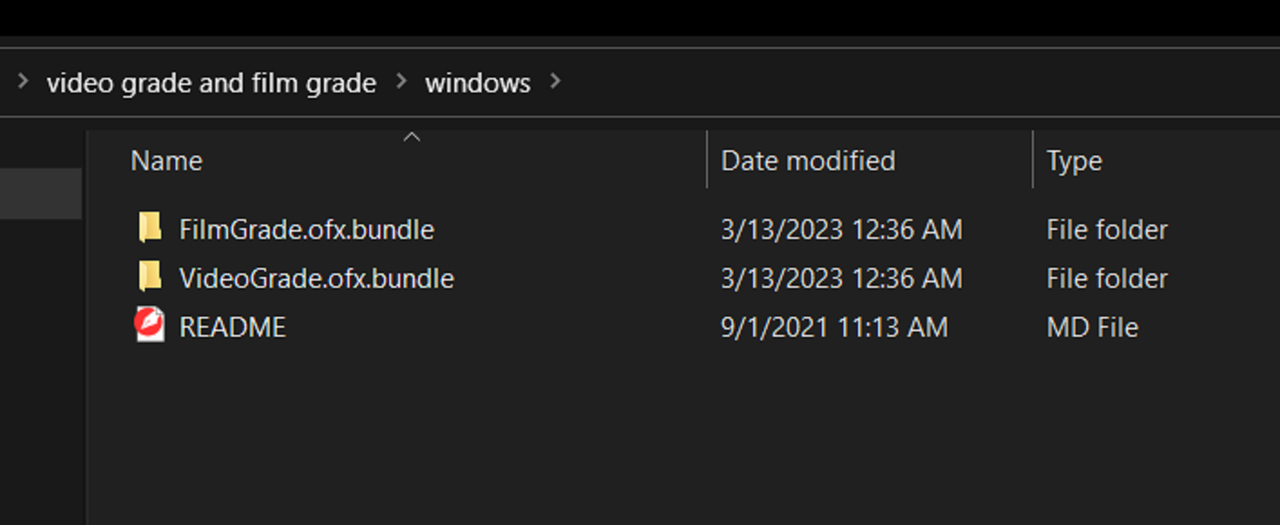
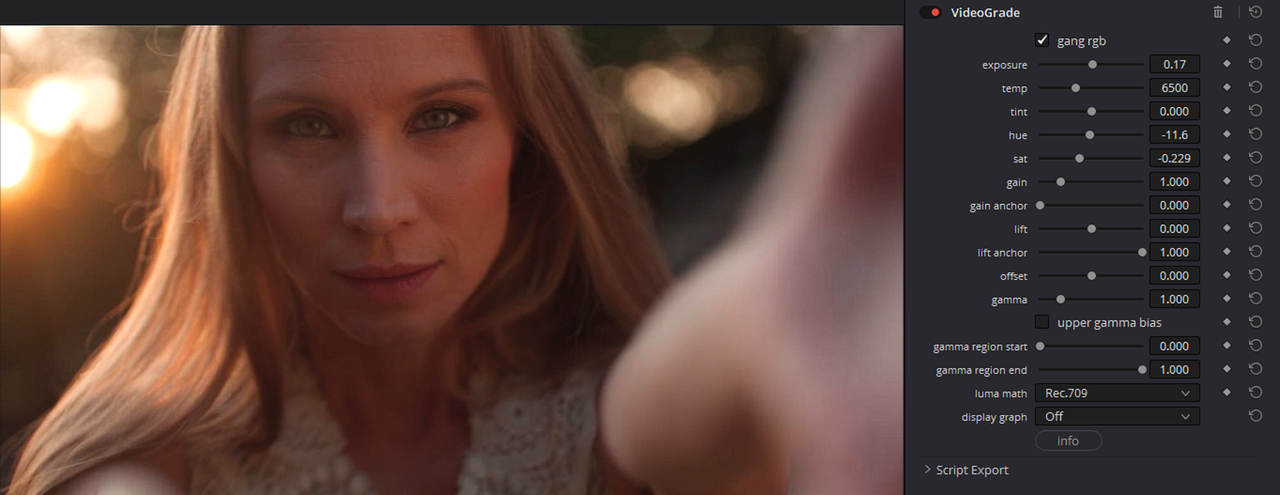
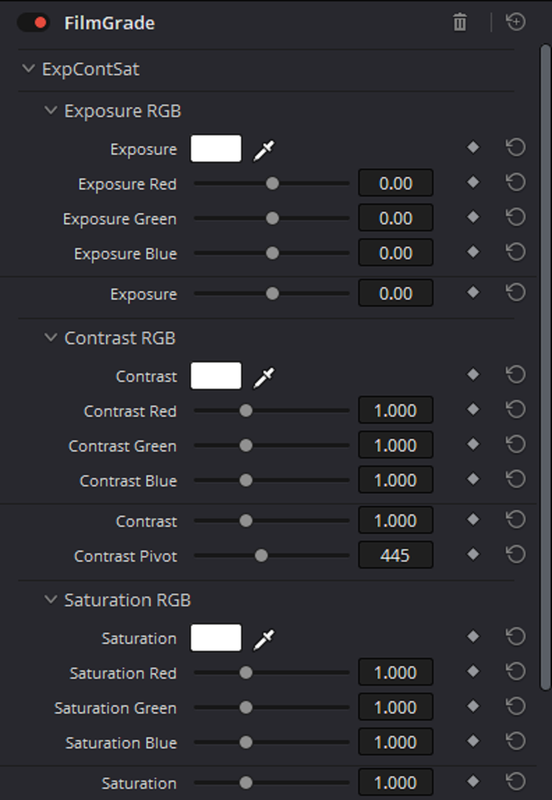
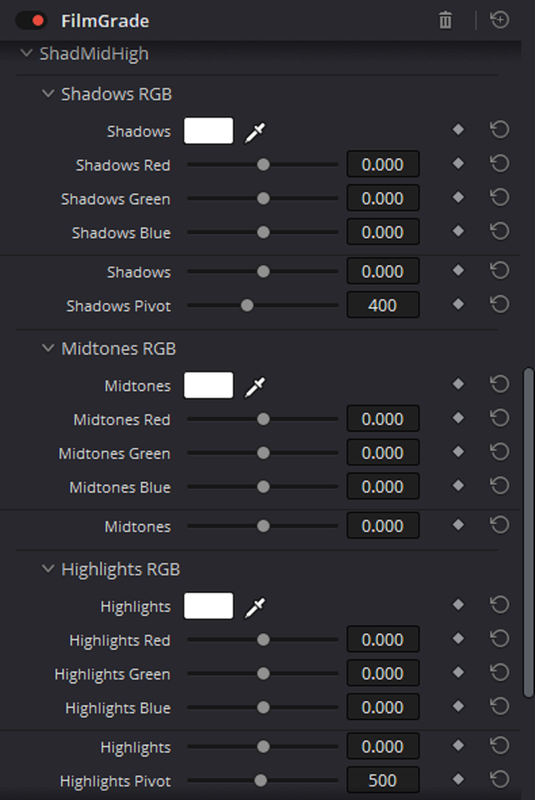
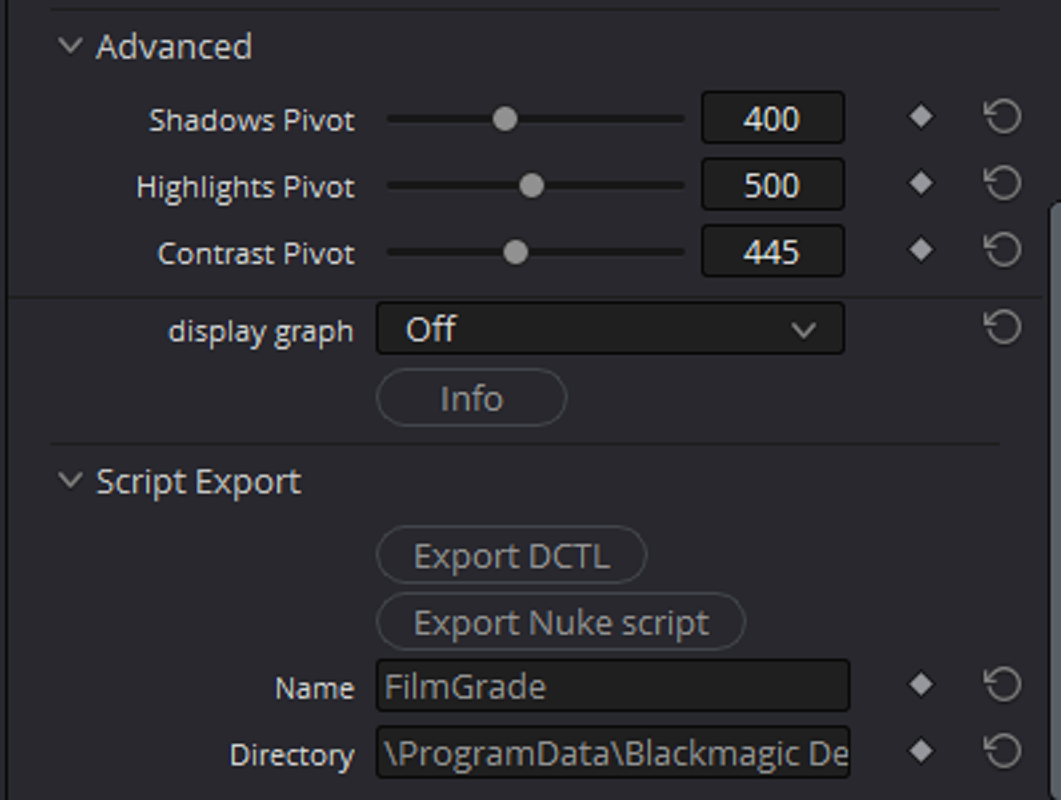
Here's the "VideoGrade" OFX I showed above and another OFX from Paul Dore called "FilmGrade"

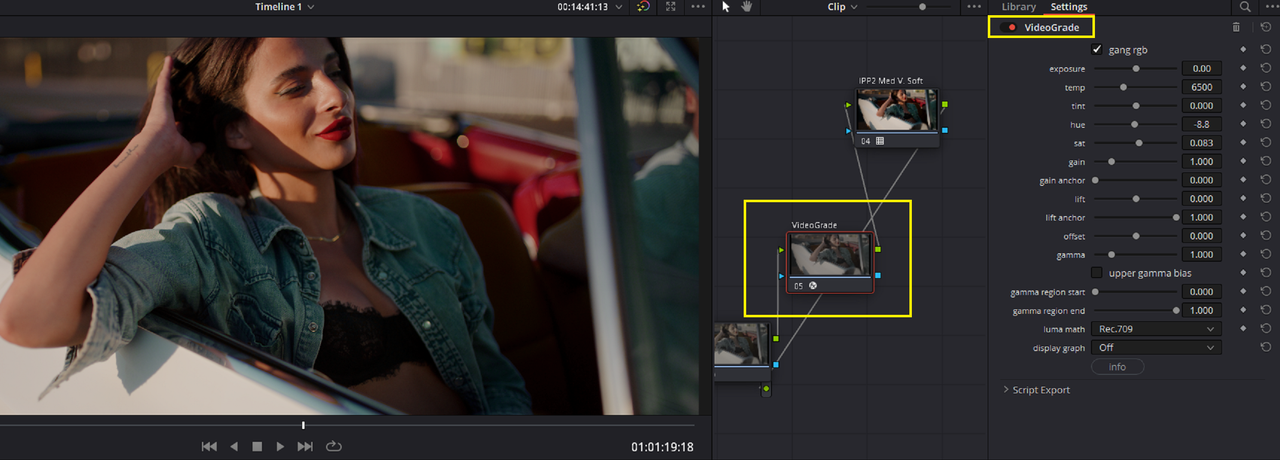
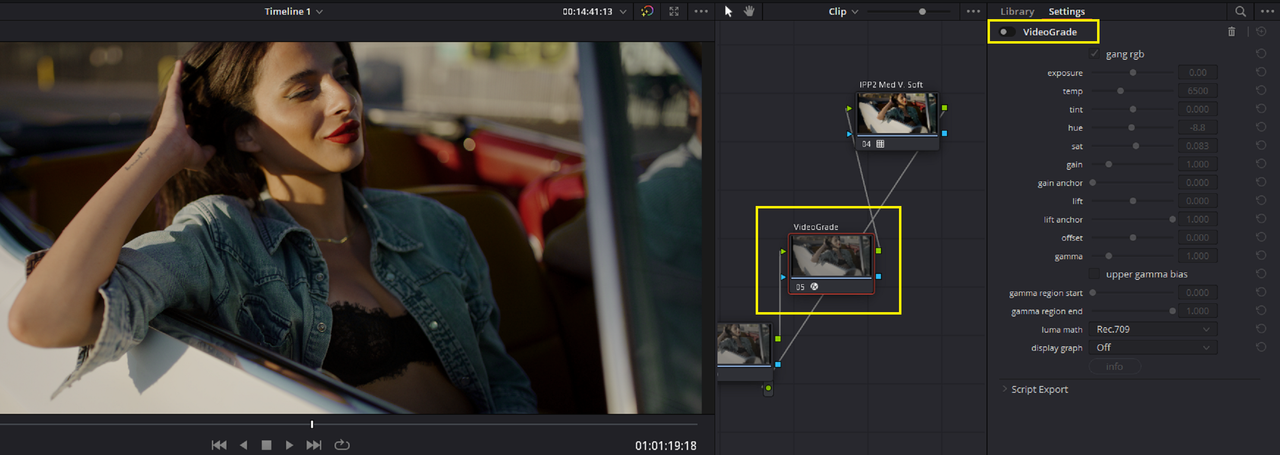
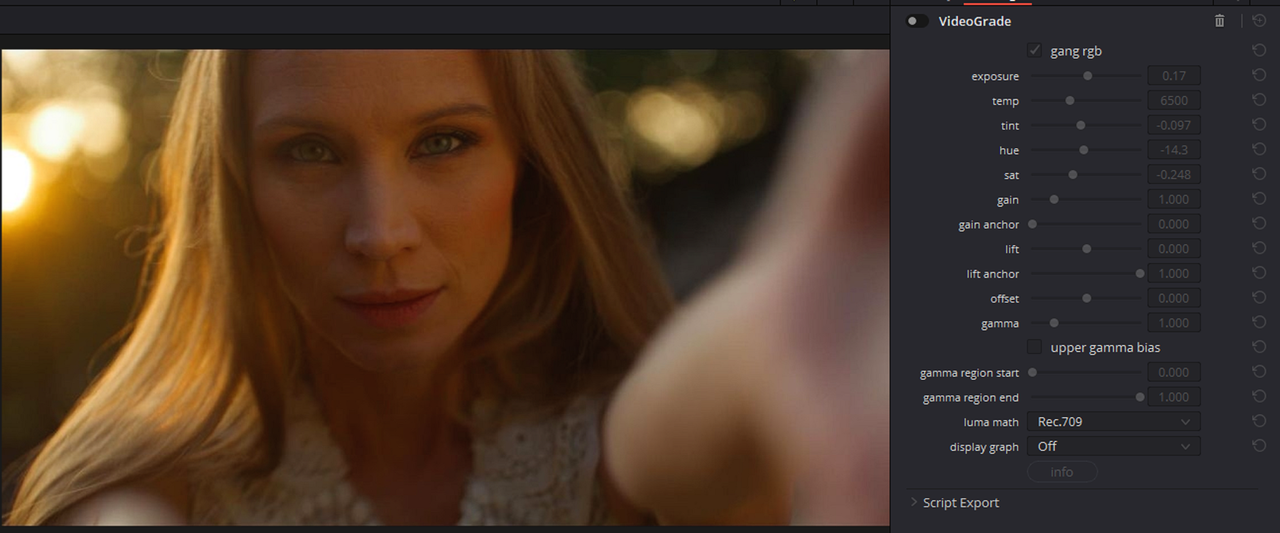
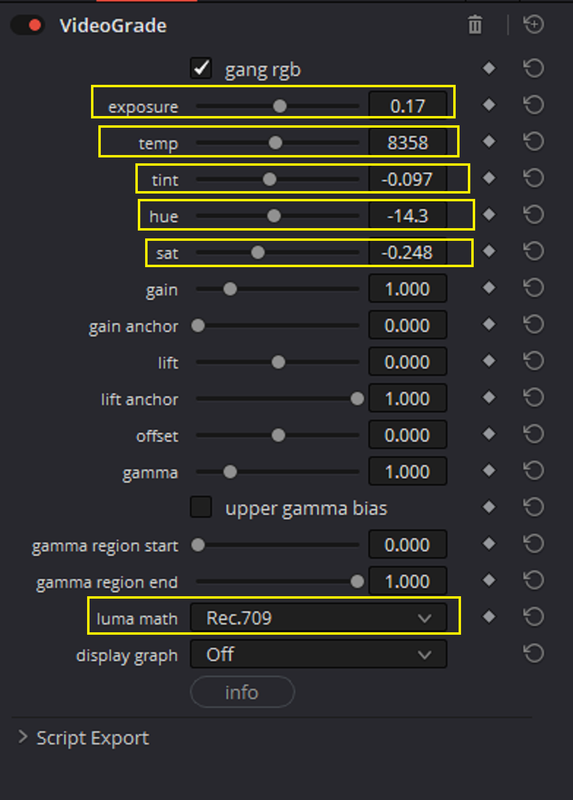
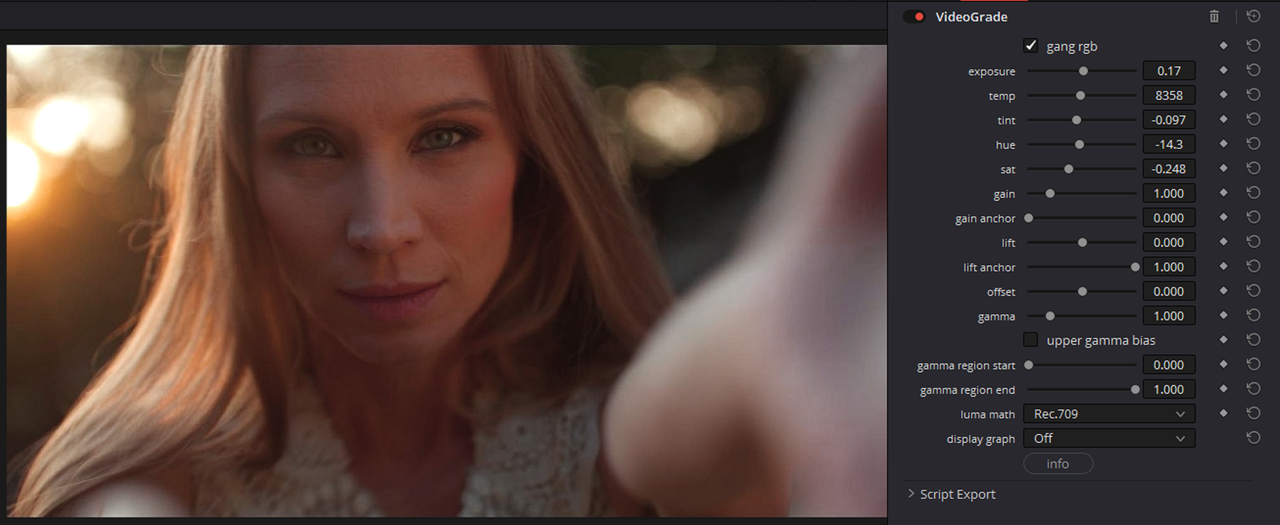
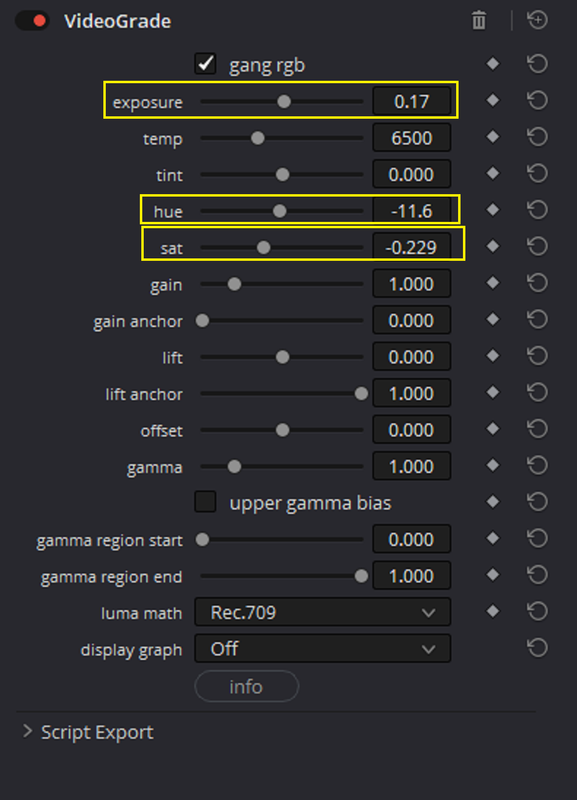
"VideoGrade", since it has a "Hue" correction Function inside of it is much better than "FilmGrade" which only has RGB corrections for Skintone Corrections. But you might want to try "FilmGrade" out.

Paul Dore
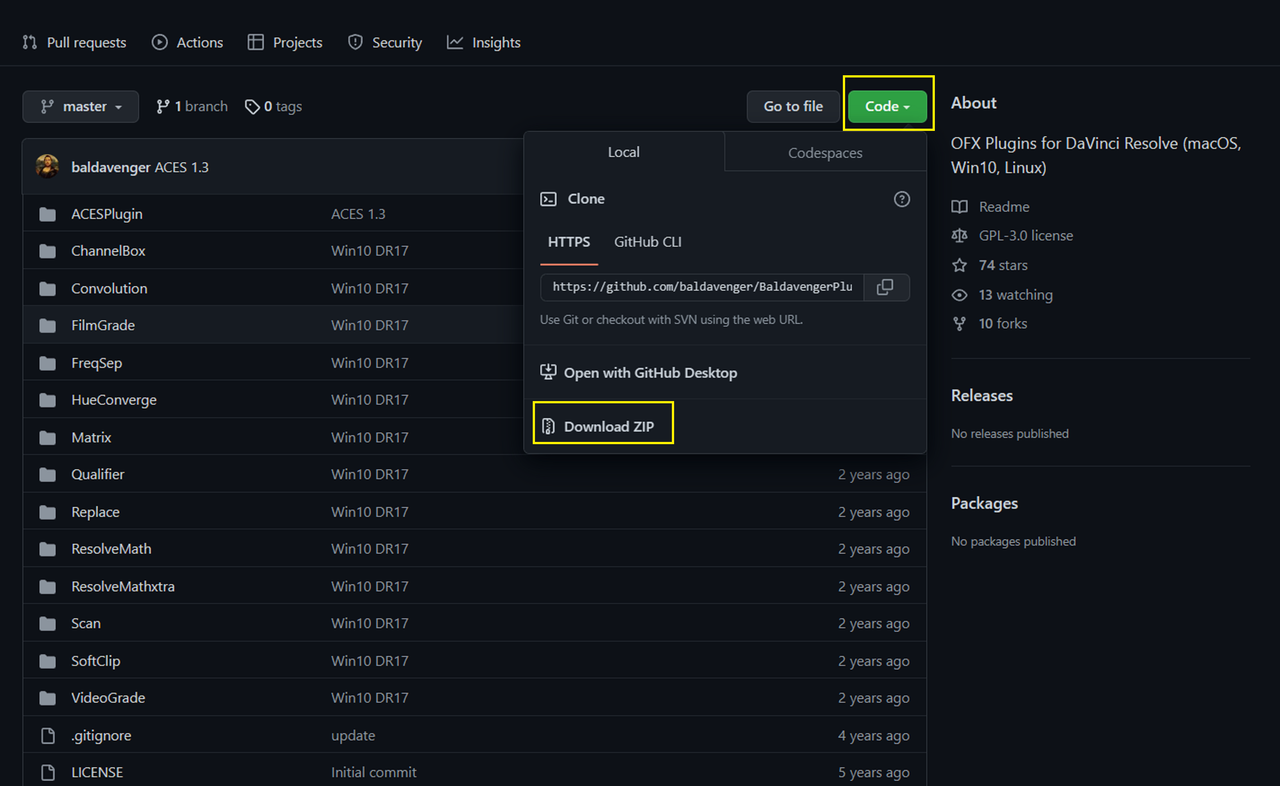
baldavenger (Paul Dore) · GitHub


2.png

3.png


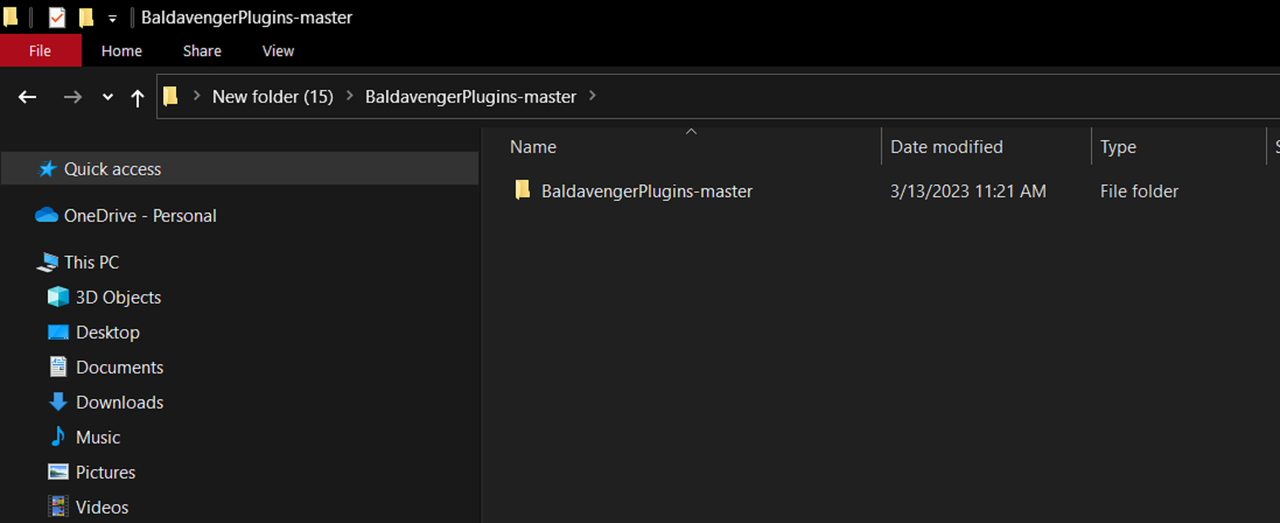
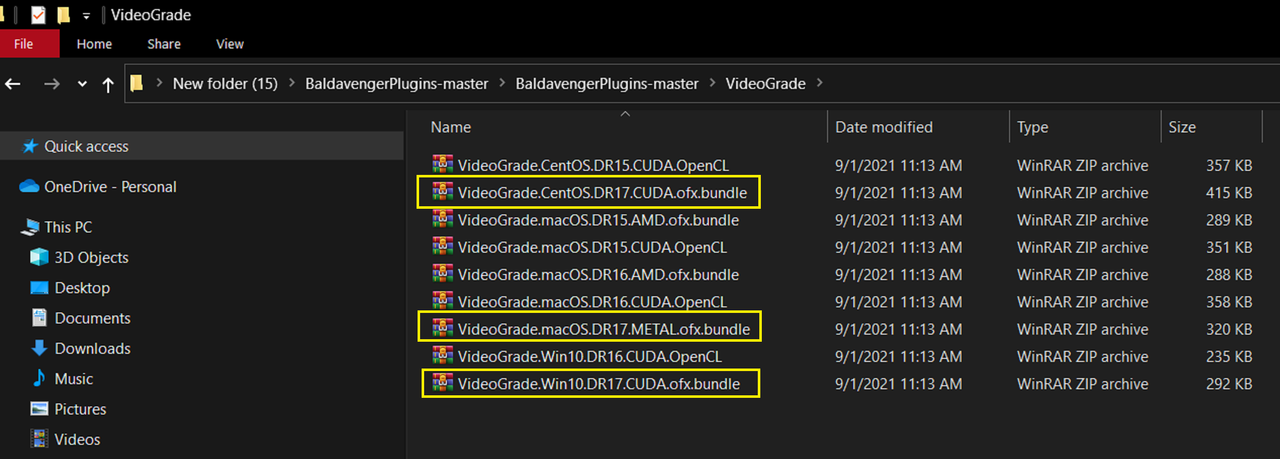
Inside the Extracted File

When you first open the extracted folder you will see this

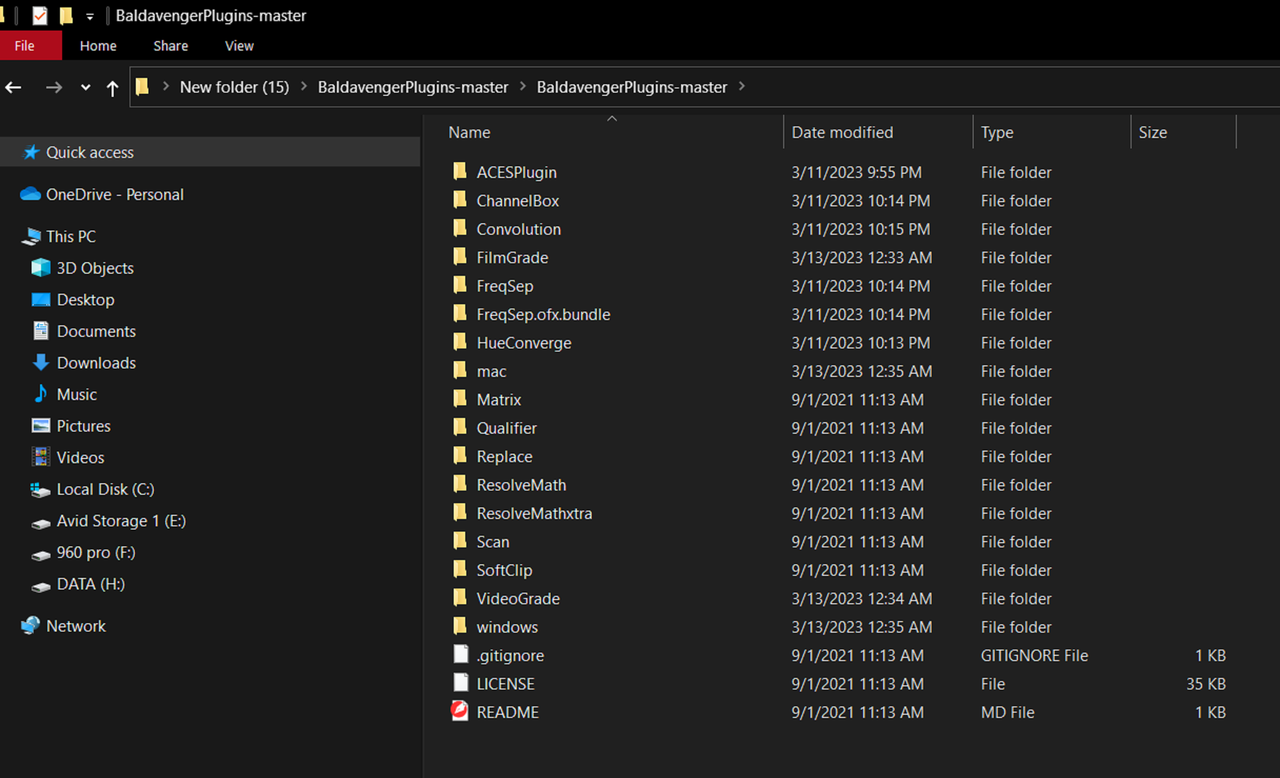
4.png

Next you will see a list of OFX plugin Folder to install

5.png

If you click on one of the folders it will bring up a list of different ZIP files to extract for different versions of Davinci Resolve and different OSX. Use the
Davinci Resolve 17 (DR17) versions unless you need an earlier version.

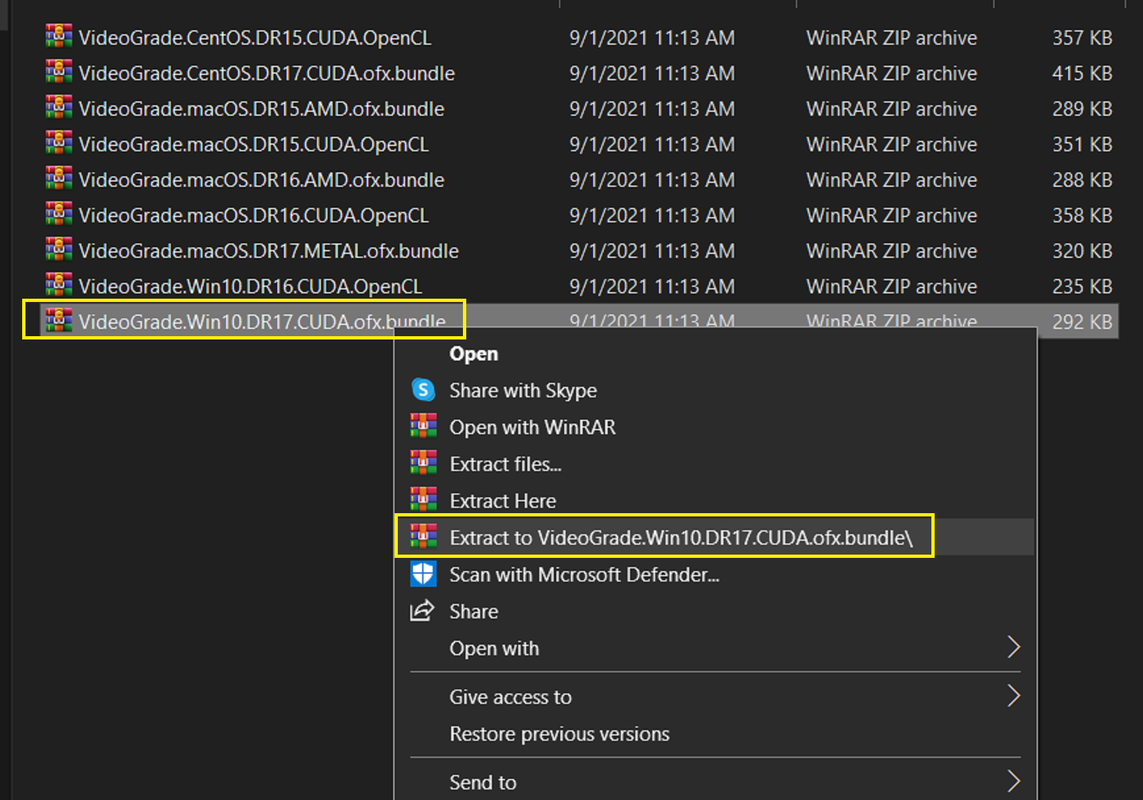
6.png

Now Extract the folder from the Zip file.

7.png


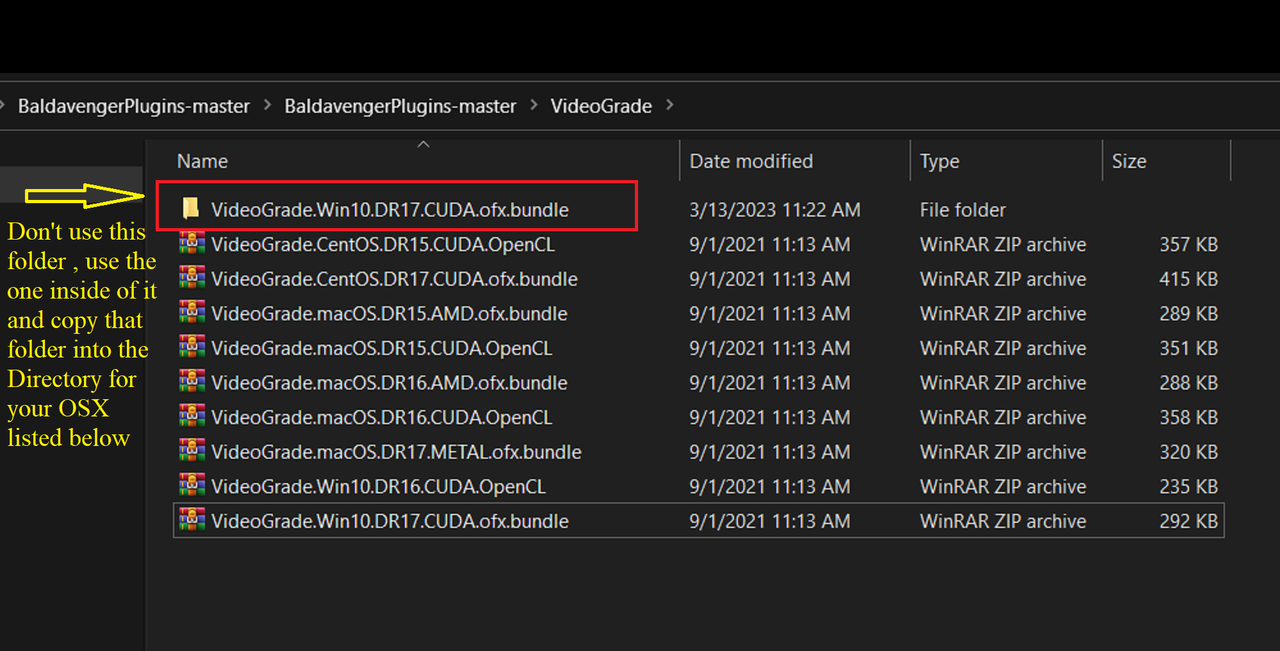
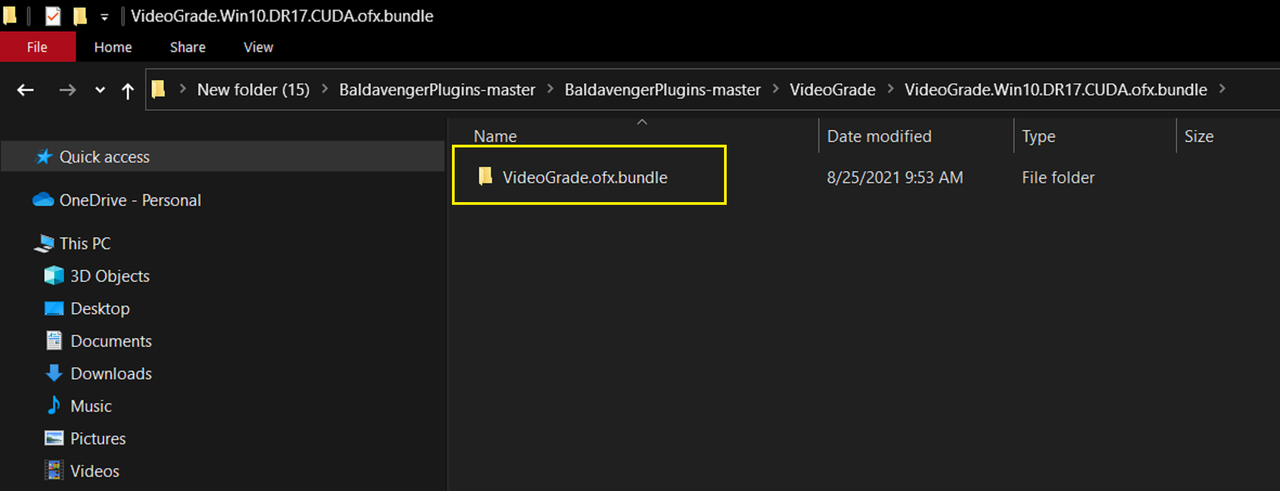
Dont use this folder below, use the one inside of this one and copy that folder to the appropriate OSX directory.

8.png


9.png

Screenshot-8727.png


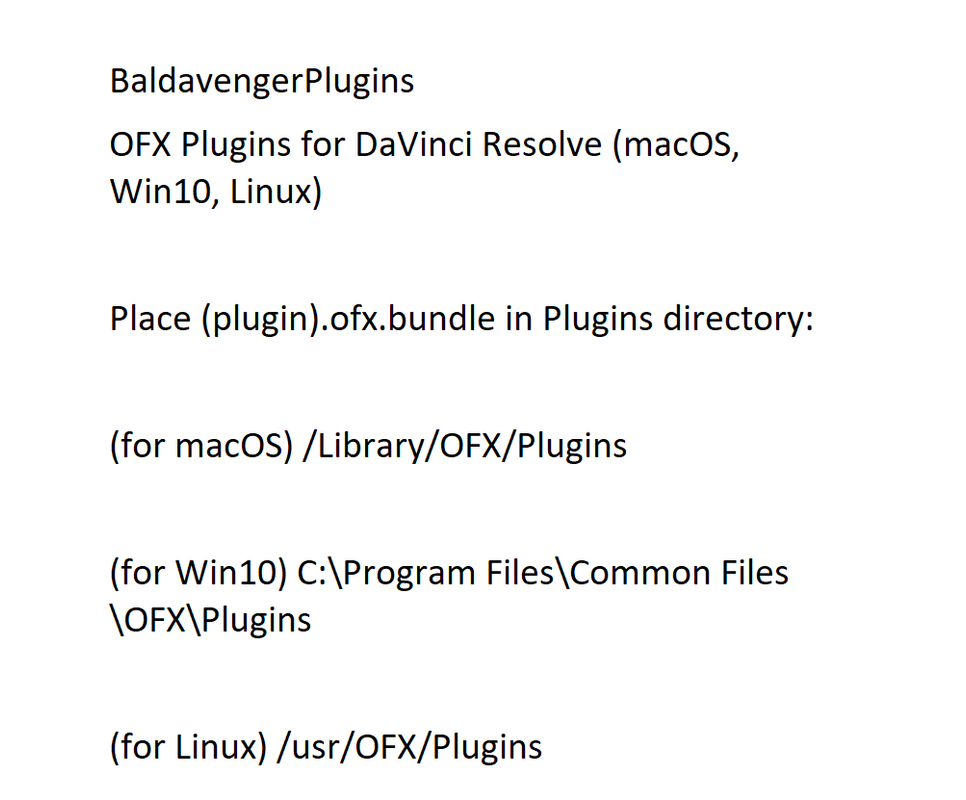
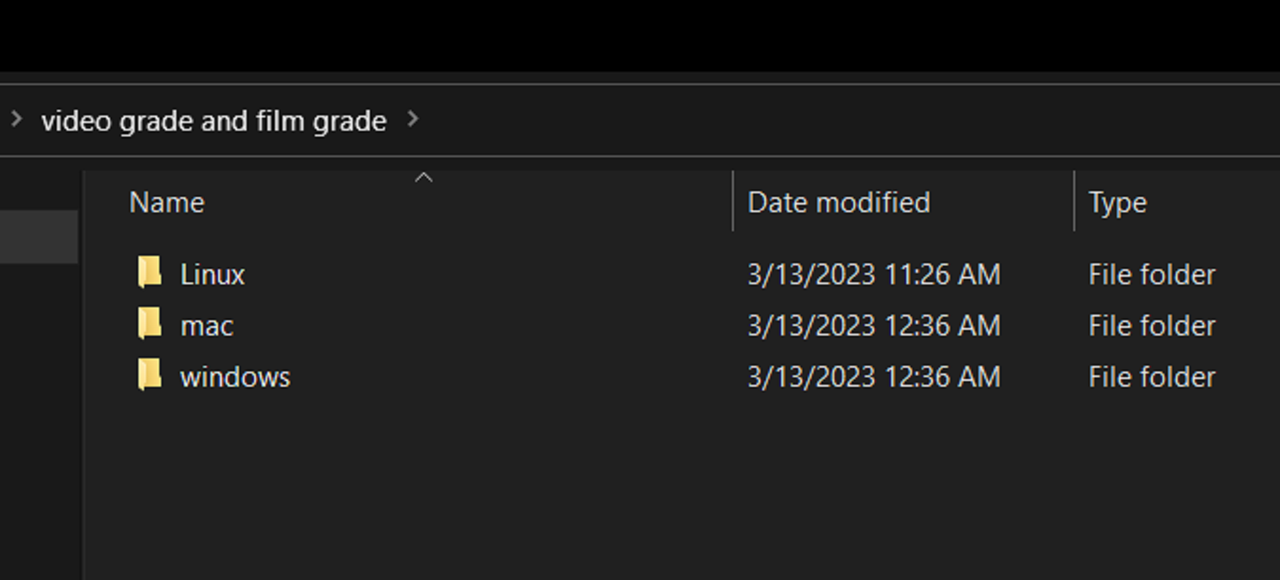
To save you all of the trouble above, I extracted the appropriate folders for the DR17 versions of both "VideoGrade" and "FilmGrade" and put them all into a Zip file and Uploaded it to SendGB.

VideoGrade and FilmGrade for Windows 10, Mac and Linux-
sendGB-1.7MB
https://sendgb.com/BuqFkJ1MDiO

Screenshot-8728.png


Screenshot-8738.png


In Davinci Resolve

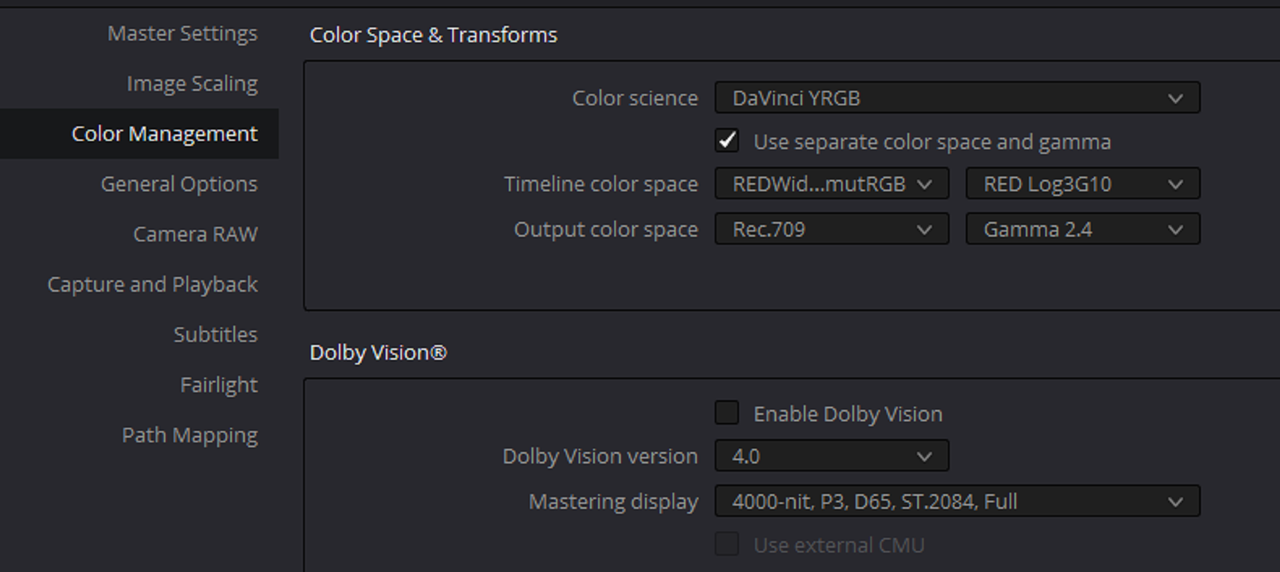
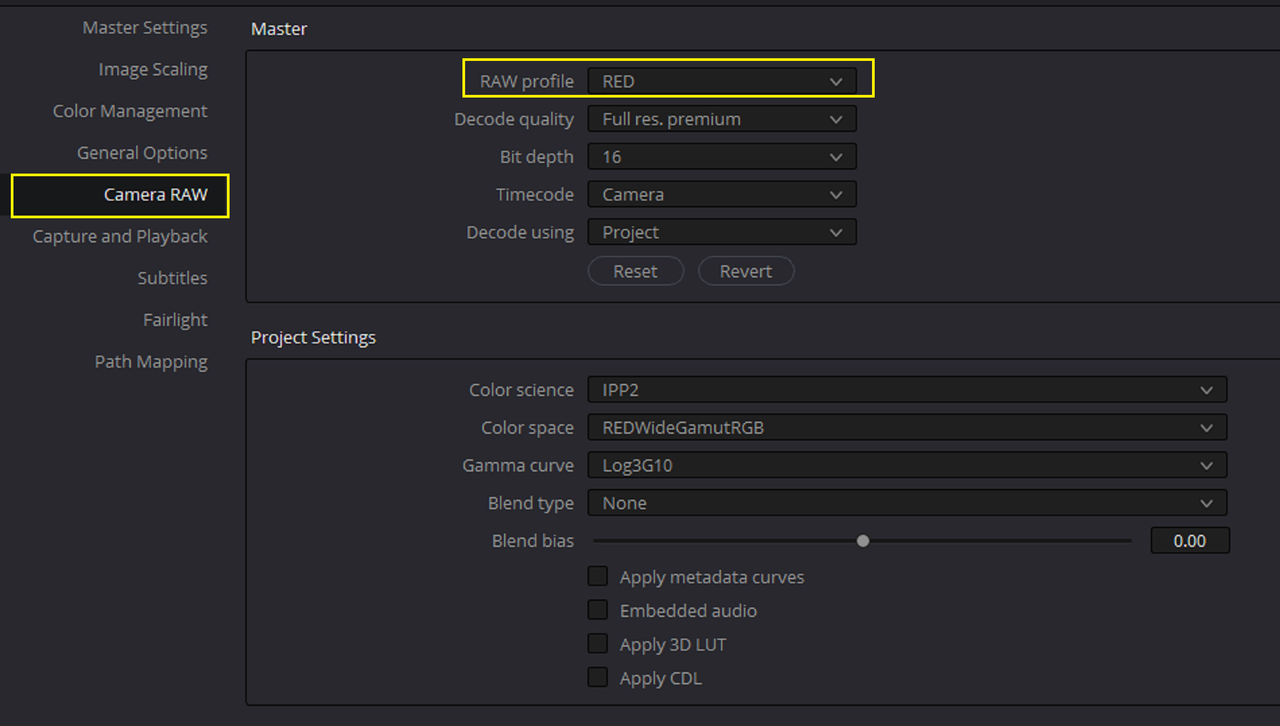
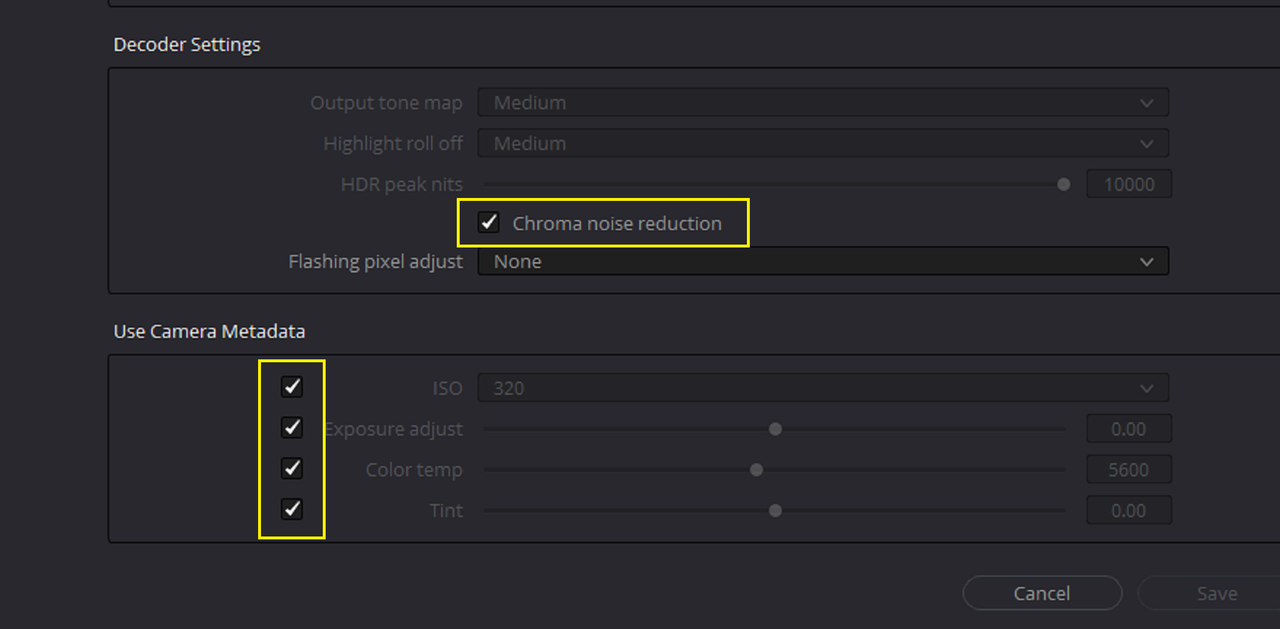
Red IPP2 Workflow

11a.png

Screenshot-8696.png

Screenshot-8695.png


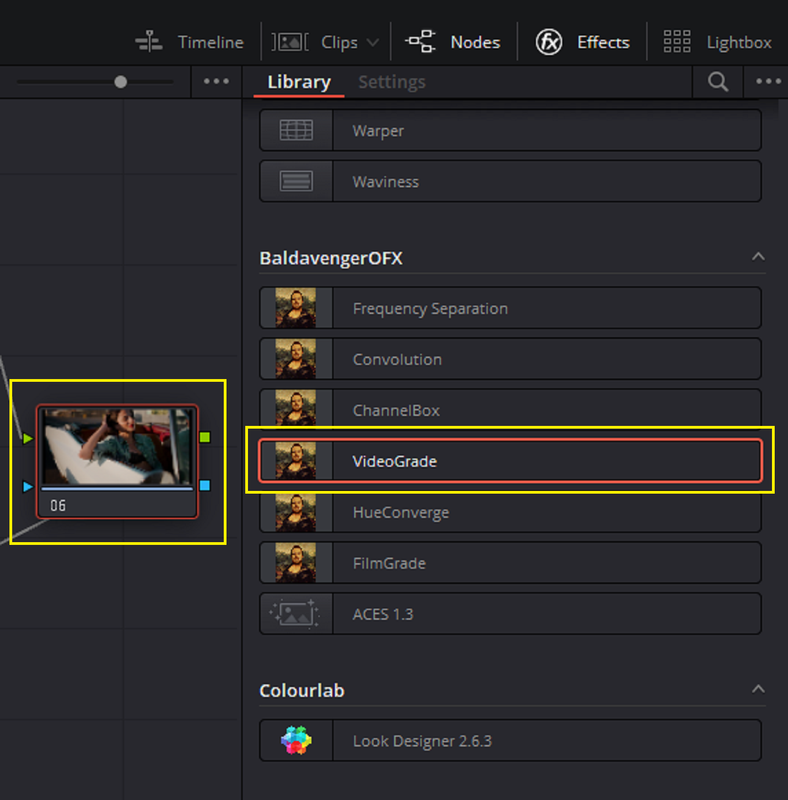
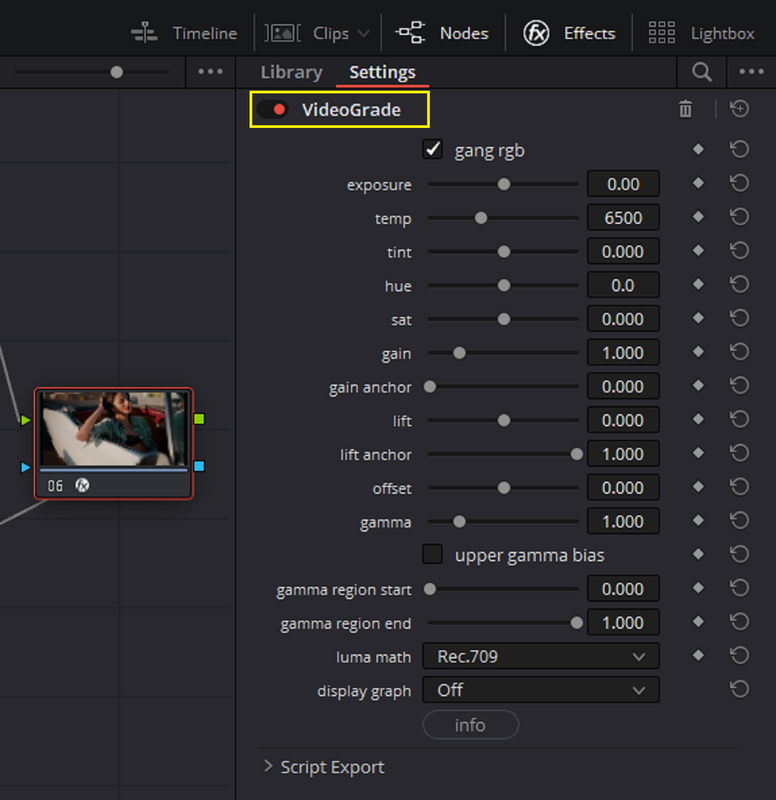
Add a Node and apply the "VideoGrade" or "FilmGrade" OFX to it

10.png

11.png


Grade with VideoGrade for Skintone and Saturation

Screenshot-8745.png


Screenshot-8740.png


With VideoGrade "Enabled"

Screenshot-8741.png


With VideoGrade "Disabled"


Screenshot-8742.png


EXAMPLE 2

Screenshot-8755.png

Screenshot-8756.png

Screenshot-8757.png


Screenshot-8759.png


Screenshot-8758.png


I included FilmGrade if you want to try it out. You can even export the final grade from FilmGrade out as another DCTL


12.png


13.png


14.png
 
Last edited:
Back to Basics

If you didn't want to worry with HALD files and DCTLs you could just use the regular "meat and potatoes" tools already in Resolve


Settings

1.png

2.png

3.png


4.jpg


5.png


5a.png


6.png


7.png


8.jpg


Screenshot-8781.png


10.png


11.png


12.png


122.png


8.jpg
 
Last edited:
Day 2 - ChatGPT for Colorists and Color Scientists

By
Colour Training


00:00 - 00:51 Countdown
00:51 - 07:42 ChatGPT for Colorists and Color Scientist
07:42 - 16:11 Learning
16:11 - 20:32 Building Custom DCTLS
20:32 - 37:40 Building 3DLUTS
37:40 Conclusion
 
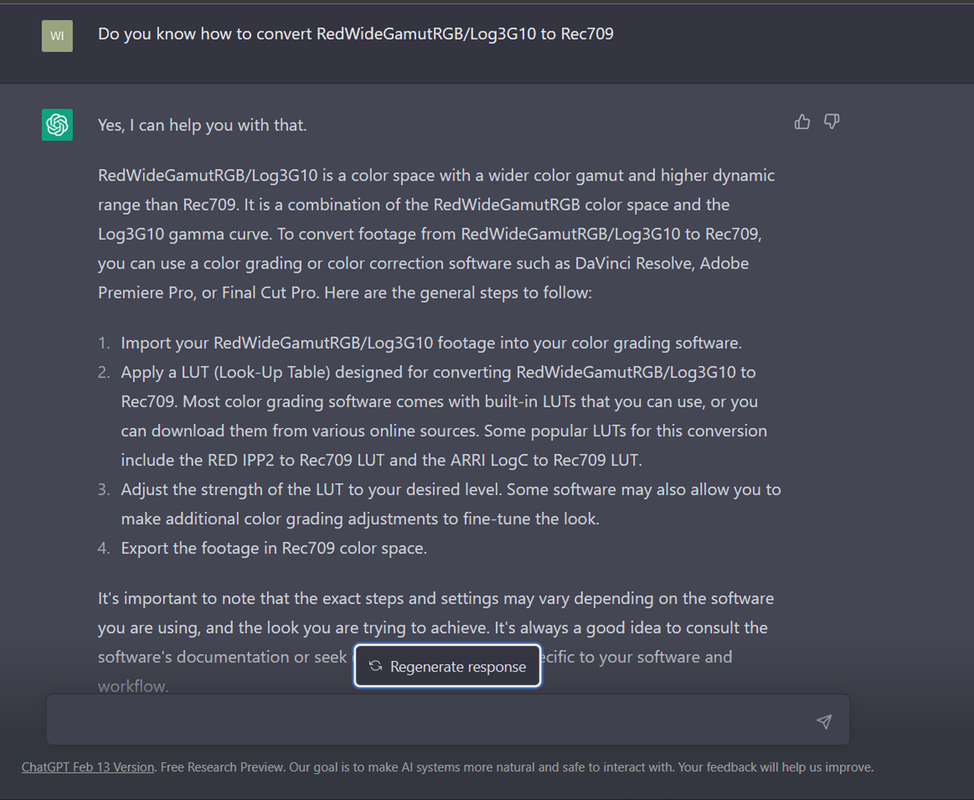
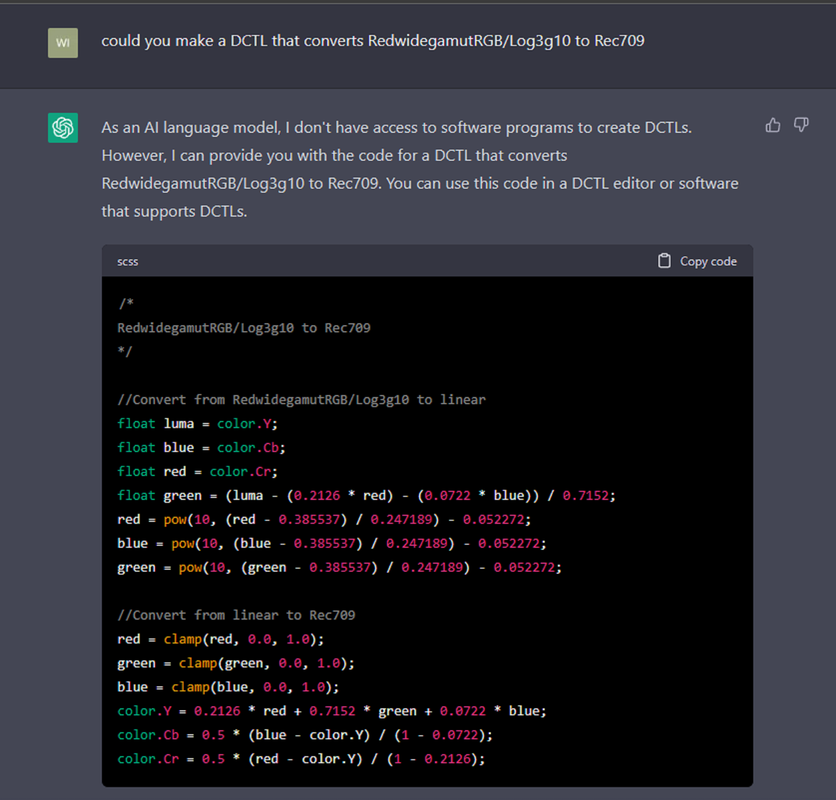
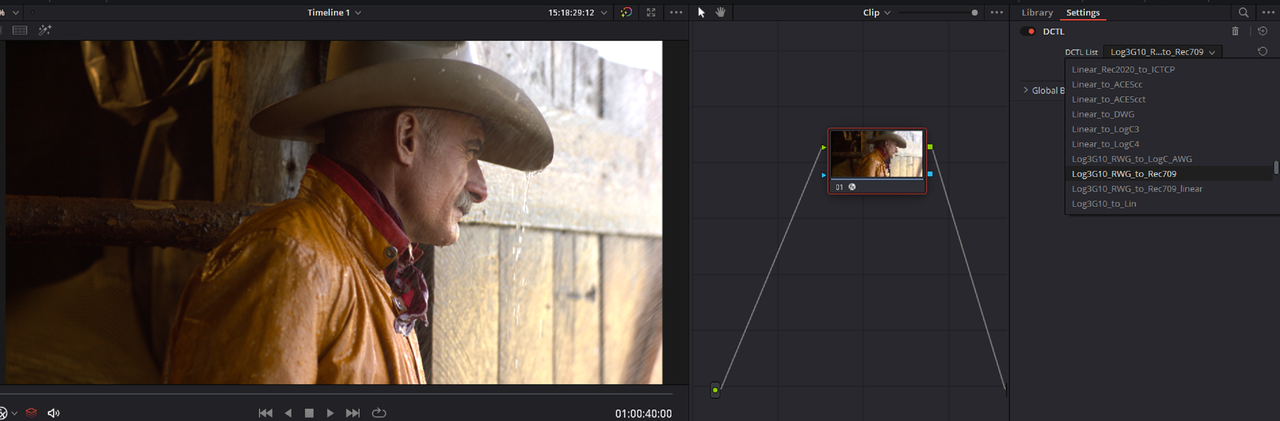
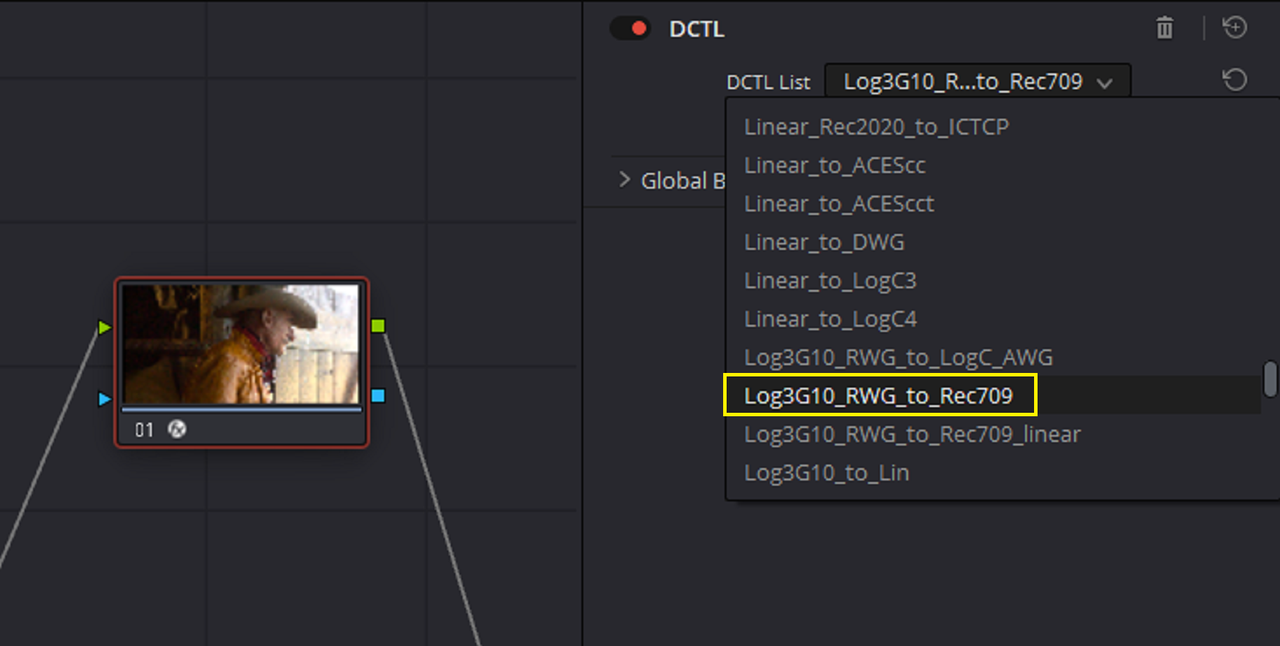
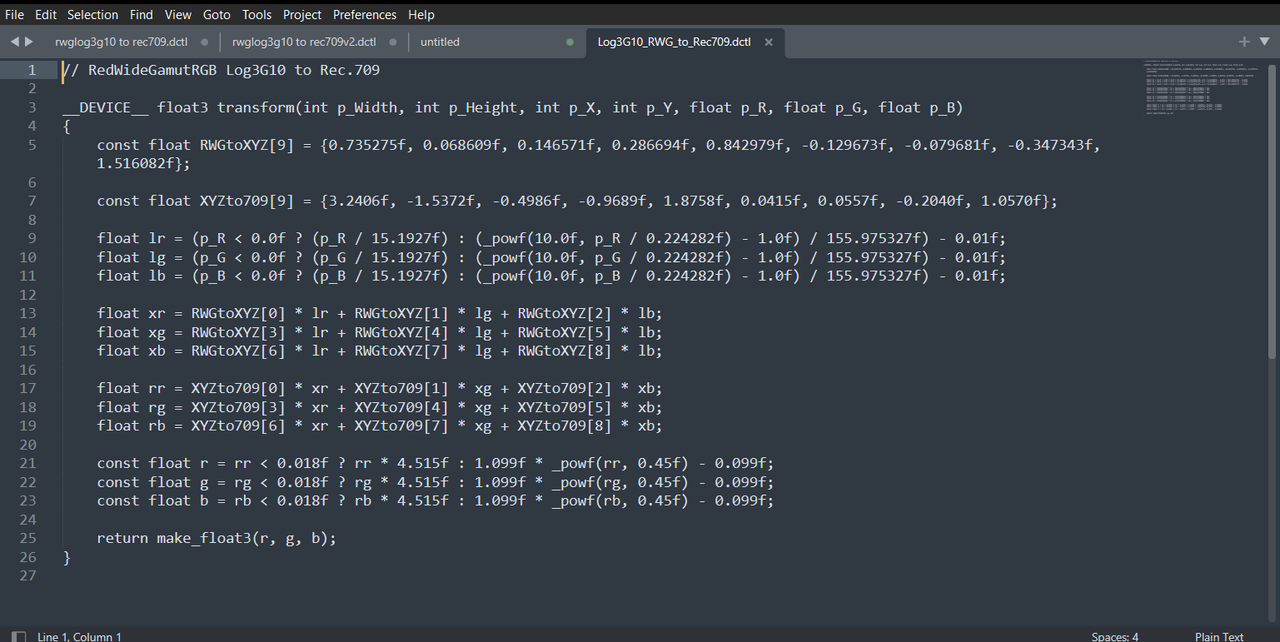
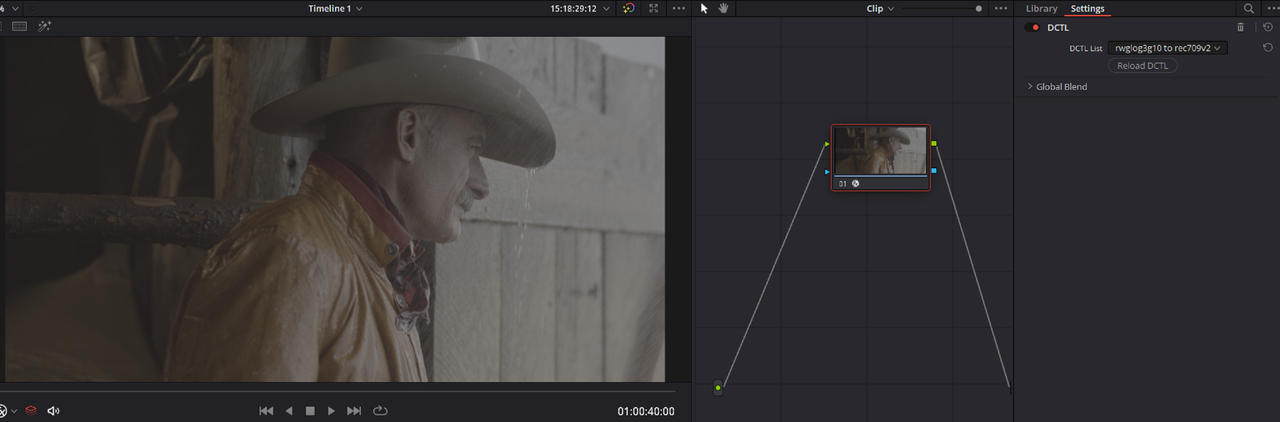
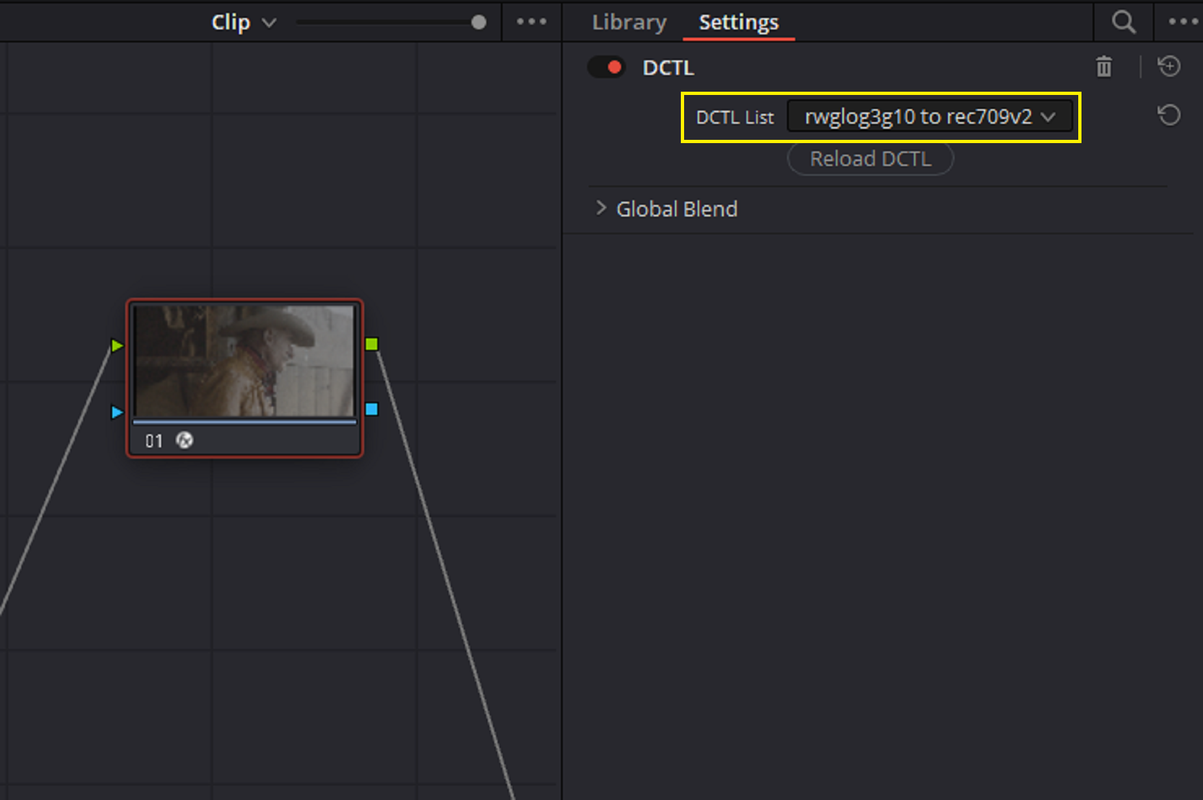
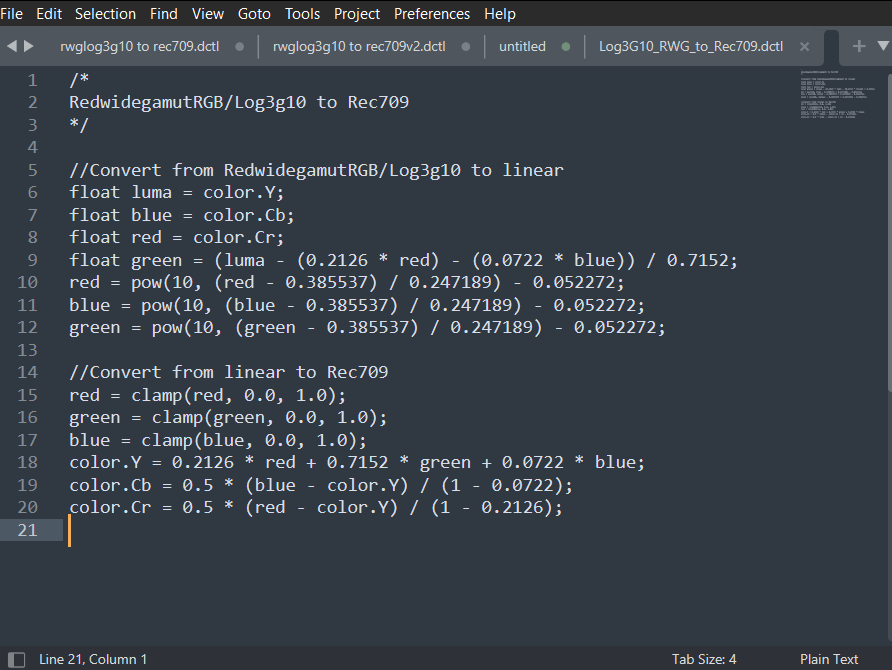
Script to create a DCTL that converts RedWidegamutRGB/Log3g10 to Rec709. However there may be some fine tuning needed.


Screenshot-8793.png
 
I have tinkered with this a bit and the best I can say is use it with EXTREME caution. Simple things tend to work, but the second you turn a bit, it's the second you are very literally hurting your material. It's improved from where it was, but be cautious.
 
I have tinkered with this a bit and the best I can say is use it with EXTREME caution. Simple things tend to work, but the second you turn a bit, it's the second you are very literally hurting your material. It's improved from where it was, but be cautious.

Phil,

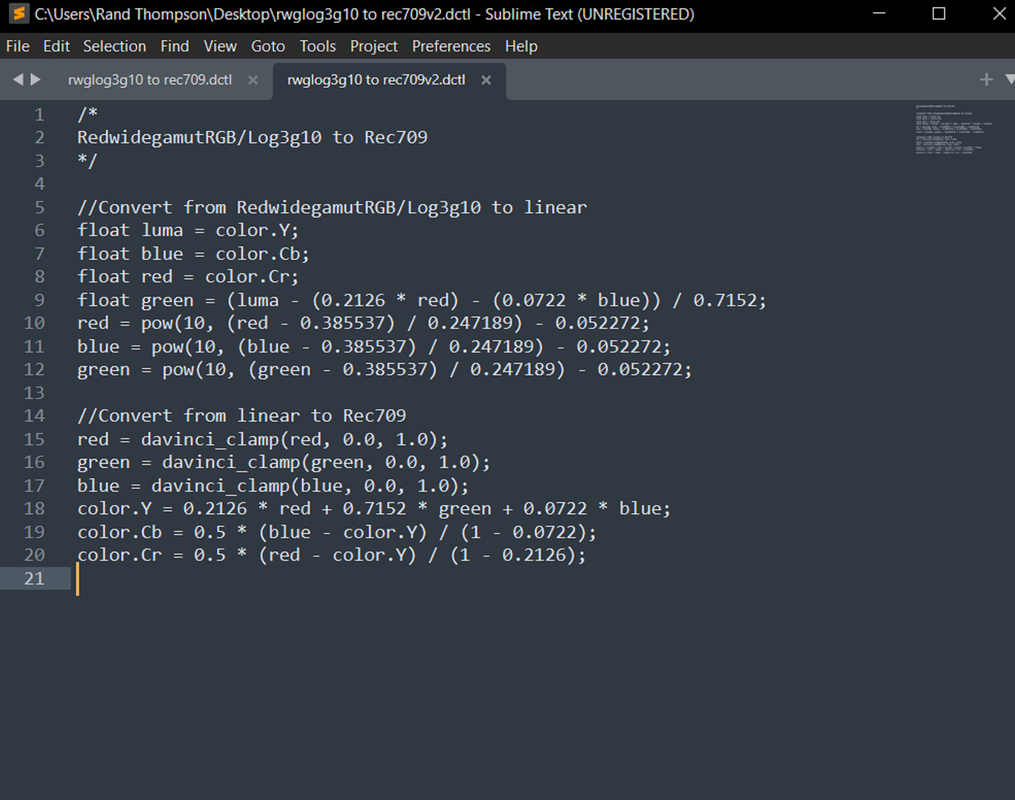
Yeah!, it seems currently that if you don't give it a very precise prompt, it leaves out some critical part of the script that is needed for any DCTL or 3Dlut to work properly in Davinci Resolve.

I used "Sublime Text" to import the code into and save as a DCTL. However when I imported it into resolve as a DCTL it didn't work. I know I probably neeed to know more about script and ChatGPt requires more detailed prompts.

link to website
Sublime Text - Text Editing, Done Right


Screenshot-8794.png
 
Last edited:
Yes. That is correct regarding the headers needed most of the time. But the weirdest aspect is we don't know where the data comes from and in some cases the math has been actually wrong. I'm certain that will get tightened up, but it's neato that it does anything close at the moment.
 
Yes. That is correct regarding the headers needed most of the time. But the weirdest aspect is we don't know where the data comes from and in some cases the math has been actually wrong. I'm certain that will get tightened up, but it's neato that it does anything close at the moment.

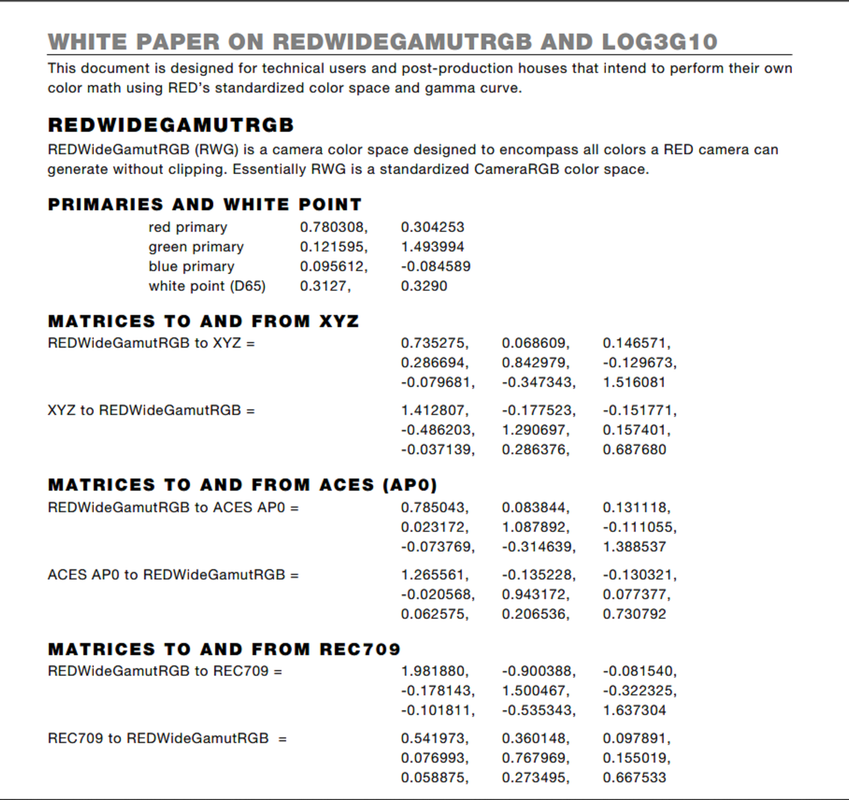
I was wondering the same thing where is it coming from? I thought maybe it had all the technical transformational info from all the manufacturers Whitepapers of their Log/linear conversions or something like that.

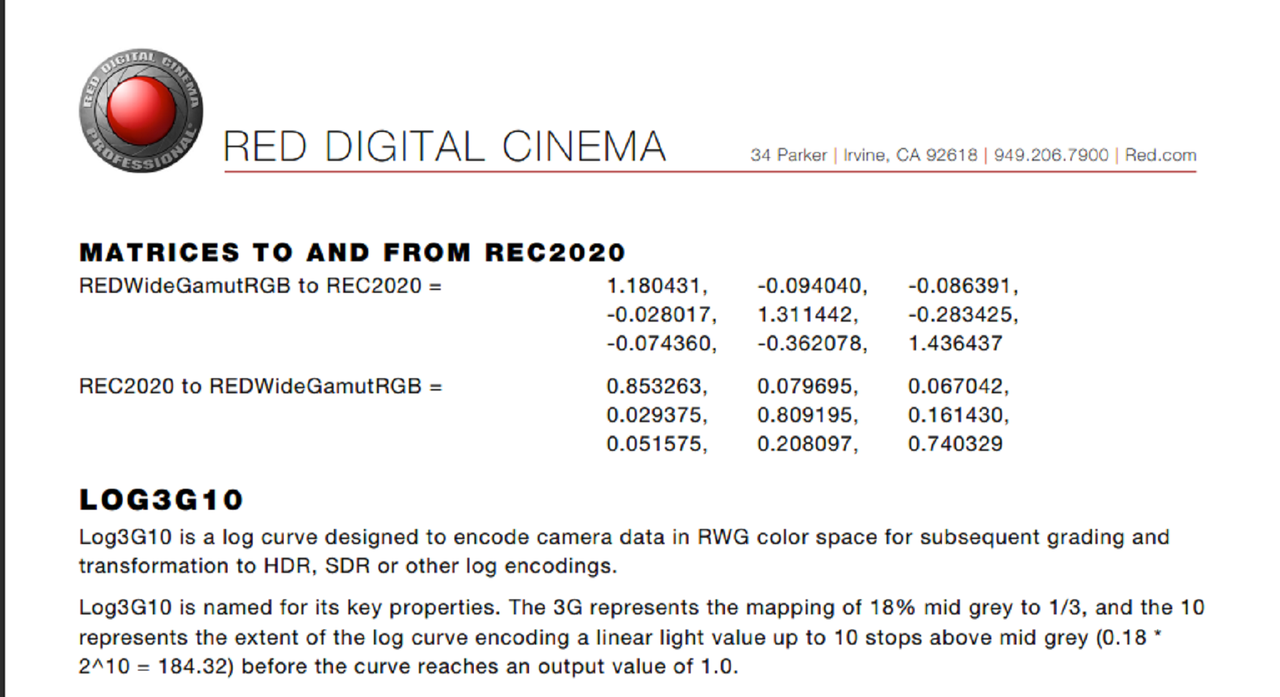
White Paper On REDWIDEGAMUTRGB And LOG3G10
Downloads Details (red.com)


Screenshot-8795.png

Screenshot-8796.png
 
I already have a DCTL that converts Log3g10/RWG to Rec709 that works( without RED's Out of gamut mapping and Highlight Roll-Off). I Copied that DCTL from the Lut Folder and imported it into Sublime Text editor and the script is completely different from the script that I used to make mine.


1.png


2.png


3.png


4.png


5.png


6.png
 
Day 3 - Advanced Color Management for Adobe Premiere

by
Colour Training


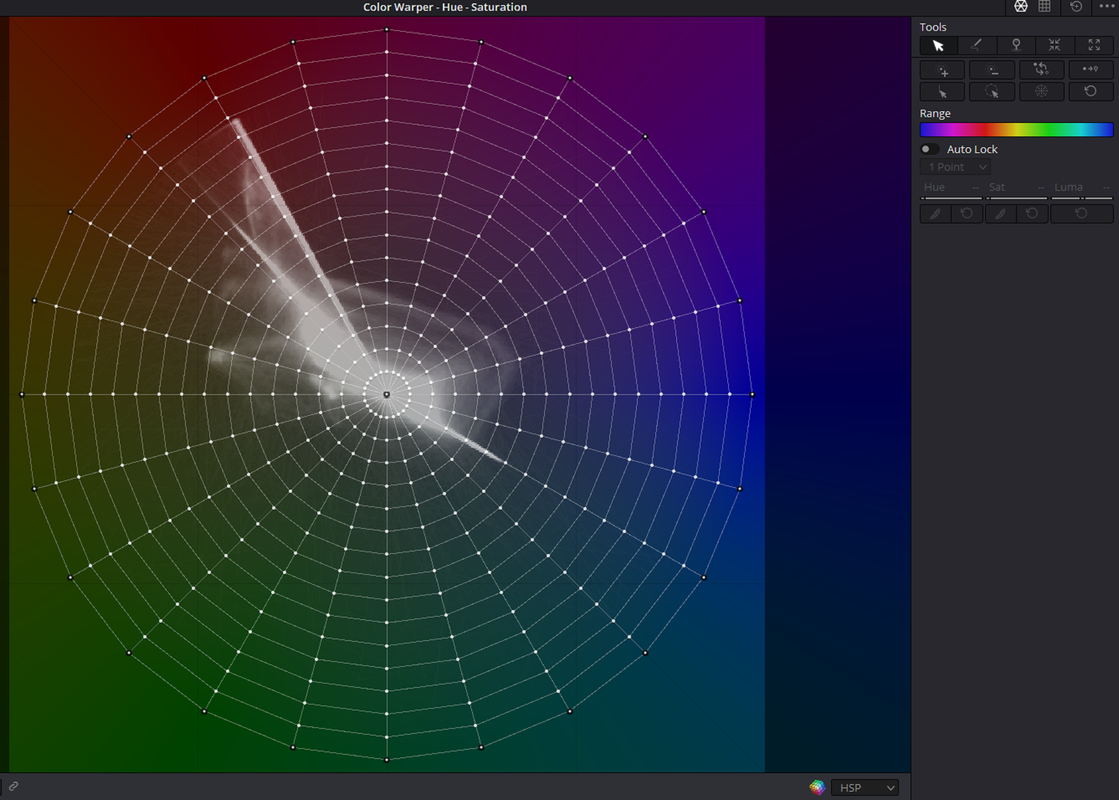
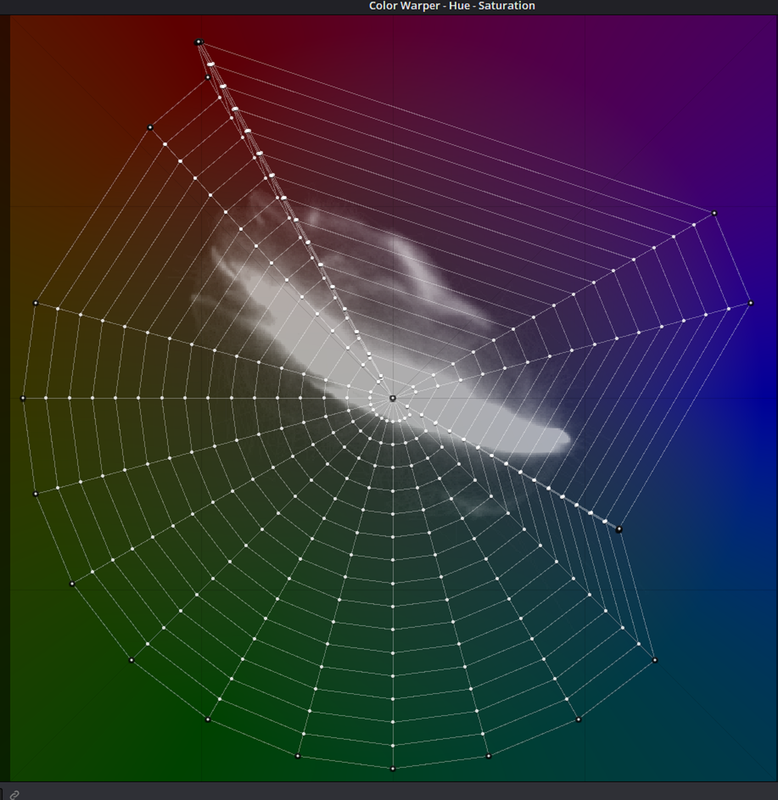
Make Entire Grade and all Corrections with the Color Warper

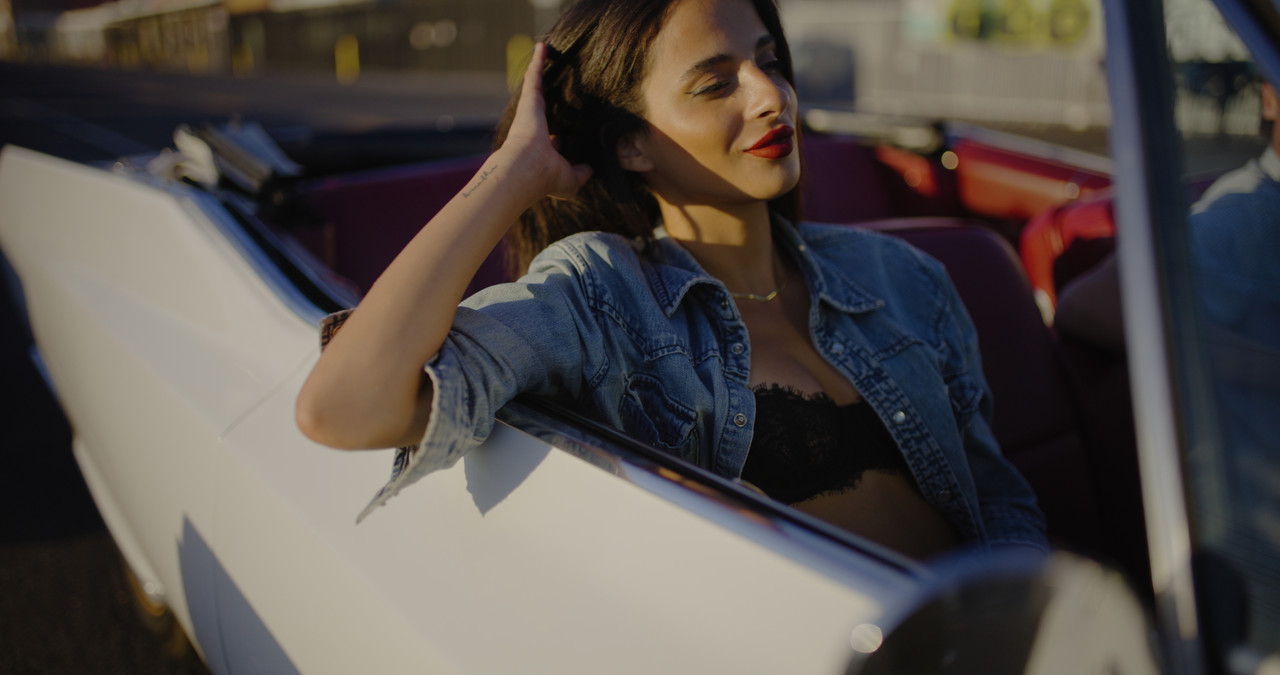
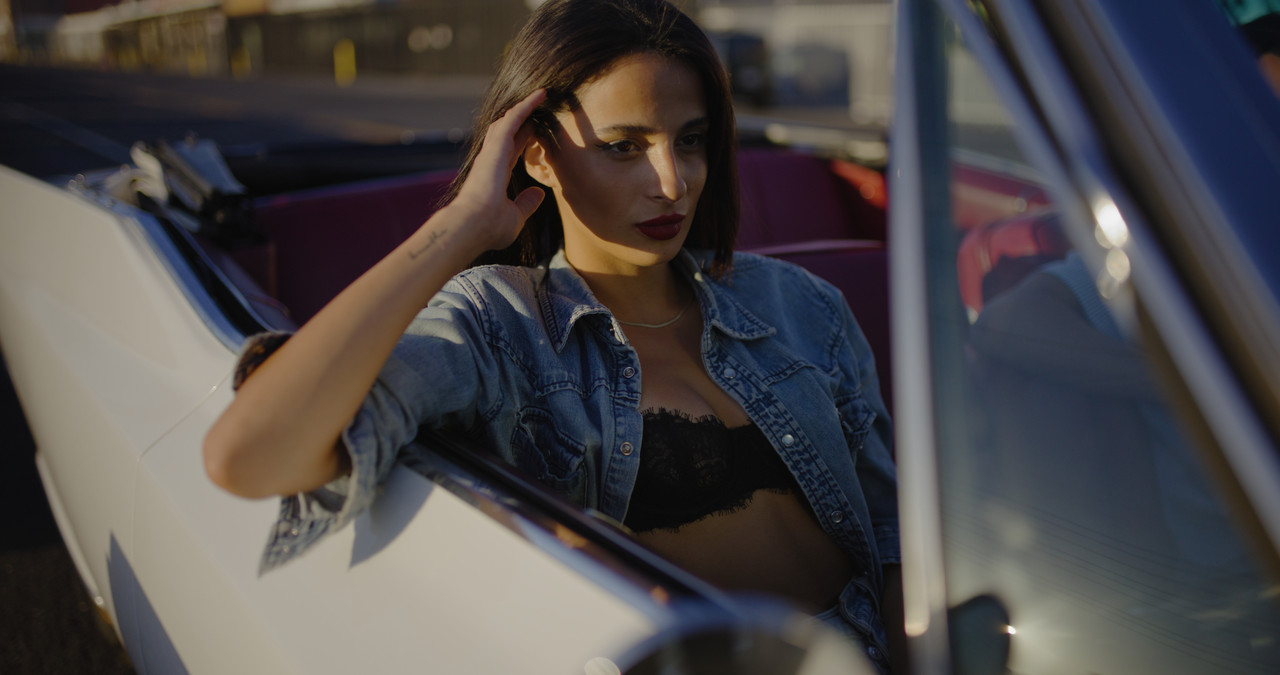
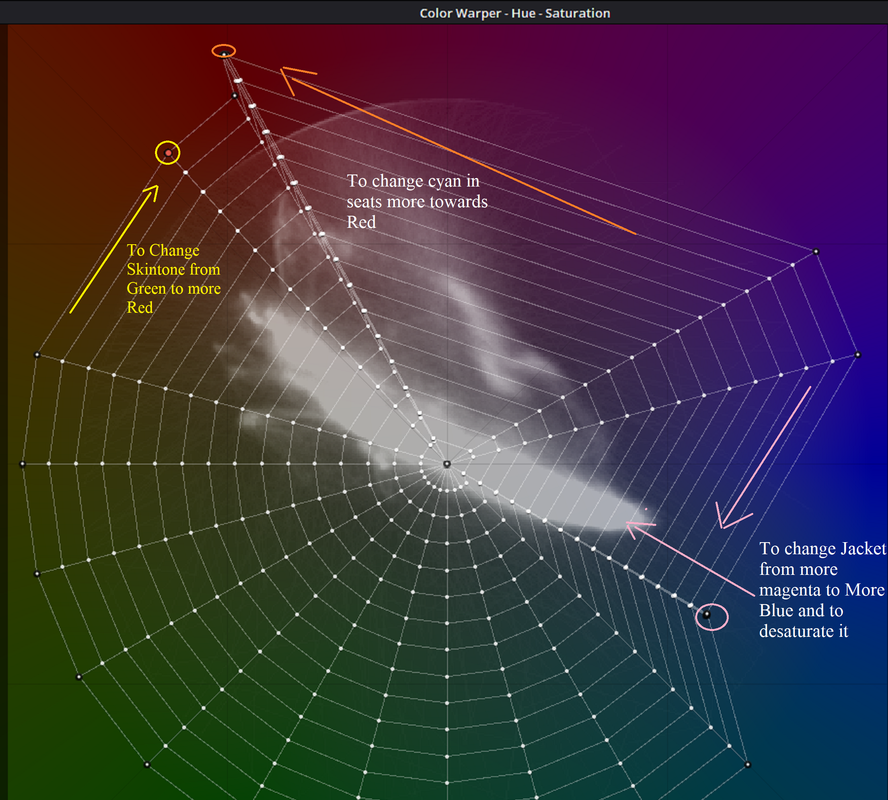
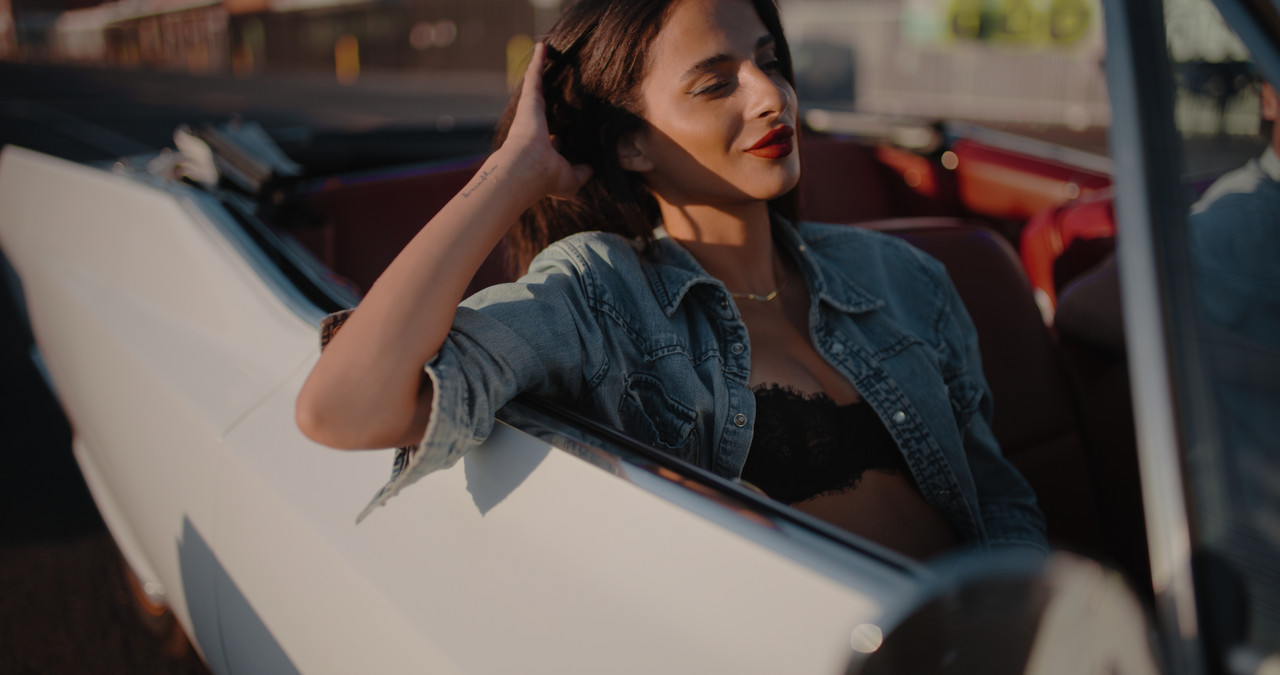
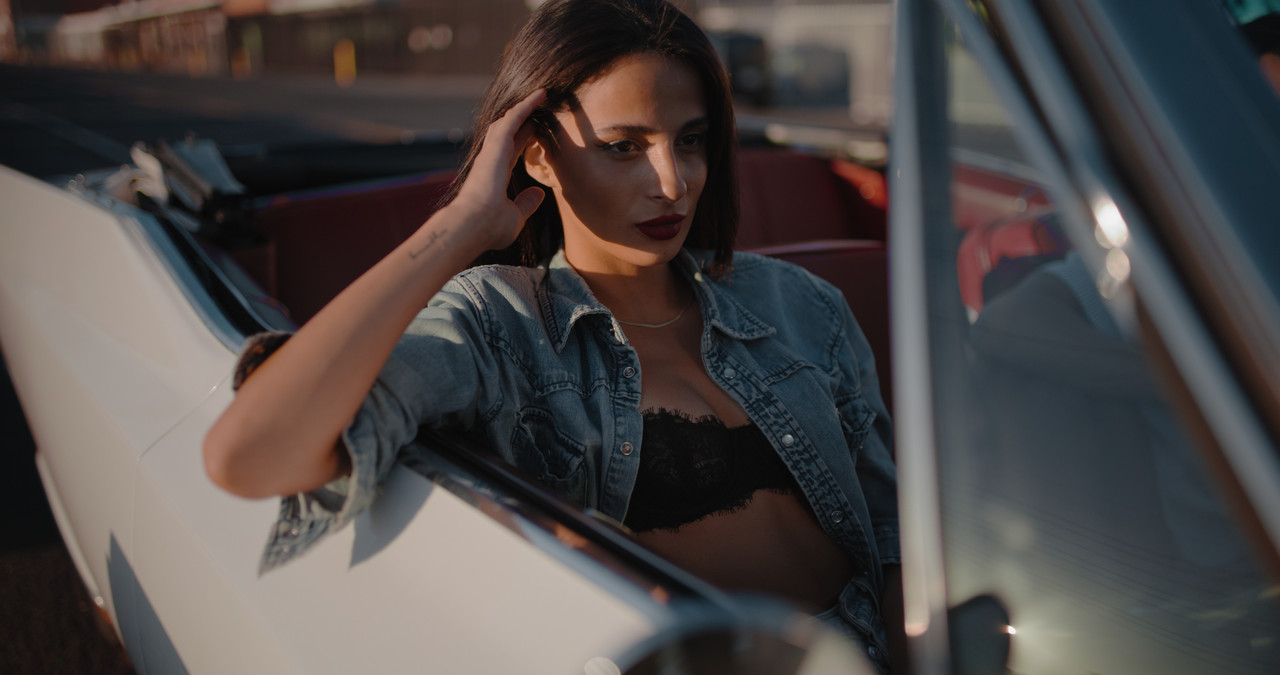
In the Image below of the girl and guy in the Cadillac, after contrast has been added, there is yellow in their skintones that you may or may not want to correct. There is a slight Cyan cast on the red car seats and there is a Purple/Magenta cast in the Cars chrome and on the Girl's blue jacket.
So what I want to do with the Color Warper is to correct for the Yellow skintone, remove the cyan color cast from the car seats and both move the Purple/Magenta color cast in the girl's jacket and in the car's chrome more toward blue and desaturate it.


Settings


2d.png


1.png

2.png

2a.png


2b.png


3.jpg

3a-before-color-warper-1-3-13.jpg


With Color Warper Corrections

5a.png


5b.png

5c.png

6.jpg

6aafter-color-warper-1-3-14.jpg
 
Color warper is cool, but careful on those extremes, easiest way to induce banding in footage right there.
 
Color warper is cool, but careful on those extremes, easiest way to induce banding in footage right there.

Phil,


Yeah, I did notice a tad bit of banding in the darker areas of the seats but I didn't know if that was just noise in the shadows that was there before any grading. And as you stated you can very easily induce banding in the footage if you don't select all or the the proper Hue range to correct.
 
Phil,


Yeah, I did notice a tad bit of banding in the darker areas of the seats but I didn't know if that was just noise in the shadows that was there before any grading. And as you stated you can very easily induce banding in the footage if you don't select all or the the proper Hue range to correct.

I think warper can use an update, there's a few different methods to do this in a "better fashion" via conical spaces and some slightly different math. It's very useful, but be cautious particularly in scene referred workflows and even display/device referred ones.
 
Back
Top