Welcome to our community

Be a part of something great, join today!

  • Hey all, just changed over the backend after 15 years I figured time to give it a bit of an update, its probably gonna be a bit weird for most of you and i am sure there is a few bugs to work out but it should kinda work the same as before... hopefully :)

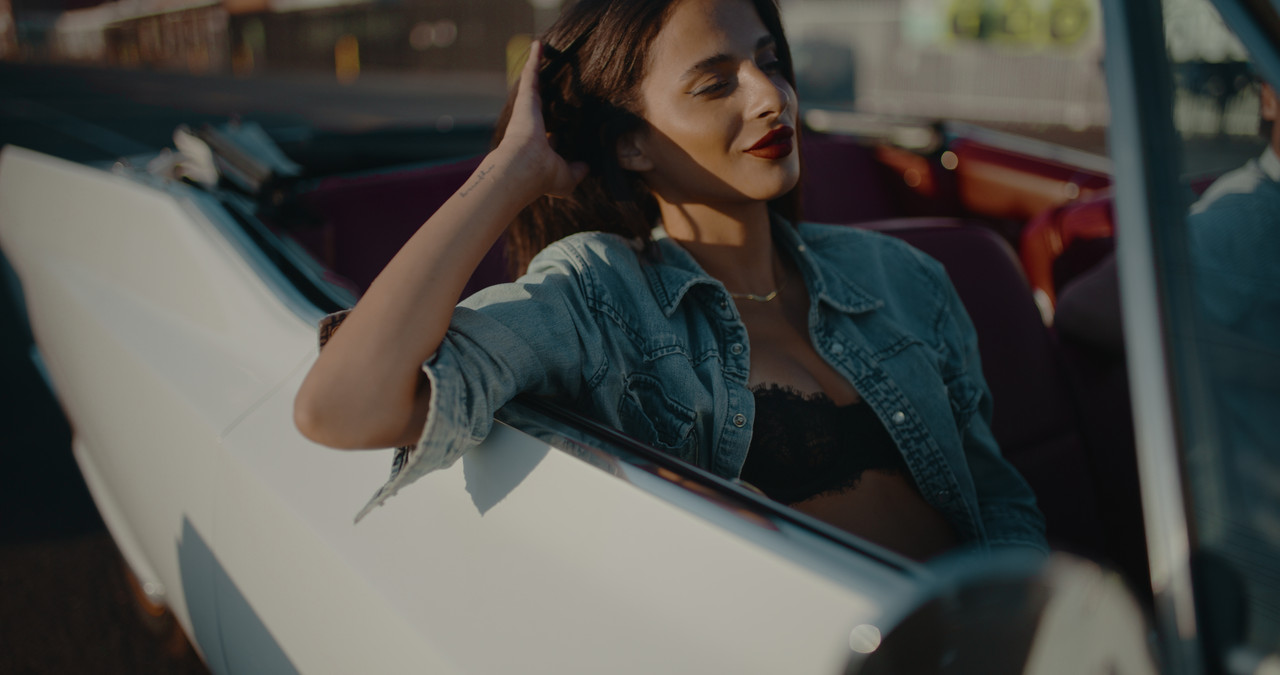
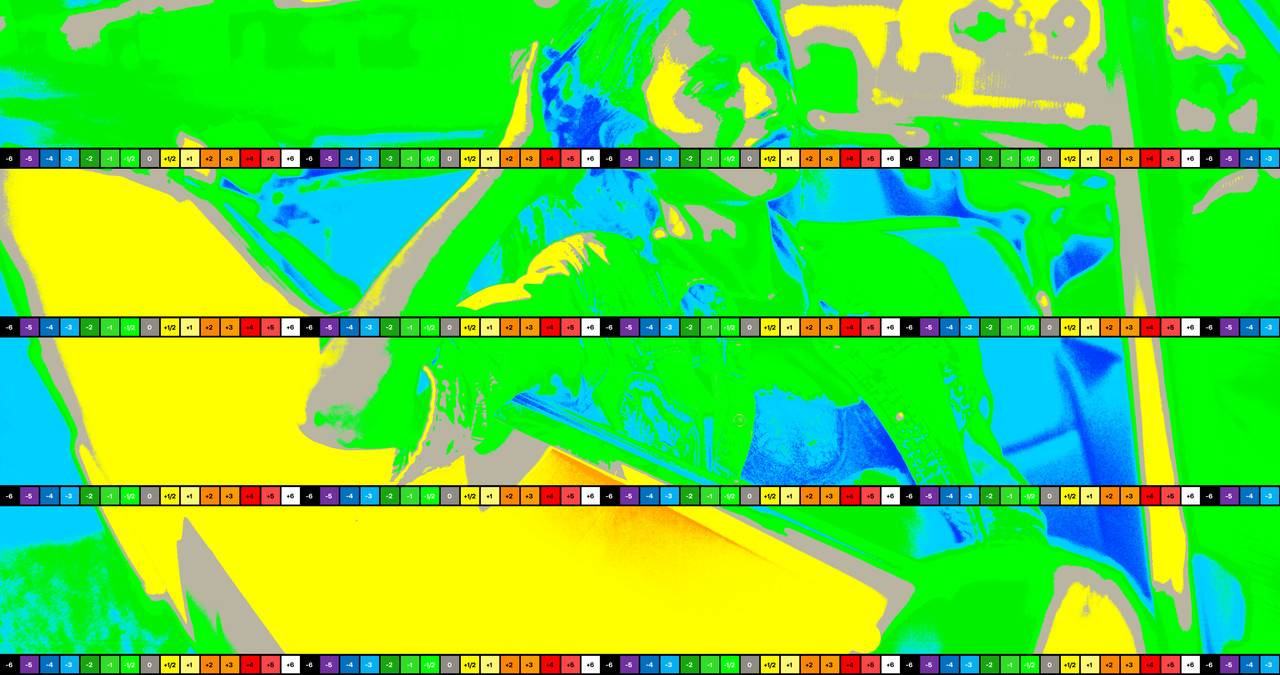
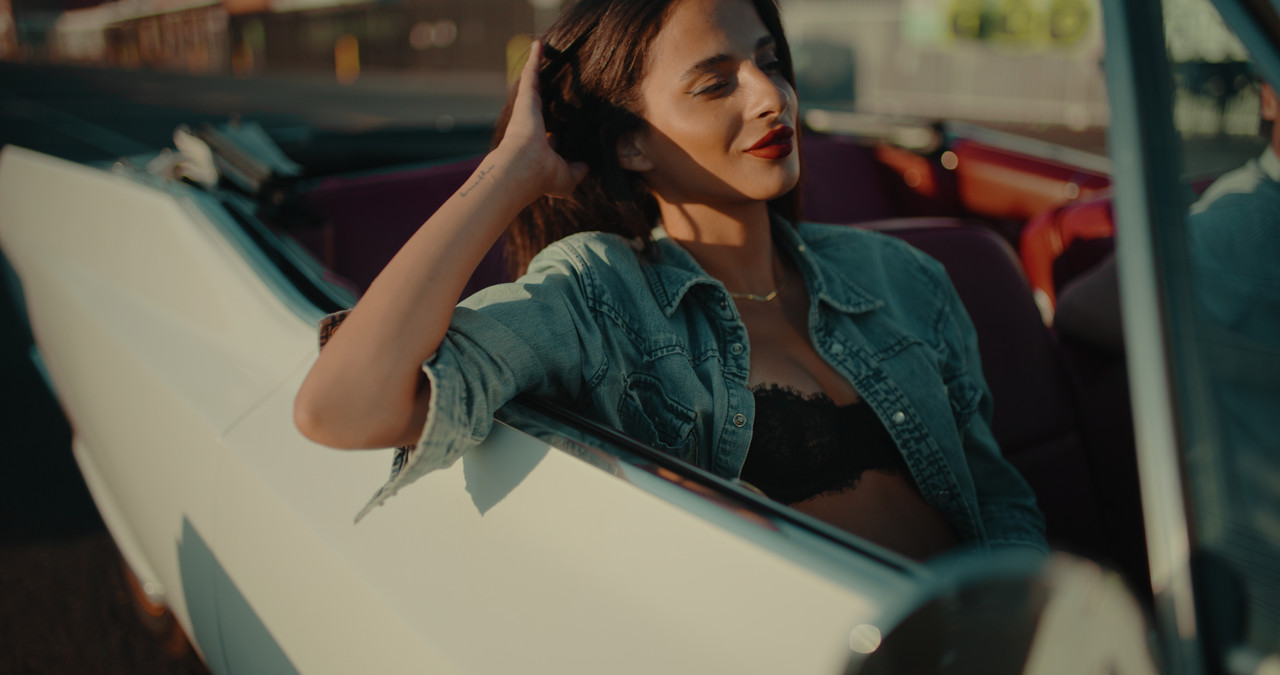
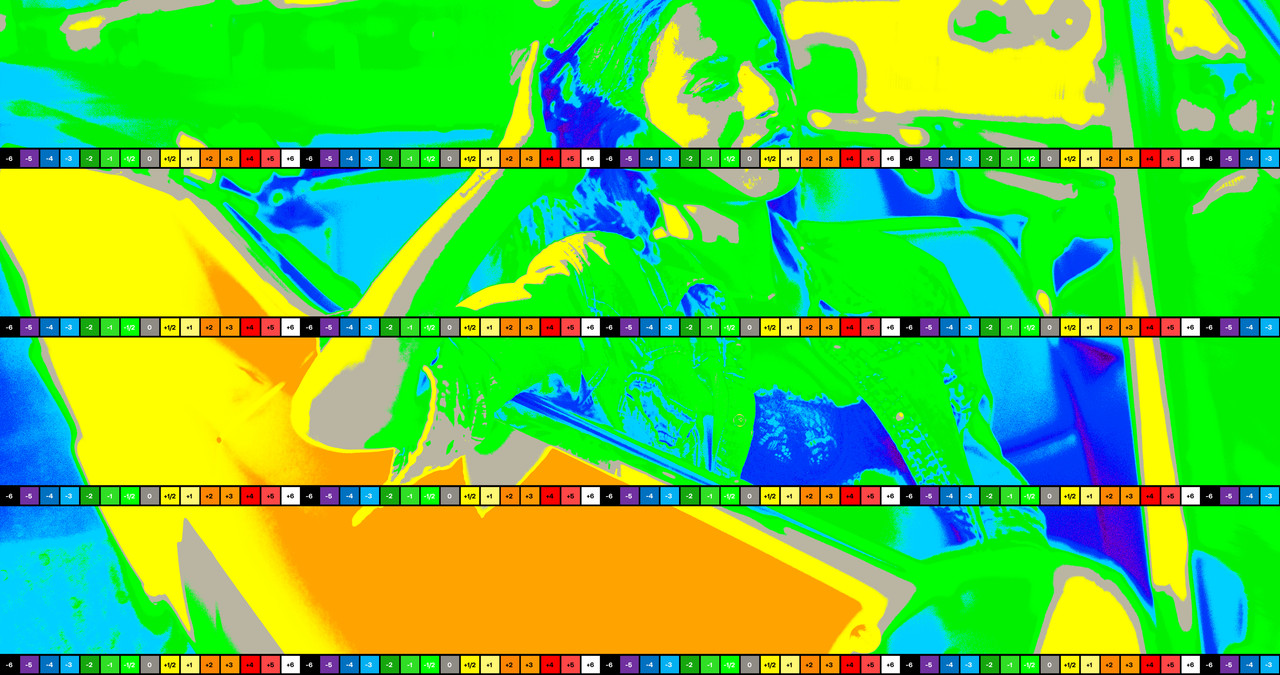
RED V-Raptor vs Alexa 35

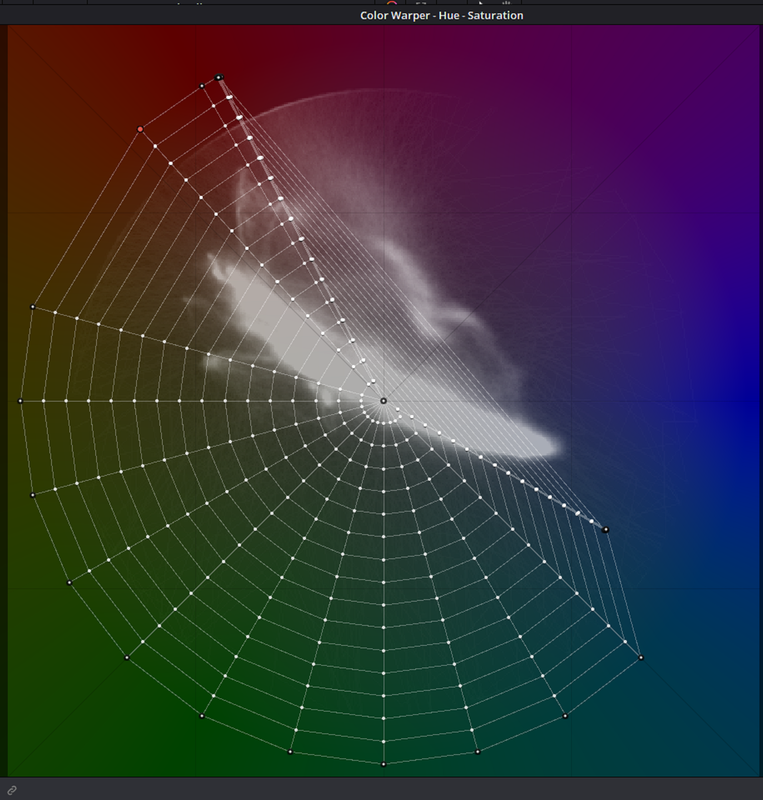
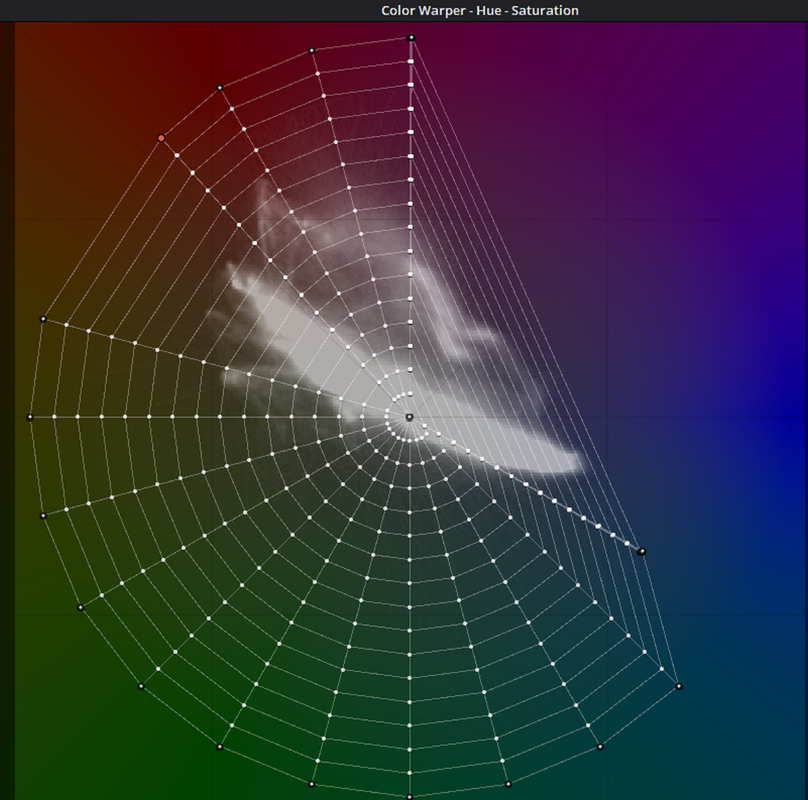
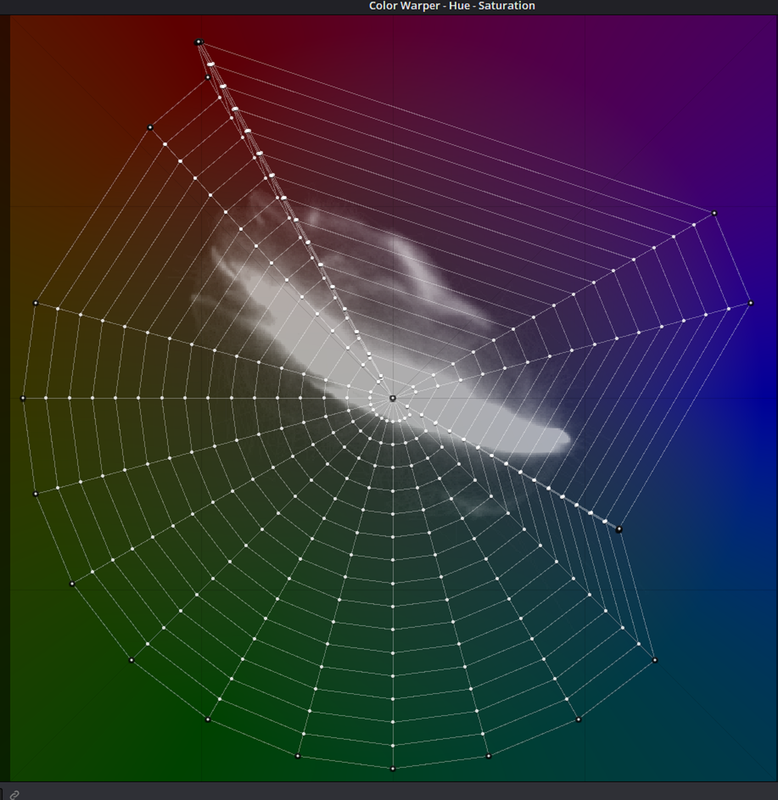
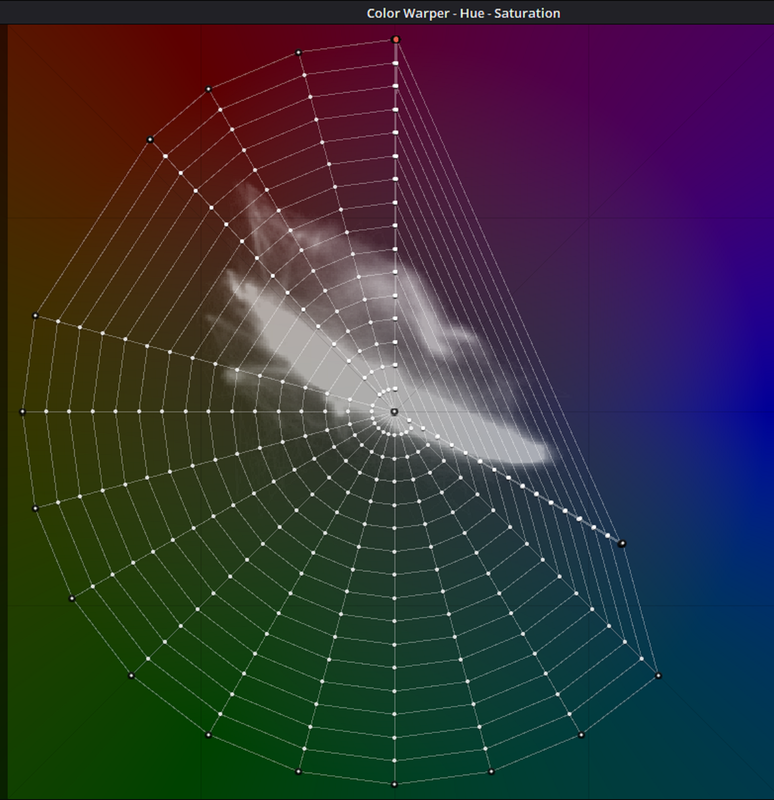
I think warper can use an update, there's a few different methods to do this in a "better fashion" via conical spaces and some slightly different math. It's very useful, but be cautious particularly in scene referred workflows and even display/device referred ones.


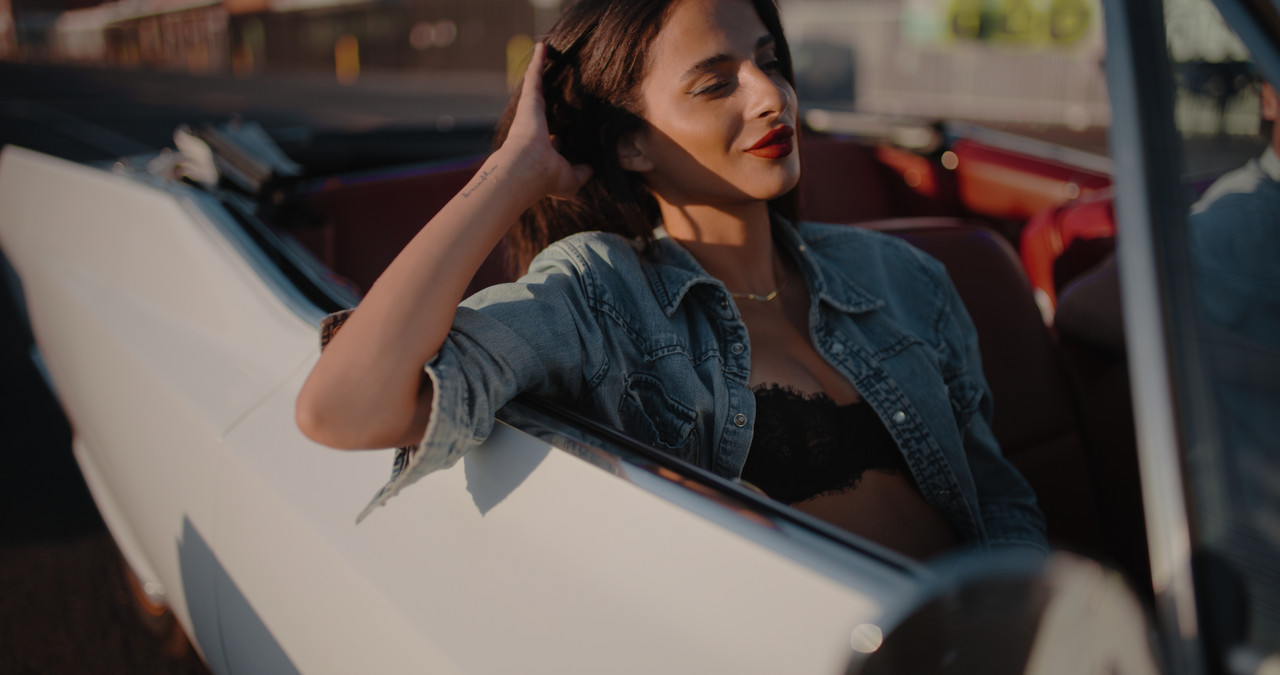
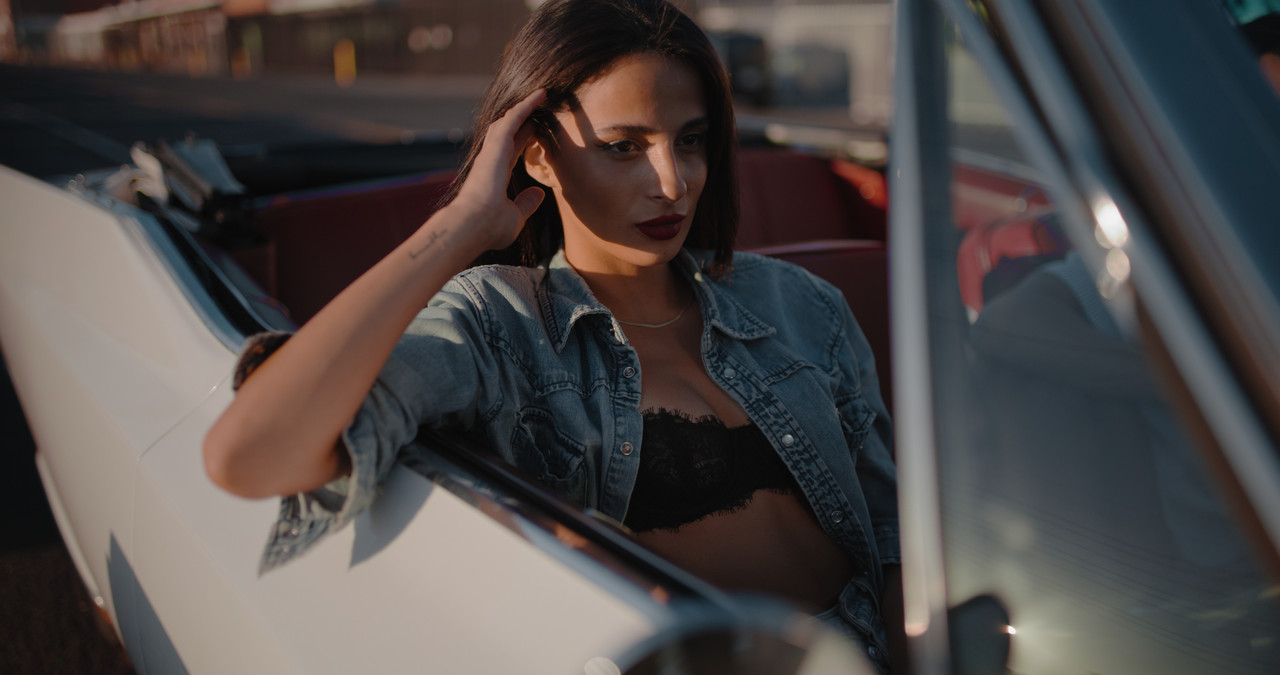
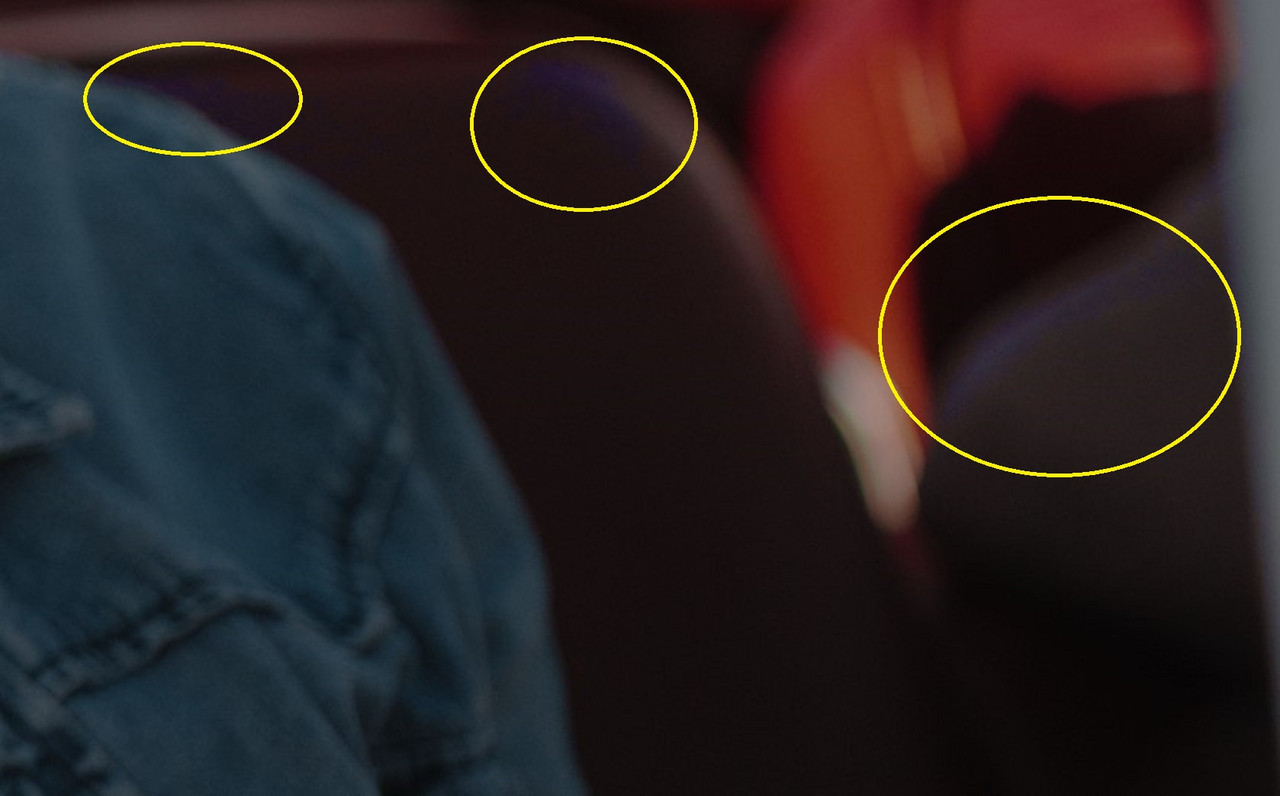
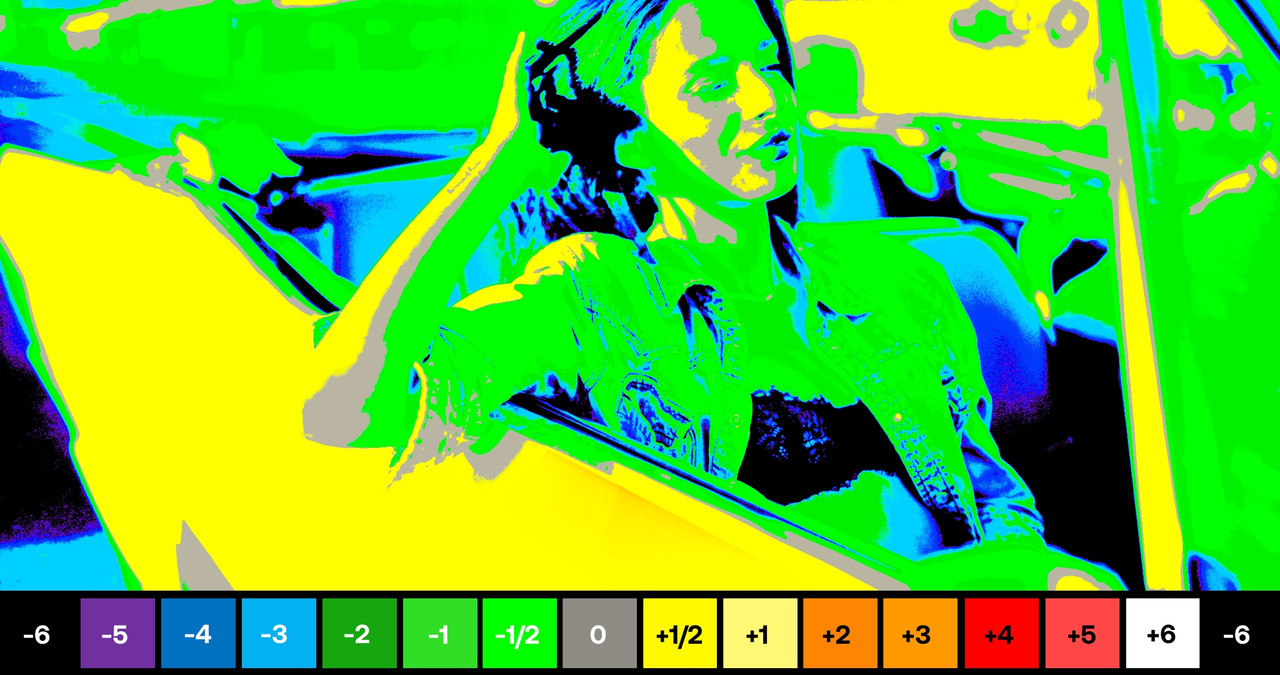
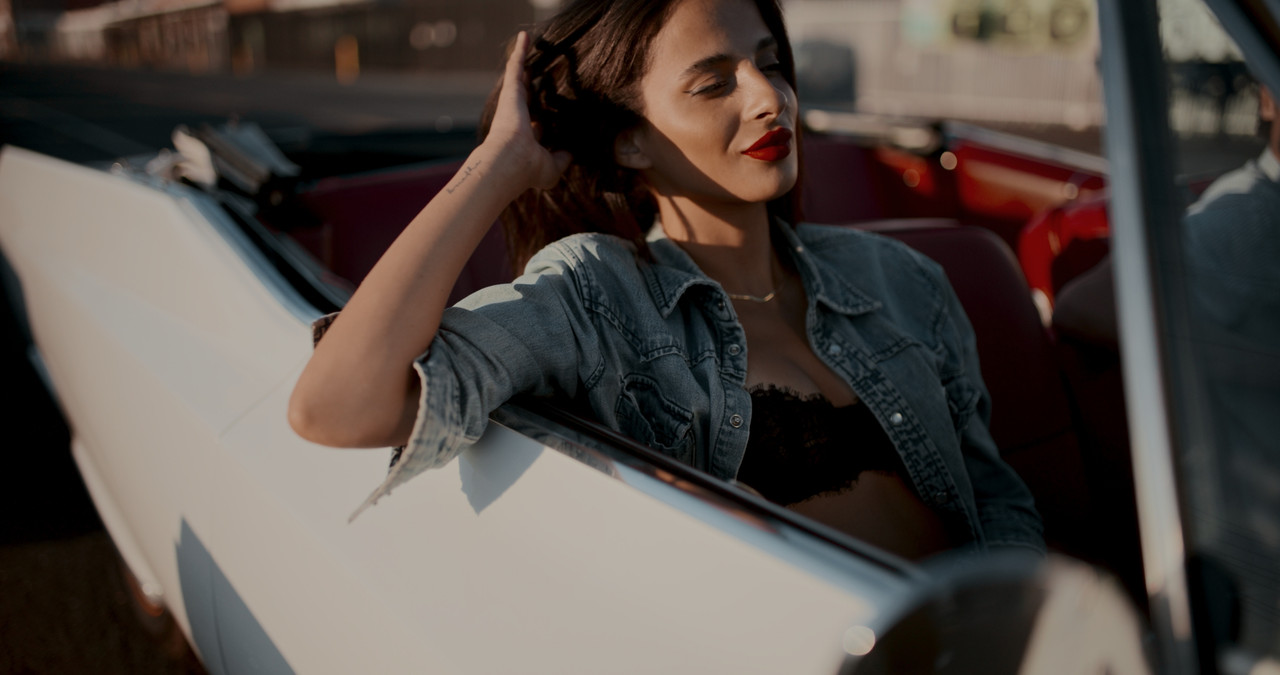
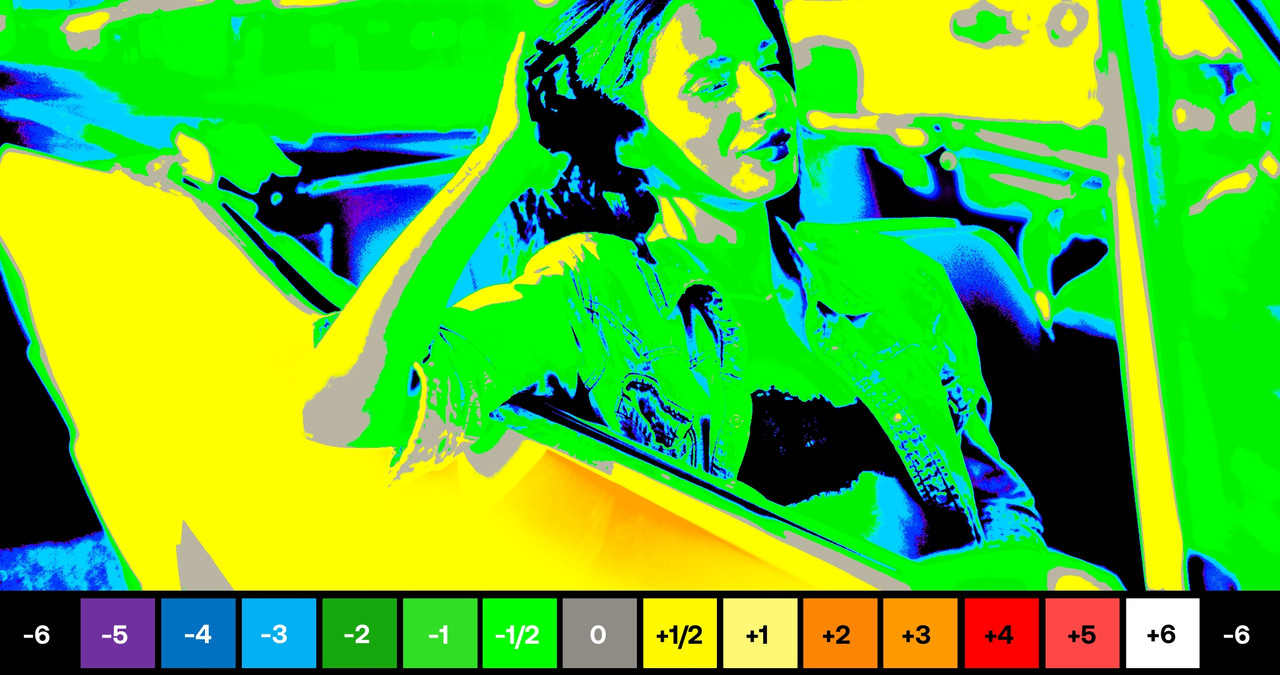
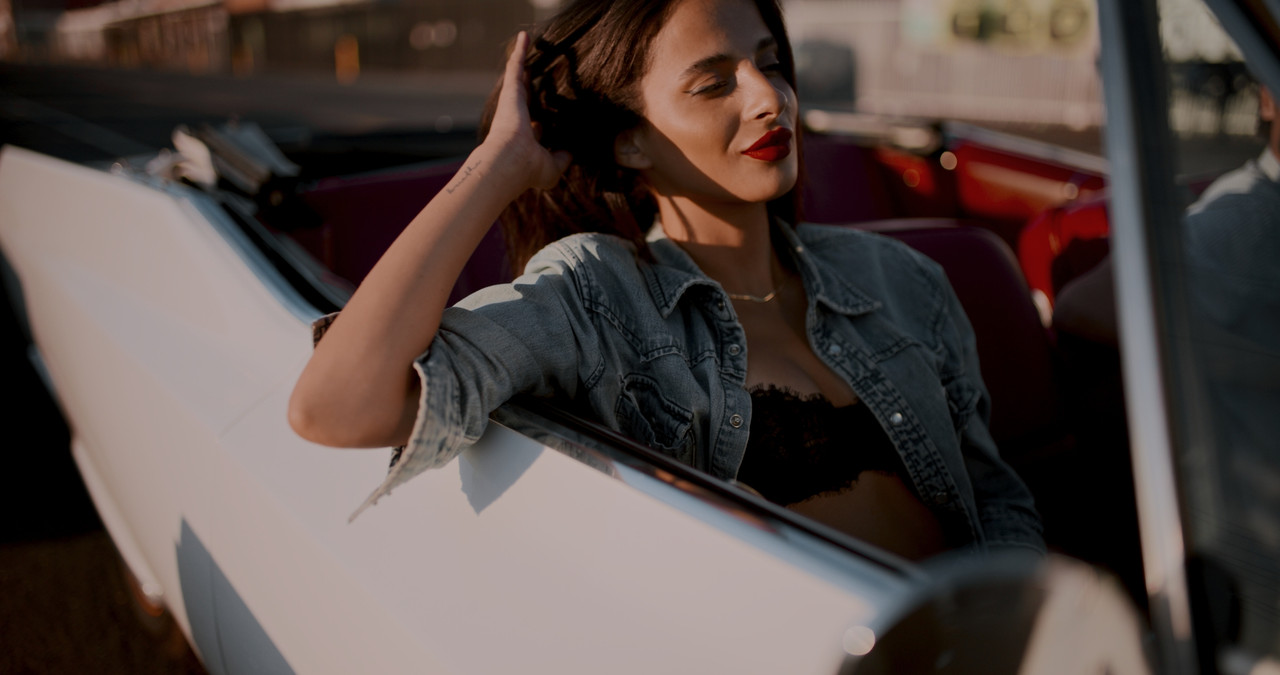
Yeah, I found three patches in the original grade that needed to be corrected. Maybe Resolve 19 will bring these updates and changes.

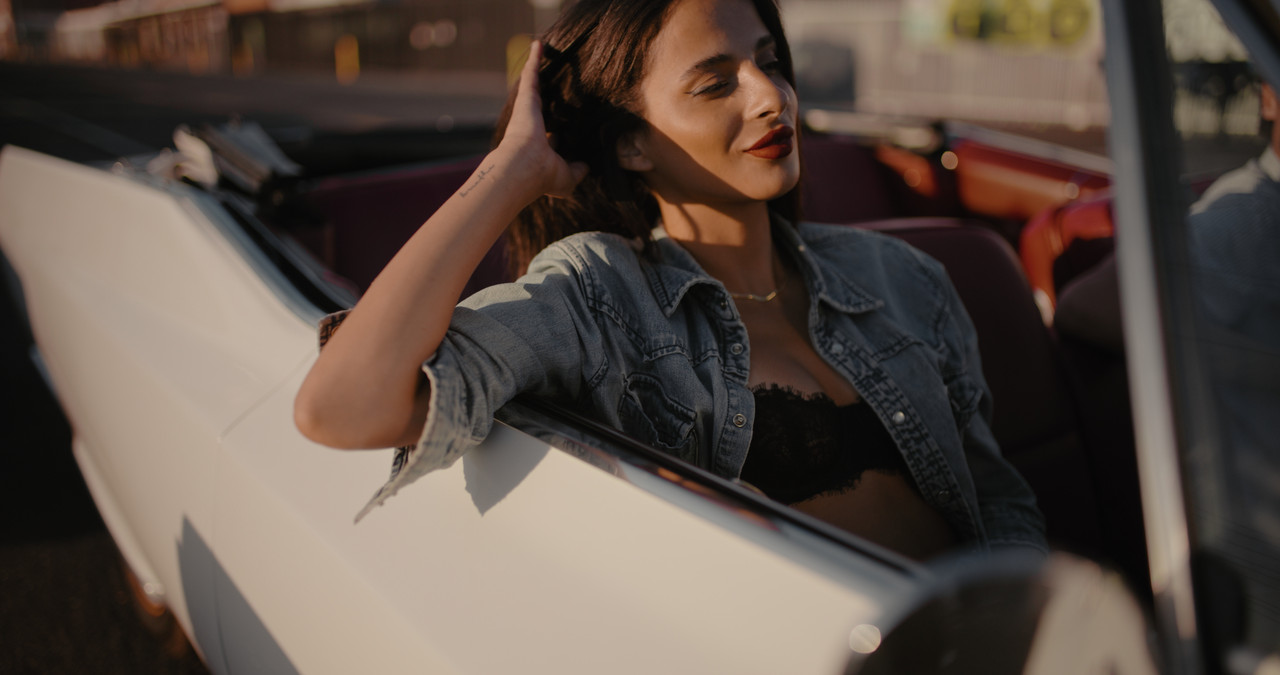
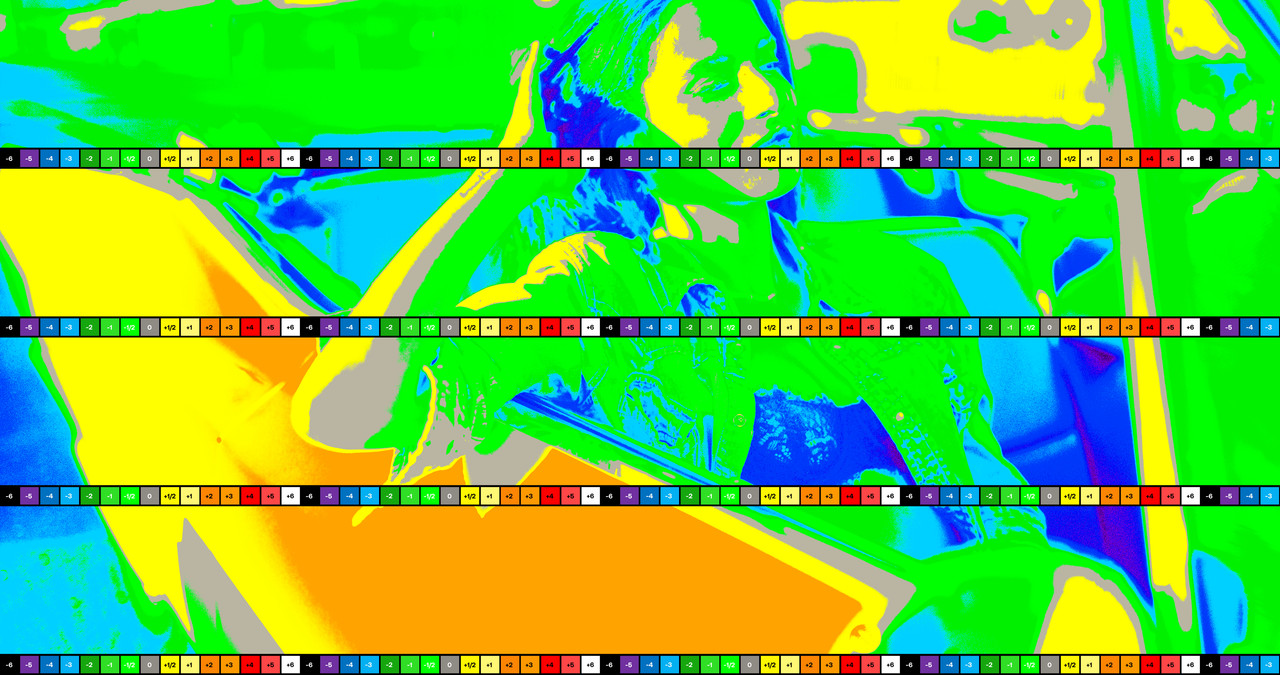
Original Grade

5a.png
6.jpg
6aafter-color-warper-1-3-14.jpg
62.jpg


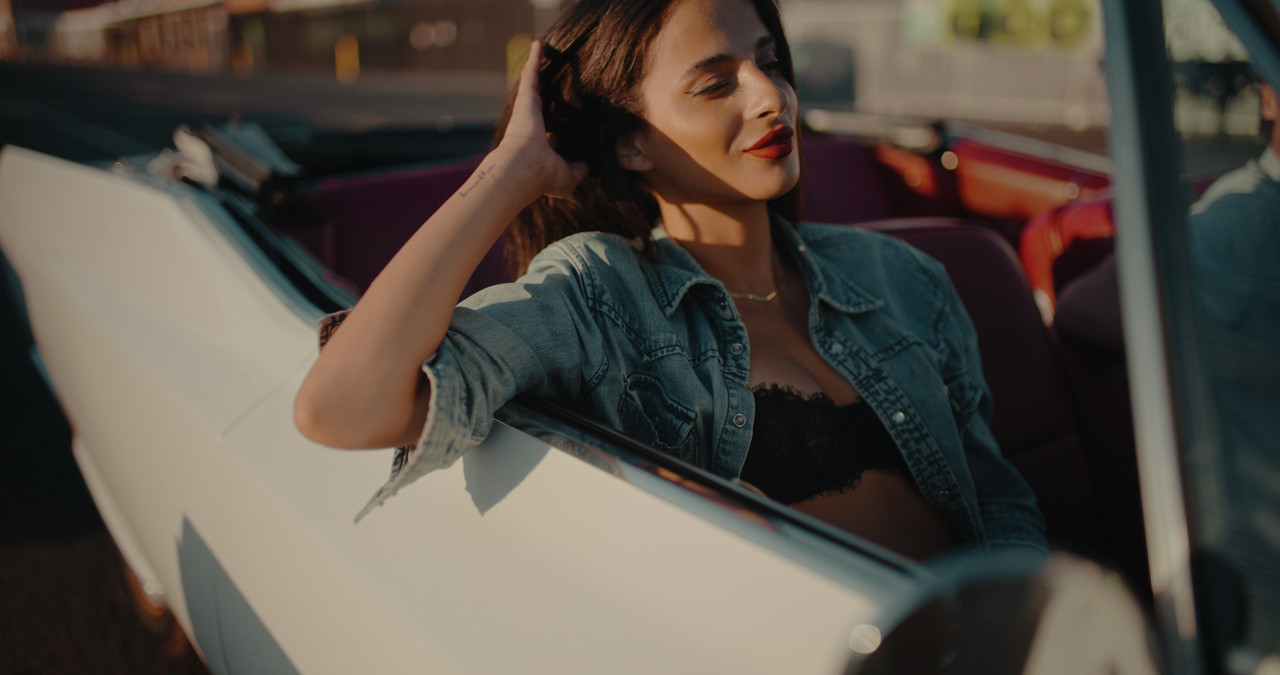
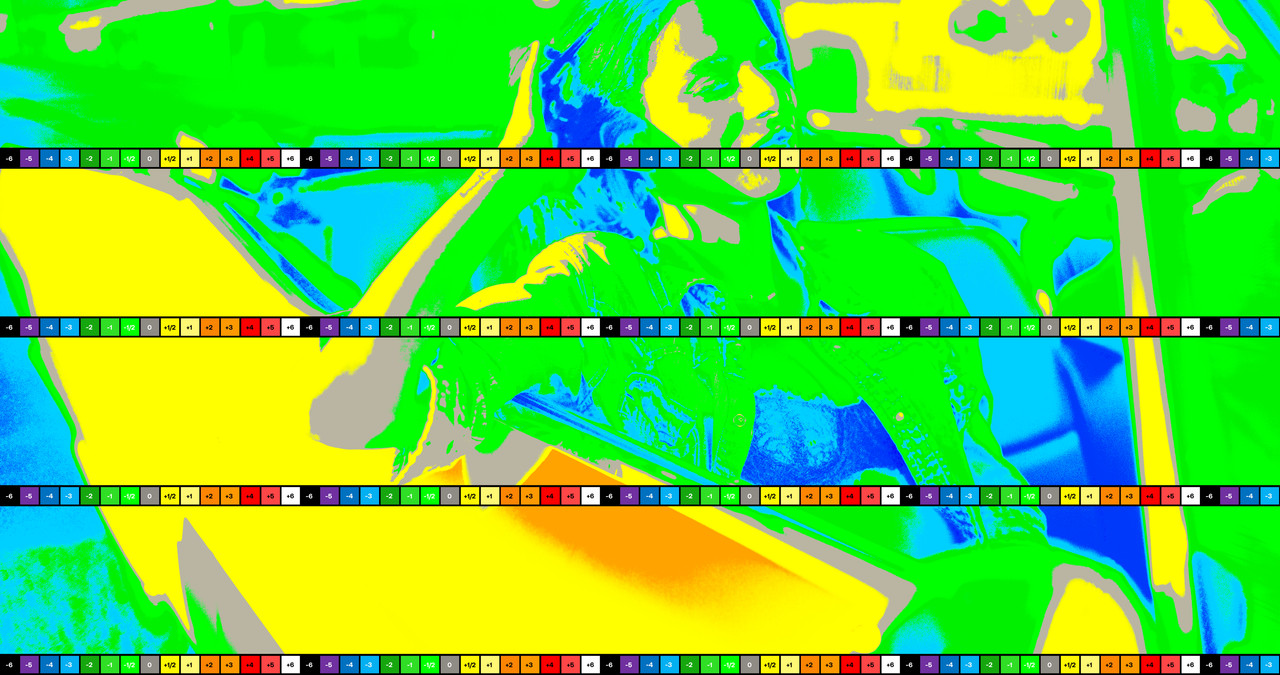
Corrected for patches

Screenshot-8815.png

NEW-4-1-3-10.jpg

NEW-5-1-3-22.jpg


to-correct-for-banding-in-the-shadows-1-3-112.jpg
 
Last edited:
I learned how to use an equivalent COLOR Warper tool in a program I use to use called "3DLut Creator Pro" I no longer used it once the "Color Warper Tool was introduced into Davinci Resolve. Here is a tutorial from 3Dlut Creator that may help you to learn how powerful and how easy it is to get looks with a "Color Warper" equivalent tool that really may not be possible anyway else,

Here's also an older thread where I show what can be done with the Color Warper tool in Resolve
Color.io Photon for 3D Color Grading Released - REDUSER.net

 
Last edited:
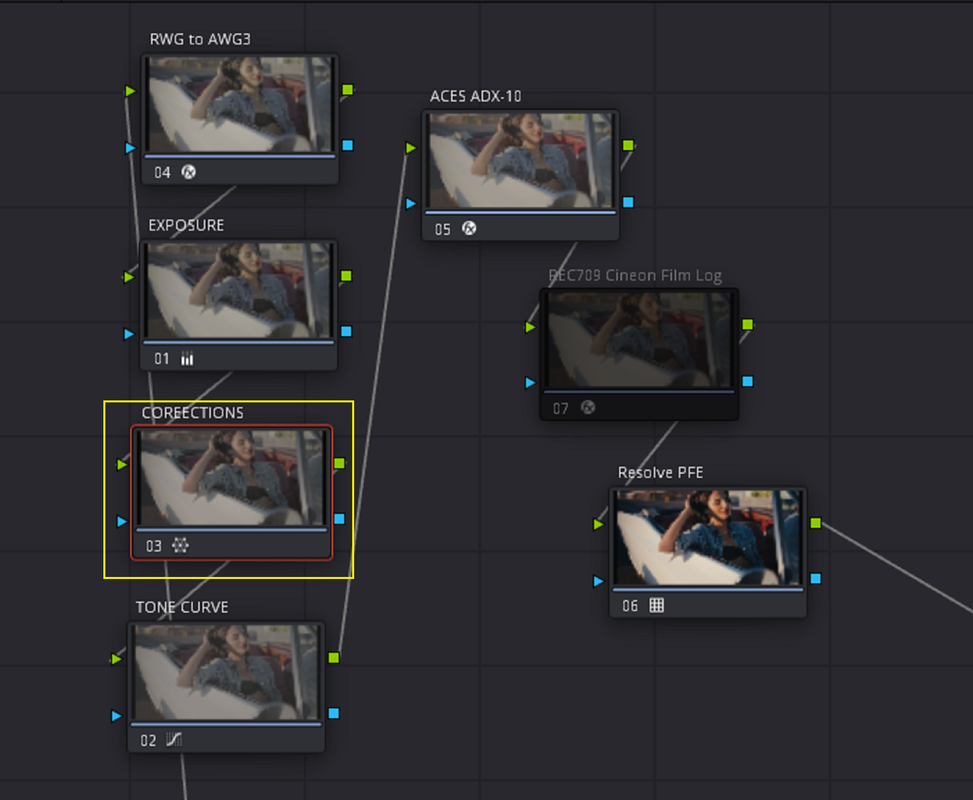
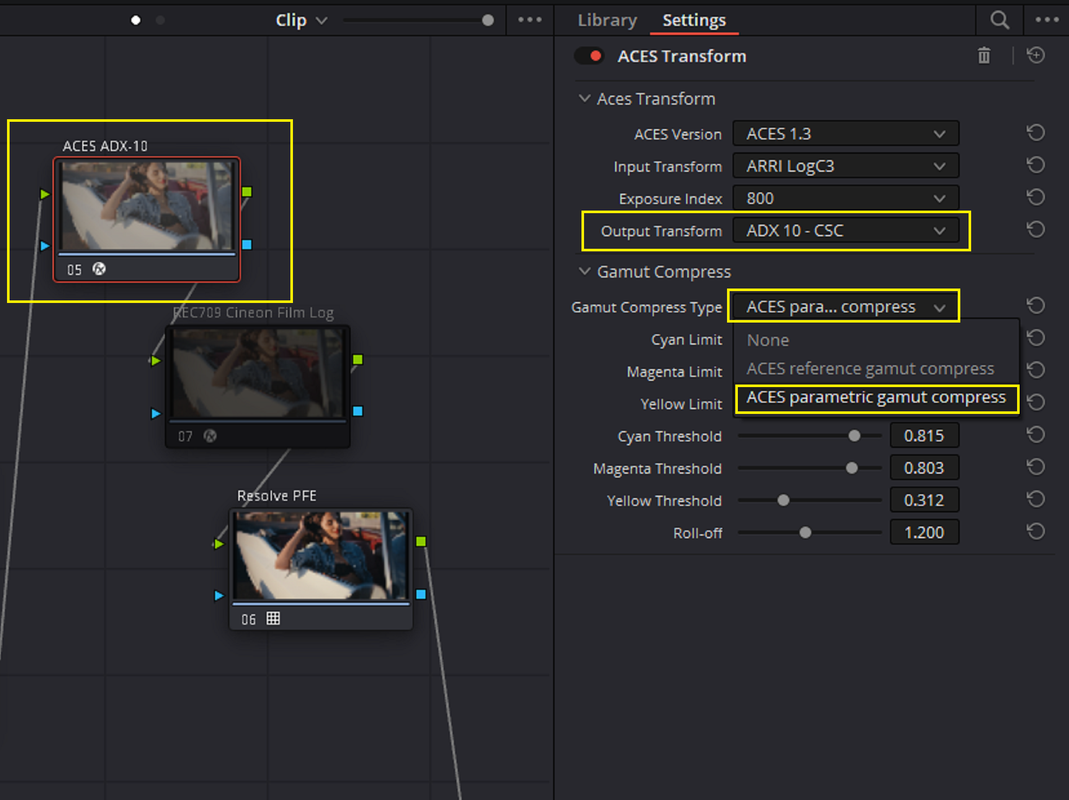
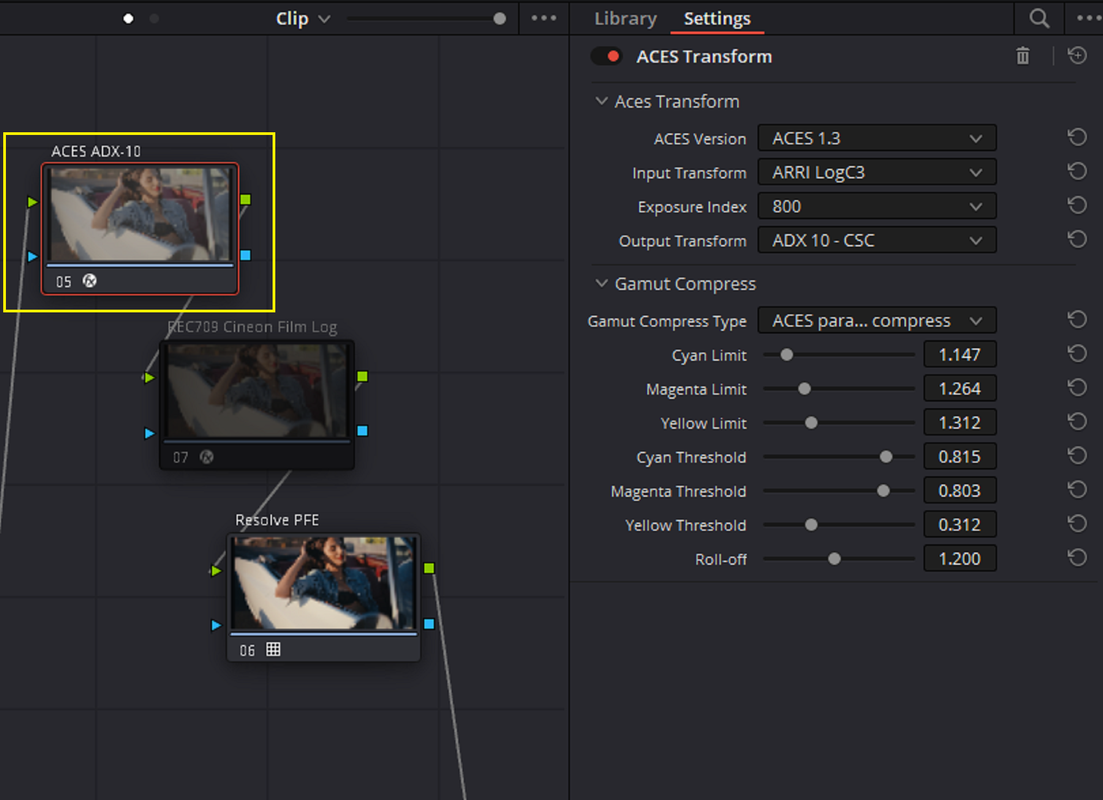
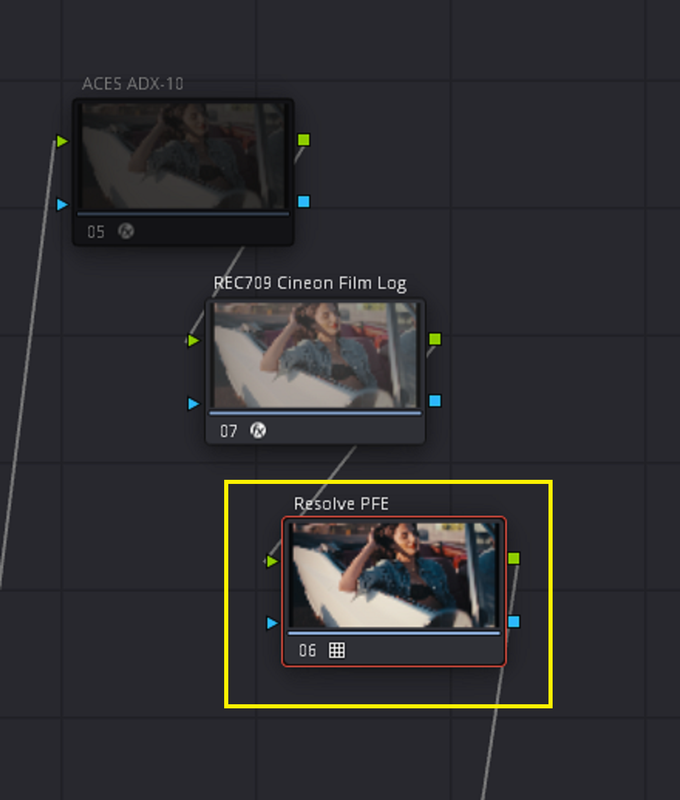
ACES ADX-10(10-bit) vs Cineon Film Log for Davinci Resolves Film Lut Emulations


Part 1


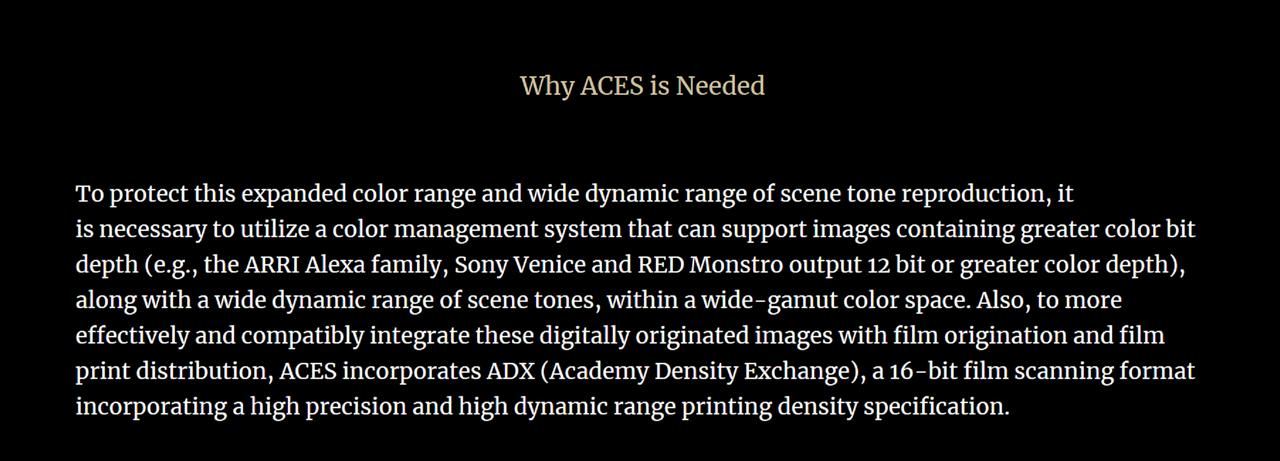
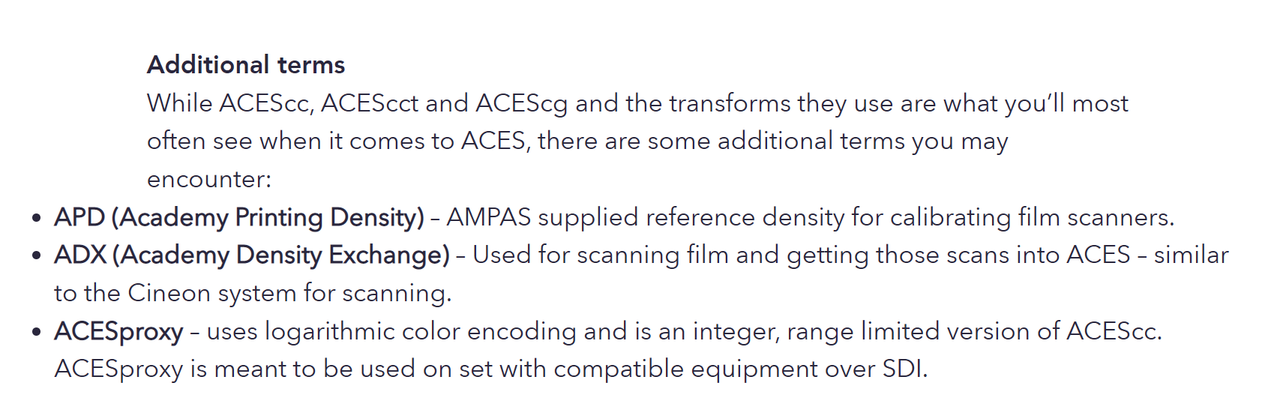
Colorists from "Mixinglight" and "LowePost" have been talking about replacing REC709/Cineon Film Log, which has been used by many to give what they believed gave the REC709 Resolve Print Film Emulations what they needed to render the Print Film Stock more accurately, with Aces ADX-10. ADX-10( 10 meaning 10-bit, there is also an ADX-16 which is 16-bit) is used to scan flim and transferring those scans to ACES, as defined below.


You can read the documents below and visit both Mixinglight and Lowepost where you can get better insight into ADX-10 than I may have been able to explain.


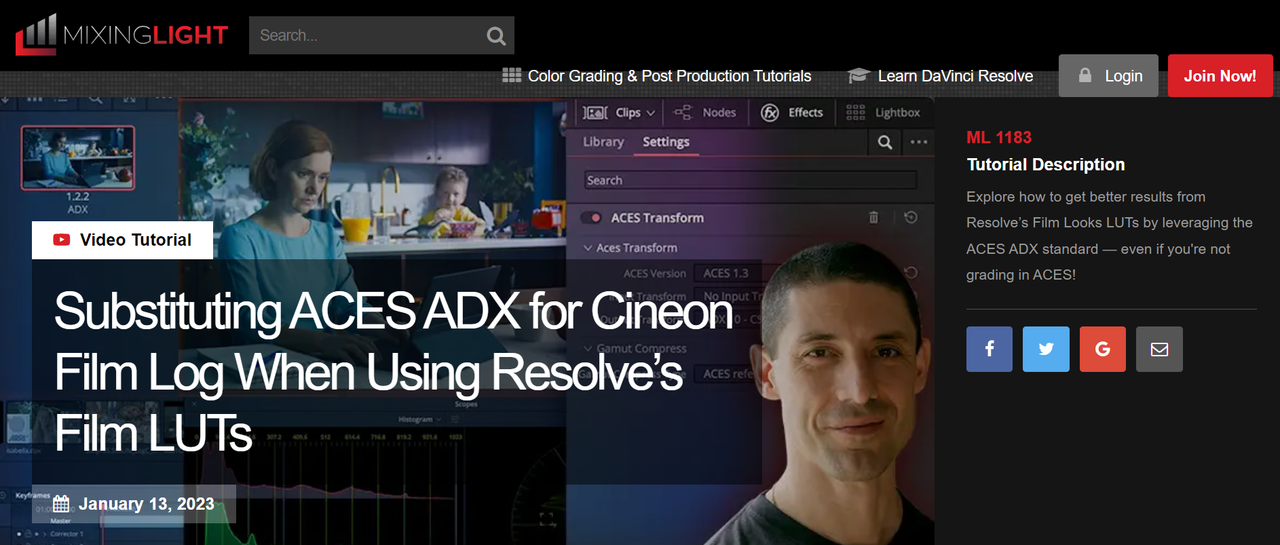
Substituting ACES ADX for Cineon Film Log When Using Resolve’s Film LUTs
Substituting ACES ADX for Cineon Film Log With Film Looks LUTs (mixinglight.com)

With Subscription you can see the entire Article


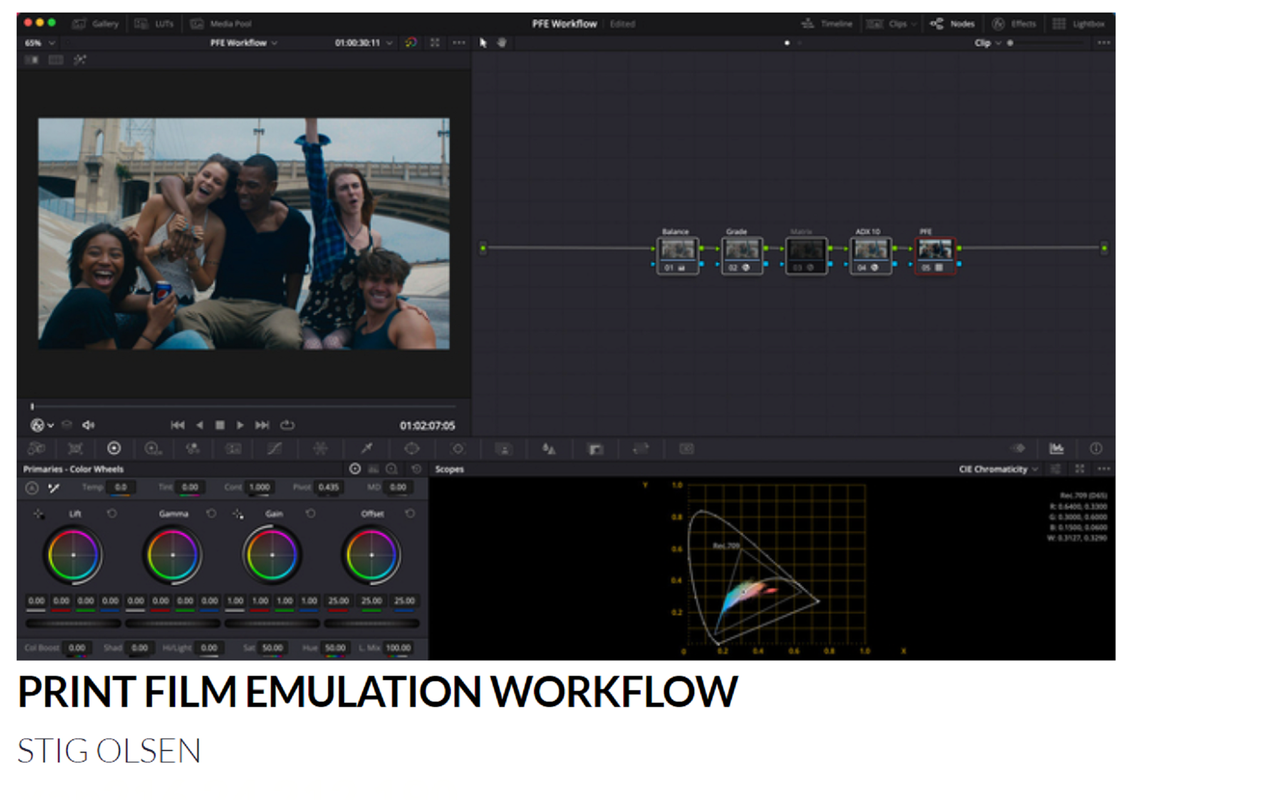
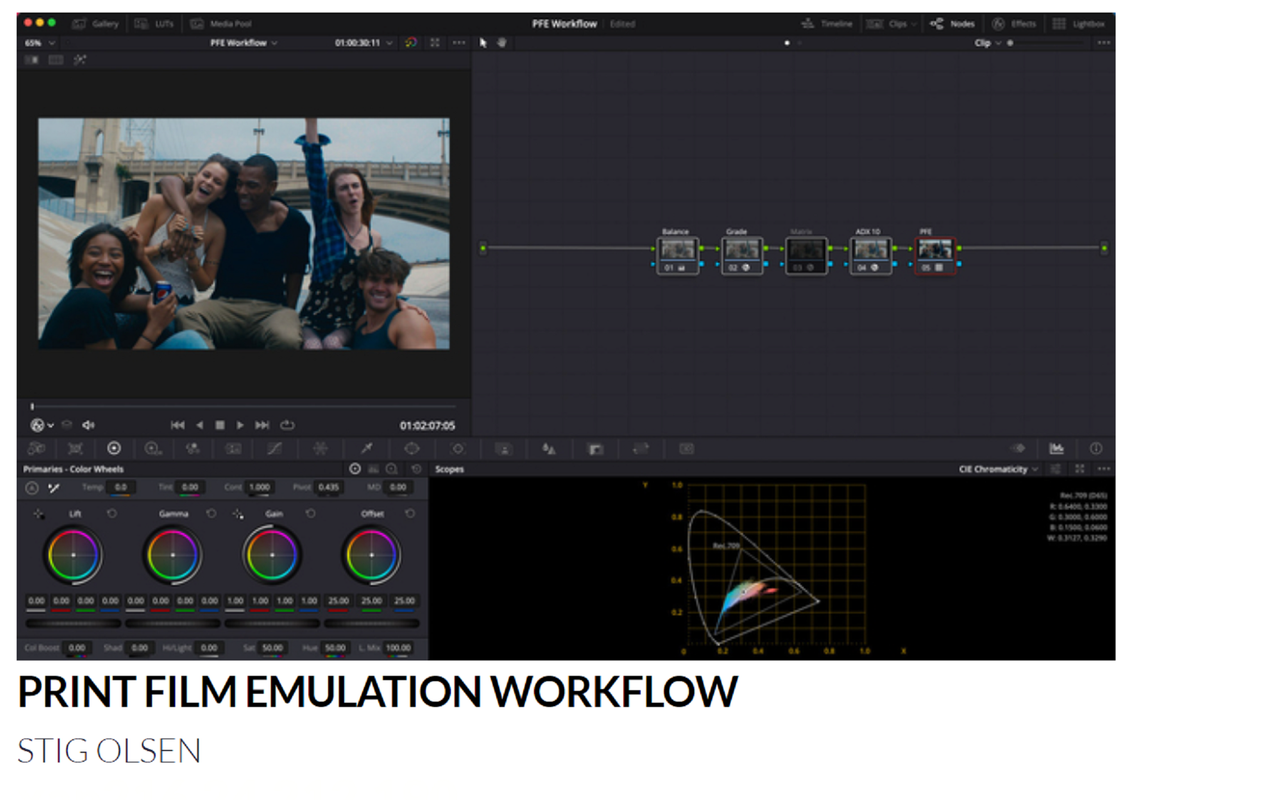
PRINT FILM EMULATION WORKFLOW
https://lowepost.com/insider/insights/print-film-emulation-workflow-r76/

With Subscription you can see the entire Article


Screenshot-8914.png


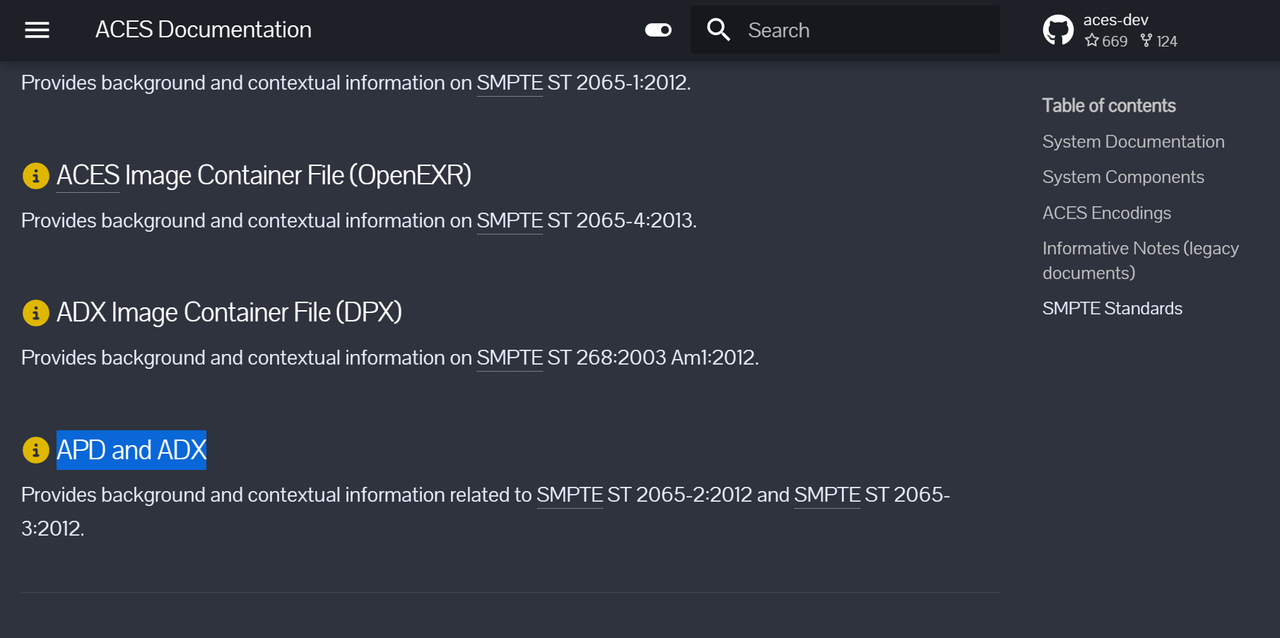
APD and ADX
https://www.dropbox.com/s/3fbg5su99fpsvpl/TB-2014-005.pdf?dl=0

Screenshot-8915.png


The American Society of Cinematographers
ACES - The American Society of Cinematographers (en-US) (theasc.com)


Frame.io

Why Every Editor, Colorist, and VFX Artist Needs to Understand ACES (frame.io)


In Part 2 I will be showing the Difference using REC 709/ Cineon Film Log and Aces ADX-10.


Part 2-REC 709/ Cineon Film Log VS Aces ADX-10.....................
 
Last edited:
Part 2 - REC 709/ Cineon Film Log VS Aces ADX-10 VS REC 709/ REDLOGFILM

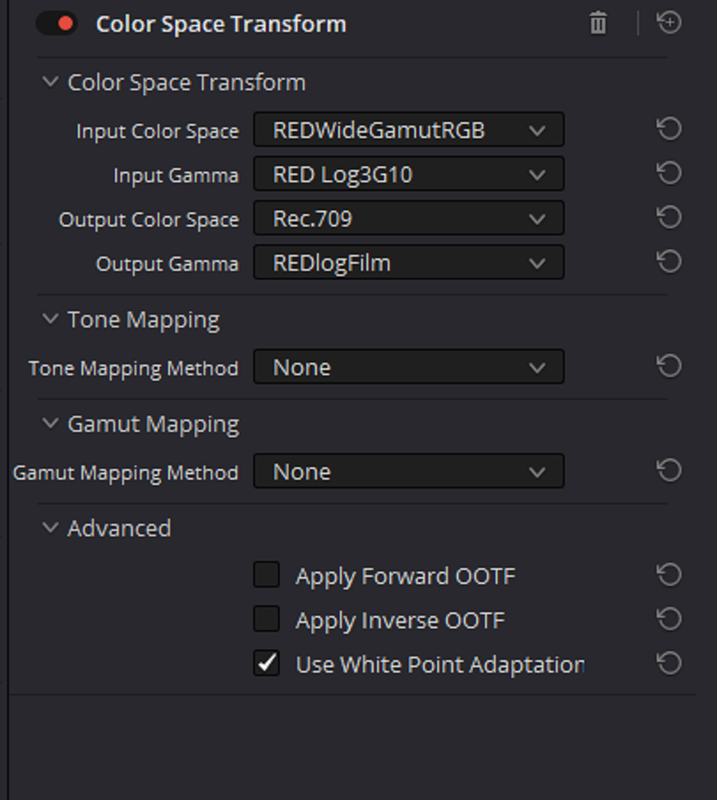
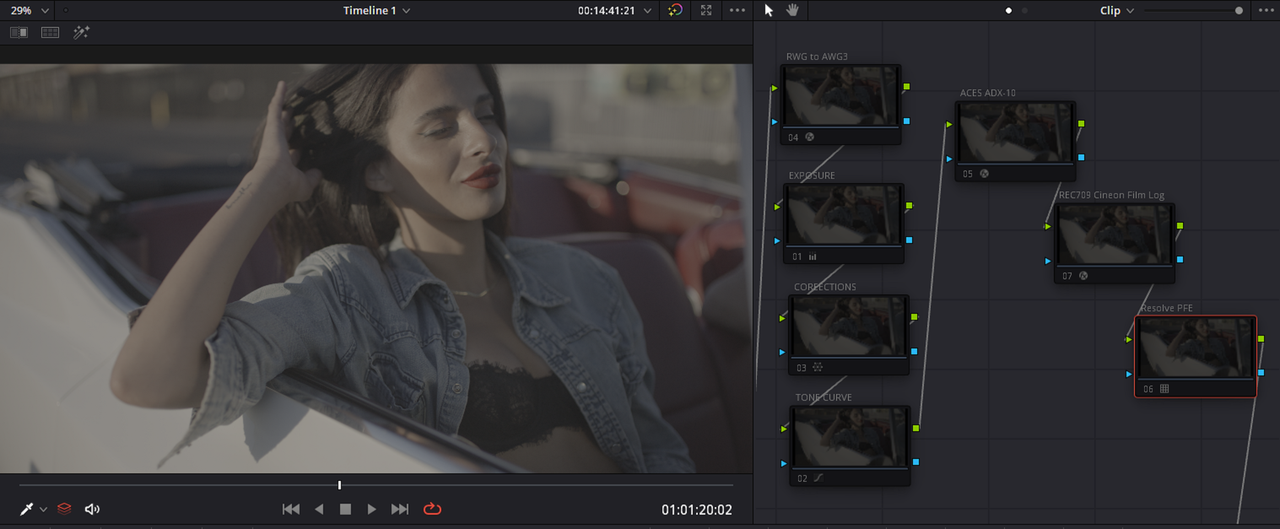
Here are the three competing methods


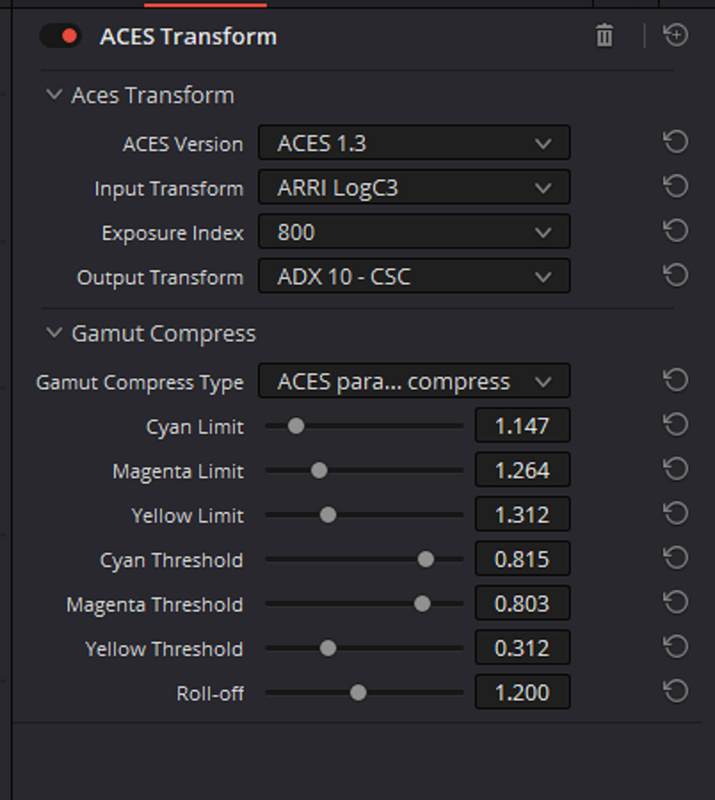
ACES ADX-10

1.png


32.png


ADX-10-2.png
wAAACH5BAEKAAAALAAAAAABAAEAAAICRAEAOw==


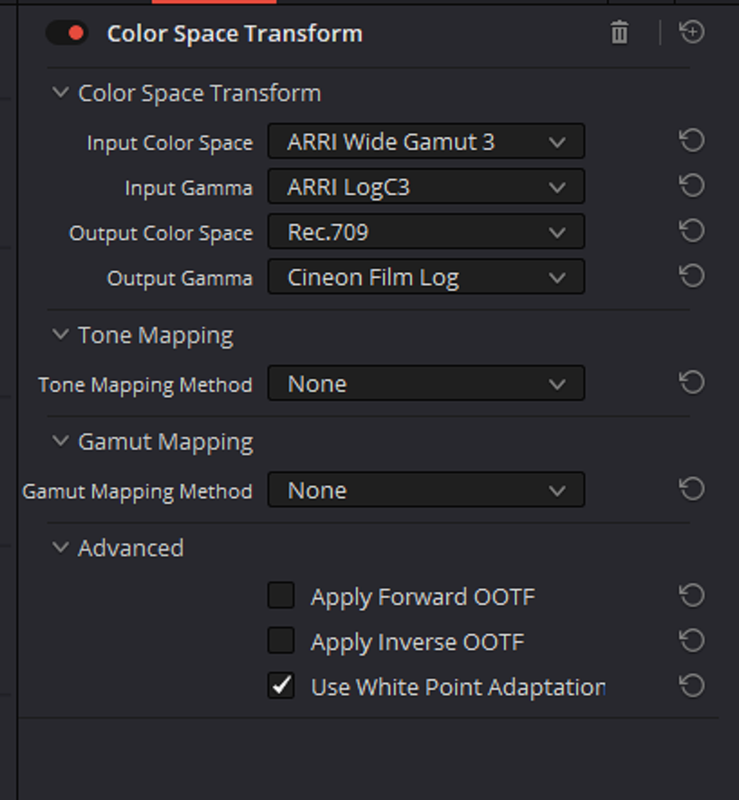
REC709 / Cineon Film Log

1.png


32.png


REC709-Cineon-Film-Log.png
wAAACH5BAEKAAAALAAAAAABAAEAAAICRAEAOw==

REC 709/ REDLOGFILM

19.png


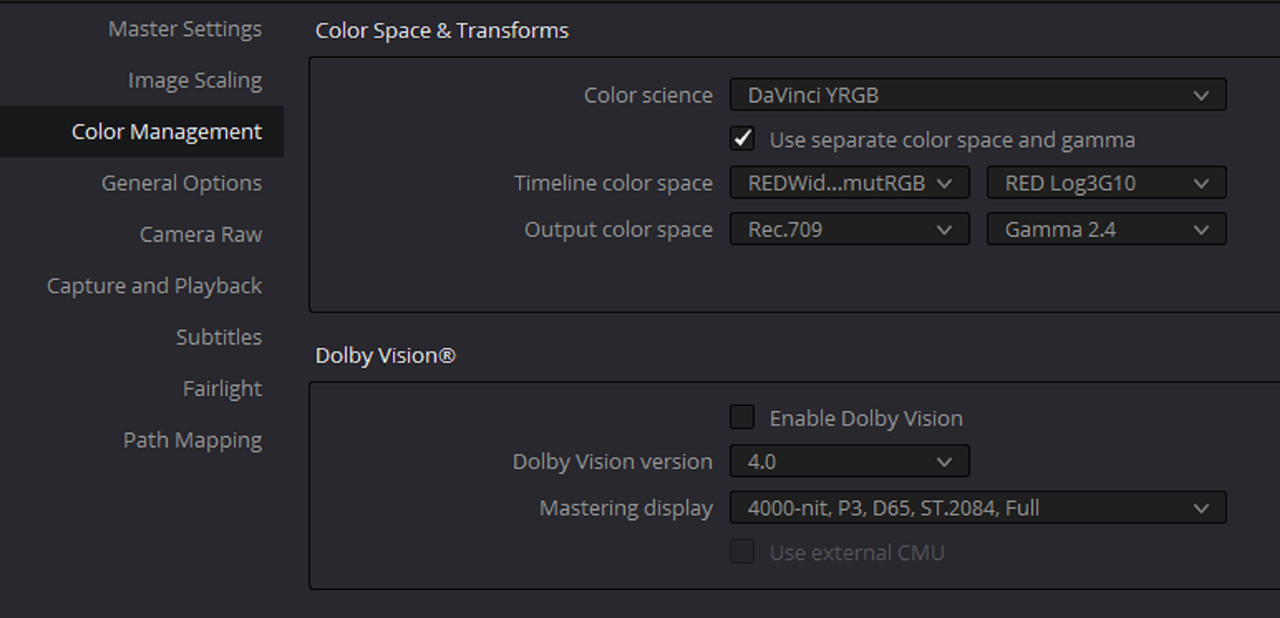
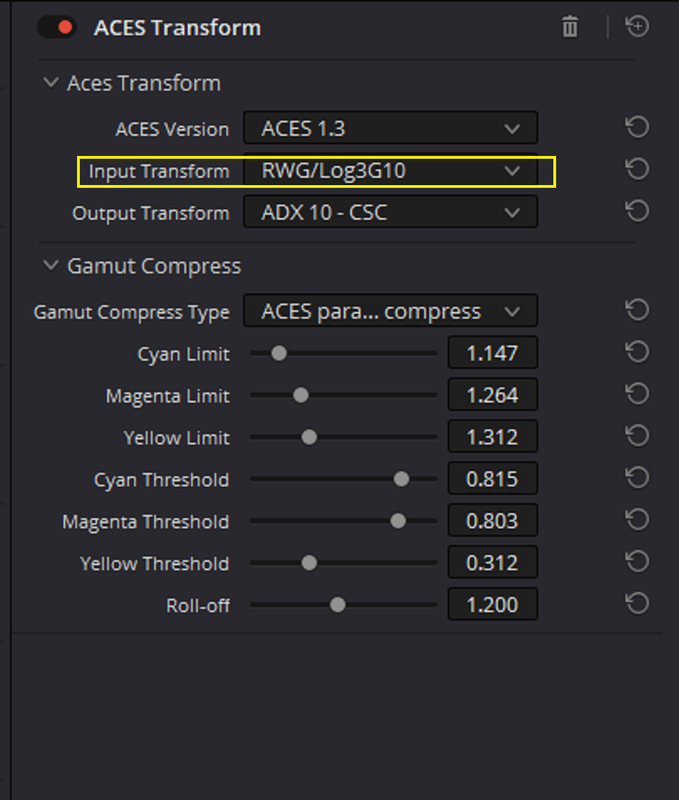
Screenshot-8930.png


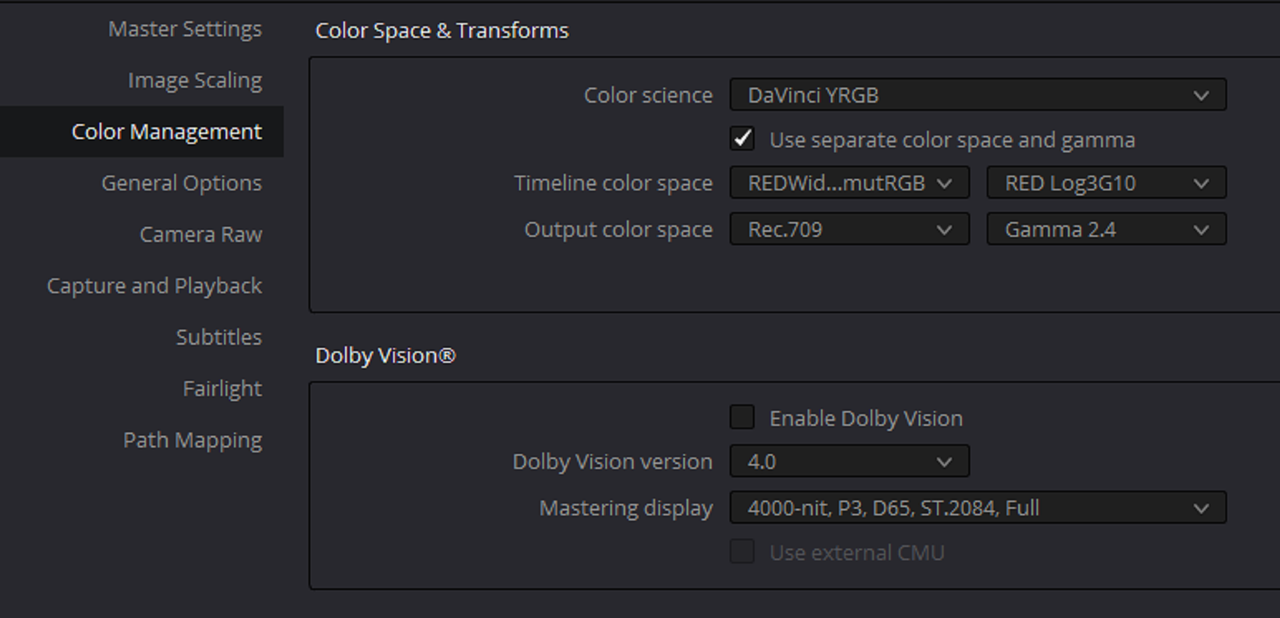
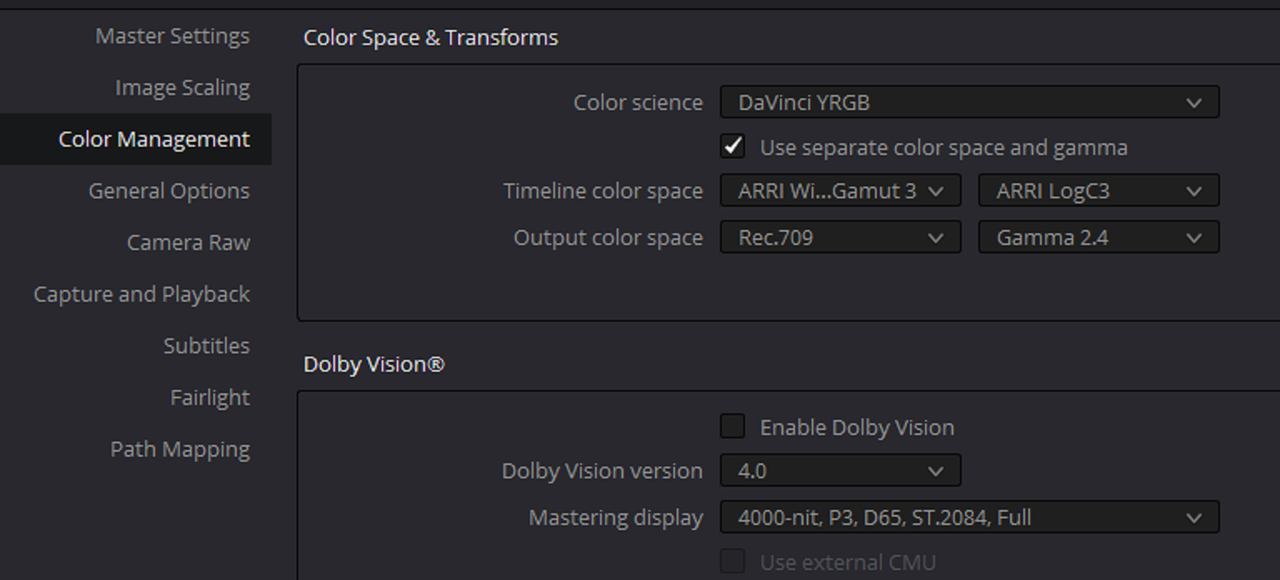
Workflow Settings

1.png
wAAACH5BAEKAAAALAAAAAABAAEAAAICRAEAOw==

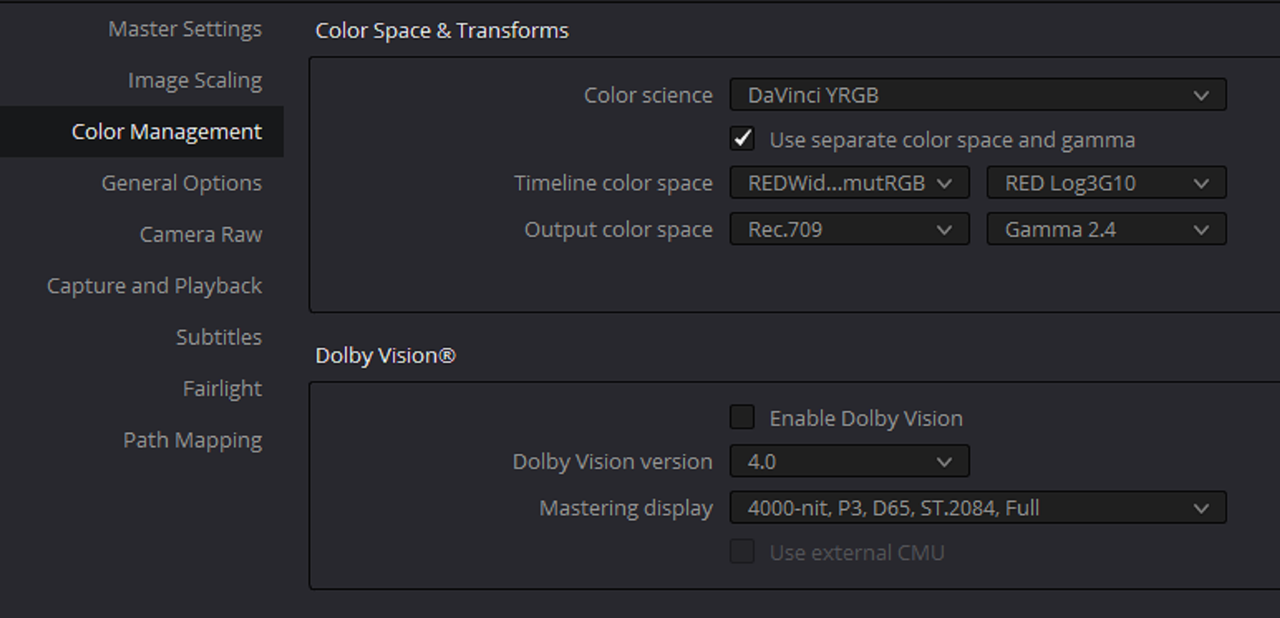
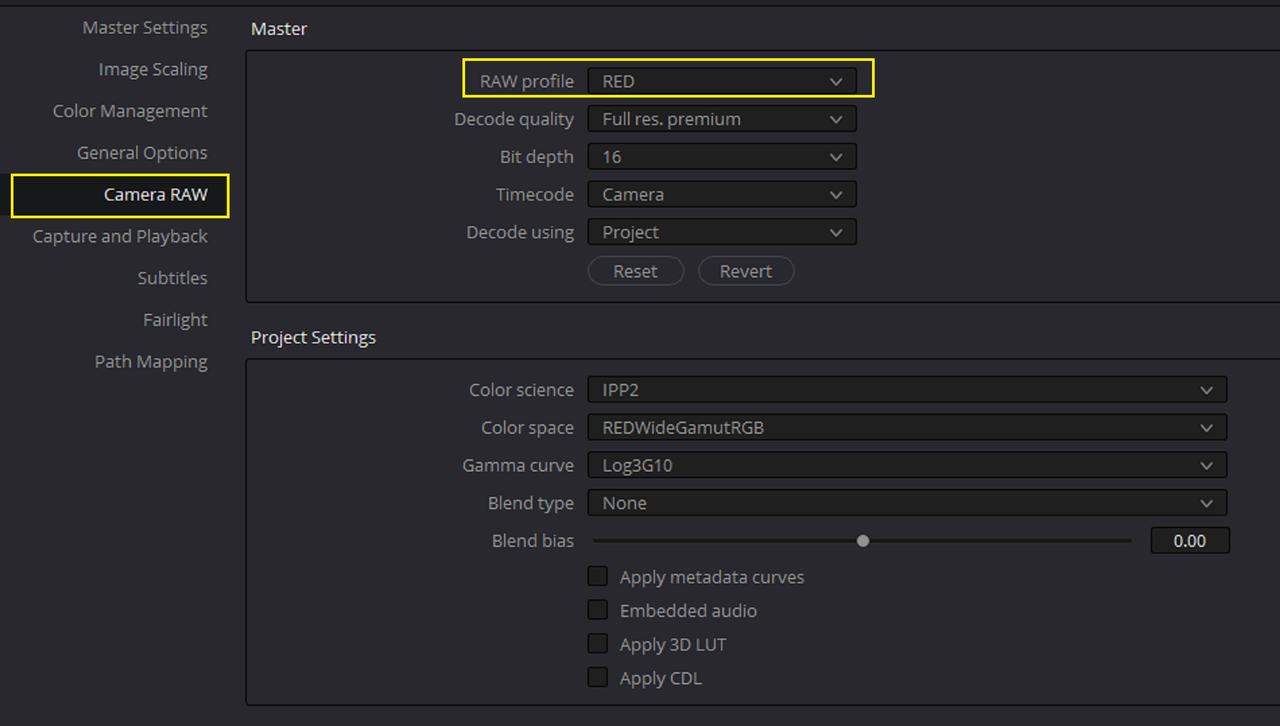
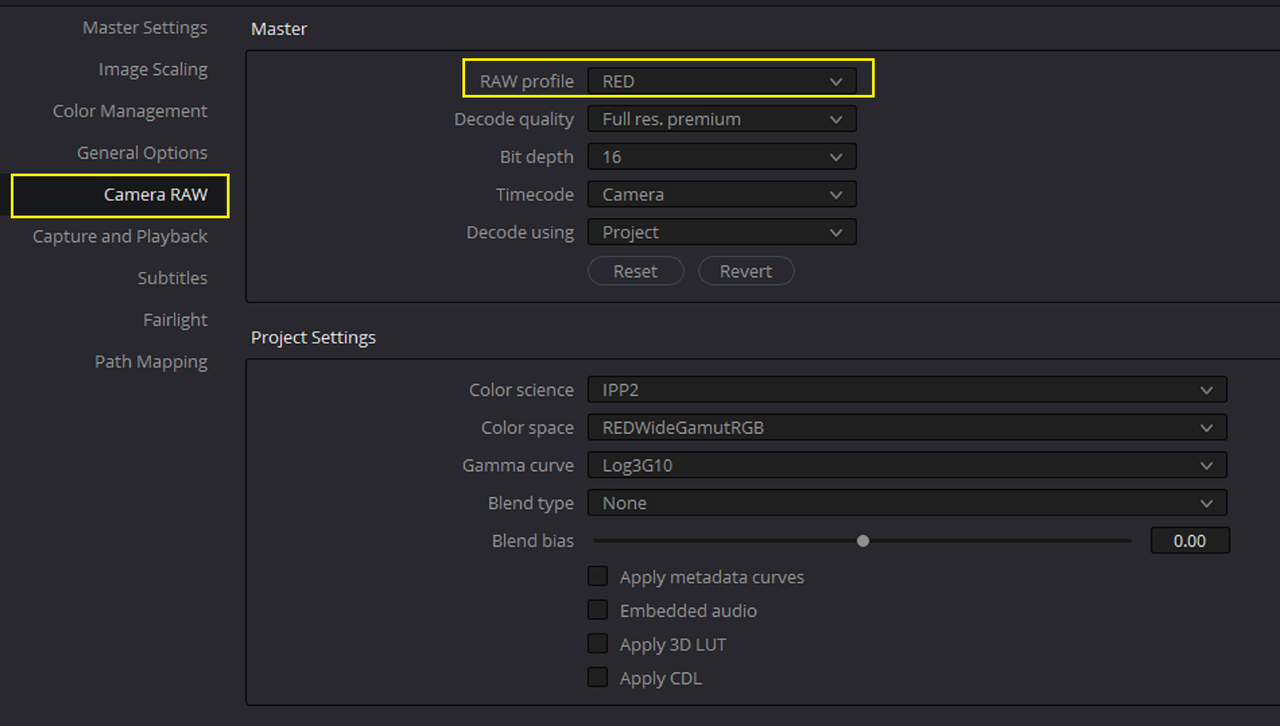
OR REDWideGamutRGB/ Log3G10 where applicable

19.png


2.png
wAAACH5BAEKAAAALAAAAAABAAEAAAICRAEAOw==


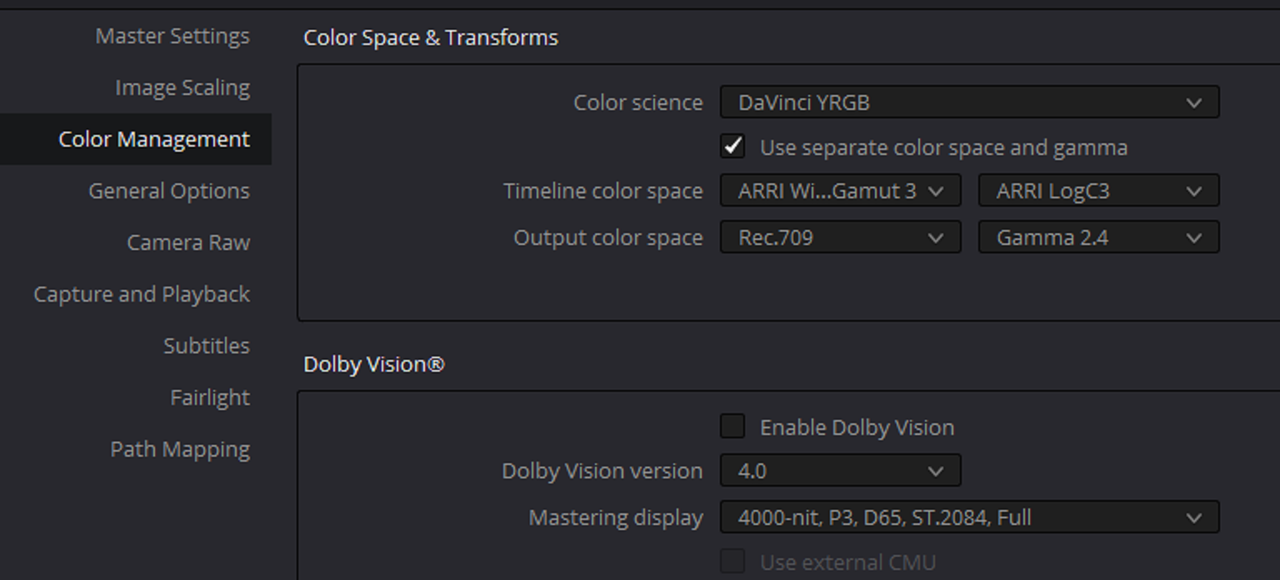
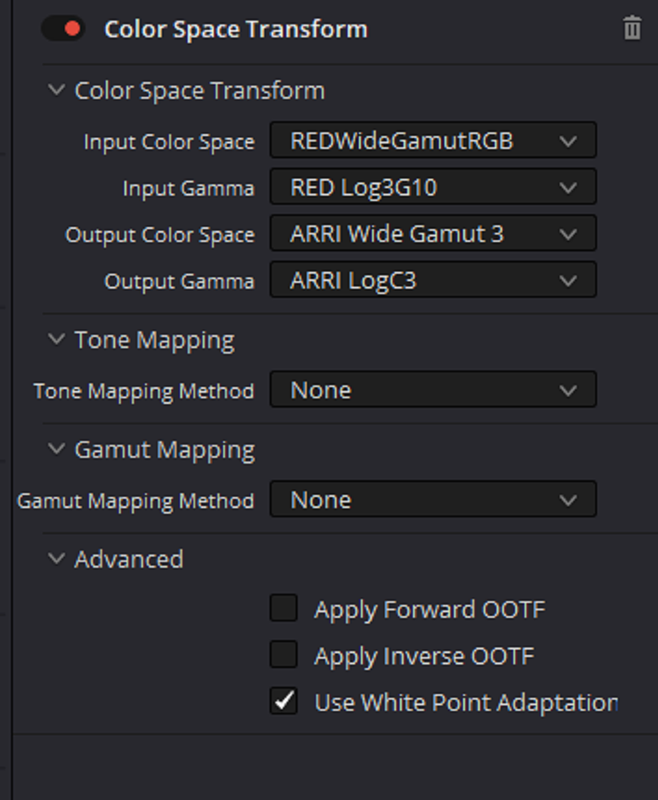
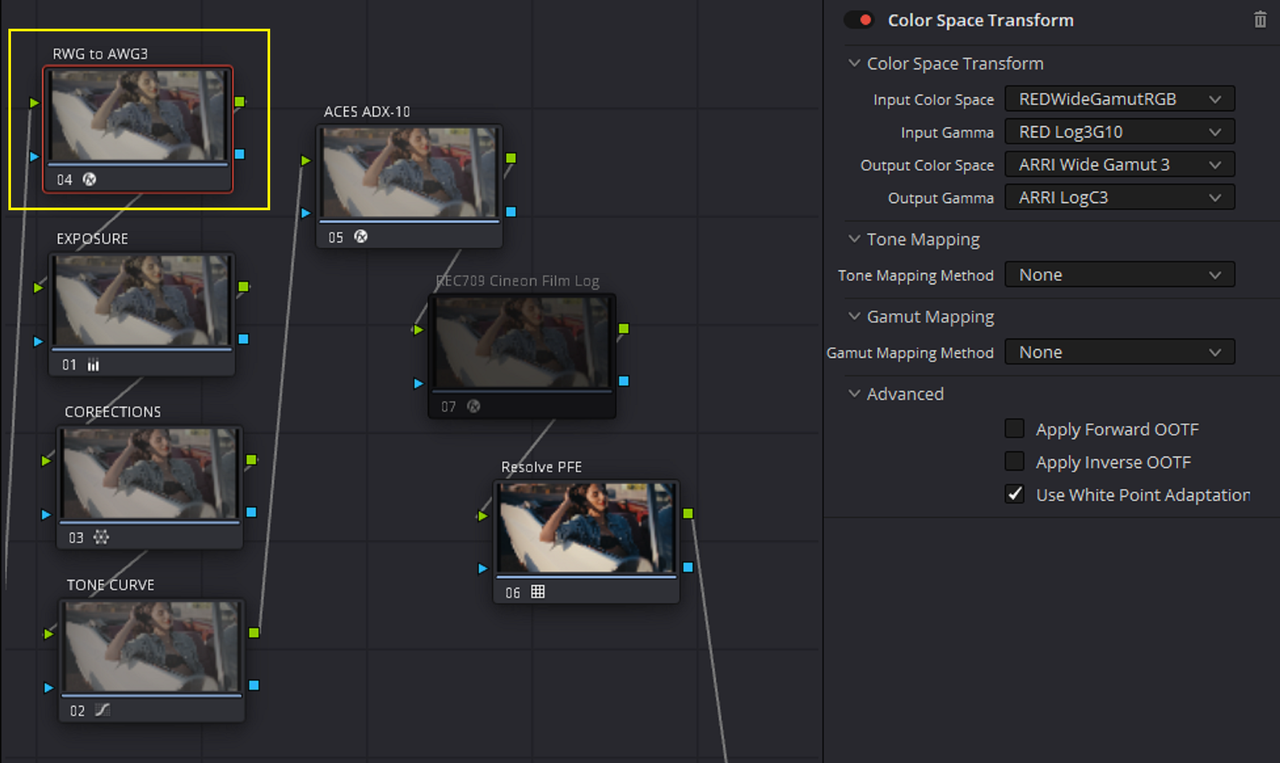
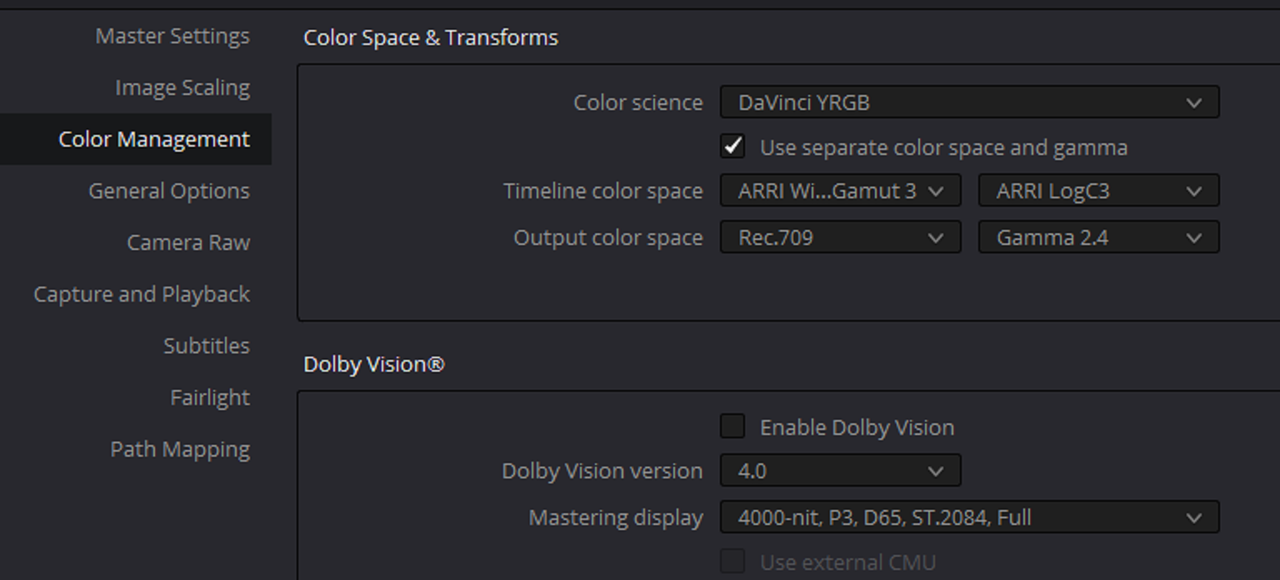
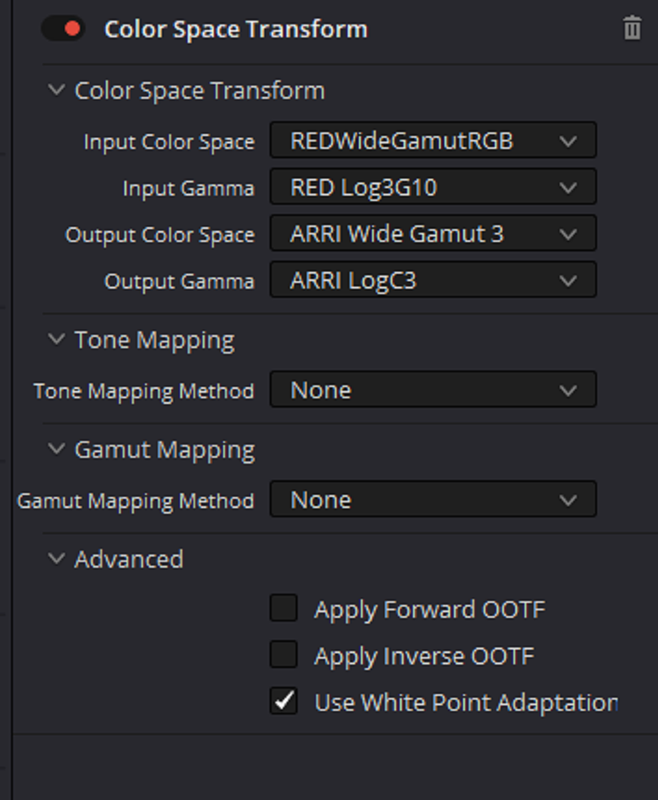
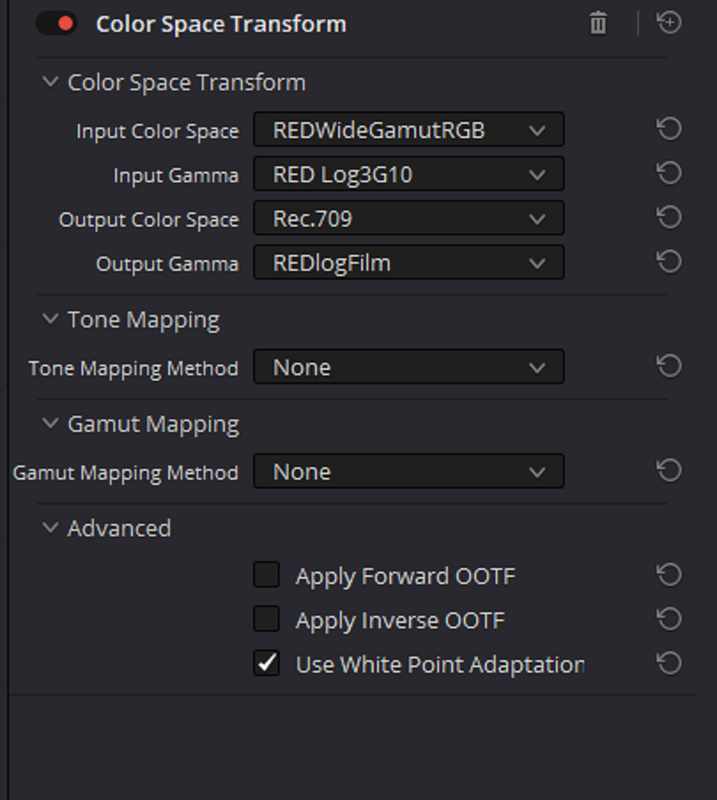
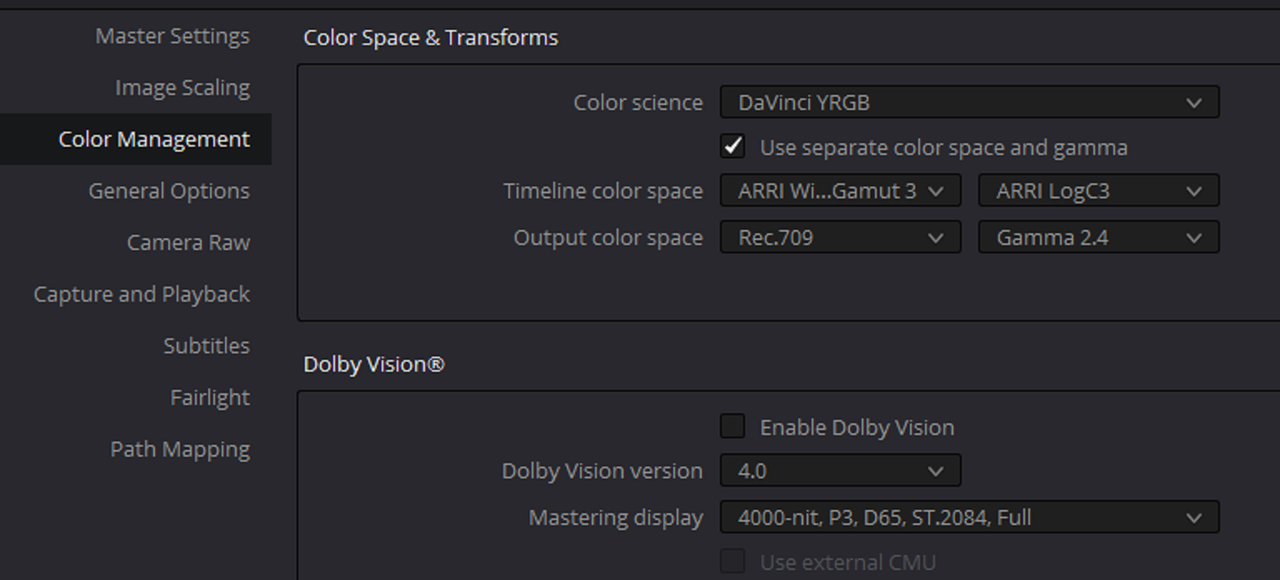
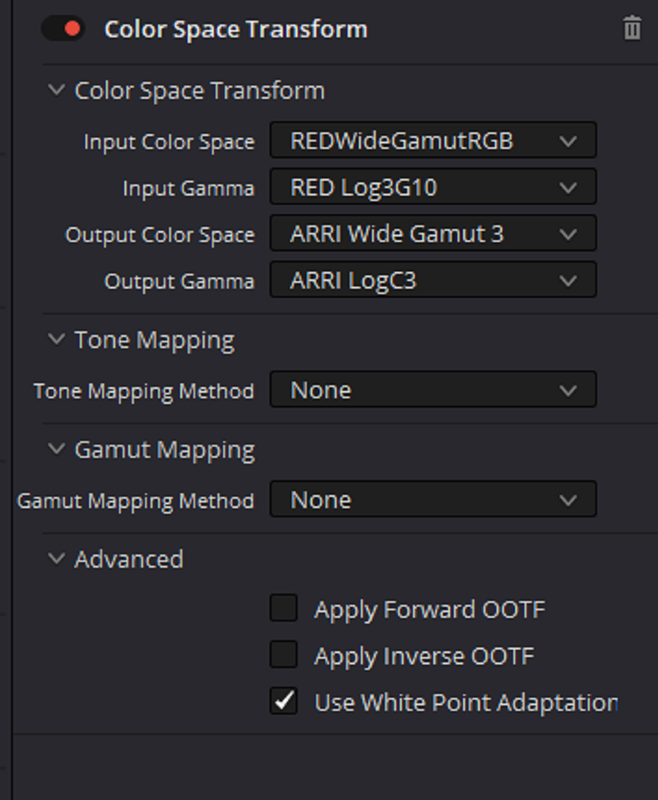
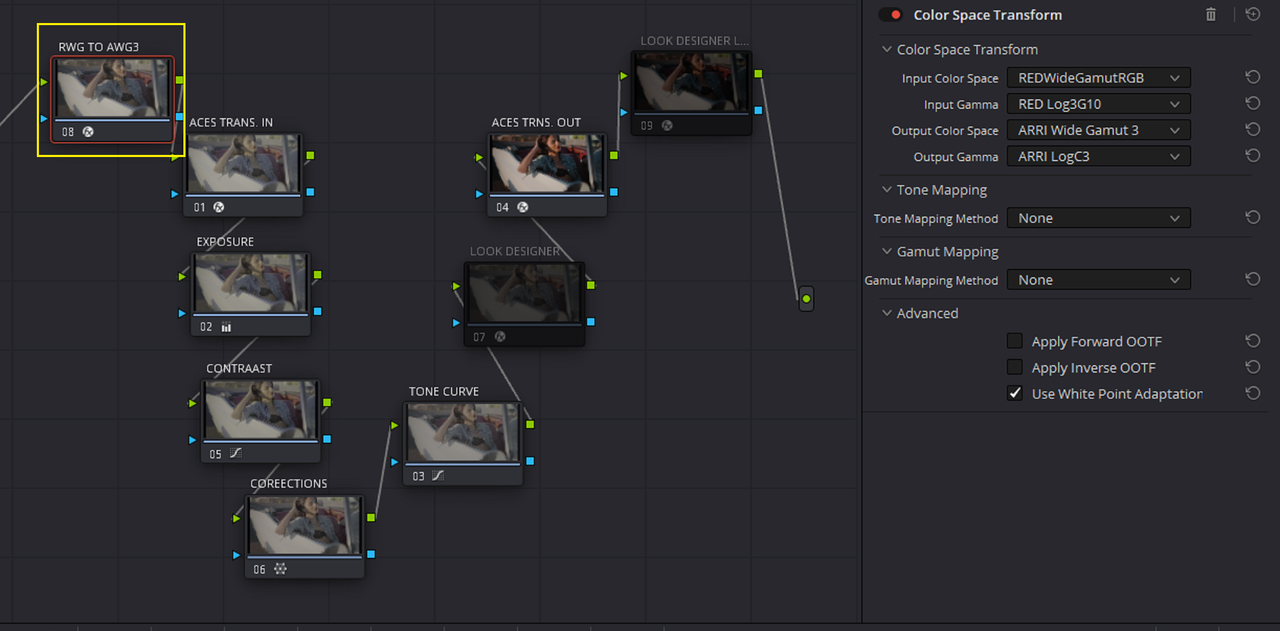
I used a "COLORSPACE TRANSFORM" to convert the "REDWideGamutRGB/Log3G10 image to "AWG3/ALC3" to me when working with Print Film Emulation Luts an image processed in ARRI AWG3/ALC3 looks better.


3.png
wAAACH5BAEKAAAALAAAAAABAAEAAAICRAEAOw==


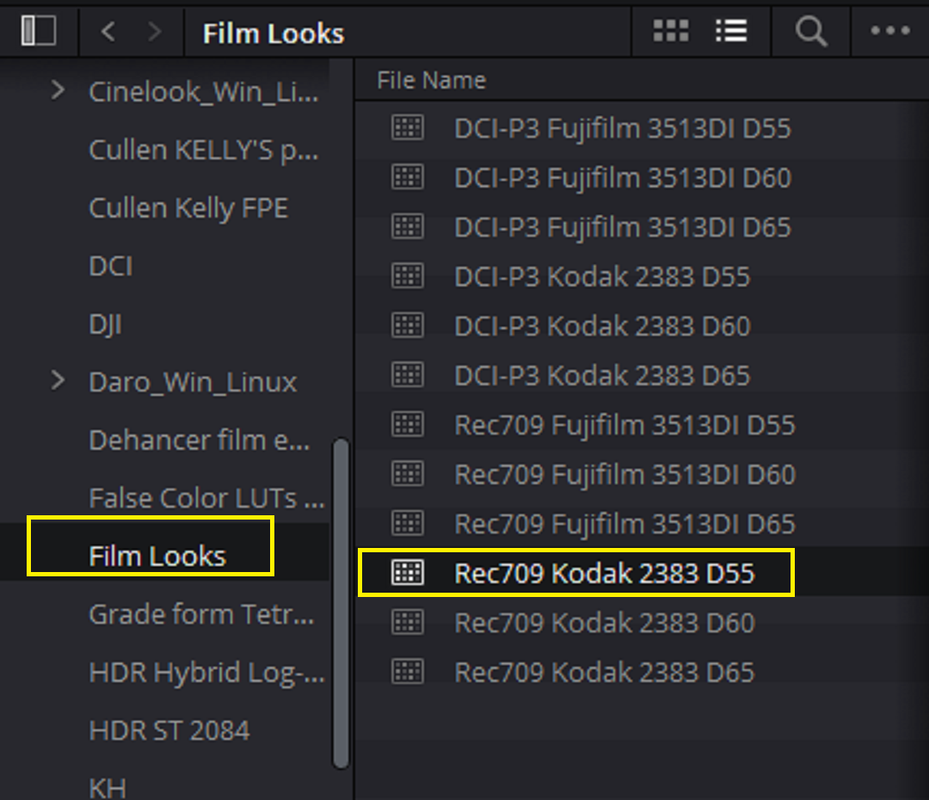
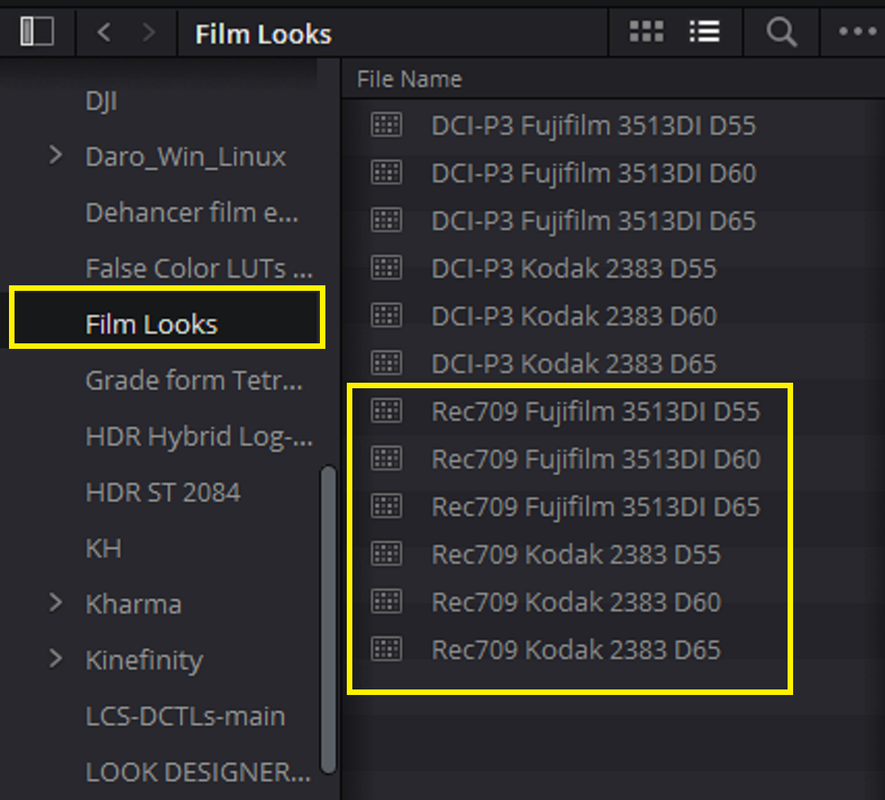
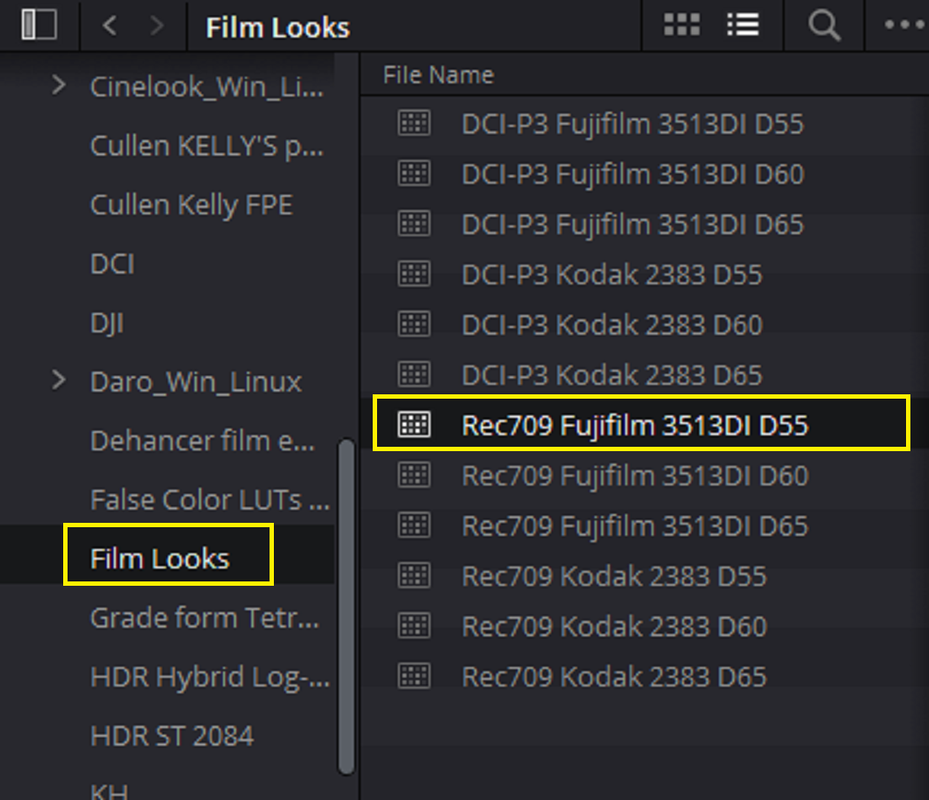
Examples Below used Resolves REC709 FujiFilm 3513DI D55 PFE


Image processed into AWG3/ALC3

16.png
wAAACH5BAEKAAAALAAAAAABAAEAAAICRAEAOw==

32.png


17.png
wAAACH5BAEKAAAALAAAAAABAAEAAAICRAEAOw==


18.jpg
wAAACH5BAEKAAAALAAAAAABAAEAAAICRAEAOw==


Image processed in RedWideGamutRGB/Log3G10

19.png
wAAACH5BAEKAAAALAAAAAABAAEAAAICRAEAOw==

20.png
wAAACH5BAEKAAAALAAAAAABAAEAAAICRAEAOw==


21.jpg
wAAACH5BAEKAAAALAAAAAABAAEAAAICRAEAOw==


I just liked the Tone-Mapping better with AWG3/ALC3

4.png
wAAACH5BAEKAAAALAAAAAABAAEAAAICRAEAOw==


5.png
wAAACH5BAEKAAAALAAAAAABAAEAAAICRAEAOw==


8.png
wAAACH5BAEKAAAALAAAAAABAAEAAAICRAEAOw==


9.png
wAAACH5BAEKAAAALAAAAAABAAEAAAICRAEAOw==


9a.png
wAAACH5BAEKAAAALAAAAAABAAEAAAICRAEAOw==


9b.png
wAAACH5BAEKAAAALAAAAAABAAEAAAICRAEAOw==


ACES ADX-10 vs REC709/ Cineon Film Log vs REC709/ REDLOGFILM


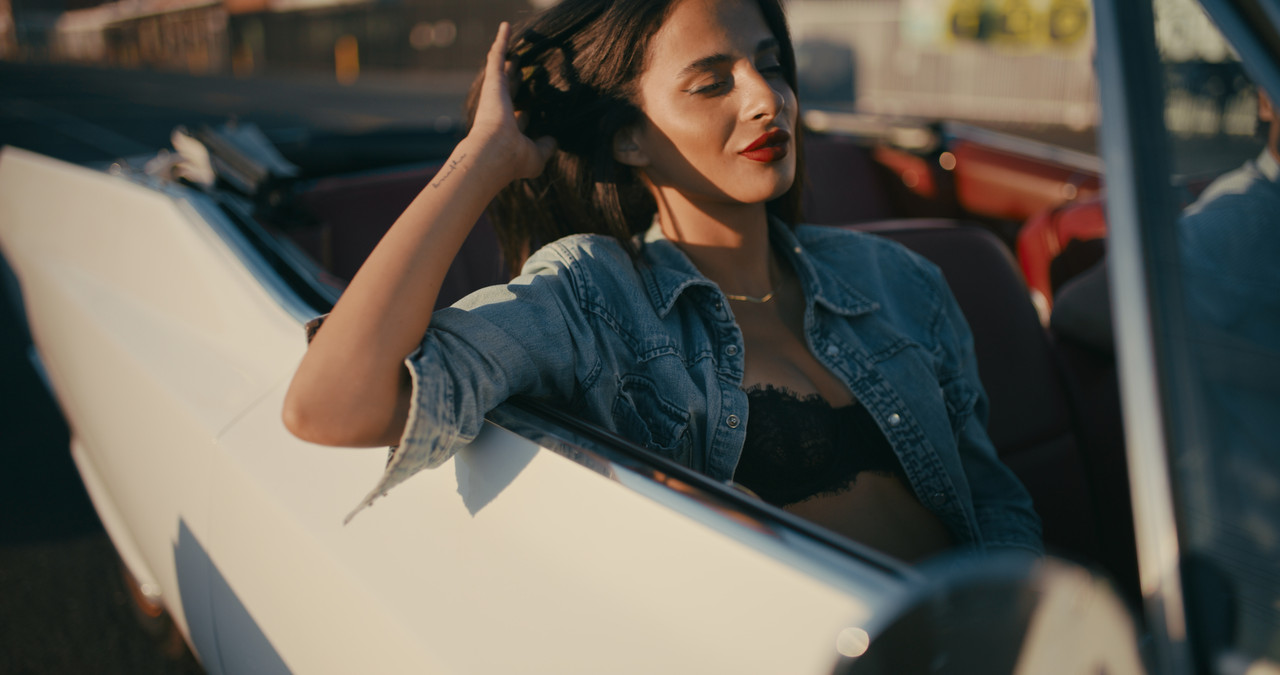
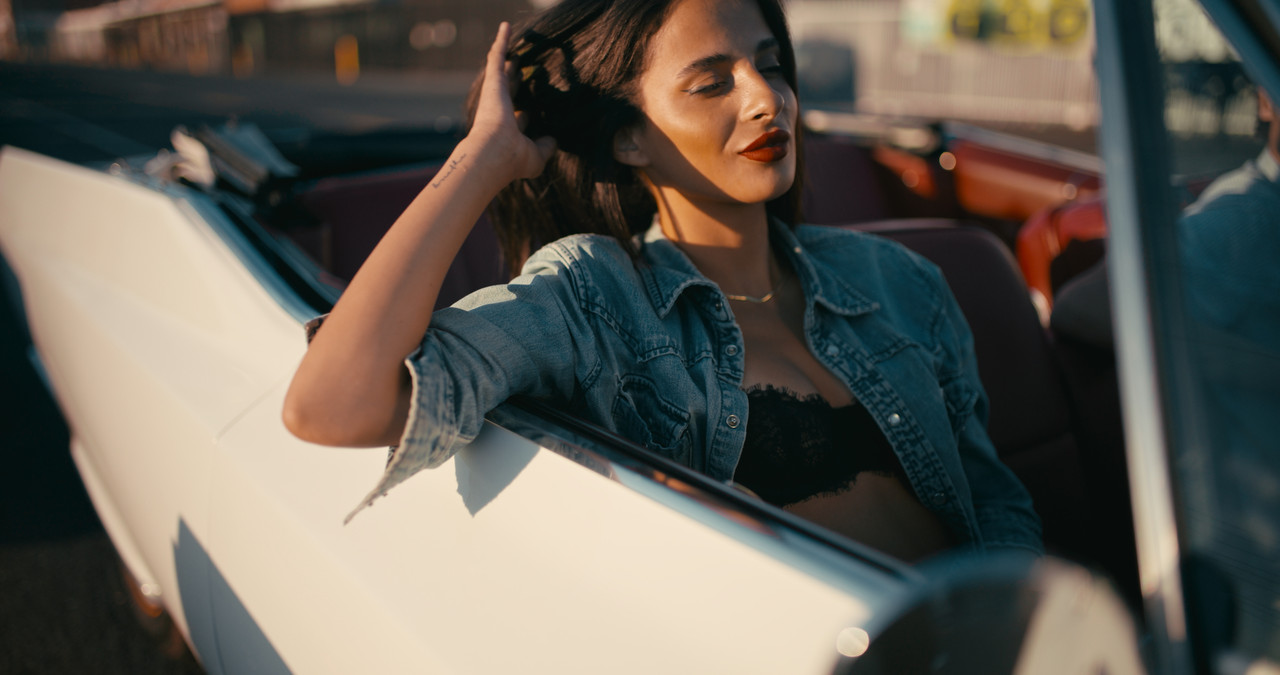
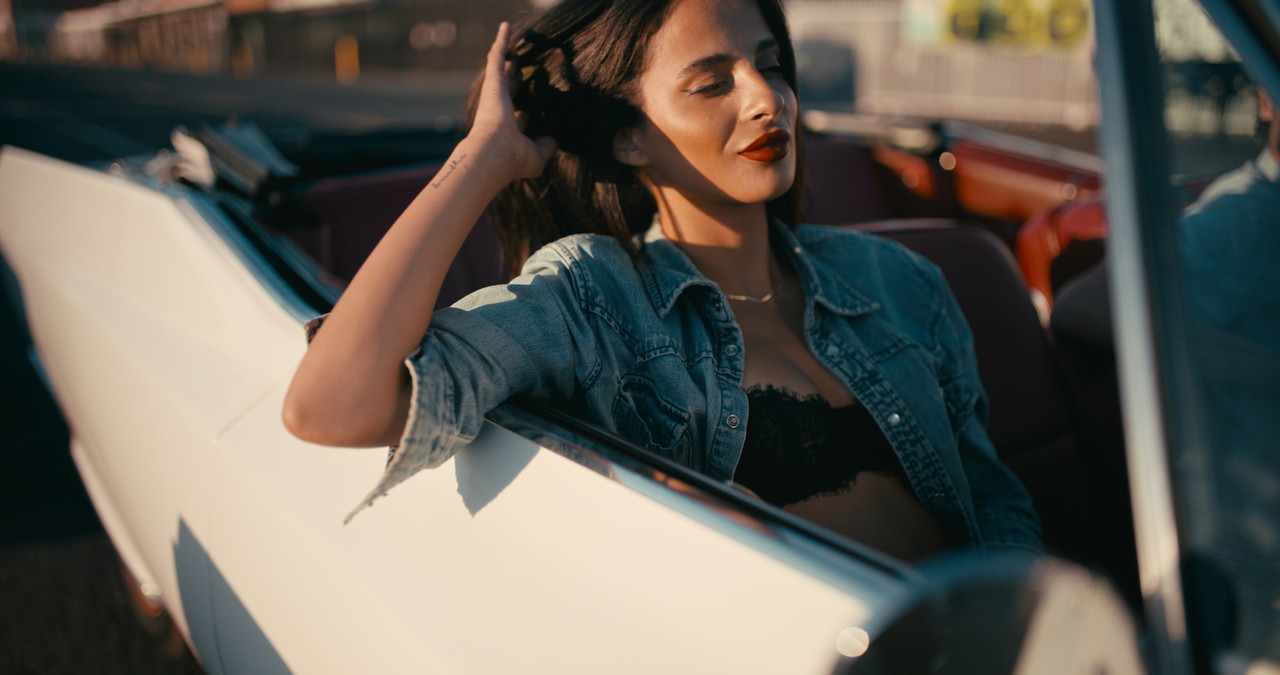
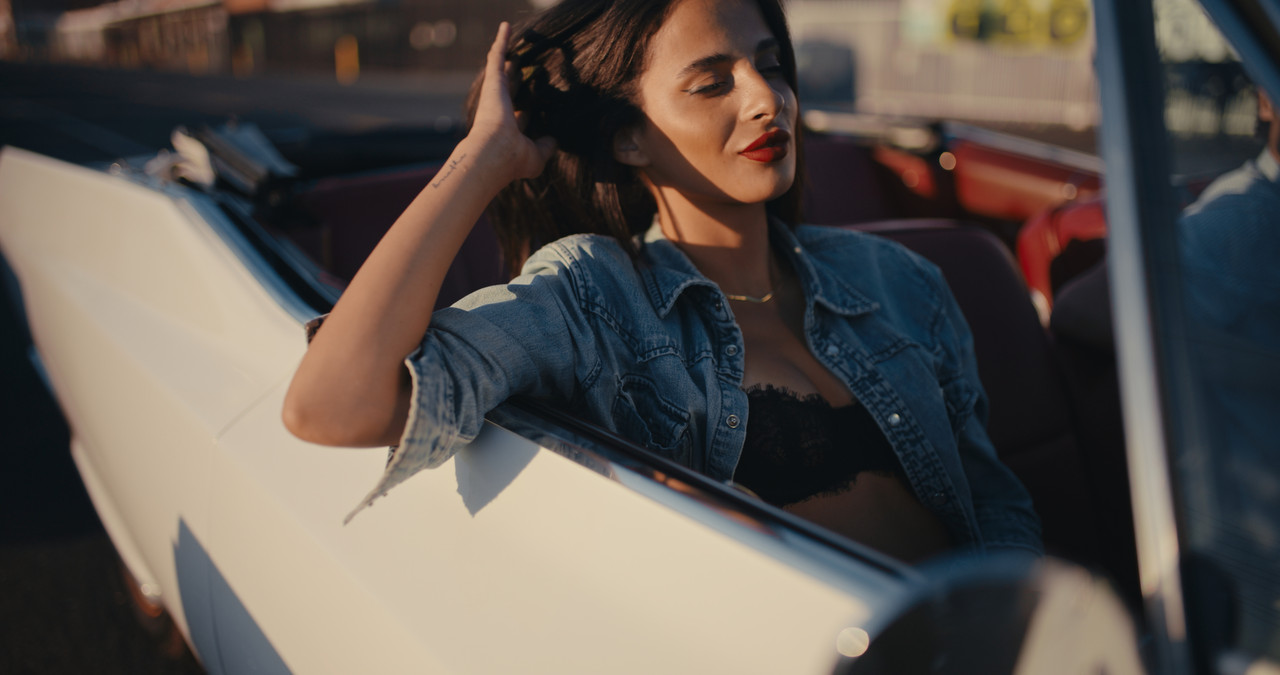
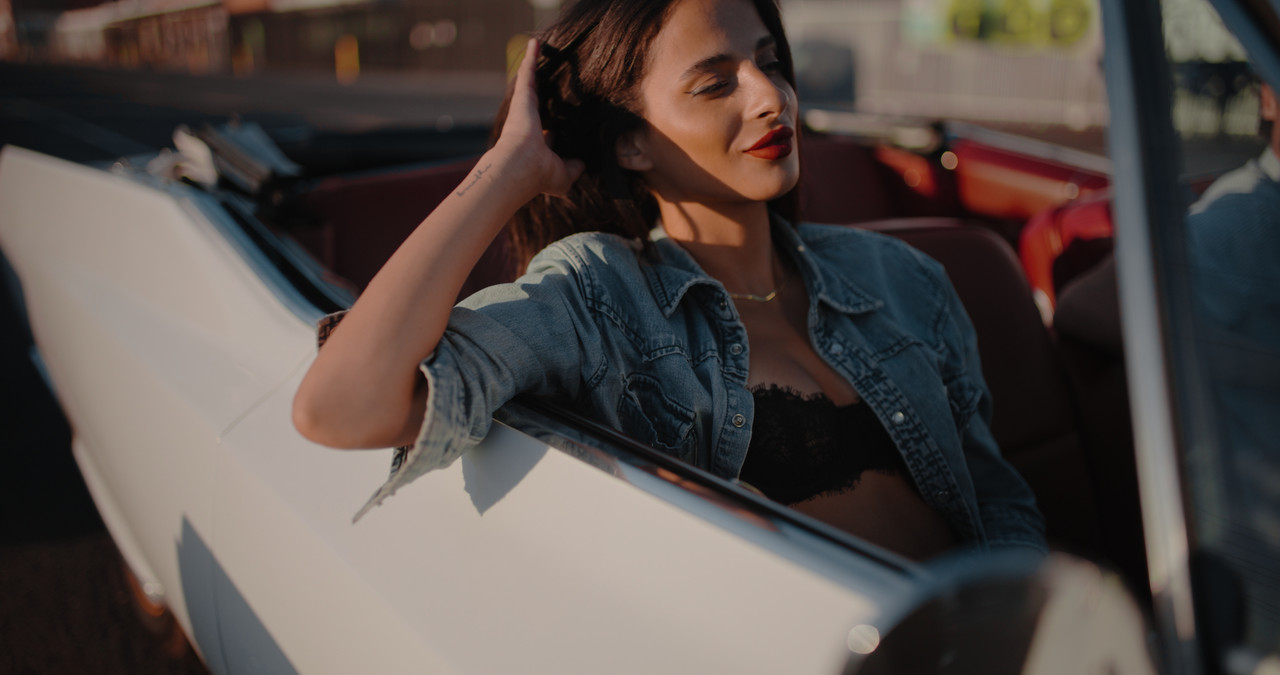
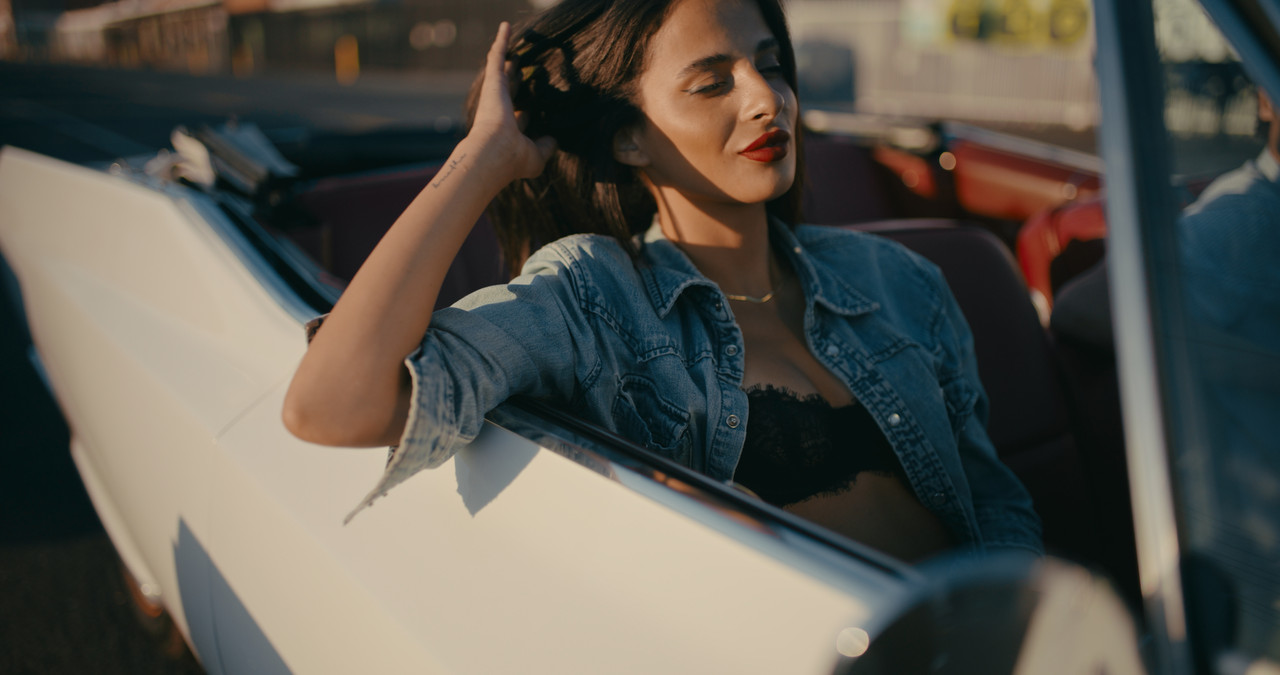
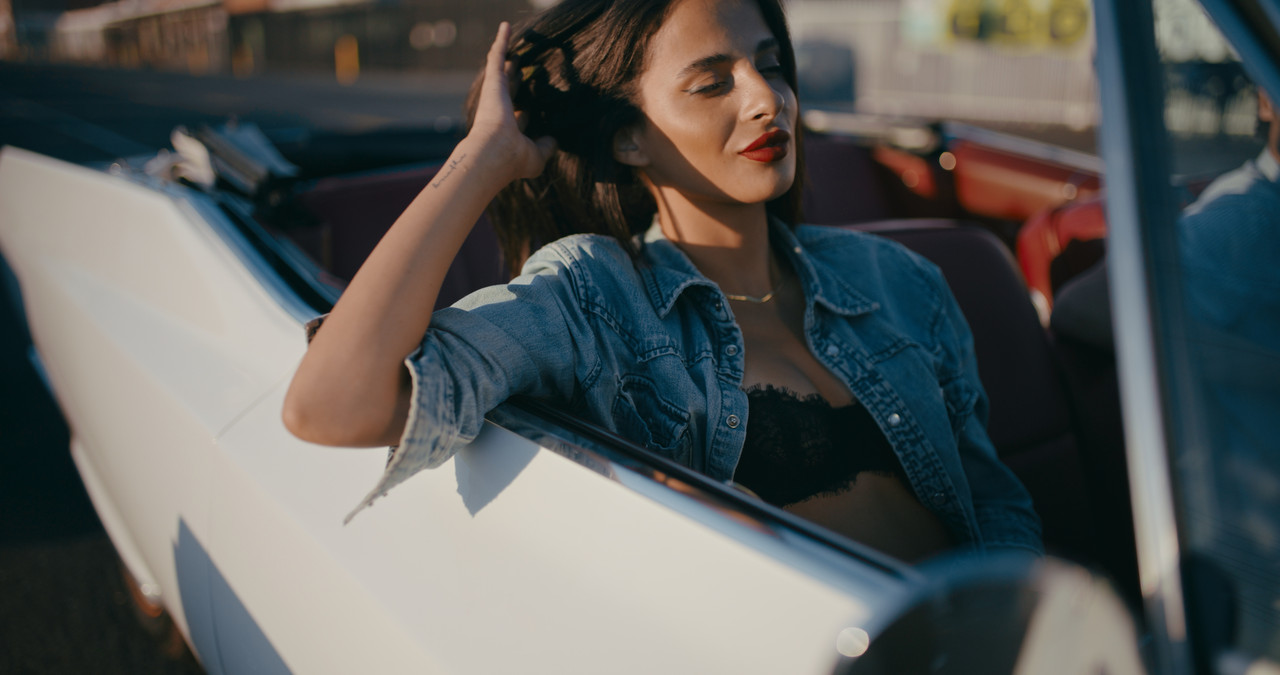
Original Grade from Last Time. All I did was remove the Contrast from this grade so that the Contrast had to come from the Print Film Emulation Luts

ORIGINAL-AFTER-GRADE.jpg


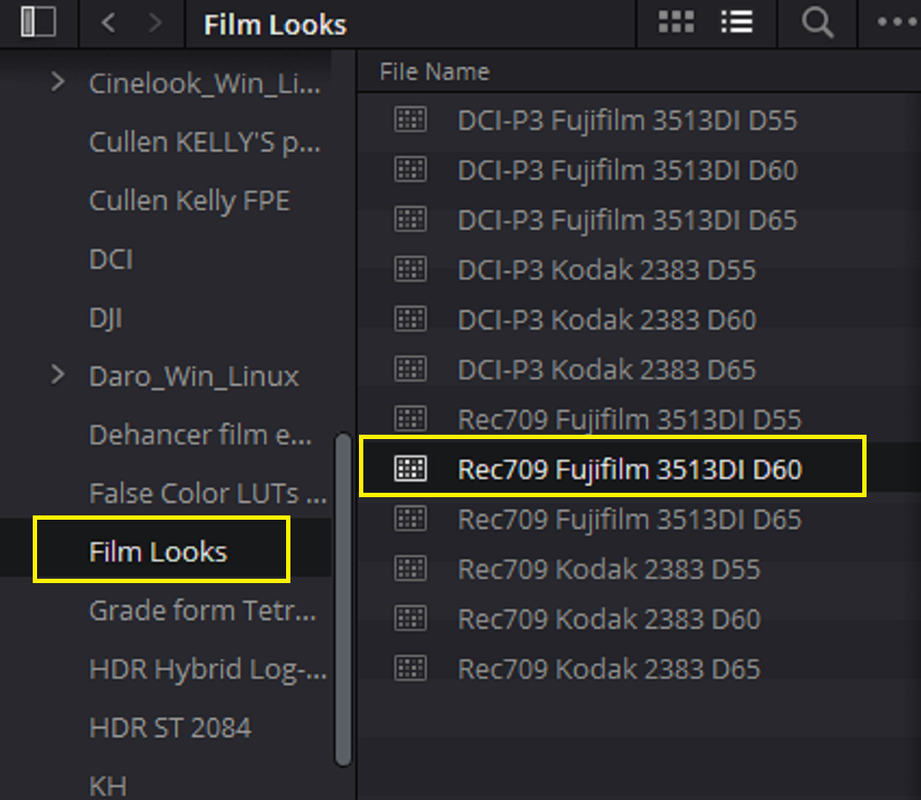
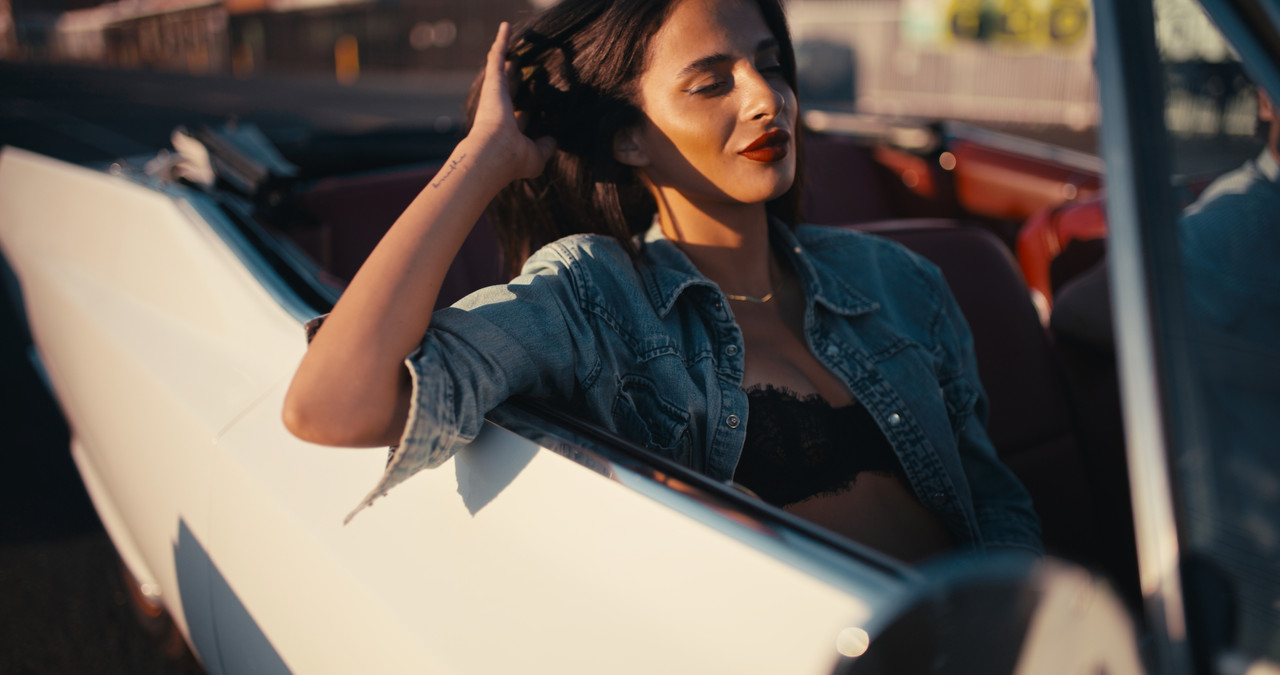
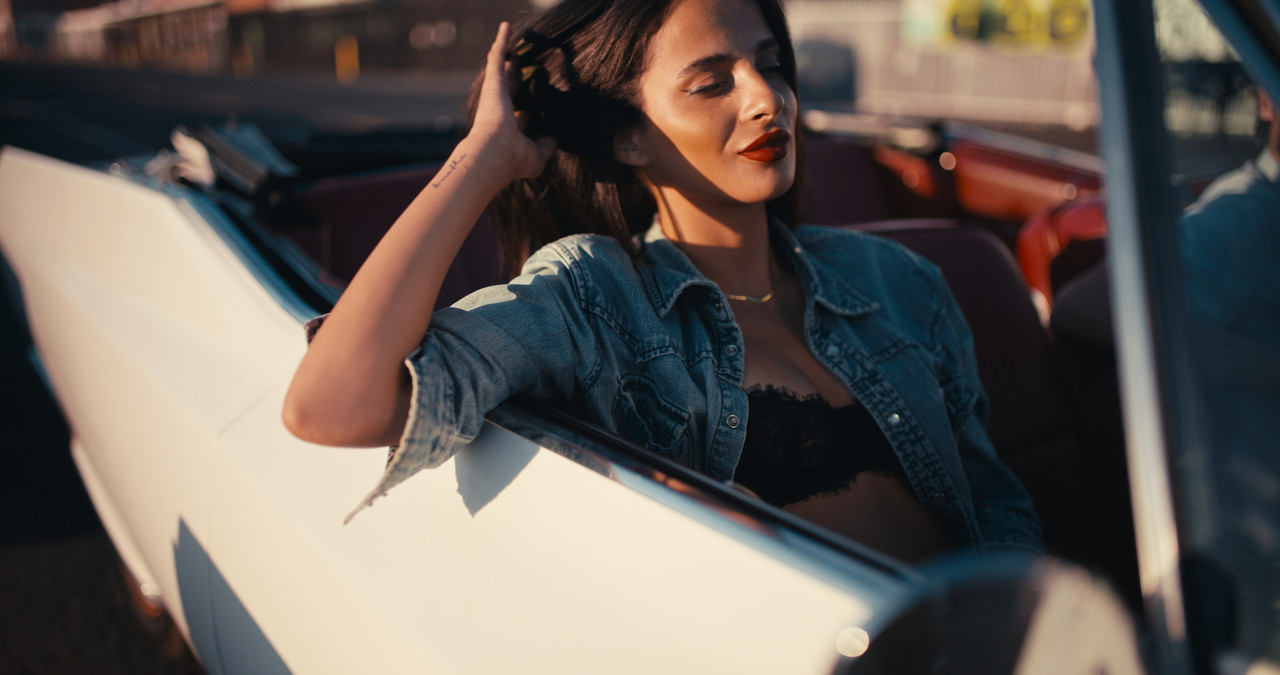
REC709 Fujifilm 3513DI D55

10.png
wAAACH5BAEKAAAALAAAAAABAAEAAAICRAEAOw==


ACES ADX-10

10a-REC709-FUJIFILM-3313-DI-D55-1-3-2.jpg
wAAACH5BAEKAAAALAAAAAABAAEAAAICRAEAOw==


REC709/ Cineon Film Log

fuji-d55-1-3-27.jpg

wAAACH5BAEKAAAALAAAAAABAAEAAAICRAEAOw==

Rec709/ Redlogfilm

redlogfilm-fuji-d55-1-3-21.jpg


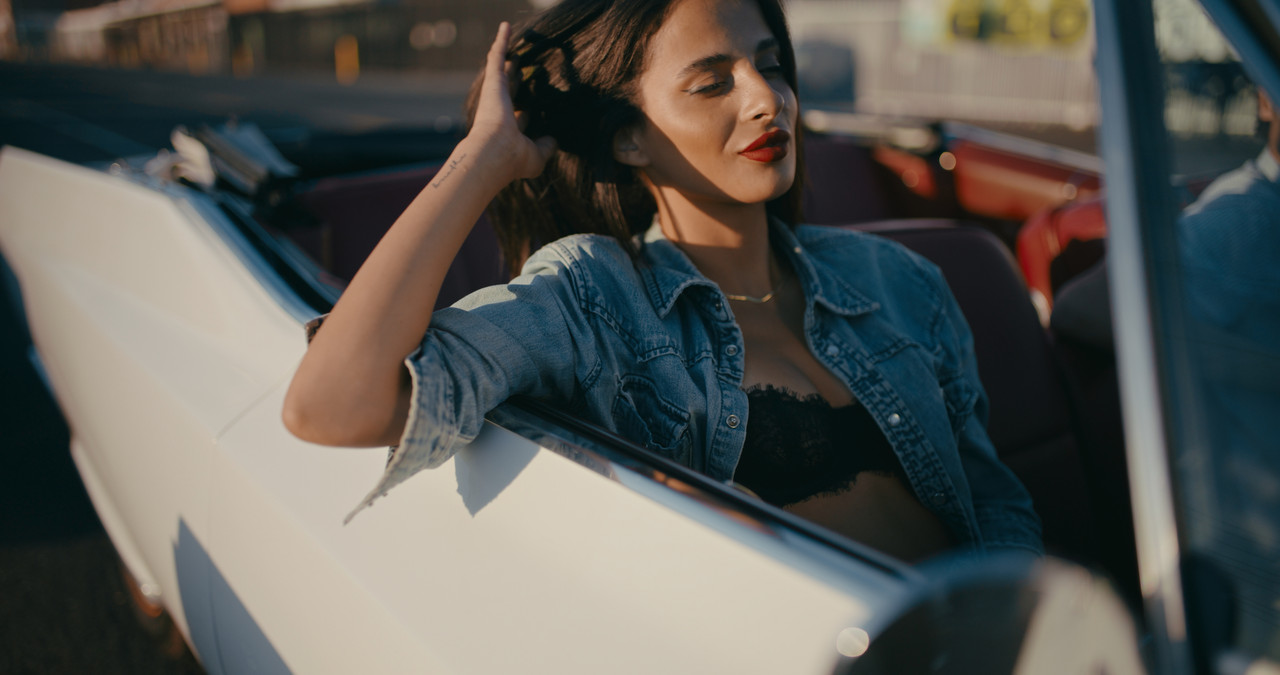
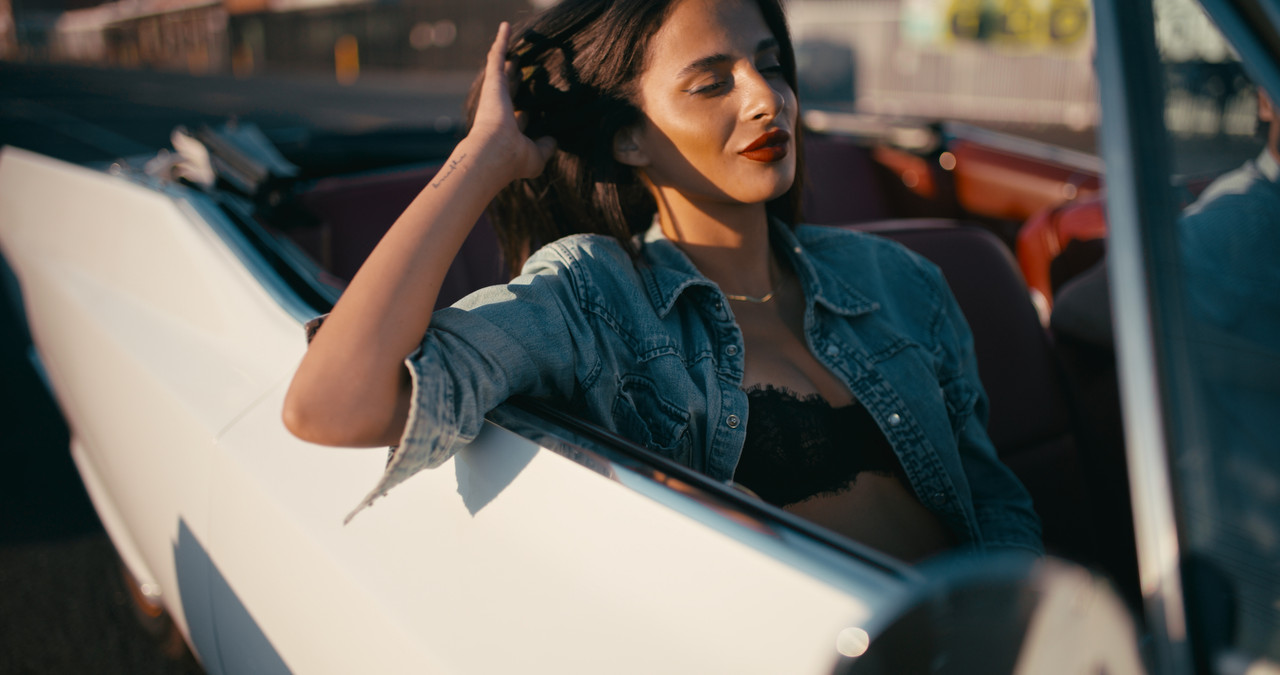
REC709 Fujifilm 3513DI D60

11.png
wAAACH5BAEKAAAALAAAAAABAAEAAAICRAEAOw==


ACES ADX-10

11a-REC709-FUJIFILM-3313-DI-D60-1-3-3.jpg
wAAACH5BAEKAAAALAAAAAABAAEAAAICRAEAOw==


REC709/ Cineon Film Log

fuji-d60-1-3-28.jpg
wAAACH5BAEKAAAALAAAAAABAAEAAAICRAEAOw==

Rec709/ Redlogfilm

redlogfilm-fuji-d60-1-3-22.jpg


REC709 Fujifilm 3513DI D65

12.png
wAAACH5BAEKAAAALAAAAAABAAEAAAICRAEAOw==


ACES ADX-10

12a-REC709-FUJIFILM-3313-DI-D65-1-3-4.jpg
wAAACH5BAEKAAAALAAAAAABAAEAAAICRAEAOw==


REC709/ Cineon Film Log

fuji-d65-1-3-29.jpg
wAAACH5BAEKAAAALAAAAAABAAEAAAICRAEAOw==

Rec709/ Redlogfilm

redlogfilm-fuji-d65-1-3-23.jpg


REC709 Kodak 2383 D55

13.png
wAAACH5BAEKAAAALAAAAAABAAEAAAICRAEAOw==


ACES ADX-10

13a-REC709-KODAK-2383-D55-1-3-5.jpg
wAAACH5BAEKAAAALAAAAAABAAEAAAICRAEAOw==


REC709/ Cineon Film Log

kodak-d55-1-3-30.jpg
wAAACH5BAEKAAAALAAAAAABAAEAAAICRAEAOw==

Rec709/ Redlogfilm

redlogfilm-kodak-d55-1-3-24.jpg


REC709 Kodak 2383 D60

14.png
wAAACH5BAEKAAAALAAAAAABAAEAAAICRAEAOw==


ACES ADX-10

14a-REC709-KODAK-2383-D60-1-3-6.jpg
wAAACH5BAEKAAAALAAAAAABAAEAAAICRAEAOw==


REC709/ Cineon Film Log

kodakd60-1-3-31.jpg


Rec709/ Redlogfilm

redlogfilm-d60-1-3-25.jpg


REC709 Kodak 2383 D65

15.png


ACES ADX-10

15a-REC709-KODAK-2383-D65-1-3-7.jpg


REC709/ Cineon Film Log

kodak-d65-1-3-32.jpg


Rec709/ Redlogfilm

redlogfilm-kodak-d65-1-3-26.jpg
 
Last edited:
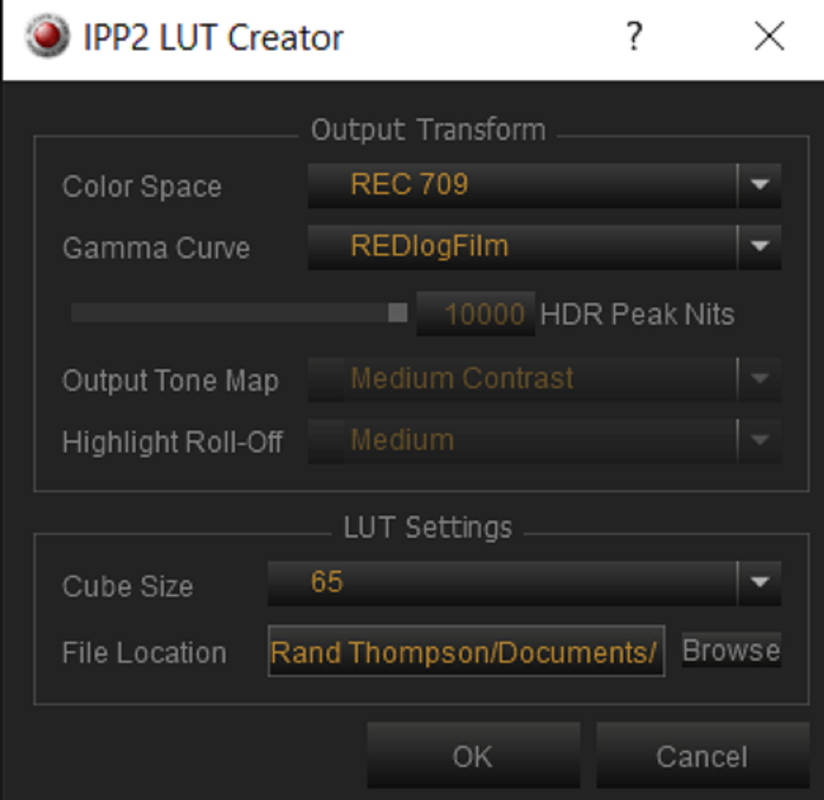
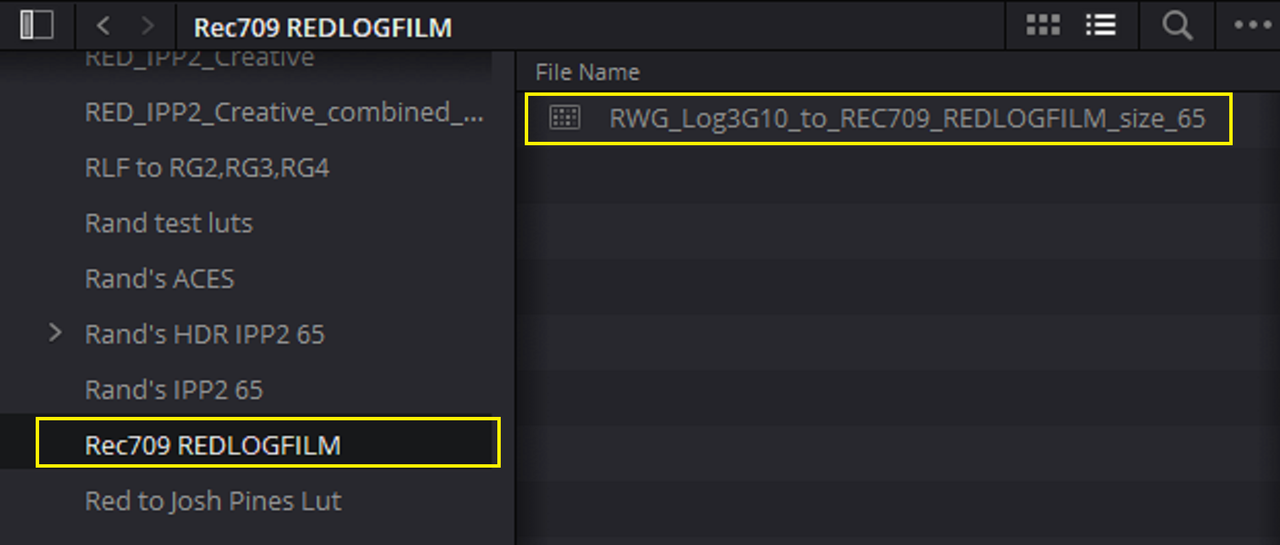
A reminder that REDlogFilm = Cineon and you can indeed use REDCINE-X PRO to create a conversion LUT to REDLOGFILM via the IPP2 LUT Creator.
 
A reminder that REDlogFilm = Cineon and you can indeed use REDCINE-X PRO to create a conversion LUT to REDLOGFILM via the IPP2 LUT Creator.

Phil,

Thanks I never thought of that! I'll try that out!
 
Phil,

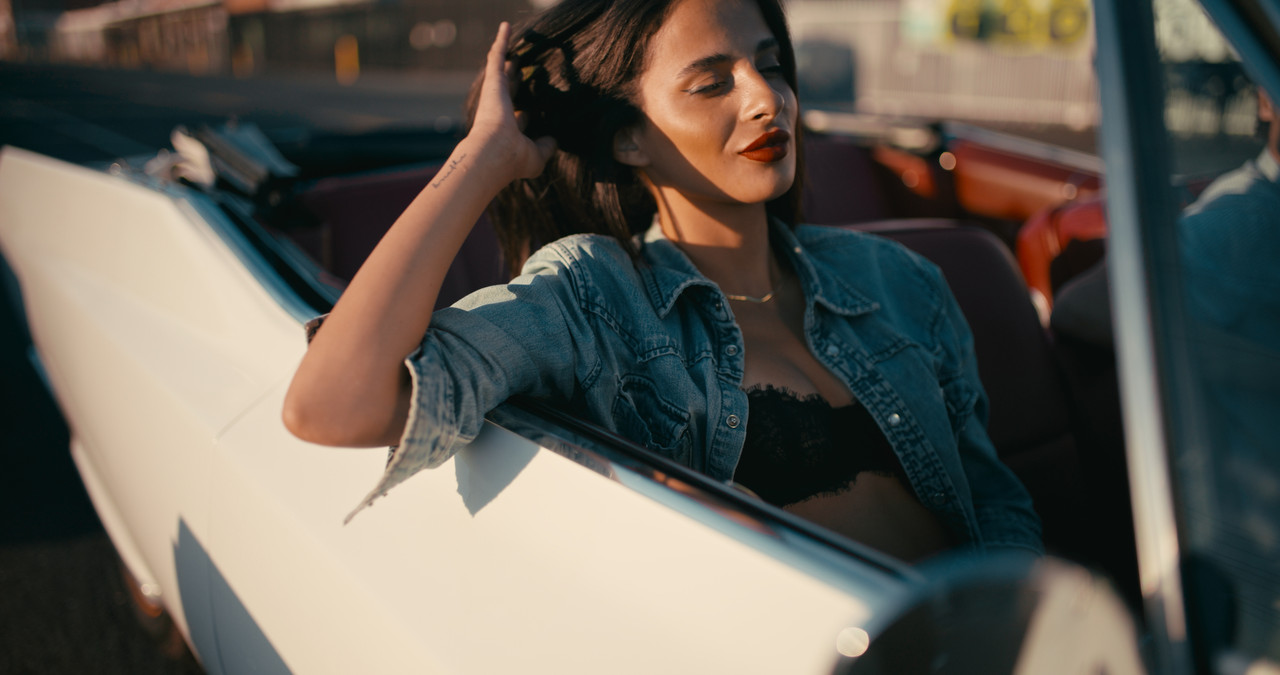
I got this using REDLOGFILM. I believe this was what you meant. It looks good.


EDIT:

I added REC709/ REDLOGFILM to the "VERSUS" above.


Screenshot-8925.png


19.png


Screenshot-8926.png


better-1-3-20.jpg


Same with COLORSPACE Transform

Screenshot-8930.png

better-1-3-20.jpg
 
Last edited:
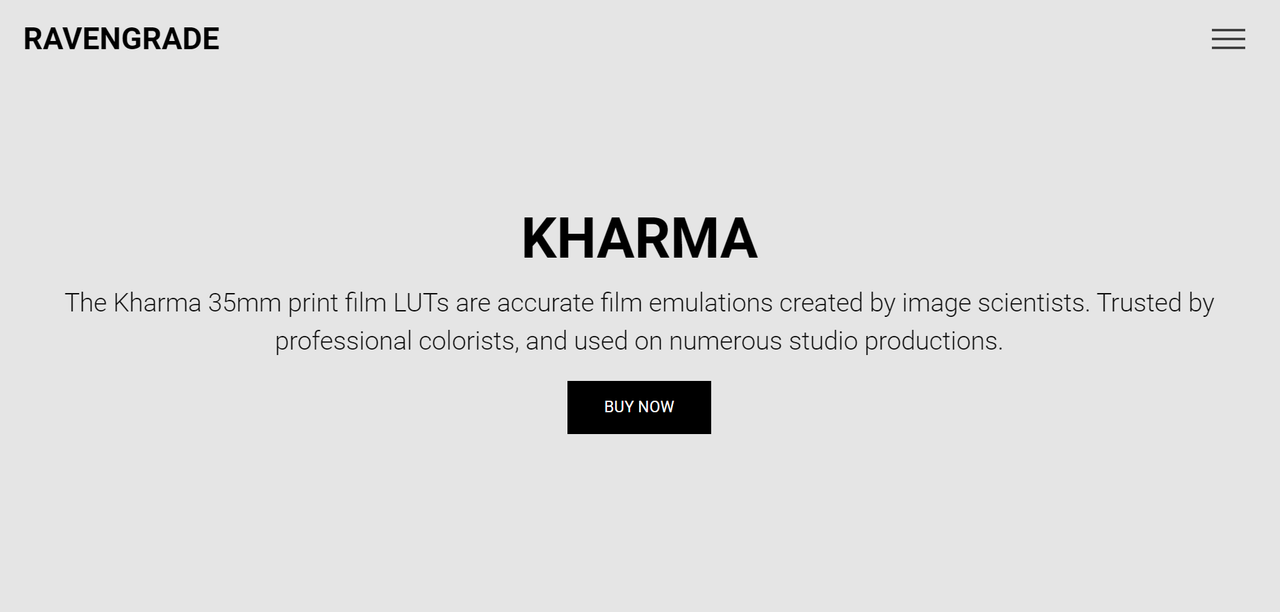
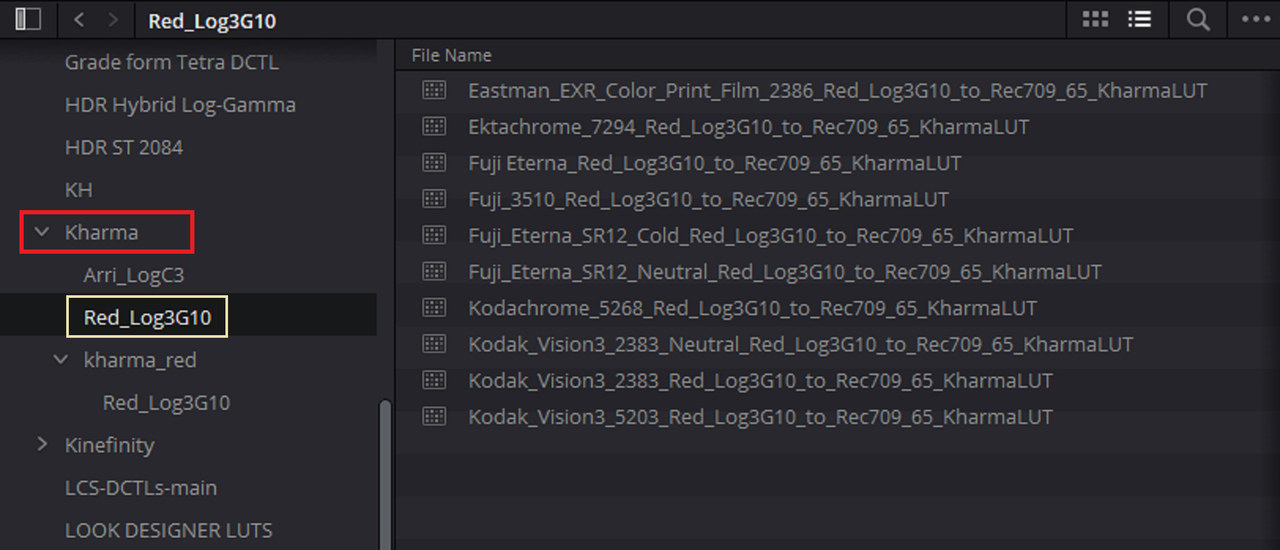
LowePost offer's "Kharma" PFE Luts in their "Print Film Emulation Workflow" tutorial for both AWG3/ALC3 and REDWideGamutRGB/LOG3G10 with a one Year Membership of only $79 as well as many great tutorials by "Professional" Colorist.

Lowepost
Lowepost, creative learning platform

Screenshot-8991.png


https://lowepost.com/get-started/

Screenshot-8989.png


https://lowepost.com/insider/insights/print-film-emulation-workflow-r76/

Screenshot-8914.png


Screenshot-8938.png


"Kharma Luts"
https://ravengrade.com/kharmaluts/

Screenshot-8942.png


I always use the AWG3.ALC3 Color Space for film print emulation

1.png


32.png


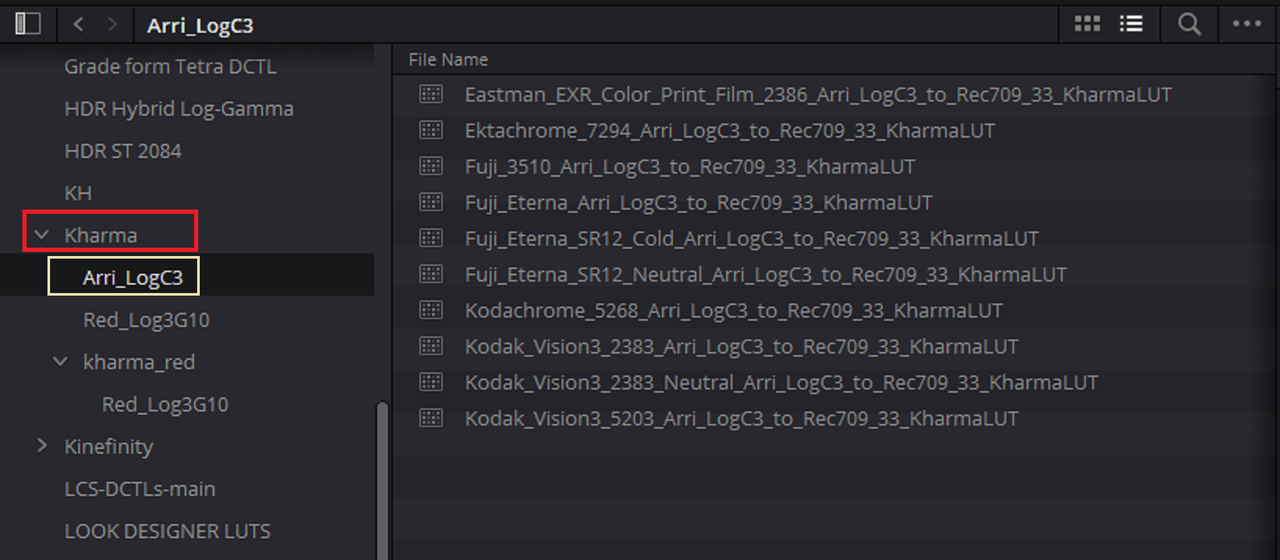
ARRI Version of Kharma Luts

Screenshot-8936.png


RED Version of Kharma Luts

Screenshot-8937.png


Here are a few of the ARRI Versions


Eastman_EXR_Color_Print_Film_2386

Eastman-EXR-Color-Print-Film-2386-Arri-Log-C3-to-Rec709-33-Kharma-LUT-1-3-2.jpg


Fuji_3510

Fuji-3510-Arri-Log-C3-to-Rec709-33-Kharma-LUT-1-3-4.jpg


Fuji_Eterna

Fuji-Eterna-Arri-Log-C3-to-Rec709-33-Kharma-LUT-1-3-5.jpg


Kodak_Vision3_2383

Kodak-Vision3-2383-Arri-Log-C3-to-Rec709-33-Kharma-LUT-1-3-9.jpg
 
ColourLab.AI- Look Designer
https://colourlab.ai/look-designer-colourlab/


Screenshot-9028.png
wAAACH5BAEKAAAALAAAAAABAAEAAAICRAEAOw==

Screenshot-9029.png
wAAACH5BAEKAAAALAAAAAABAAEAAAICRAEAOw==


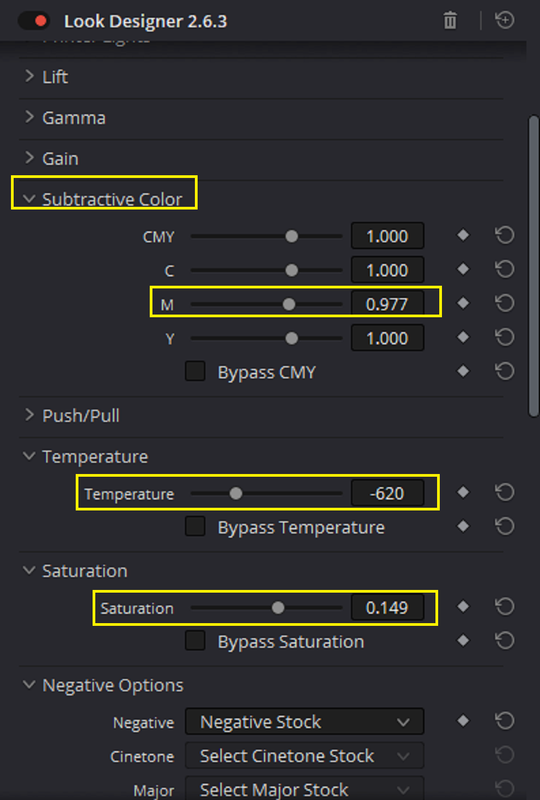
I love Look Designer not only for the Print Film Emulations that I sometimes Rawly use but for it's other features as well.


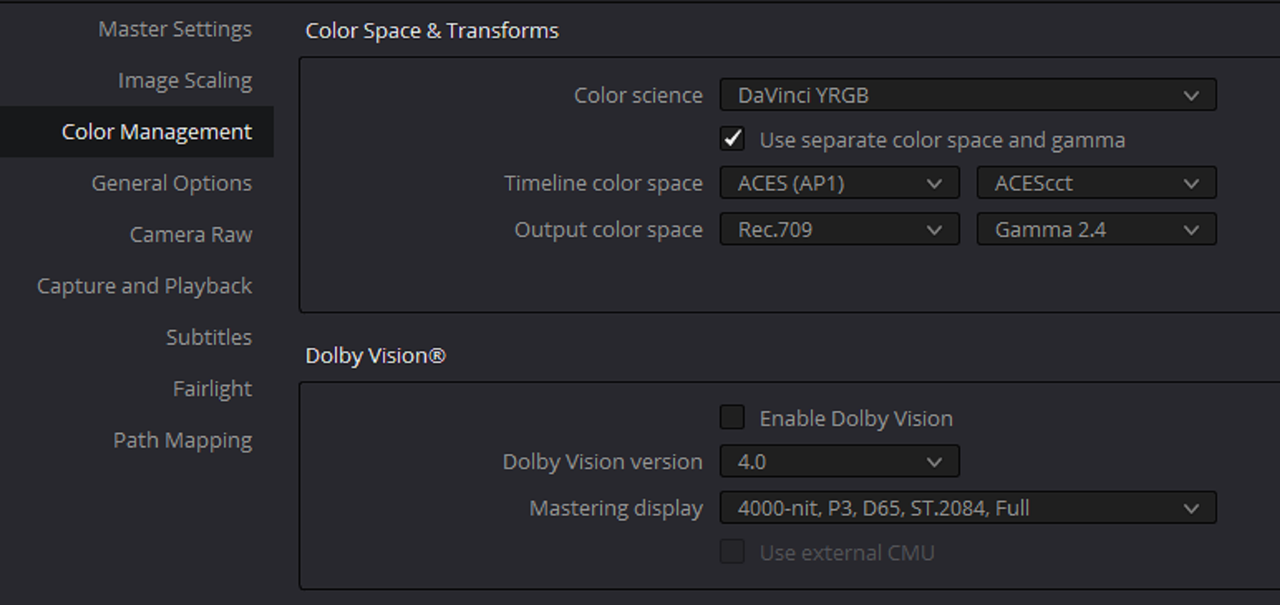
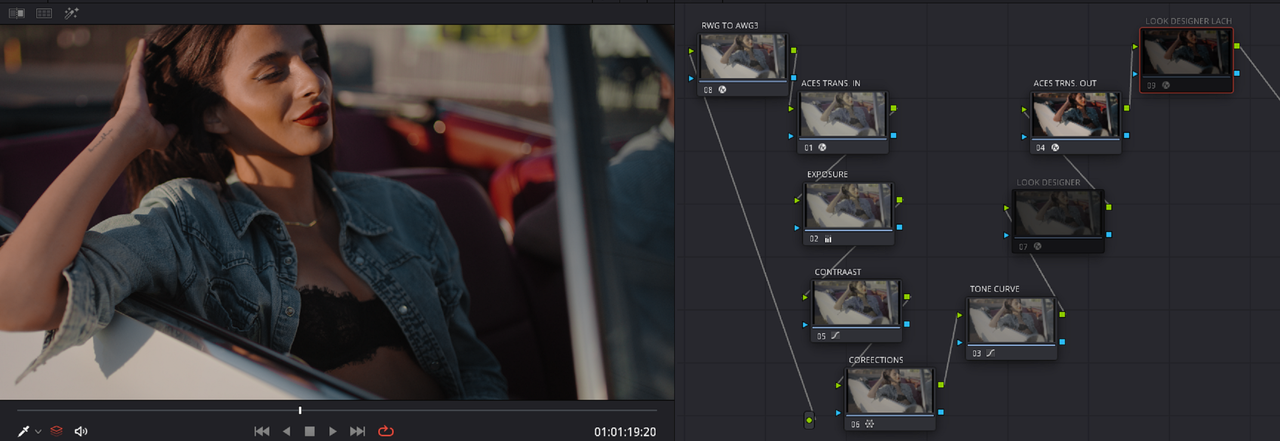
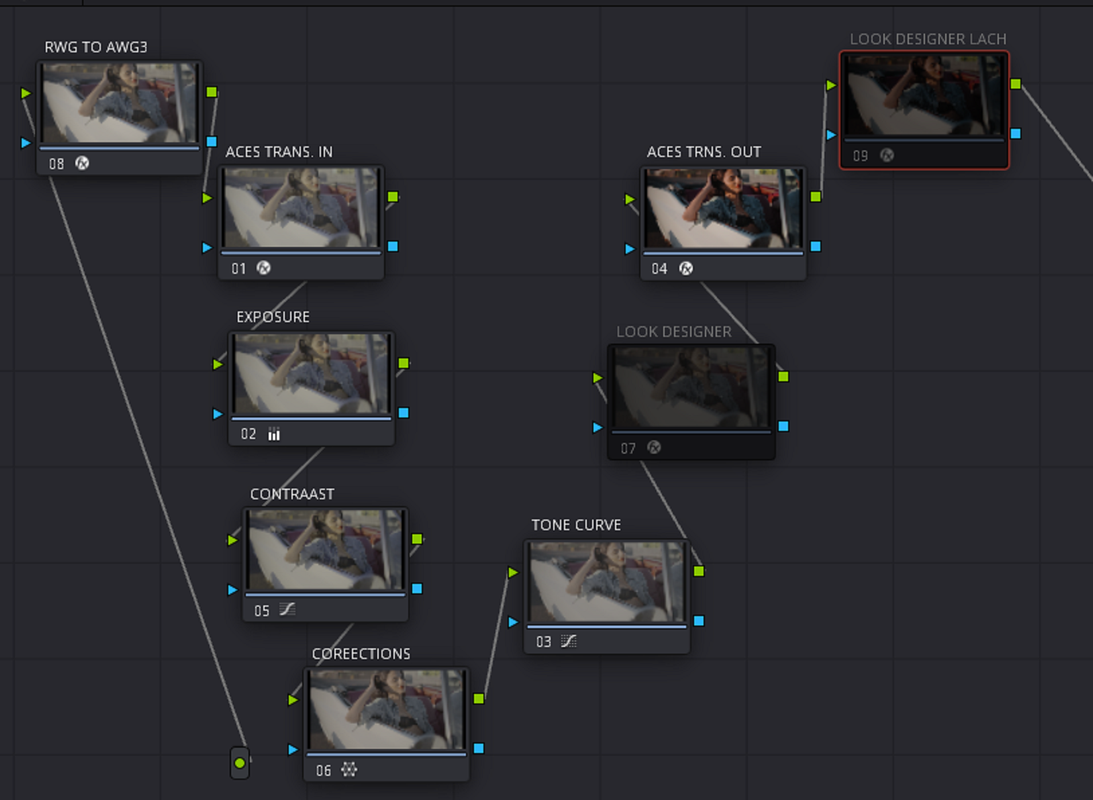
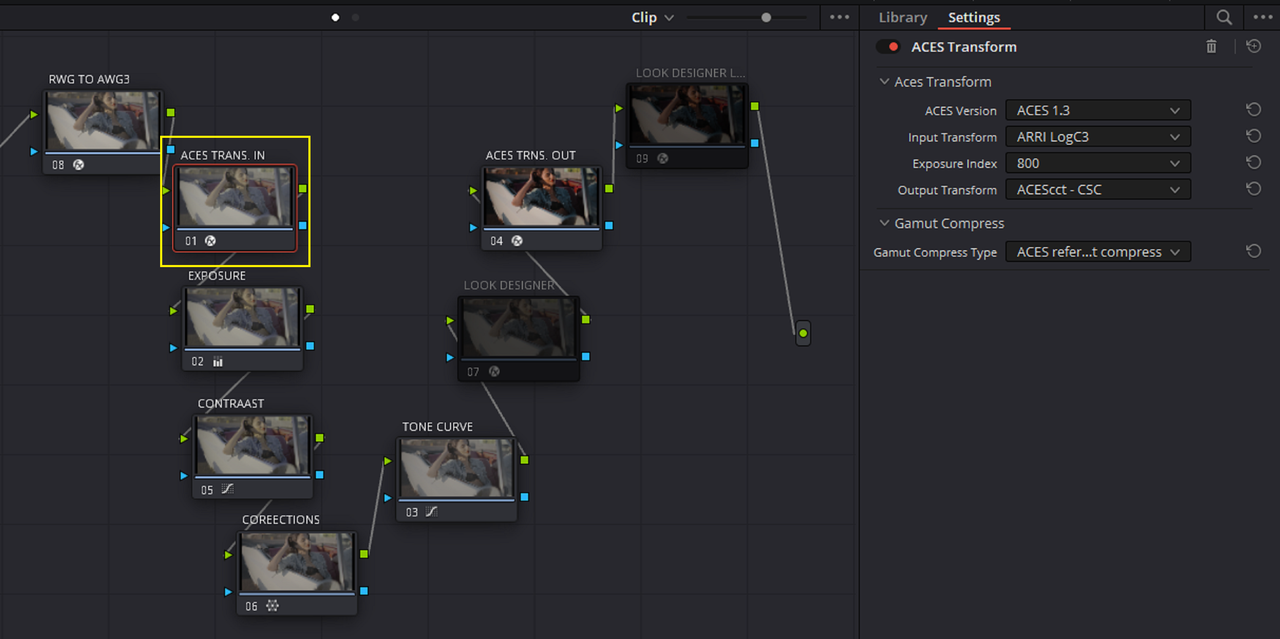
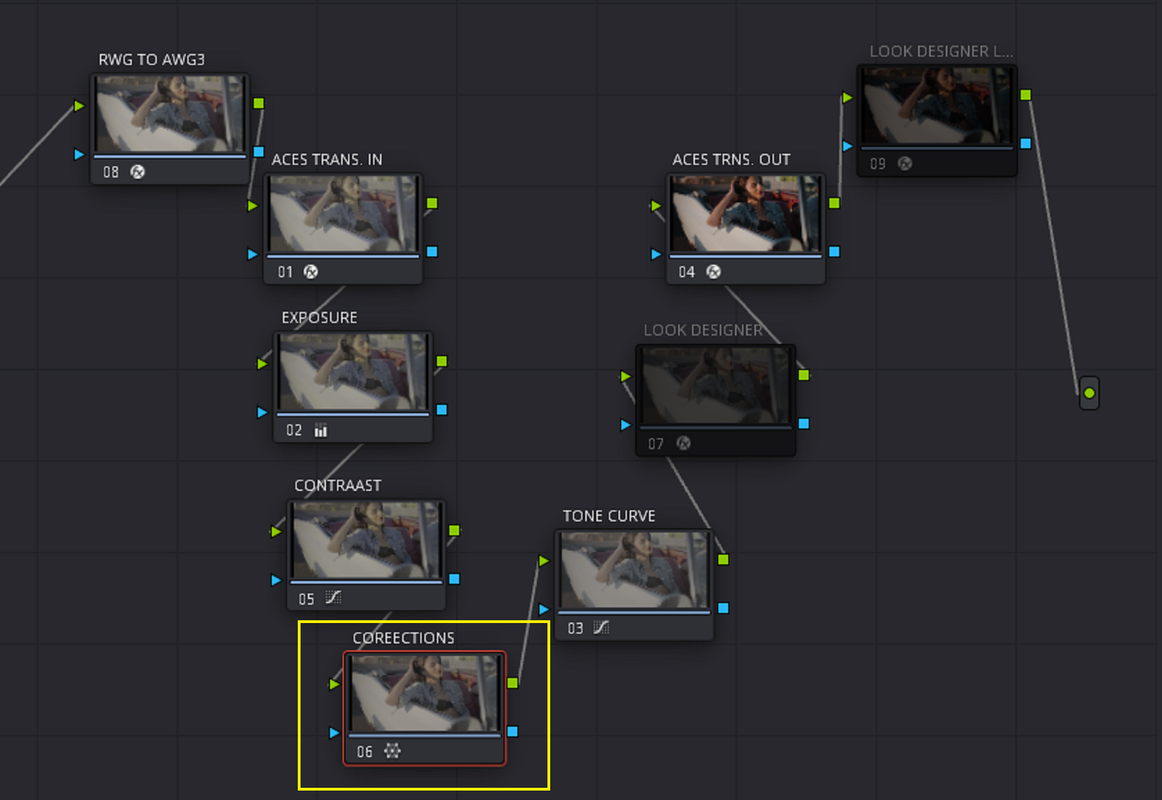
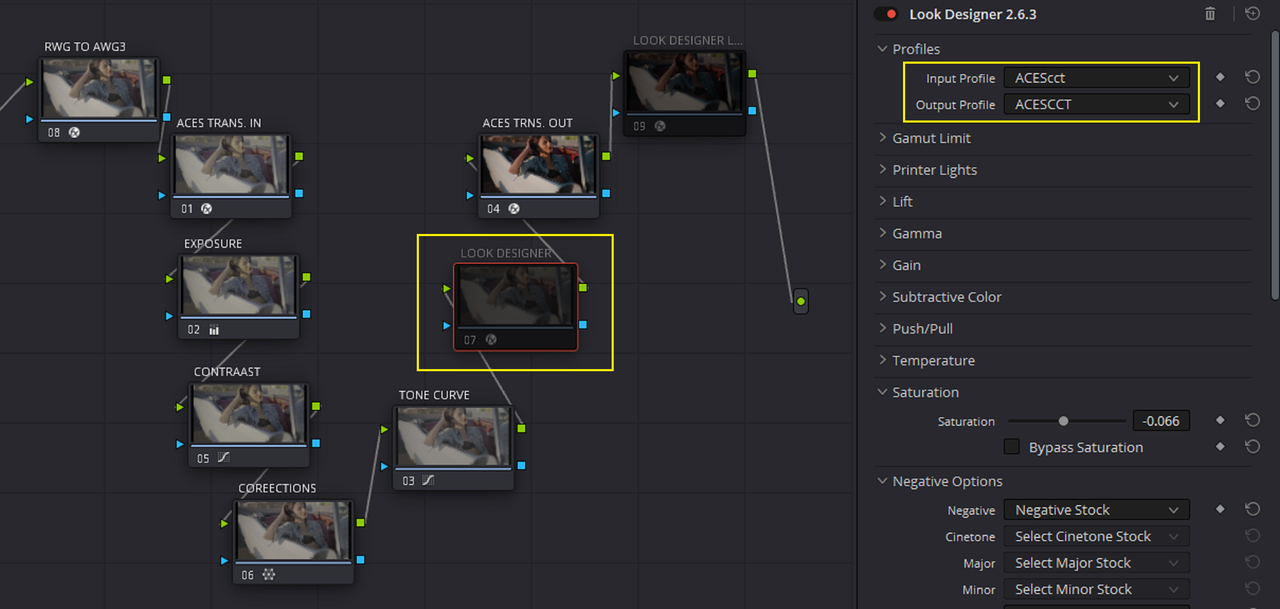
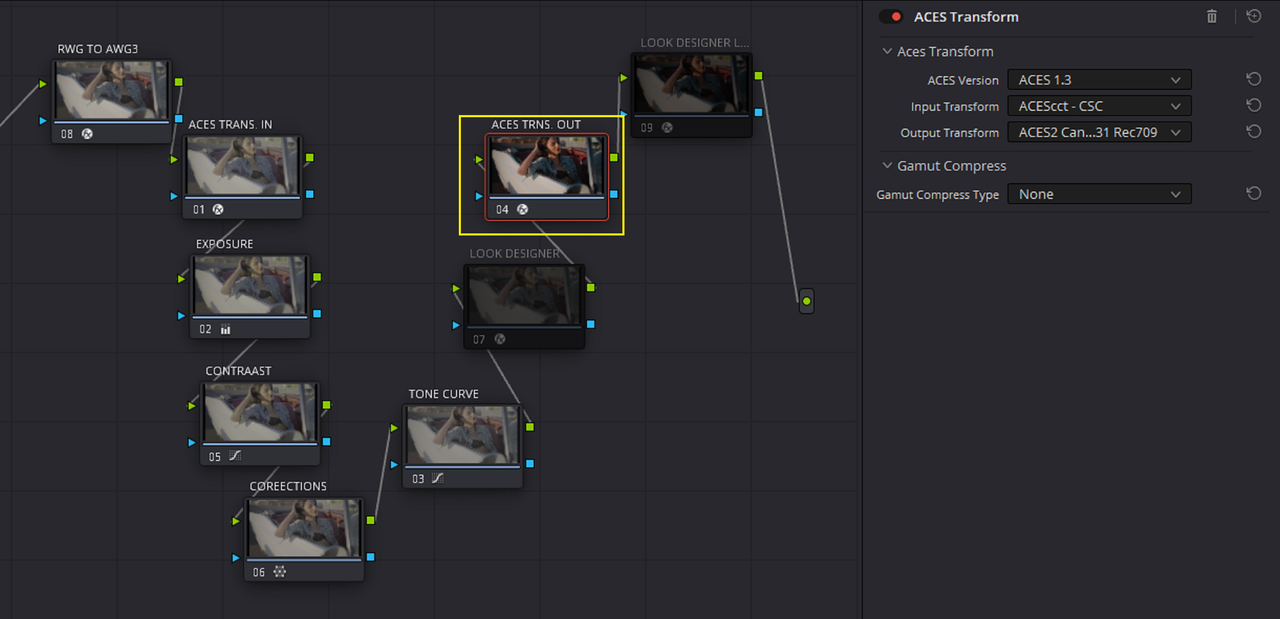
Here is the workflow I use with an ACES setup.


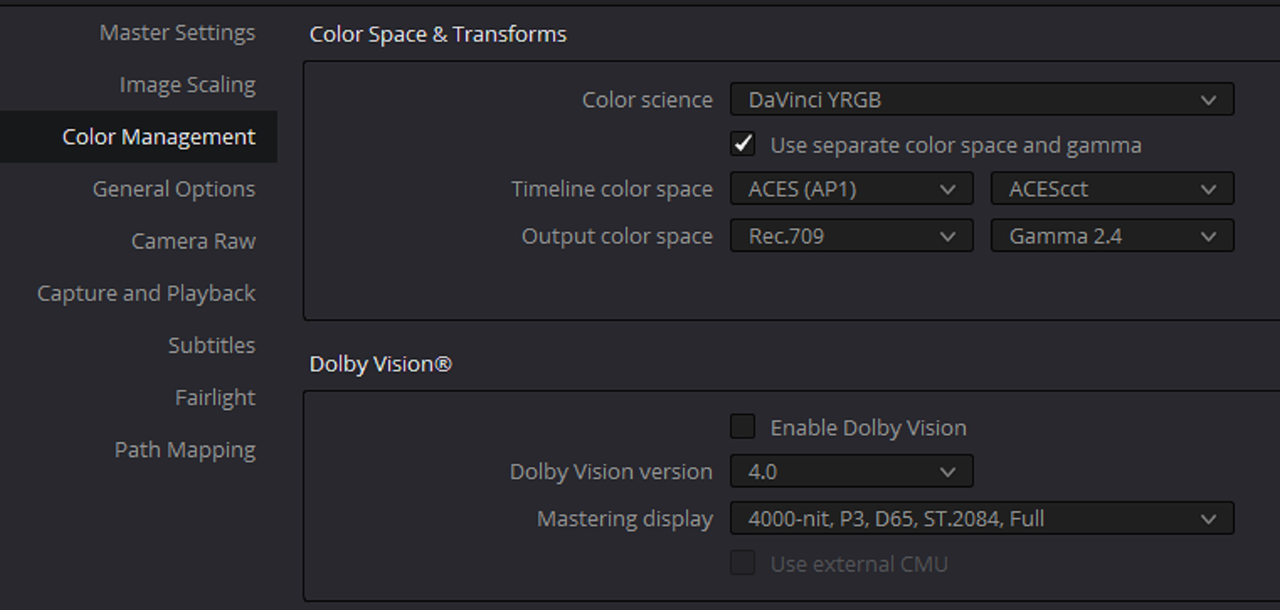
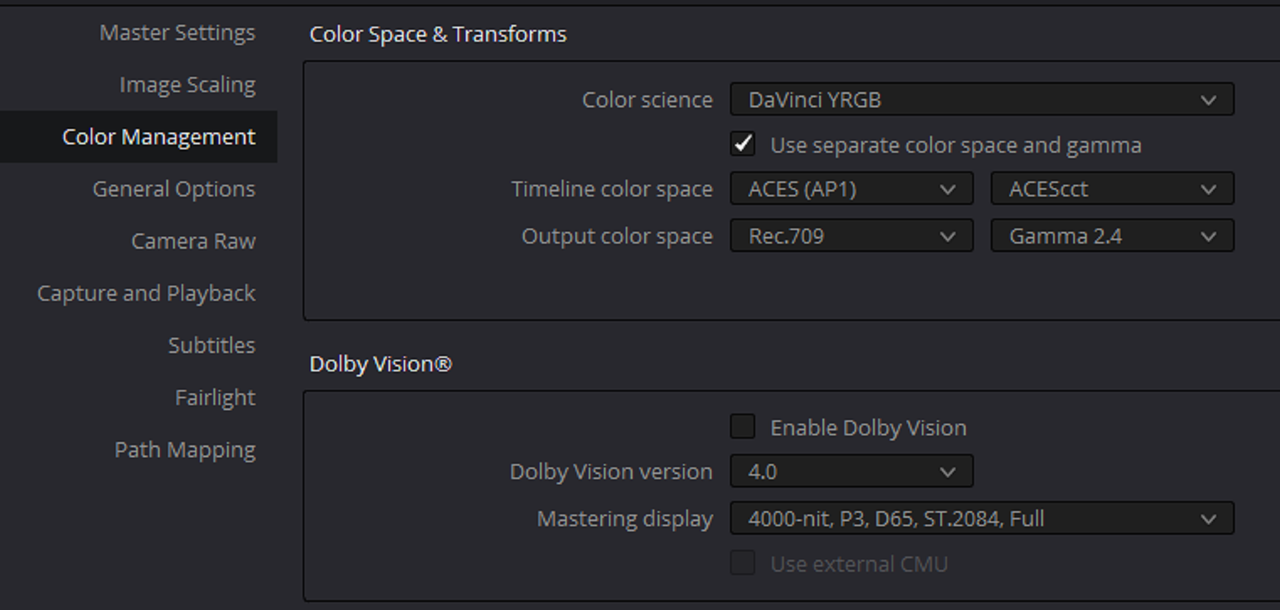
Part 1- My ACES Setup

1.png

2.png


Excuse the "AA" and "EE" these keys stick sometimes when I type a little too fast. I didn't catch the error until after I had already made the screengrabs.

3.png


4.png


5.png


6.png


7.png


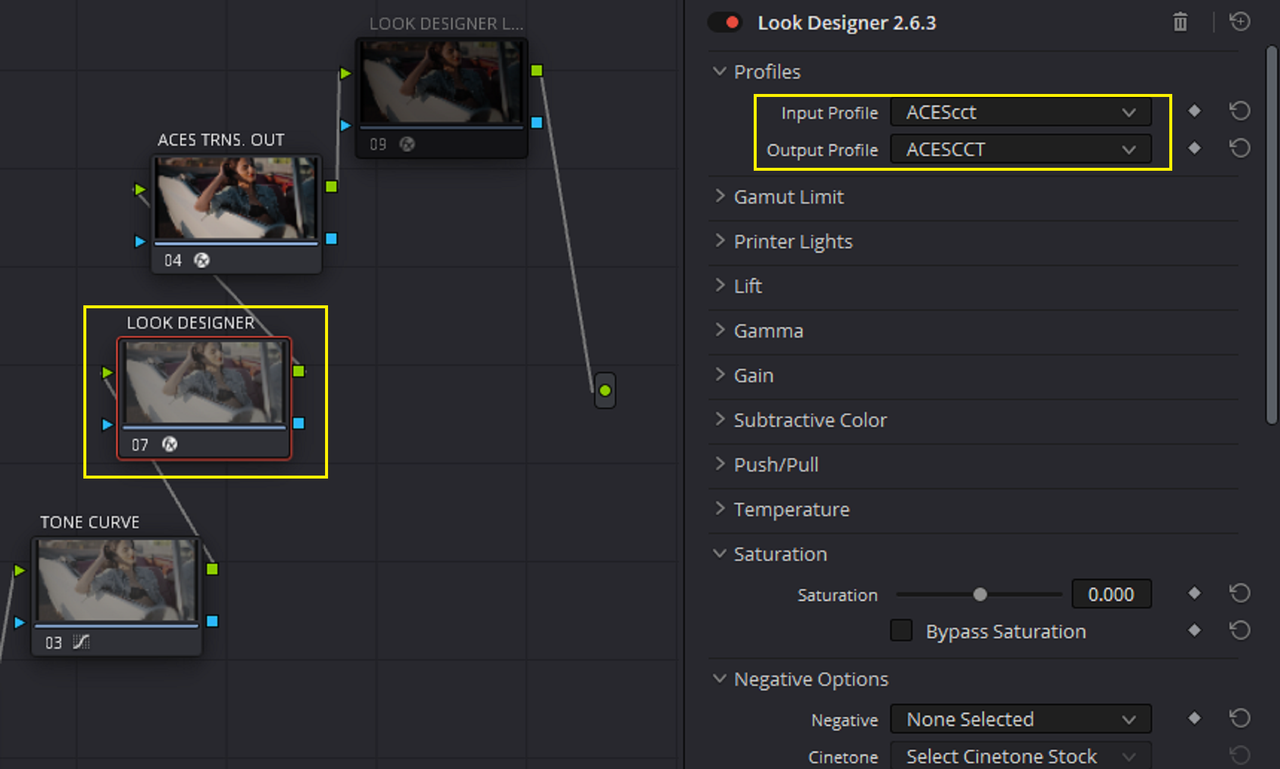
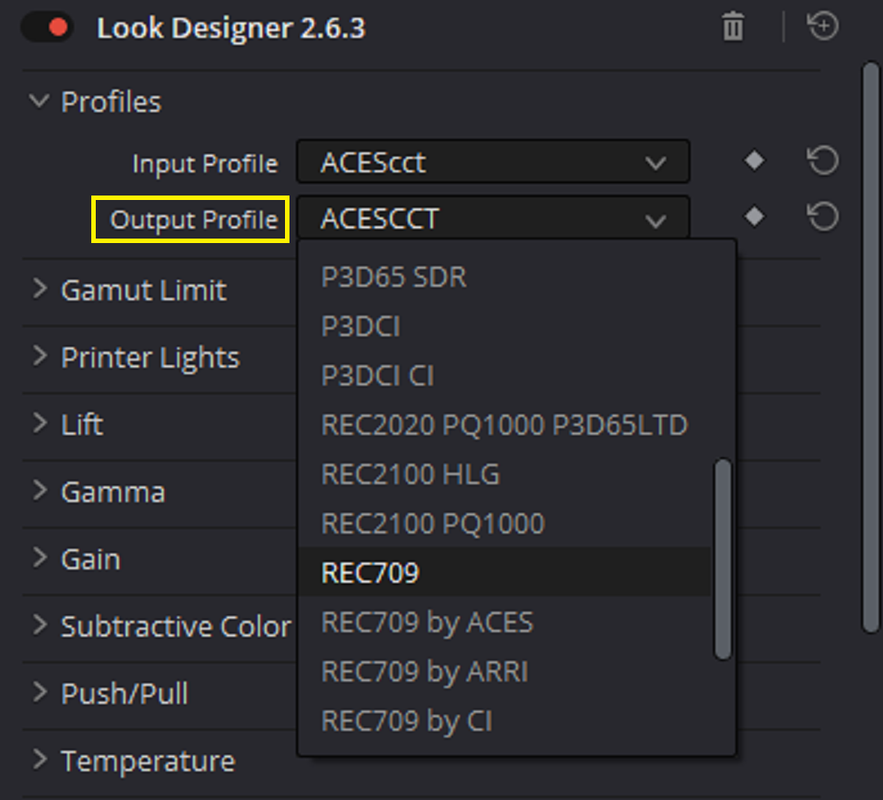
I chose an "INPUT" and "OUTPUT" Profile of "ACEScct" so that the grade would be entirely done in the ACEScct Color Space


8.png


9.png


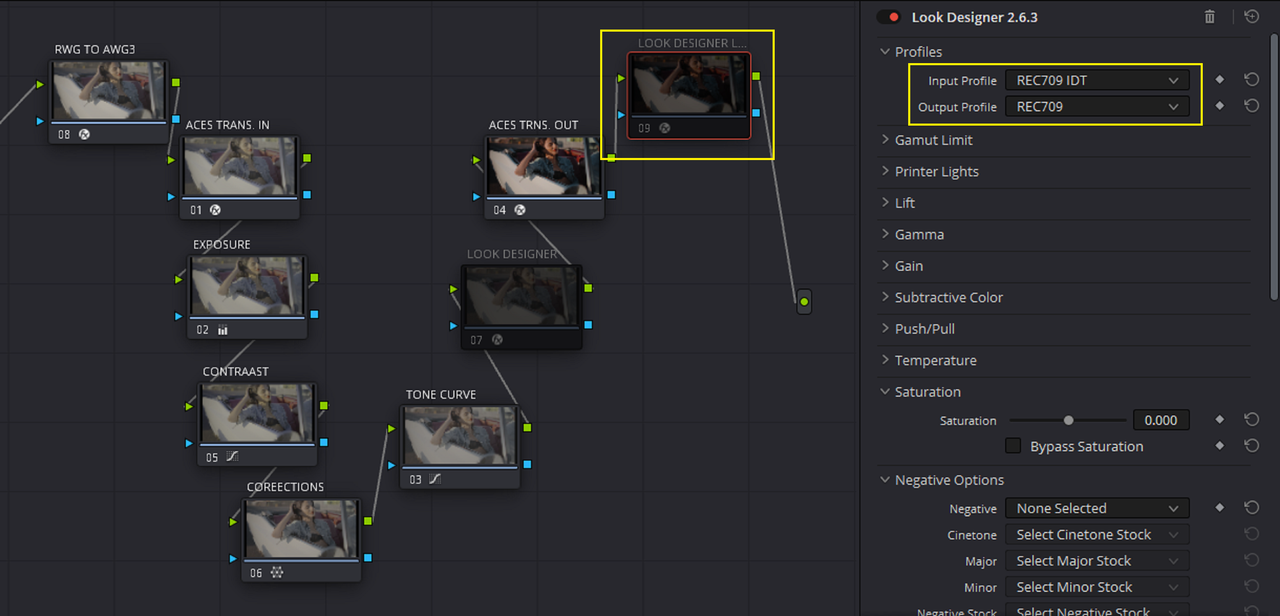
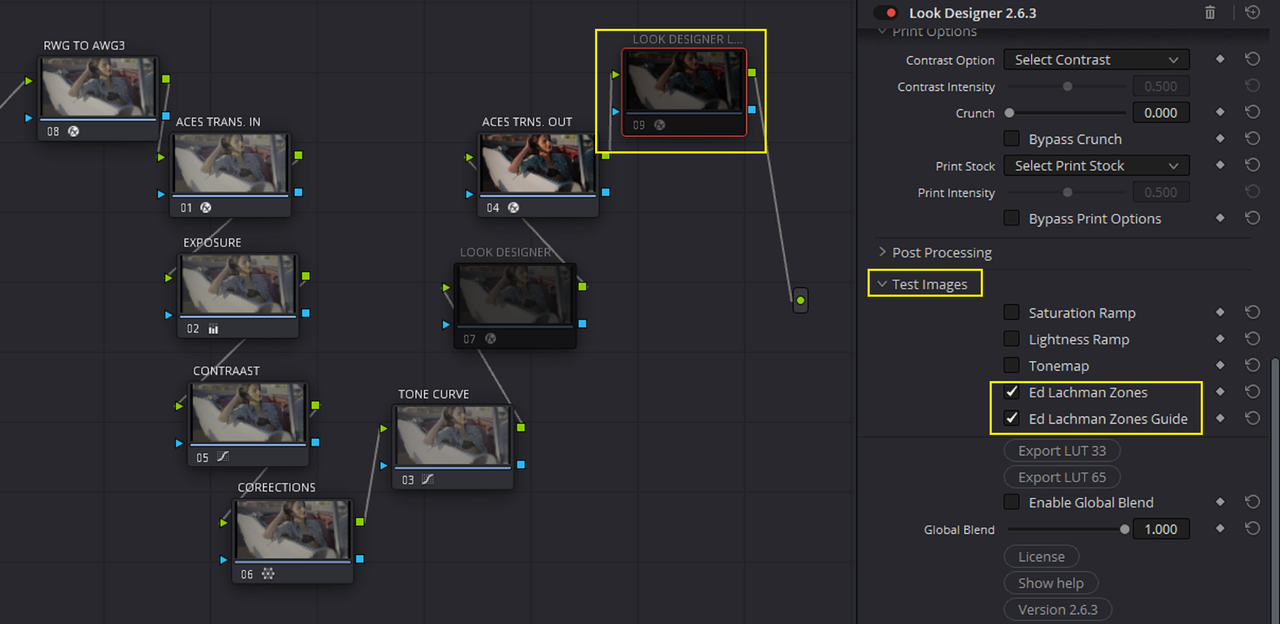
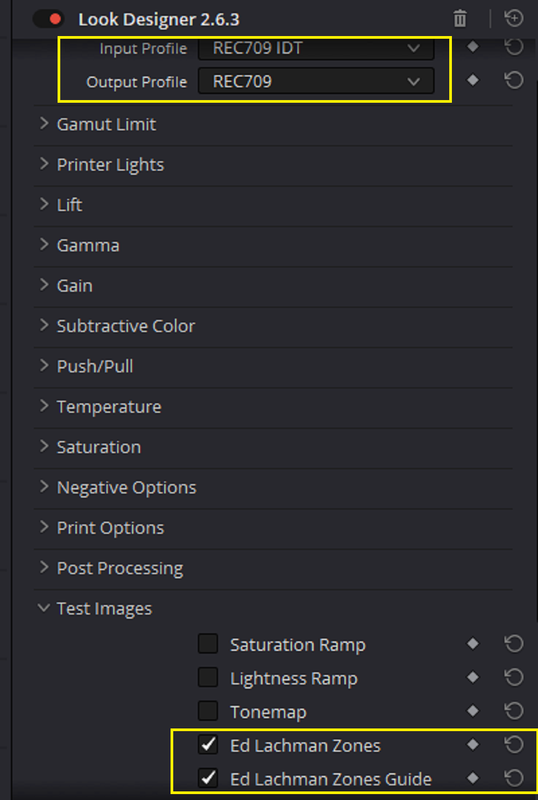
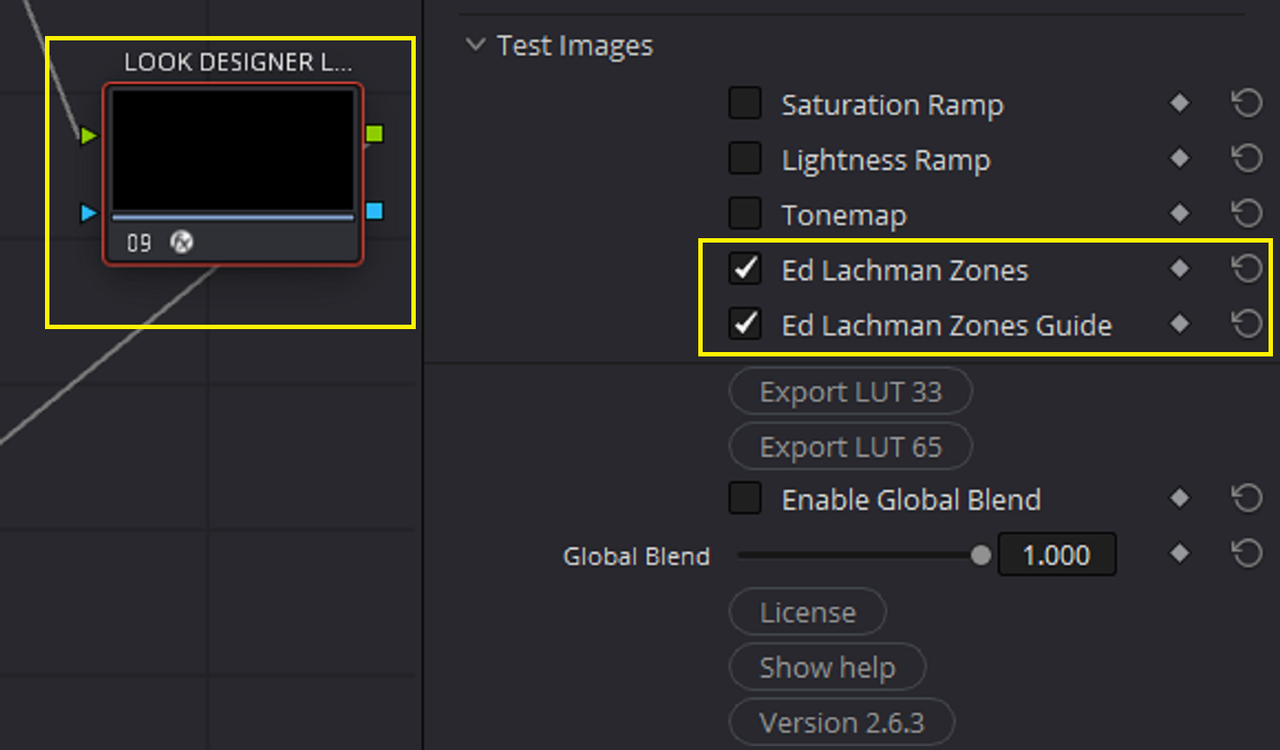
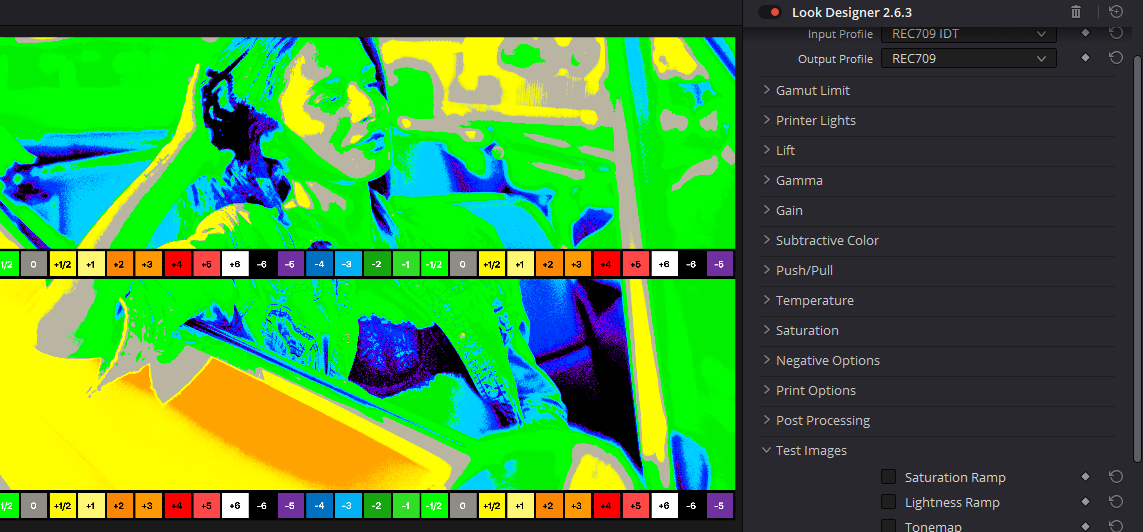
I used a second instance of "LOOK DESIGNER" so that I could use the Ed Lachman's Zones Tools. This Tool only works in REC709 so I had to choose an "INPUT" and "OUTPUT" Profile of "REC709" for it to be shown correctly.

10.png


11.png
 
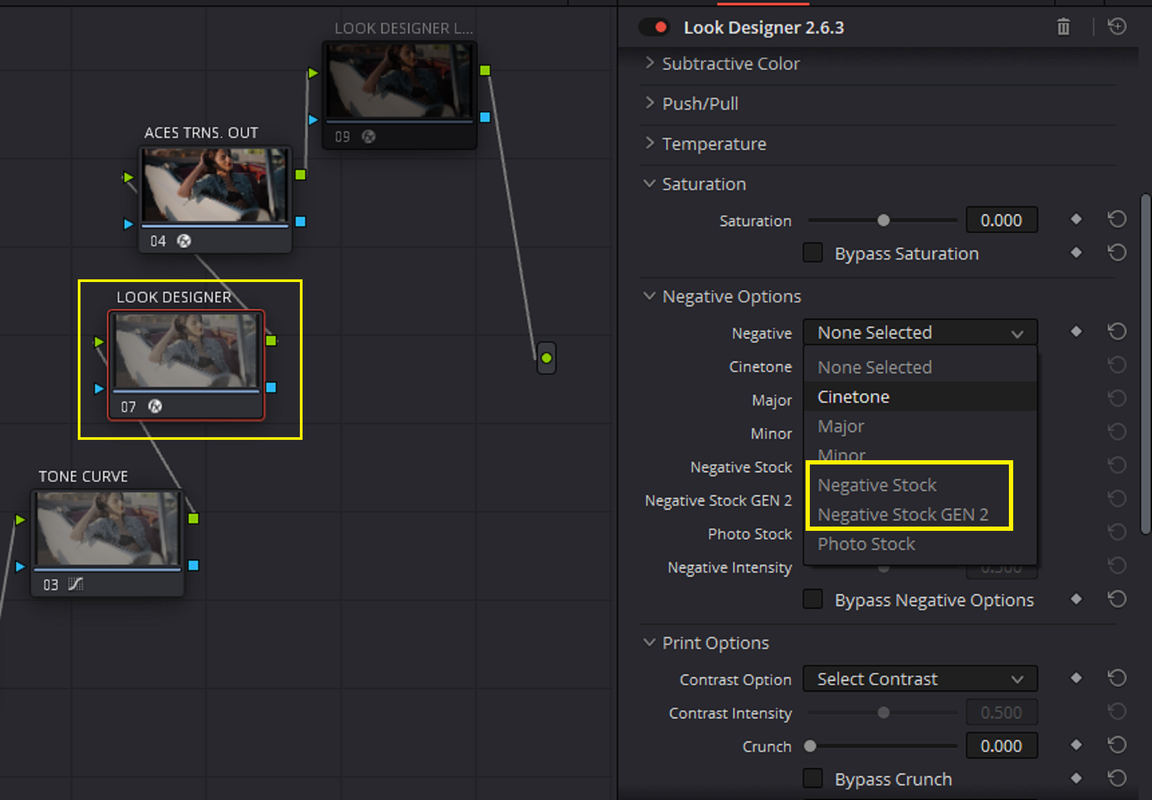
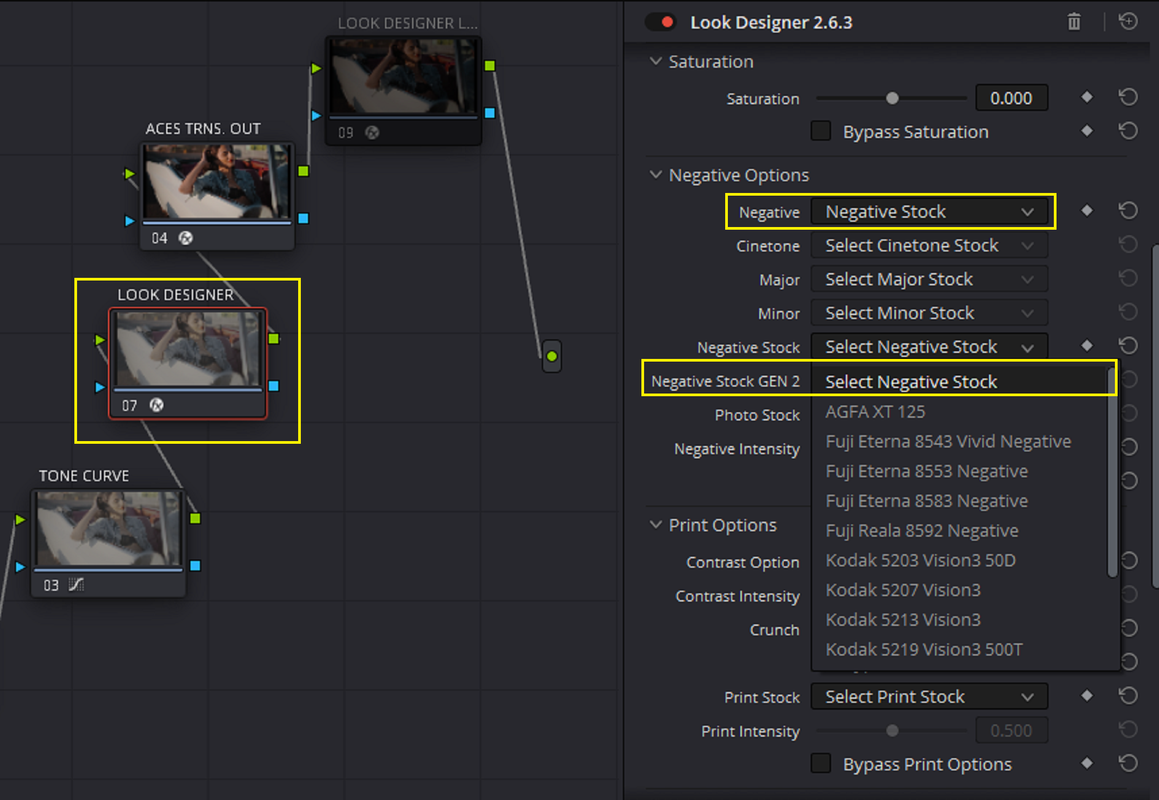
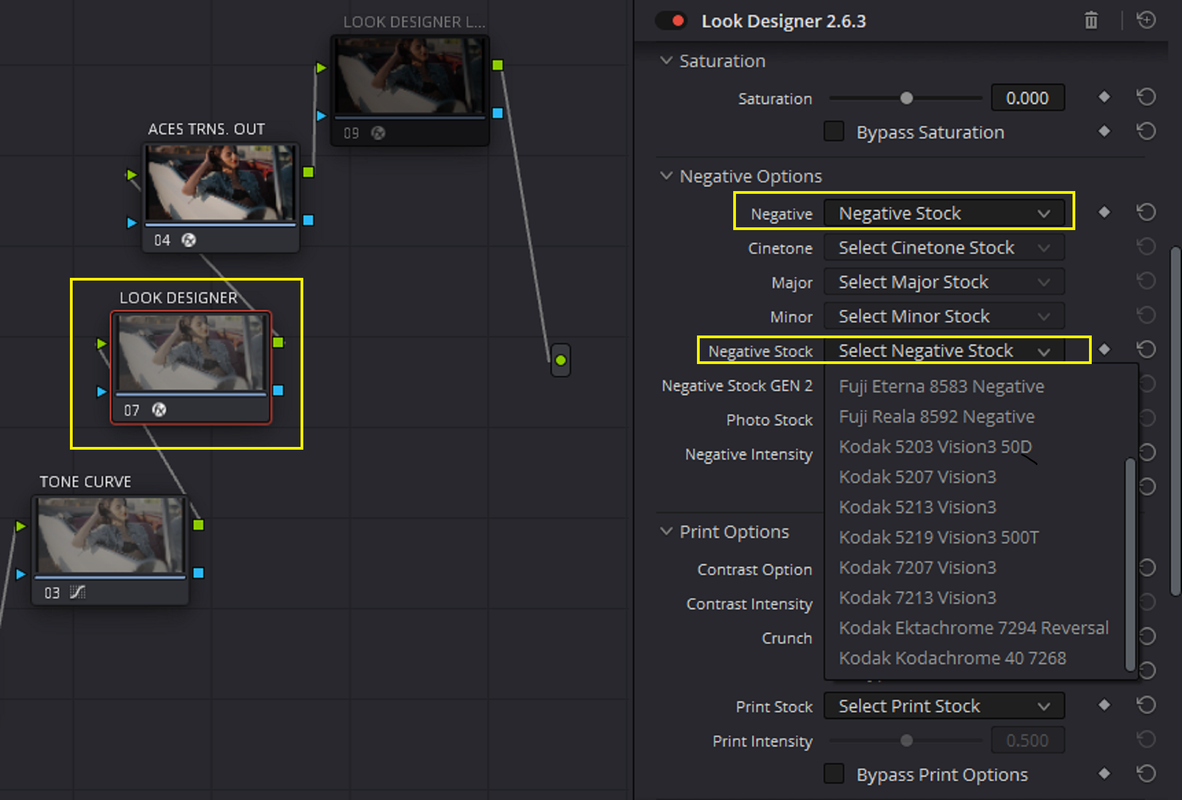
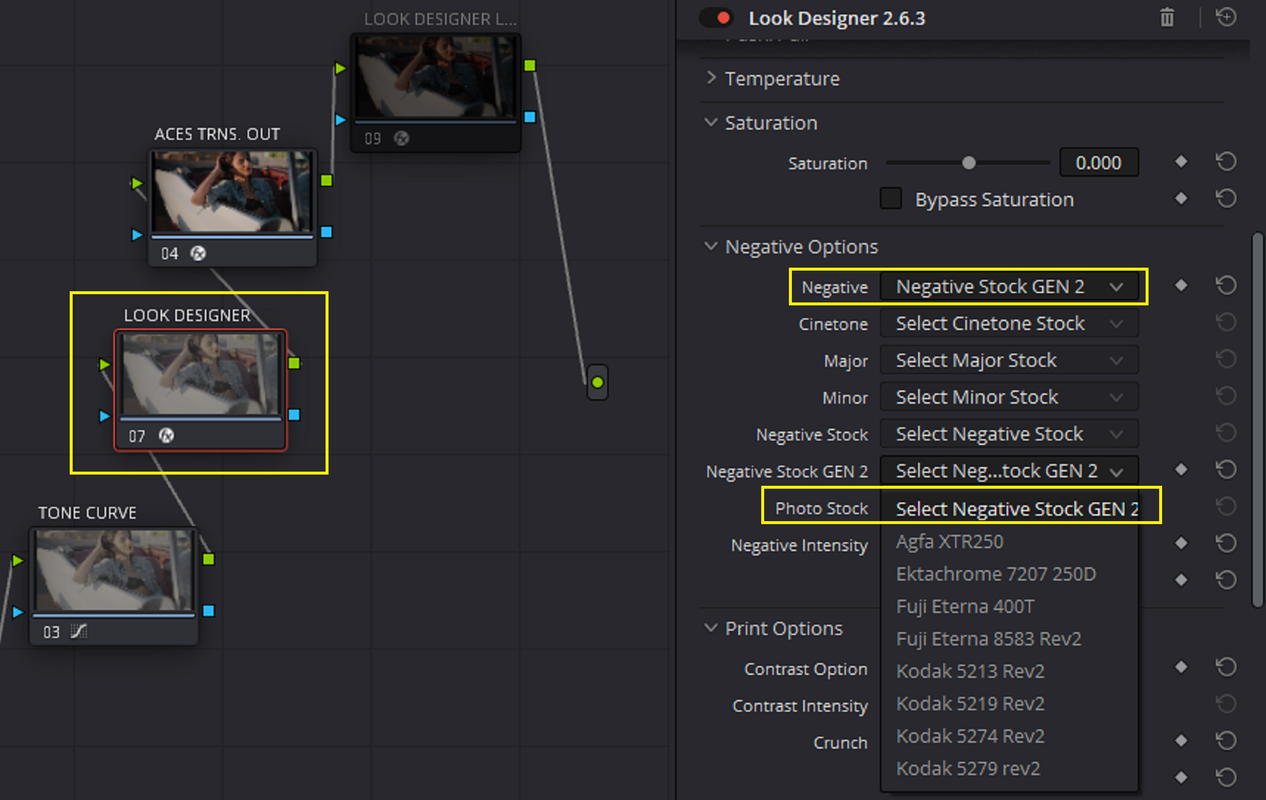
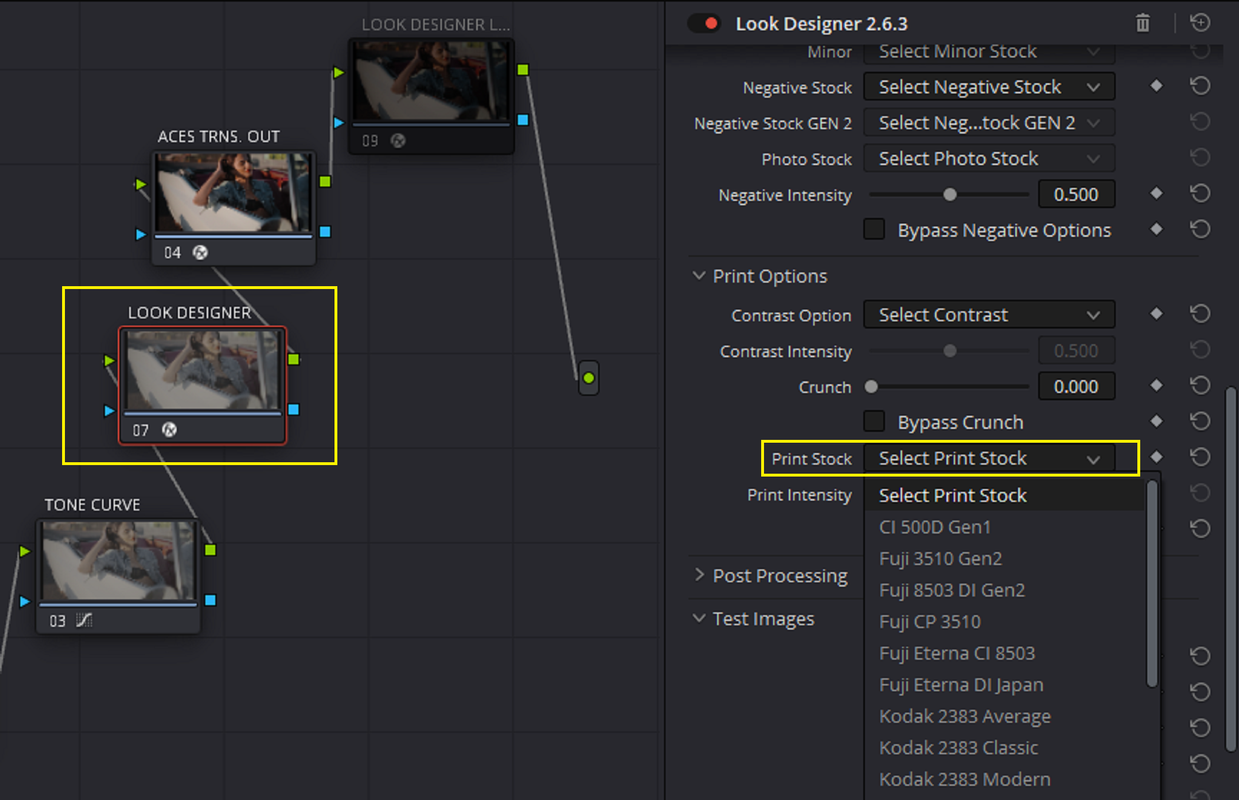
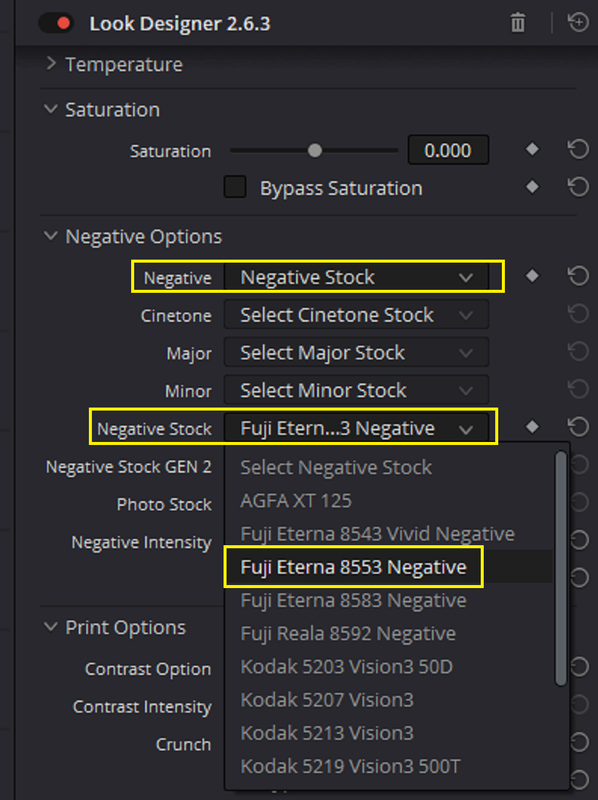
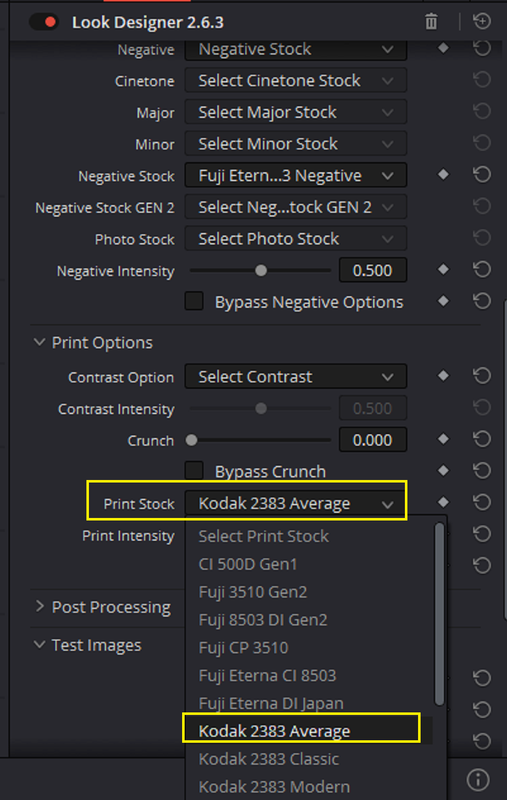
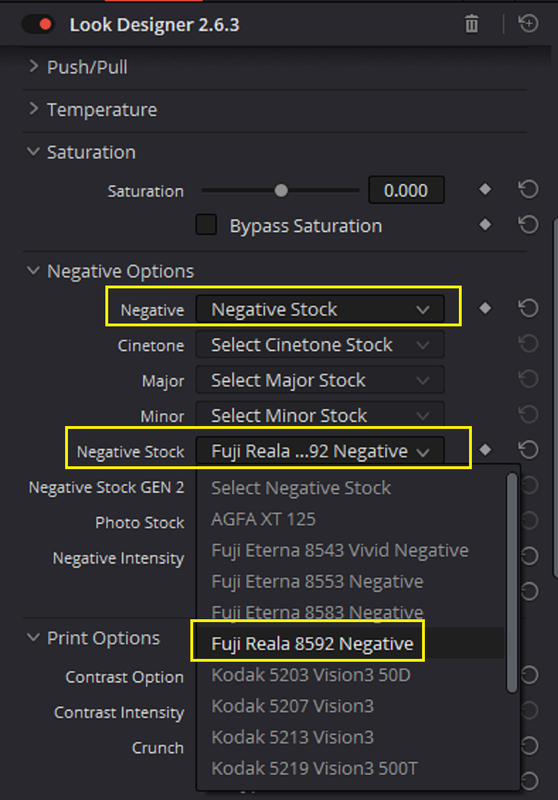
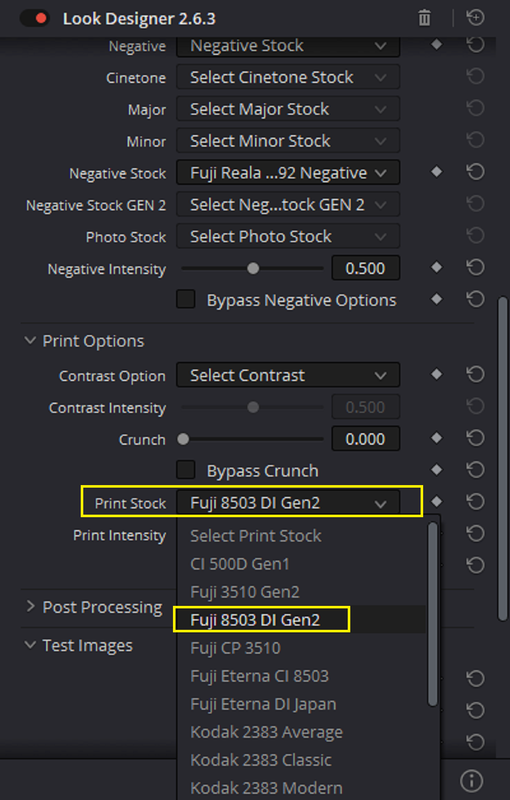
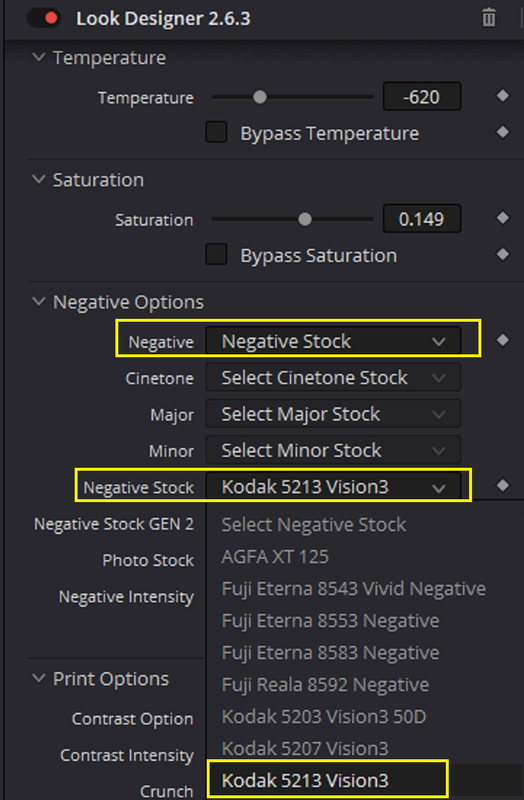
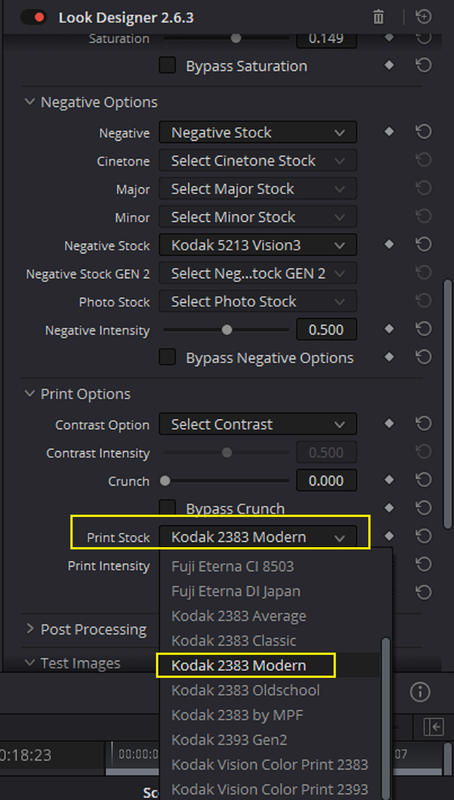
Part 2- The "Negative Stock" and "Negative Stock Gen 2" options along with the "Print Stock" settings and the "Input and Output" Profile Options in LOOK DESIGNER.


There are multiple ways to develop an PFE image in Look Designer. I like only the "Negative Stock" and "Negative Stock Gen 2" options along with the "Print Stock" settings.


12.png


13.png


"Negative Stock"

14.png

15.png


"Negative Stock Gen 2"

18.png


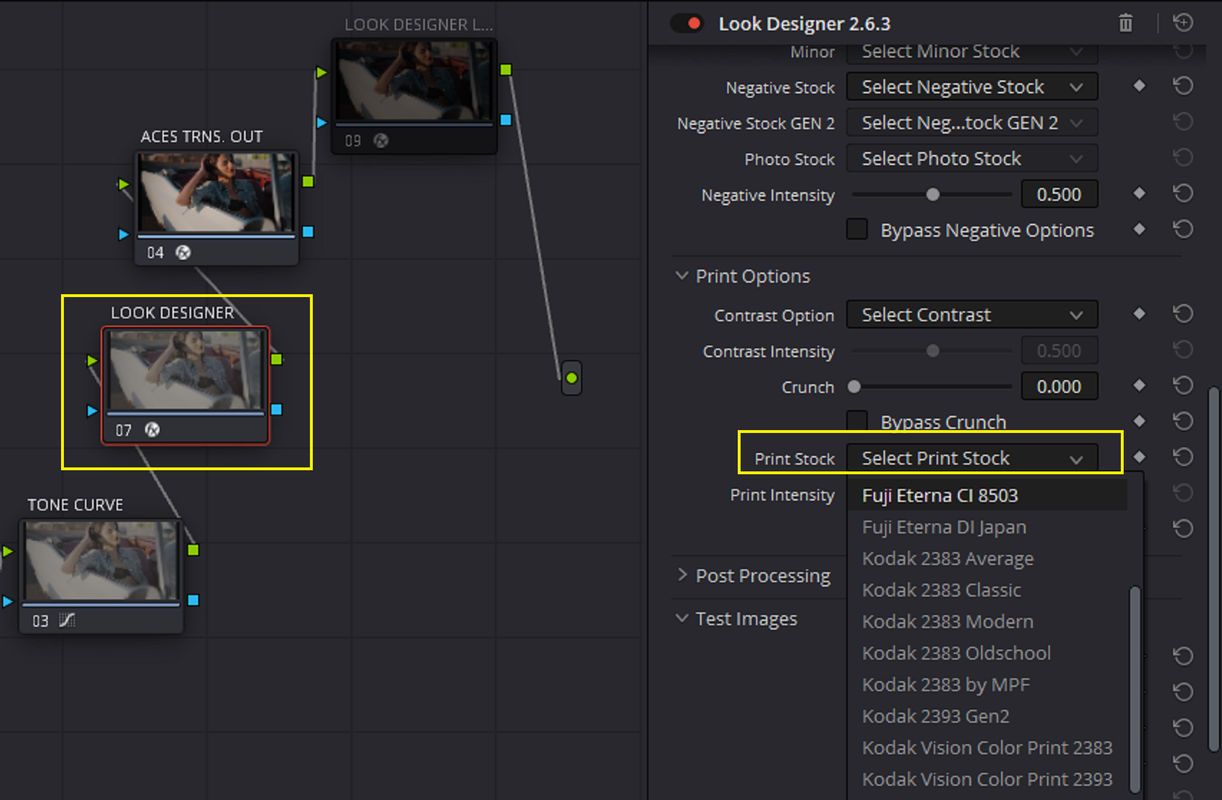
"Print Stock"

16.png
17.png


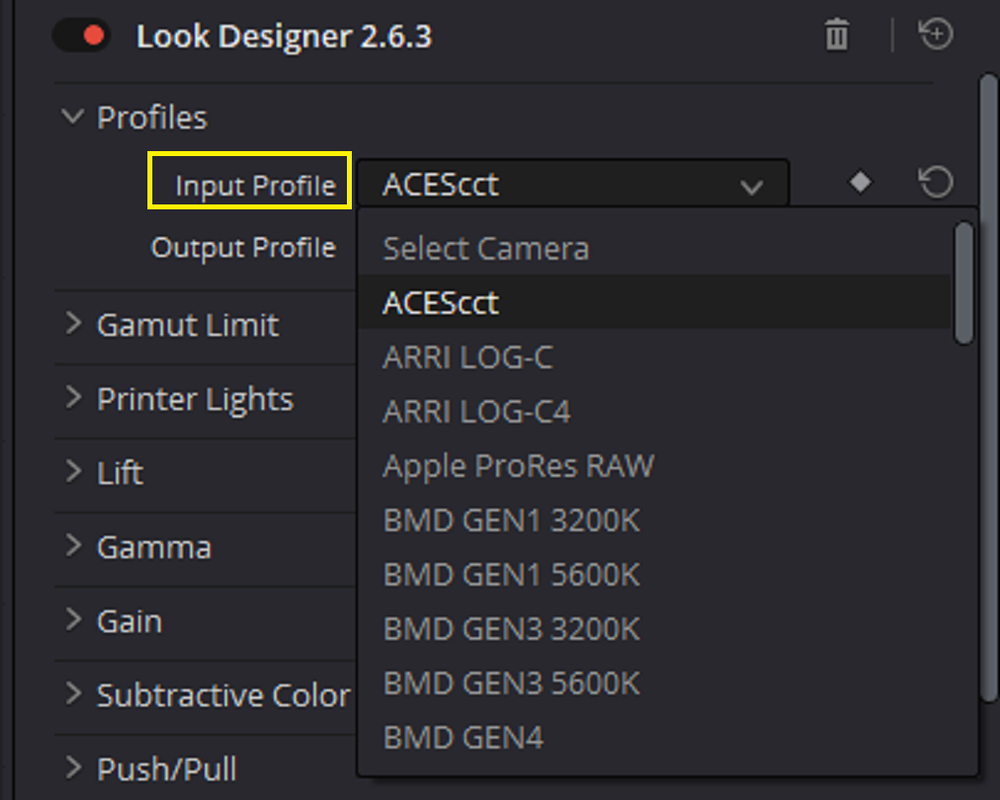
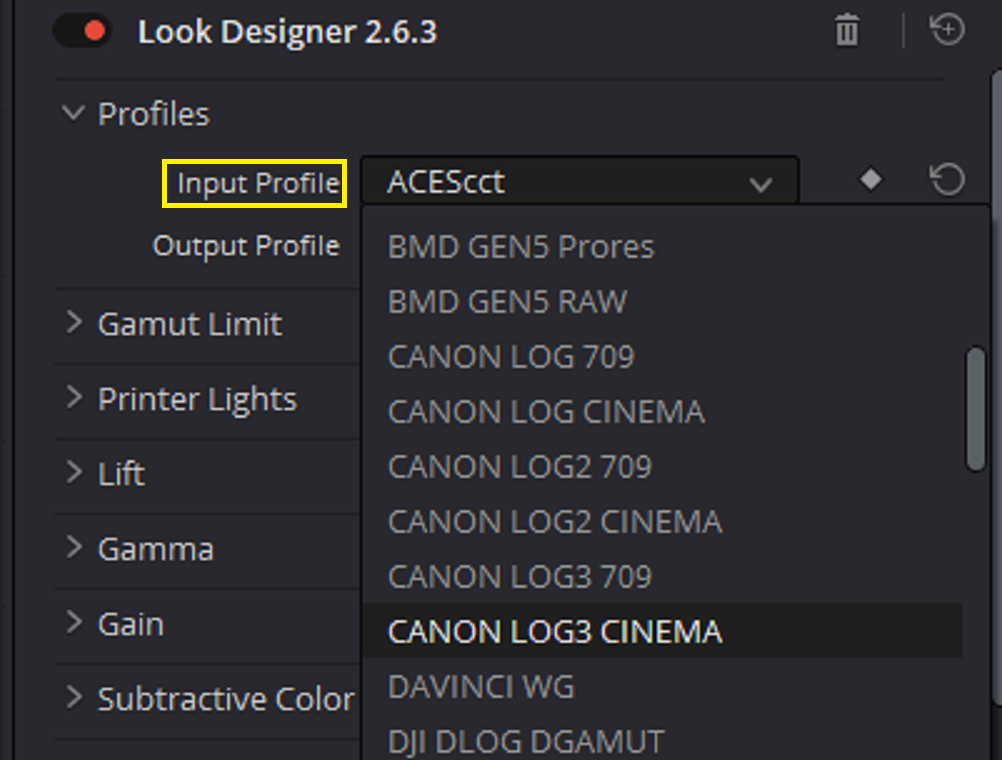
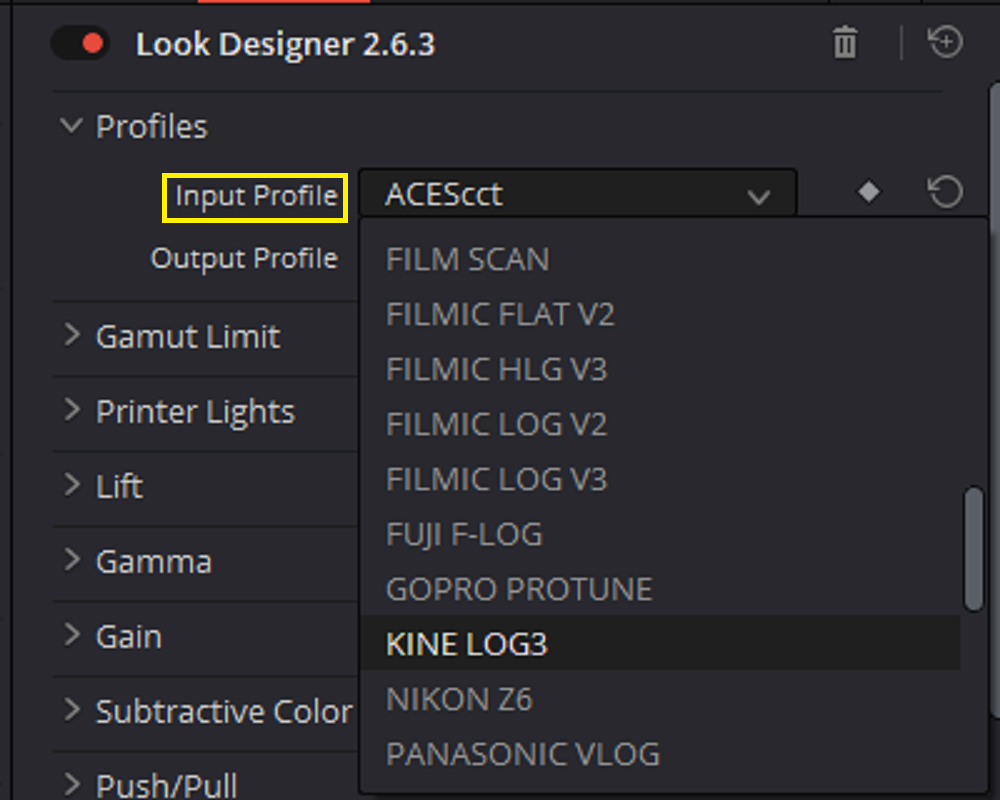
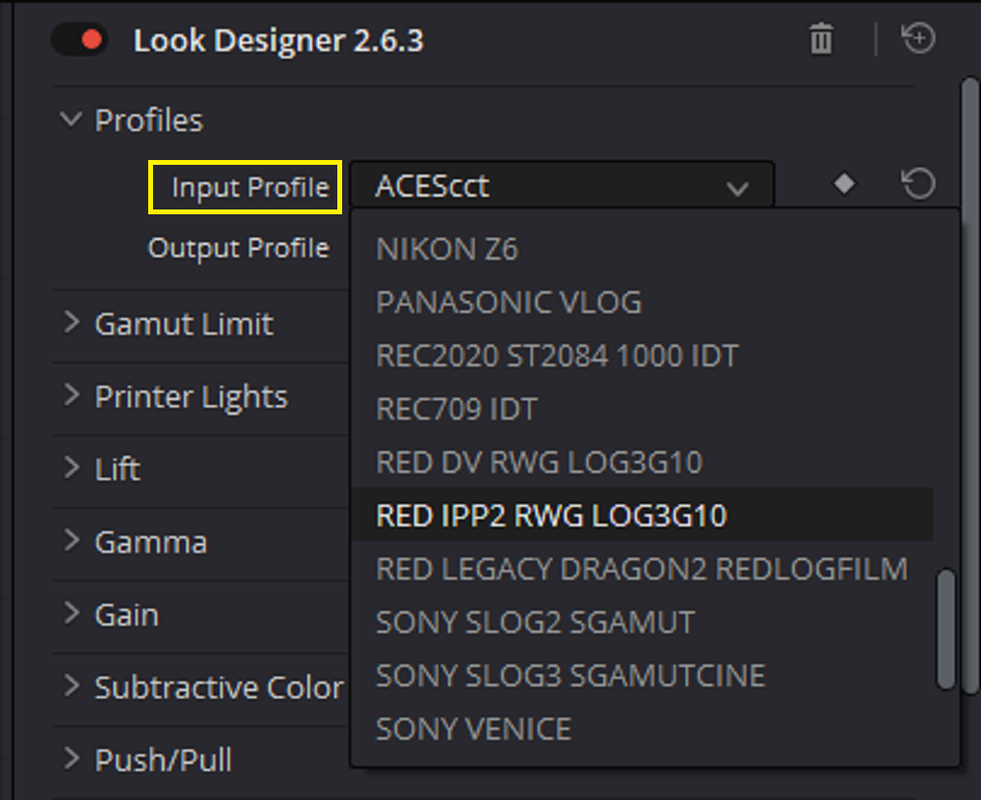
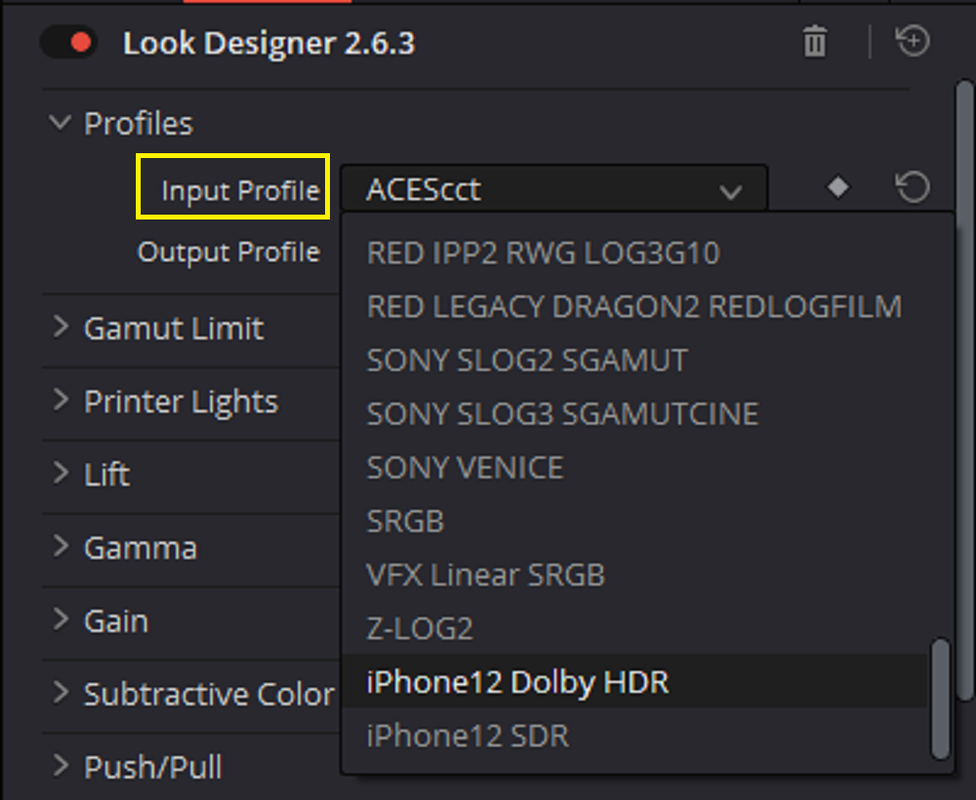
"Input" Profiles

19.png
20.png
21.png
22.png
23.png


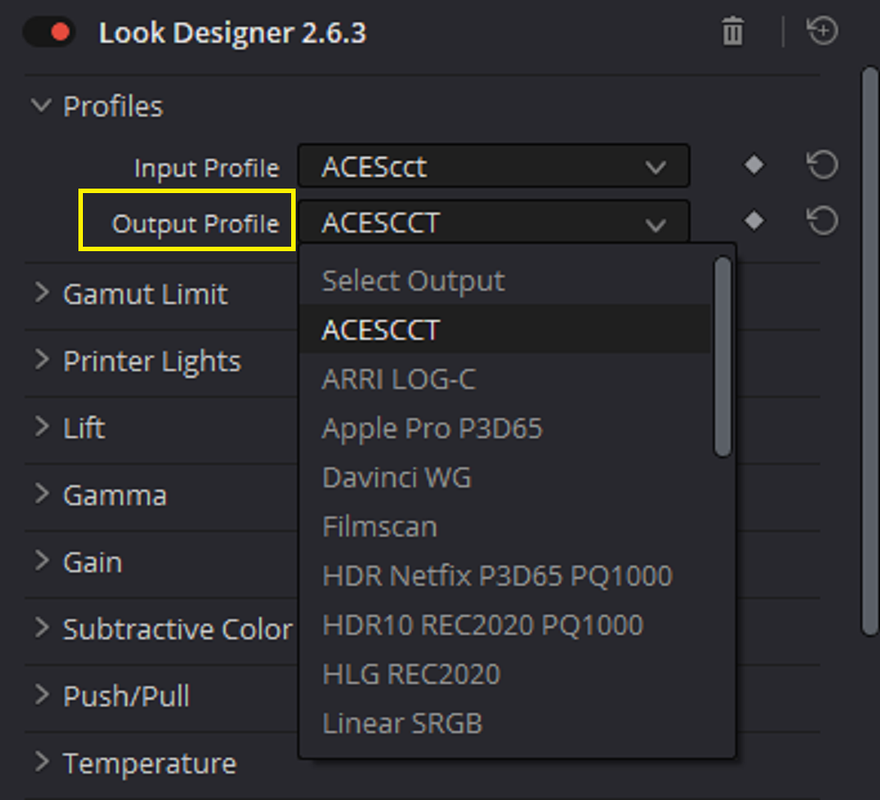
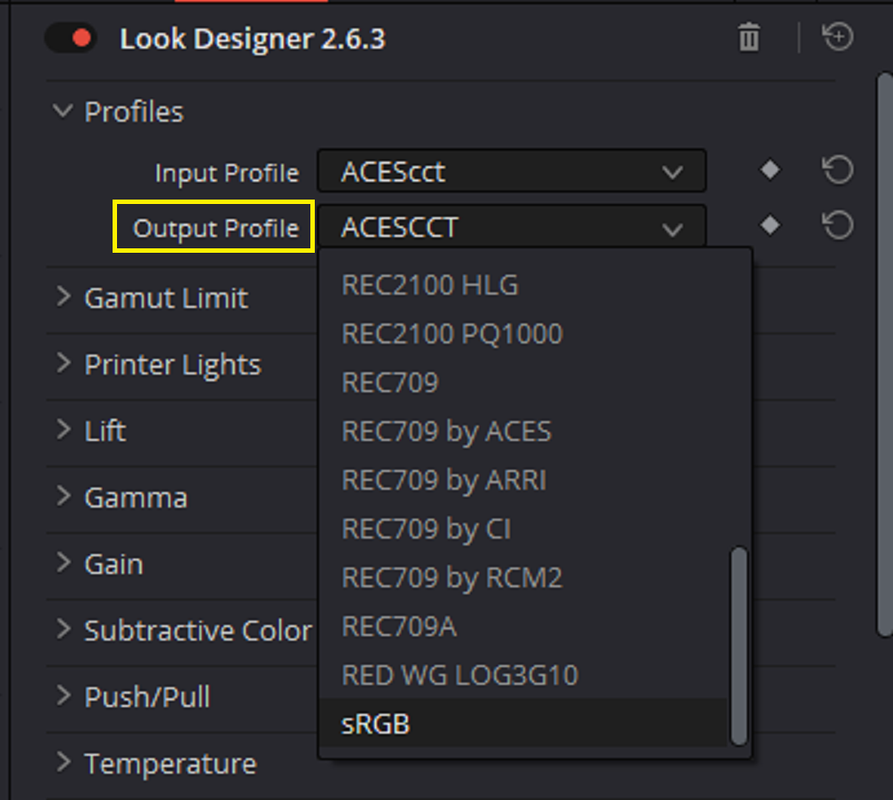
"Output" Profiles

24.png

25.png

26.png
 
PART 3- LOOK DESIGNER example images and the the "ED LACHMAN ZONES TOOLS"

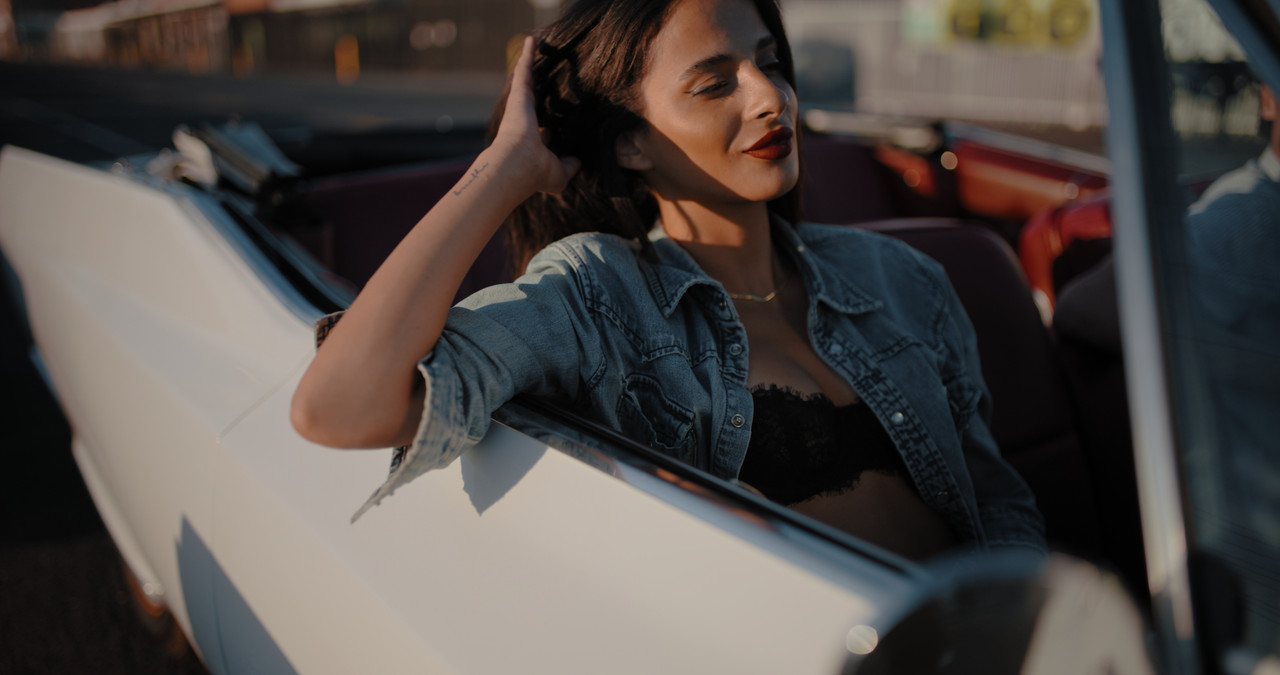
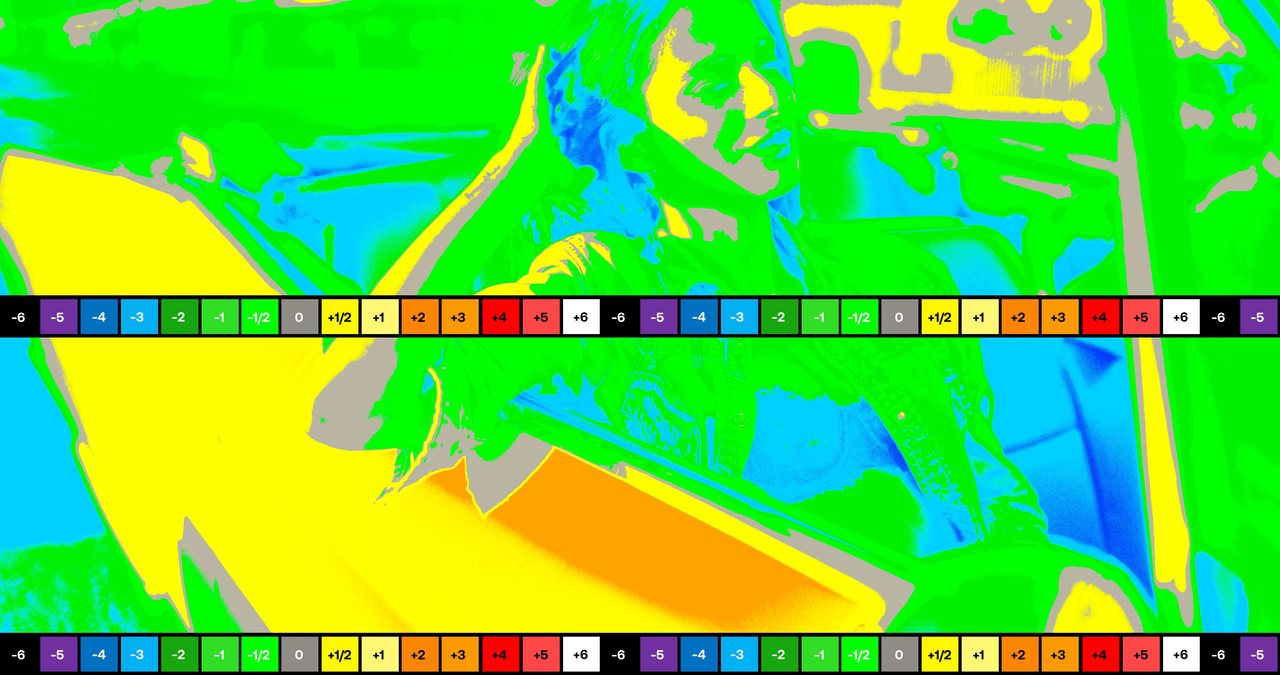
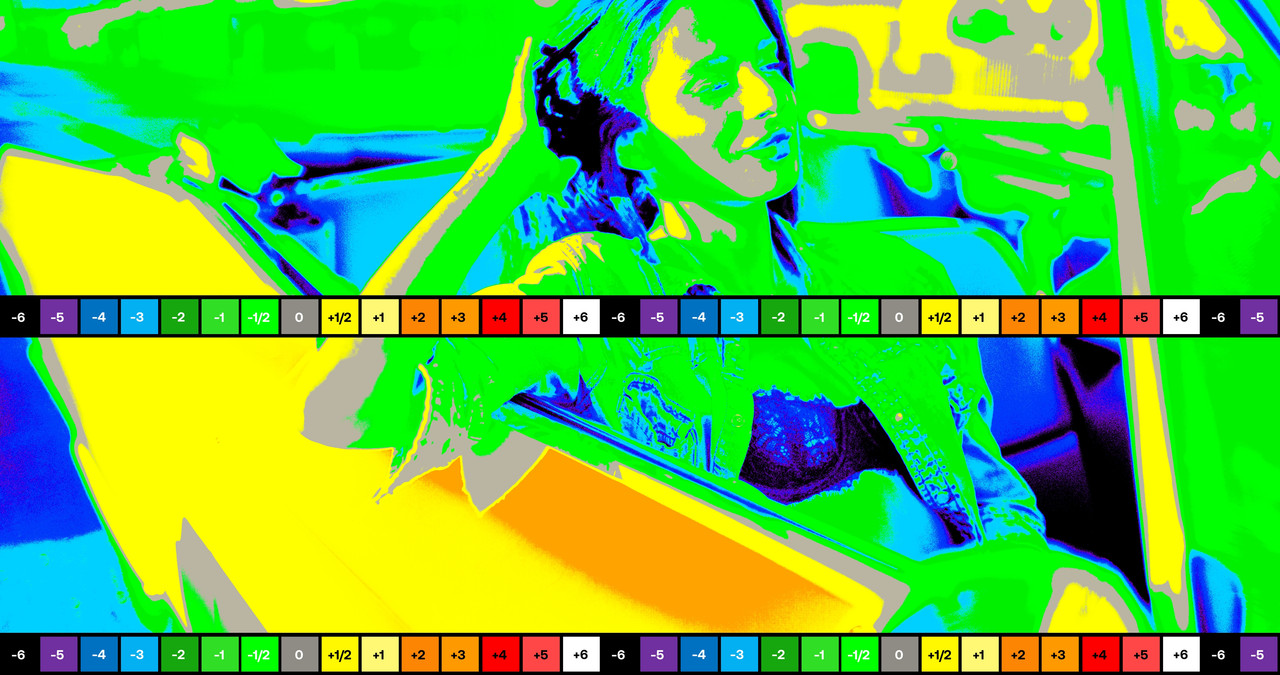
Here are a few example looks and how the ED Lachman Zone tools are useful.


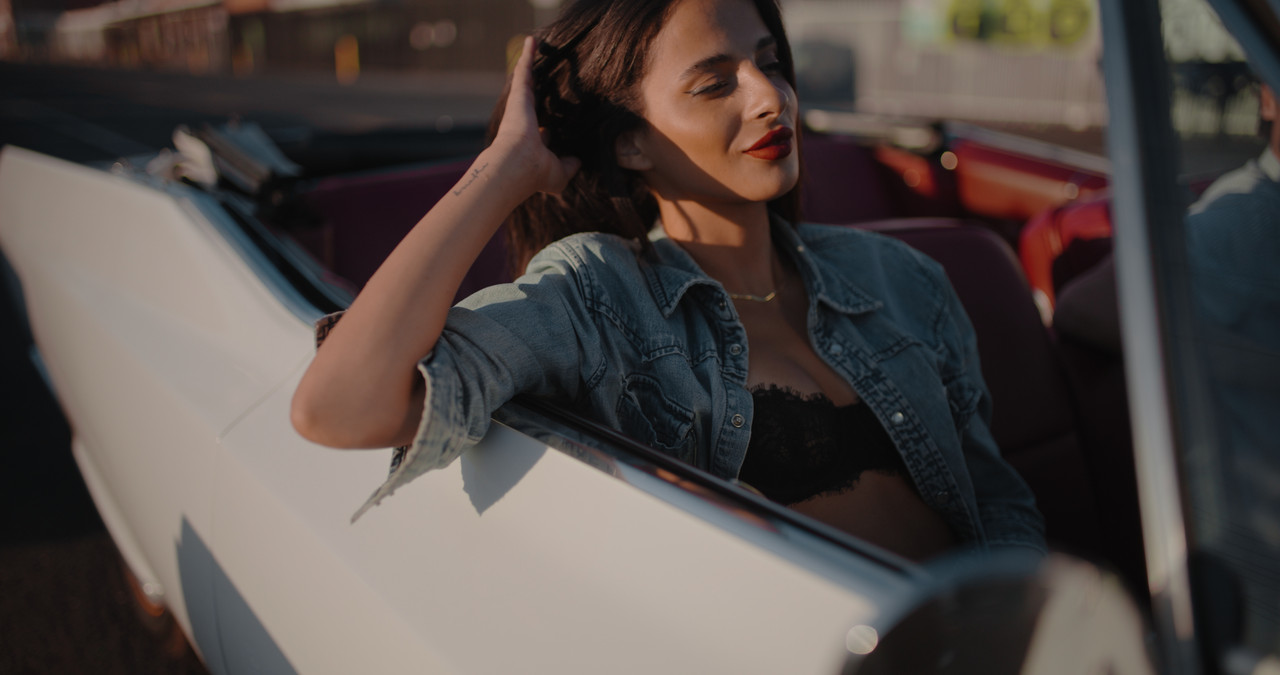
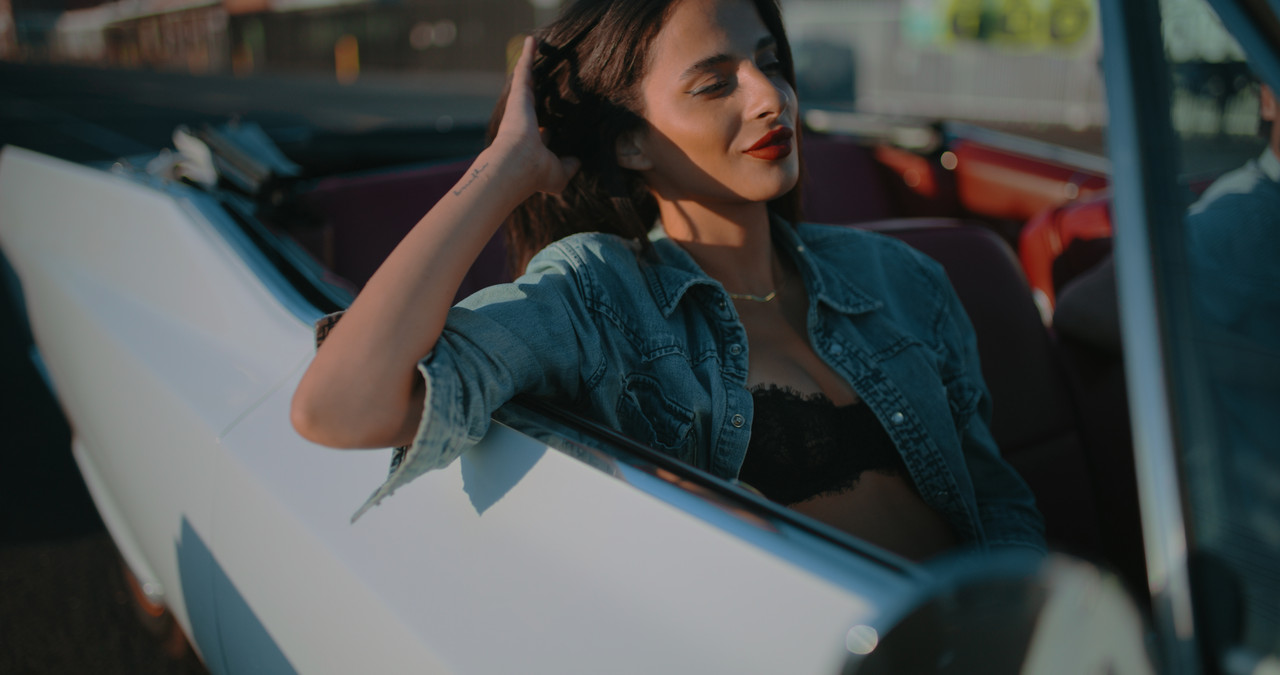
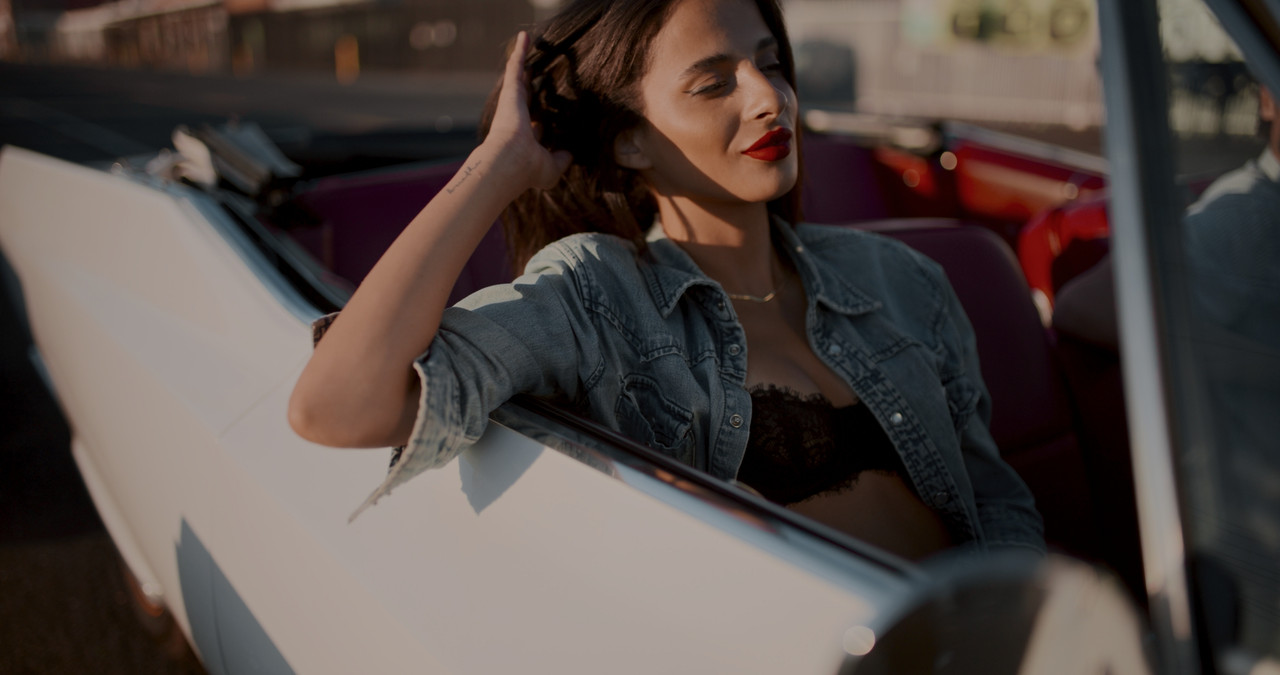
Original Grade before LOOK DESIGNER

26a.jpg
wAAACH5BAEKAAAALAAAAAABAAEAAAICRAEAOw==


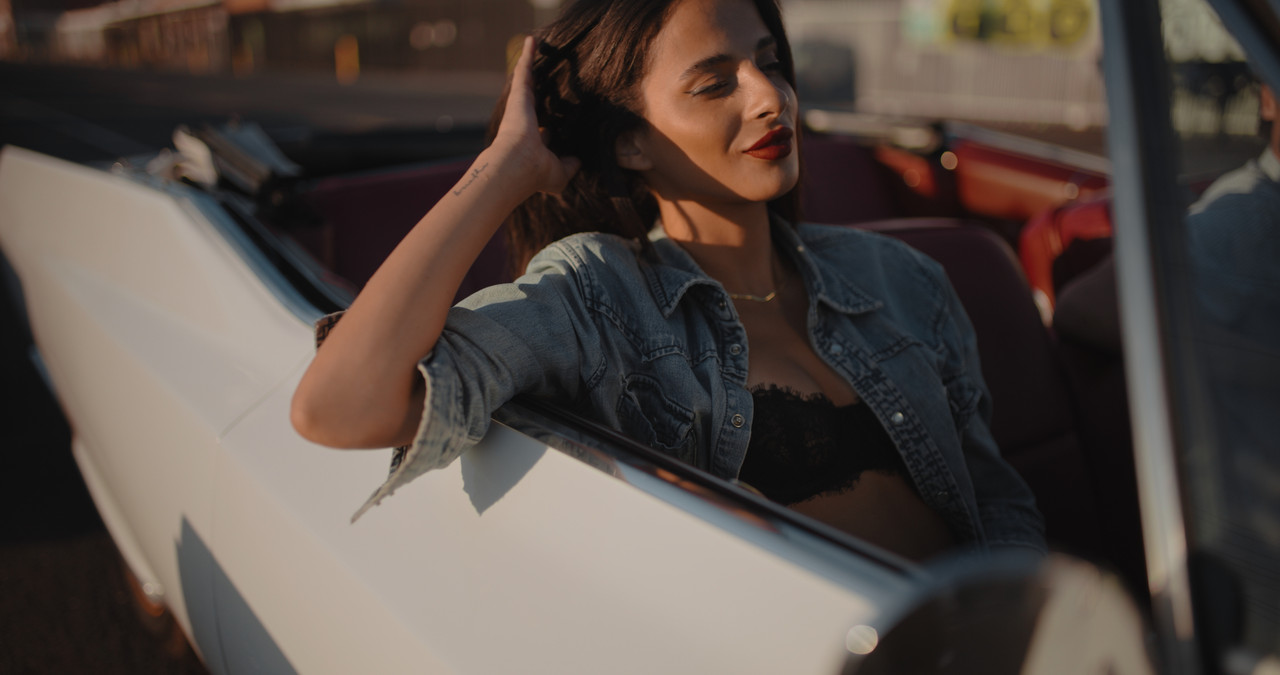
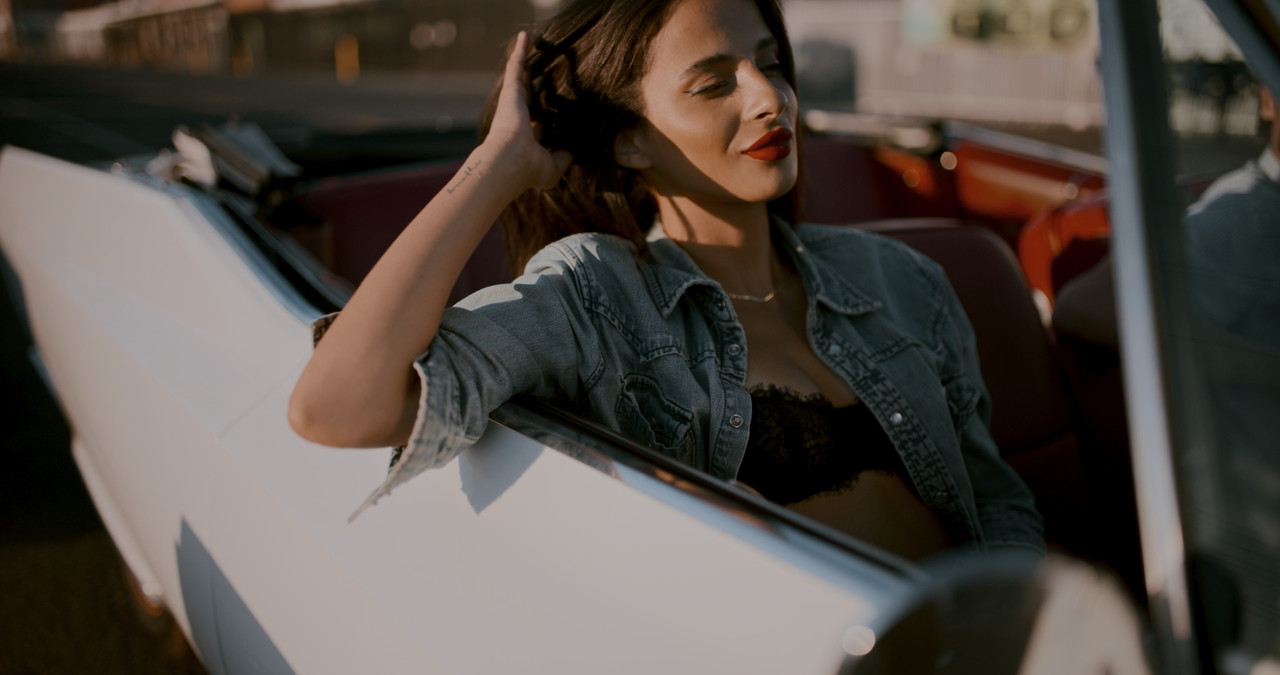
LOOK DESIGNER

EXAMPLE 1

27.png
wAAACH5BAEKAAAALAAAAAABAAEAAAICRAEAOw==


28.png
wAAACH5BAEKAAAALAAAAAABAAEAAAICRAEAOw==


29.jpg
wAAACH5BAEKAAAALAAAAAABAAEAAAICRAEAOw==


EXAMPLE 2

30.png
wAAACH5BAEKAAAALAAAAAABAAEAAAICRAEAOw==


31.png
wAAACH5BAEKAAAALAAAAAABAAEAAAICRAEAOw==


32.jpg
wAAACH5BAEKAAAALAAAAAABAAEAAAICRAEAOw==


EXAMPLE 3

32a.png
wAAACH5BAEKAAAALAAAAAABAAEAAAICRAEAOw==


32b.png
wAAACH5BAEKAAAALAAAAAABAAEAAAICRAEAOw==


32c.png
wAAACH5BAEKAAAALAAAAAABAAEAAAICRAEAOw==


32d.jpg
wAAACH5BAEKAAAALAAAAAABAAEAAAICRAEAOw==


LOOK DESIGNER- ED LACHMAN ZONE TOOLS

33.png


34.png


35.png


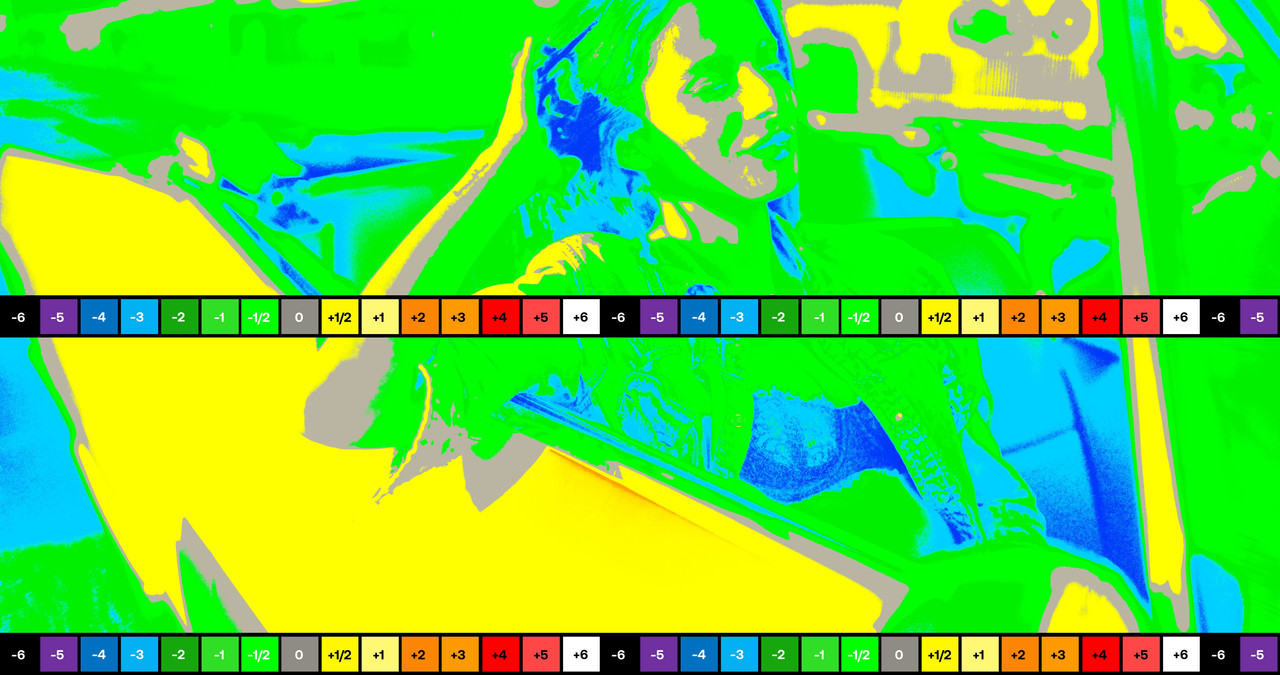
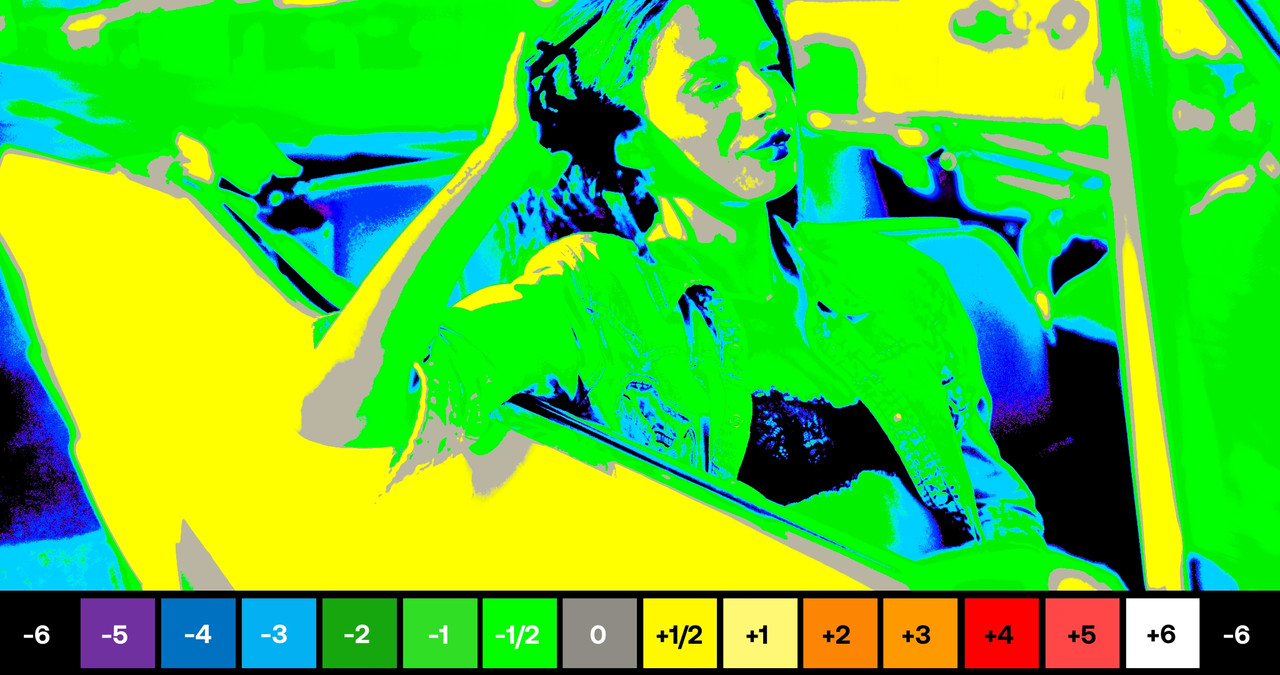
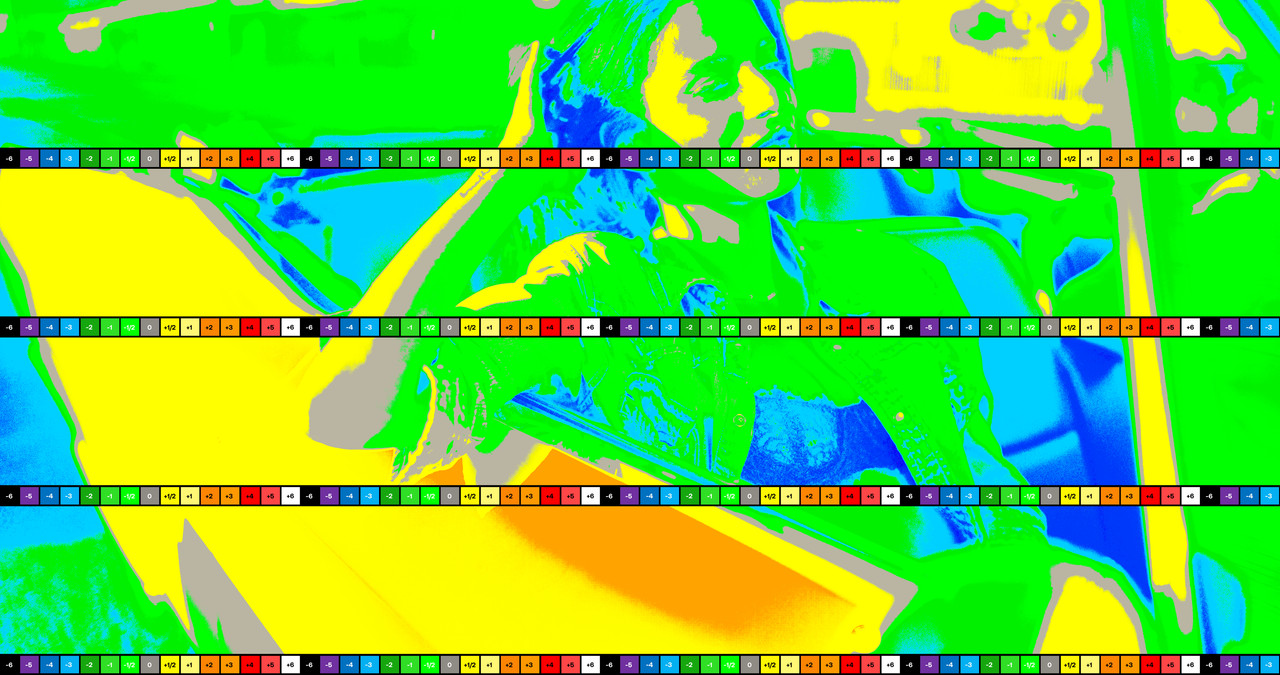
Ed Lachman Zones for EXAMPLE 1

EXAMPLE-1-1-3-2.jpg


Ed Lachman Zones for EXAMPLE 2

36.jpg


Ed Lachman Zones for EXAMPLE 3

R036-W007-0628-WV-001-1-3-24.jpg
 
Last edited:
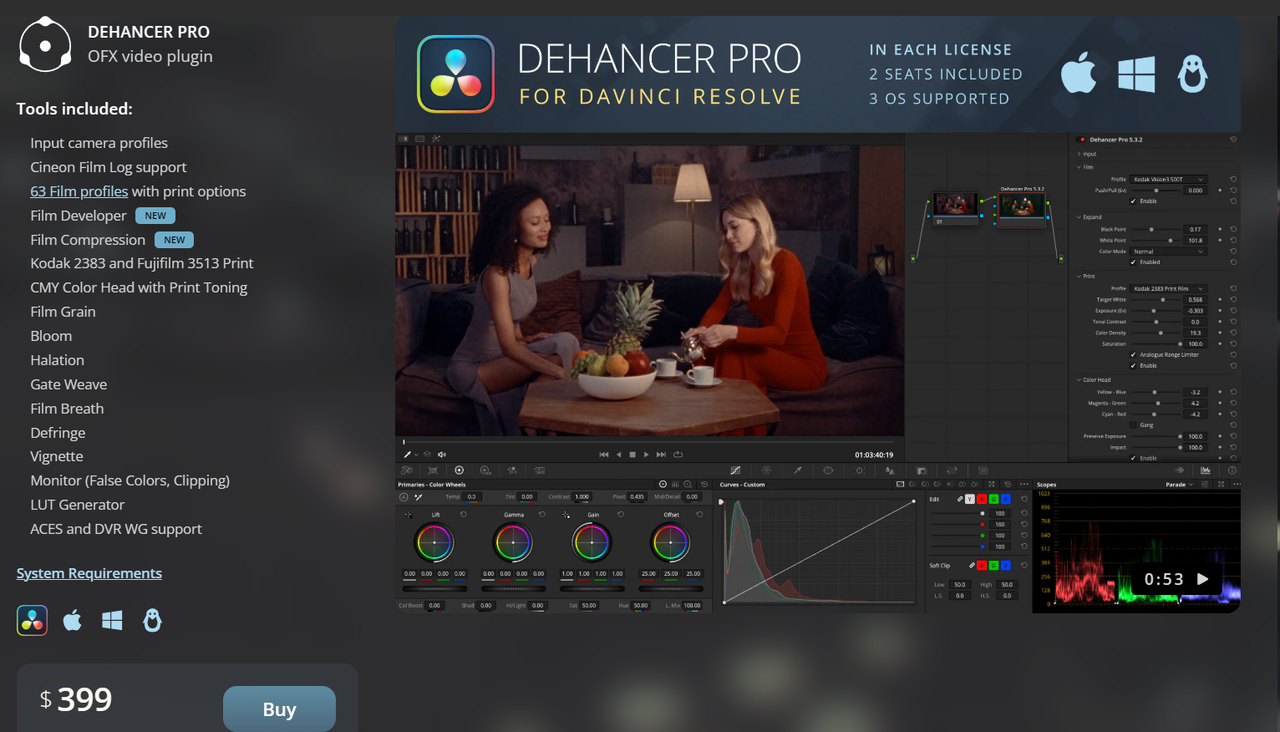
DEHANCER
Dehancer

0.png


Another great tool to use with RED cameras for a Print Film Emulation especially if you're looking for a film emulation tool that can give you all of the characteristics of old film artifacts and processing is DEHANCER.

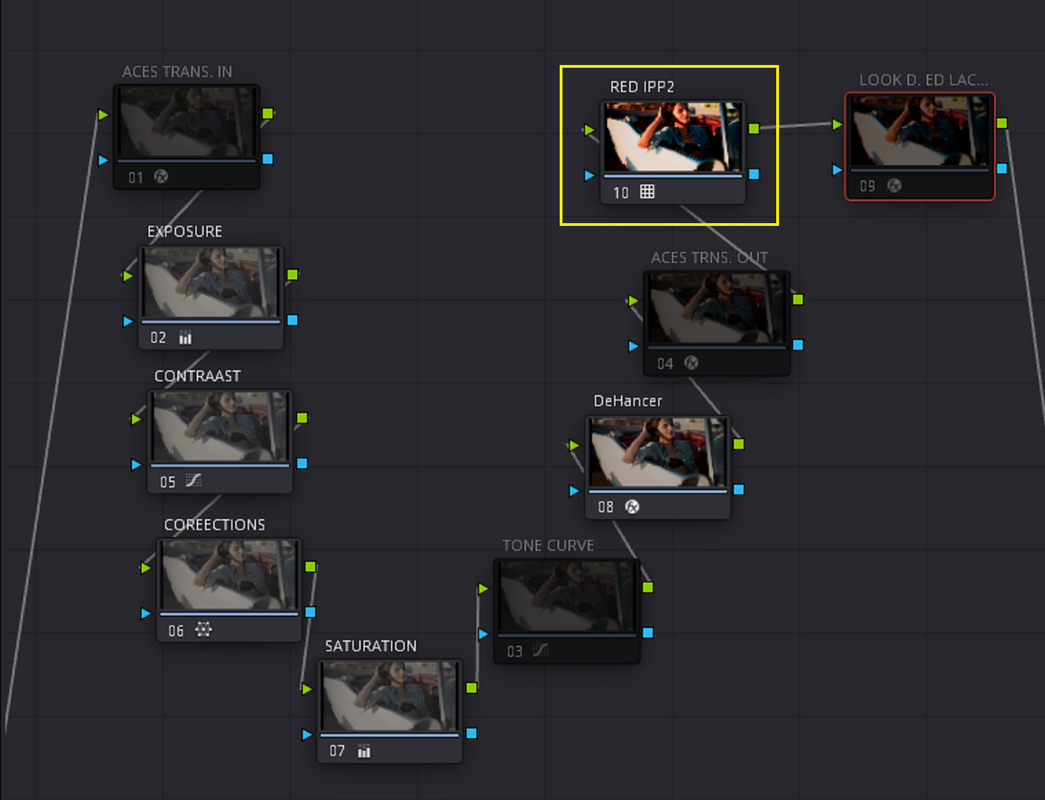
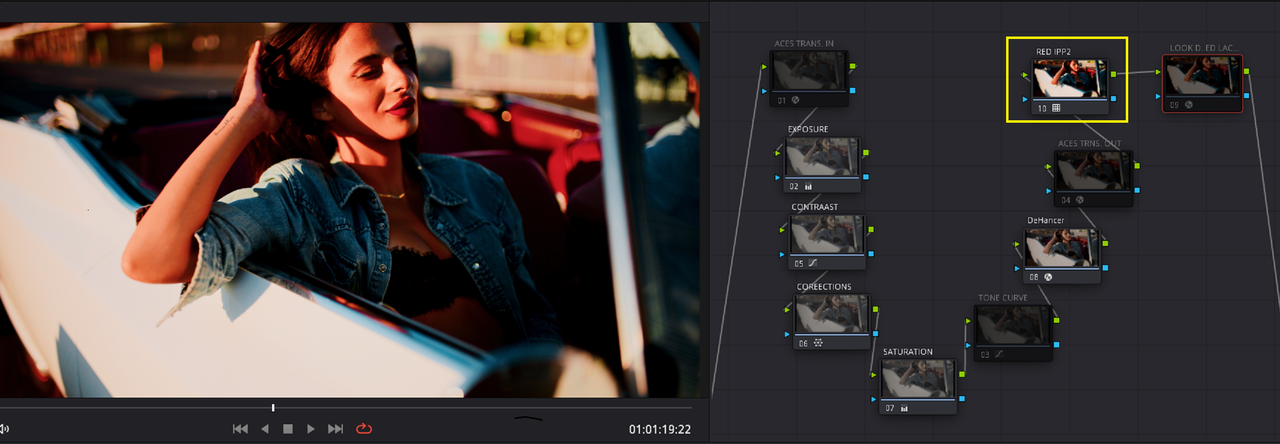
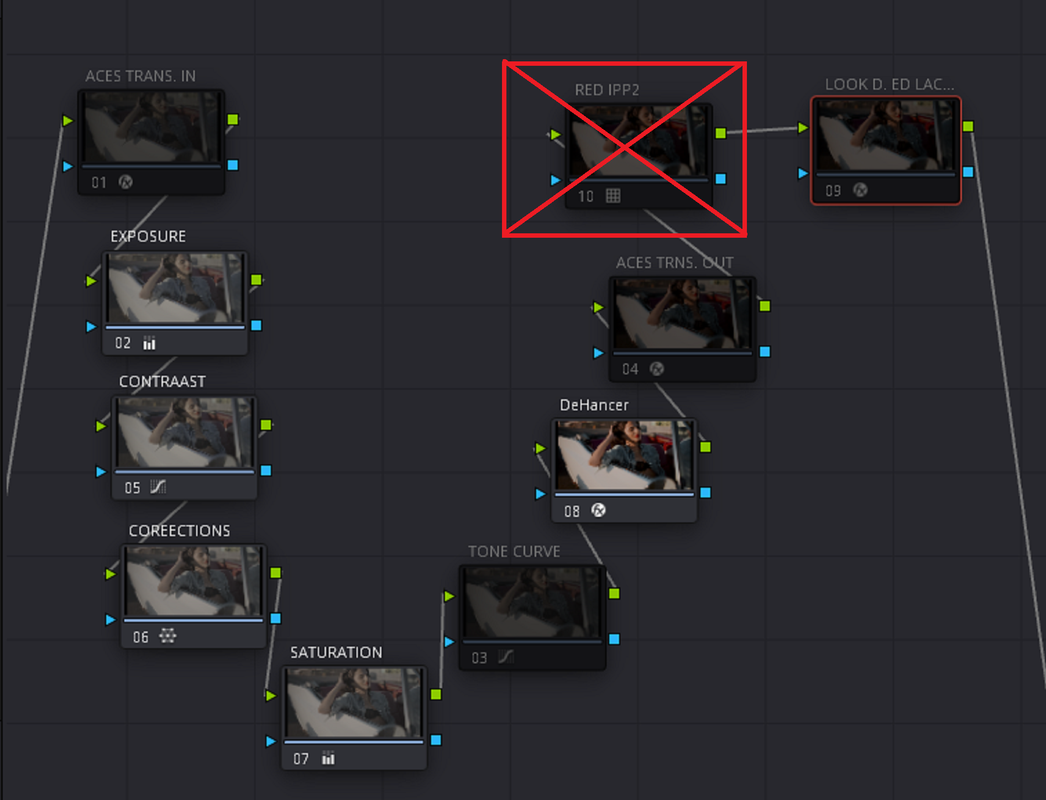
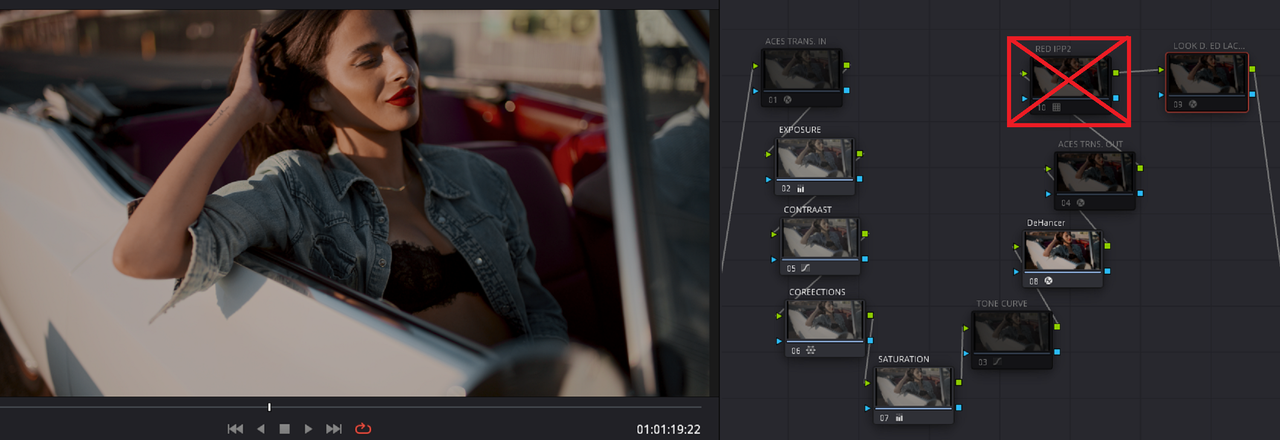
Below is an ACEScct and RED IPP2 workflow with just basic processing( No Grain, Halation, Glow....etc)


ACEScct

Screenshot-8696.png

Screenshot-8695.png


1.png


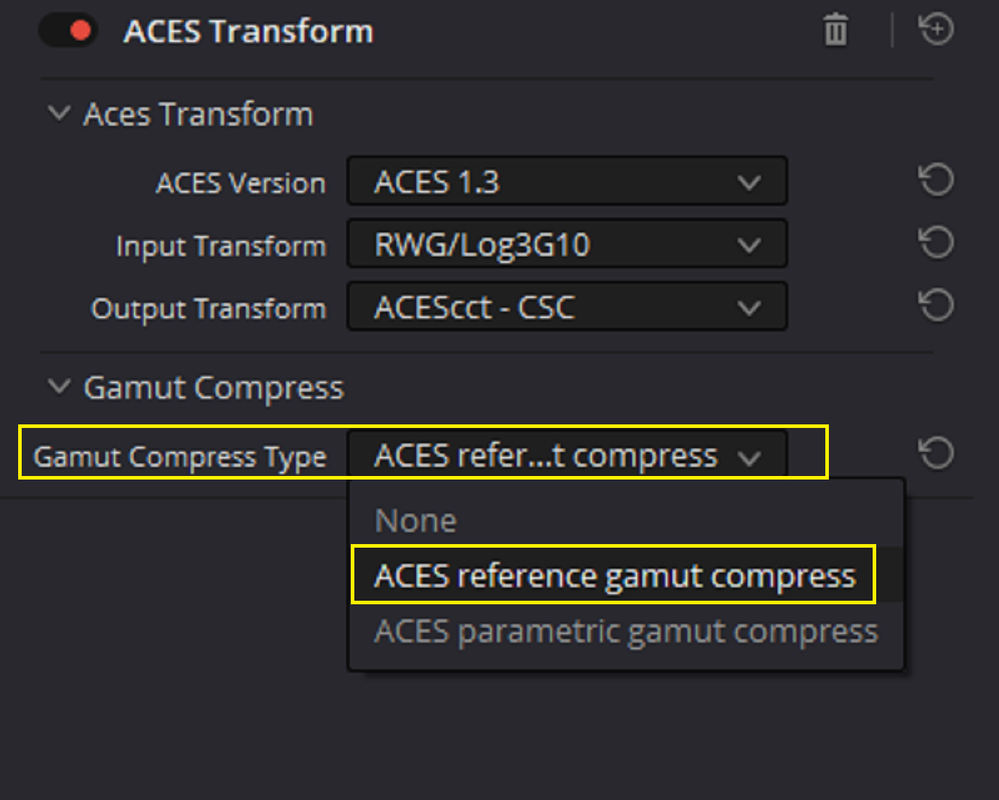
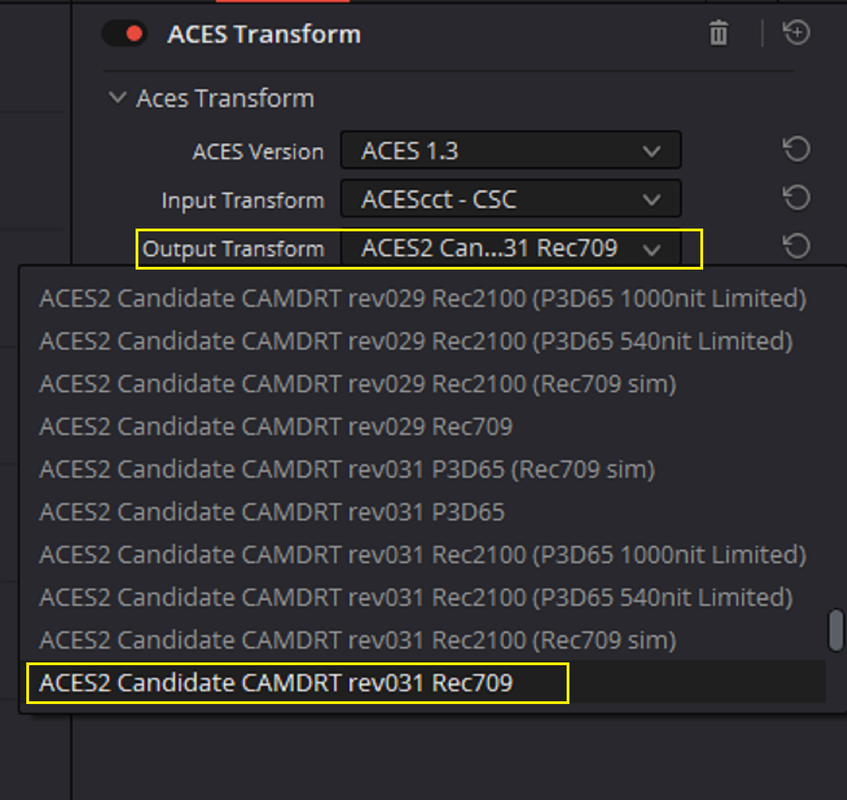
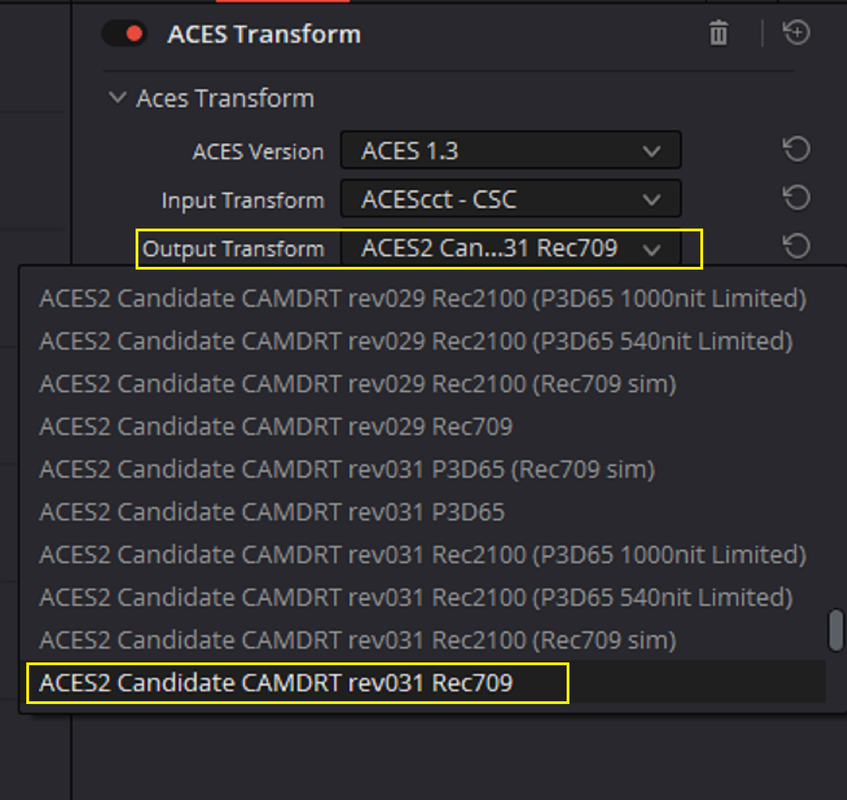
ACES Transform IN

Screenshot-9066.png


ACES Transform OUT

Screenshot-9067.png


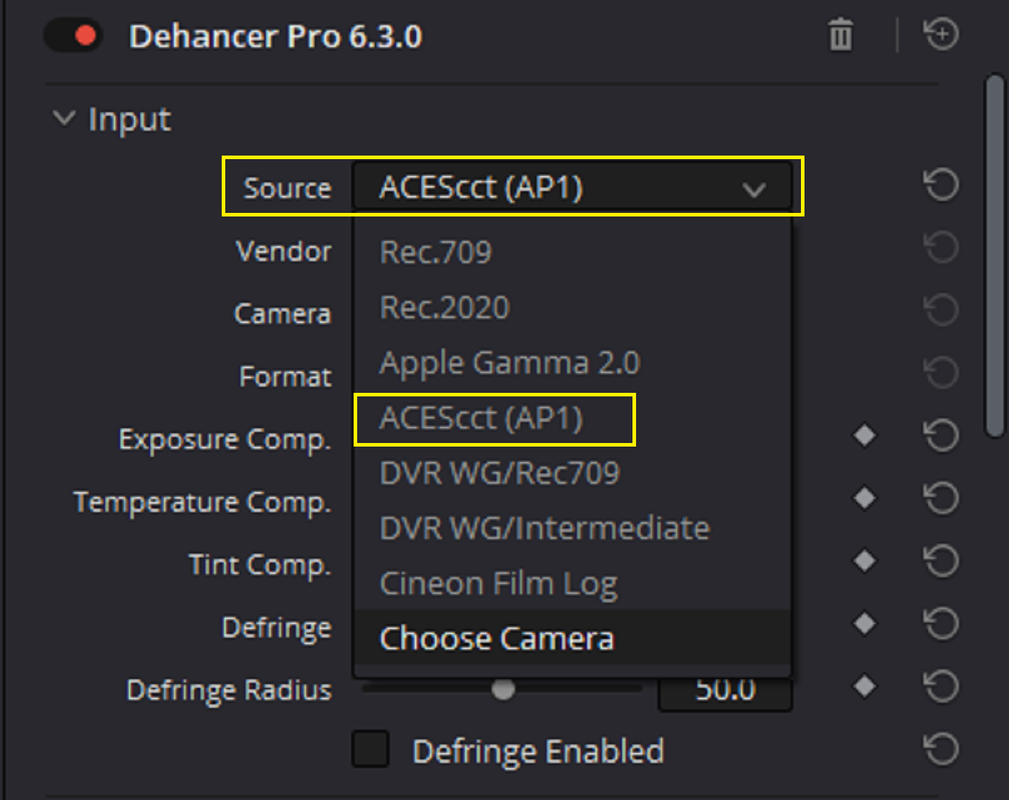
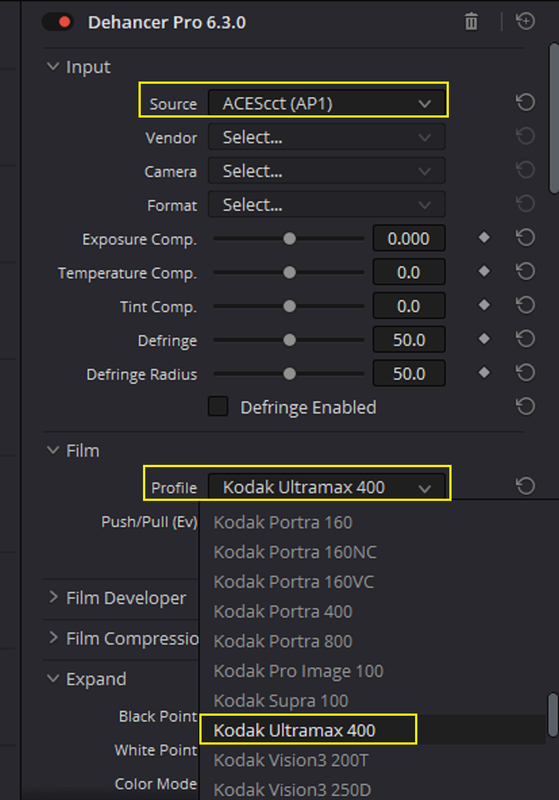
Since I'm using ACEScct, I just needed to select "ACEScct(AP1)" for the "SOURCE" setting. I noticed in DEHANCER that if you wanted to create a "LOG-to-LOG"( Grade done entirely inside of one Color Space, Usually "Scene-Referred" like ACES or DWG/DI) "LOOK" Lut that you can't for REDWideGamutRGB/LOG3G10. This, unless there is some additional Profile you can download, is because the RED IPP2 workflow assigns an ODT( Output Display Transform) with the RED IPP2 workflow. They call this "IPP2 RWG Log 3G10 Standard" which is more than likely Medium Contrast/ Soft to REC709. I hoped that it was initially Log-to-Log however when I added an IPP2 Out Transform at the end, It just added another ODT. I'll demonstrate this later.


2.png


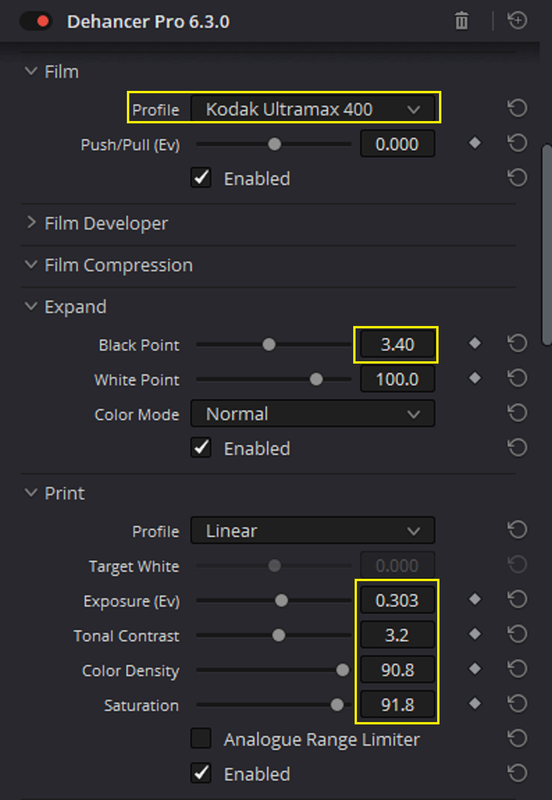
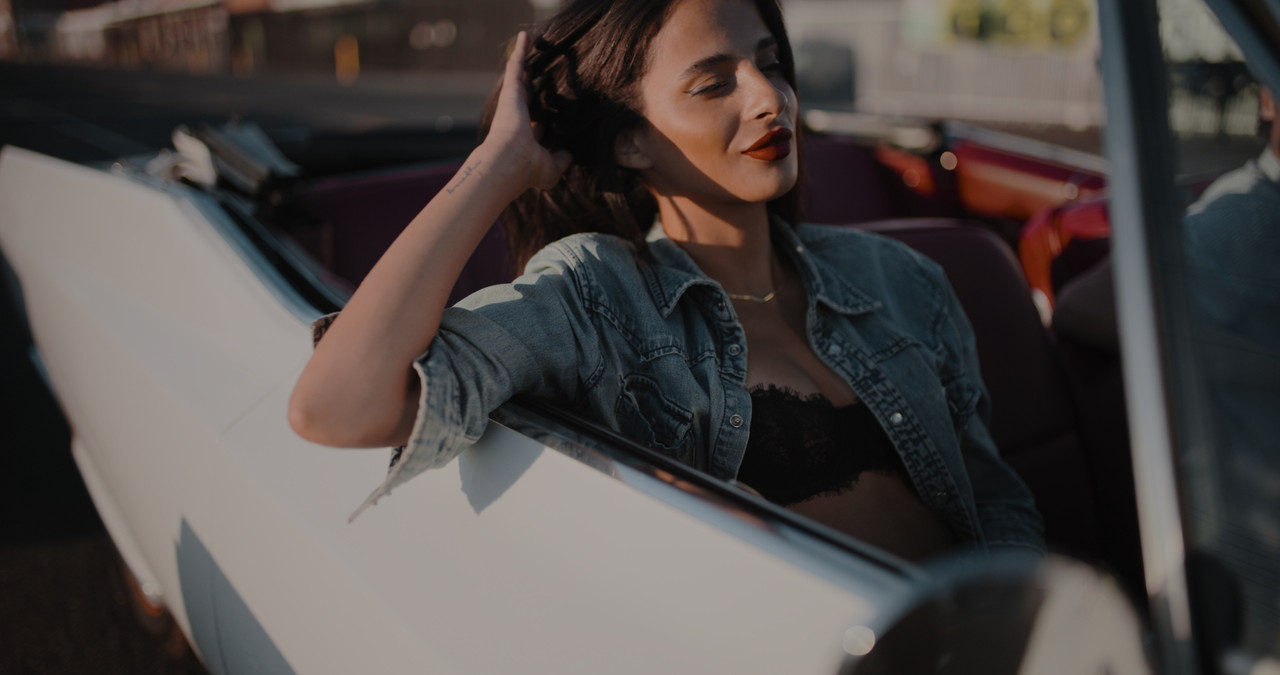
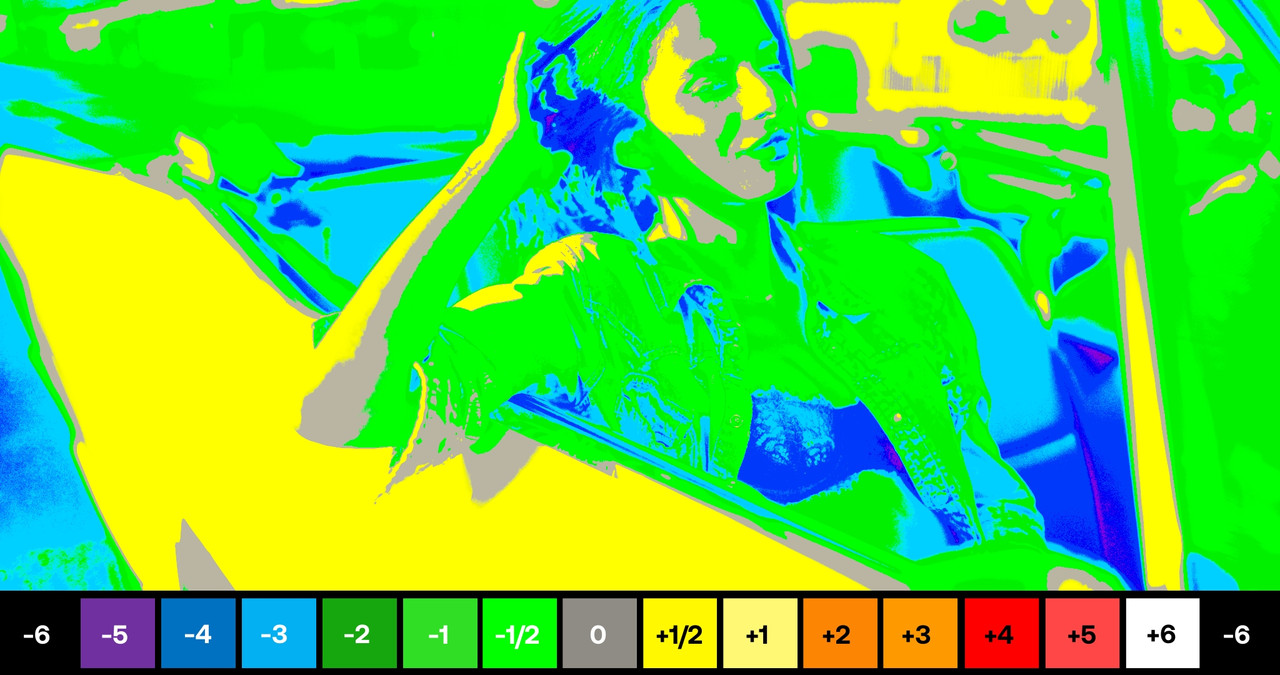
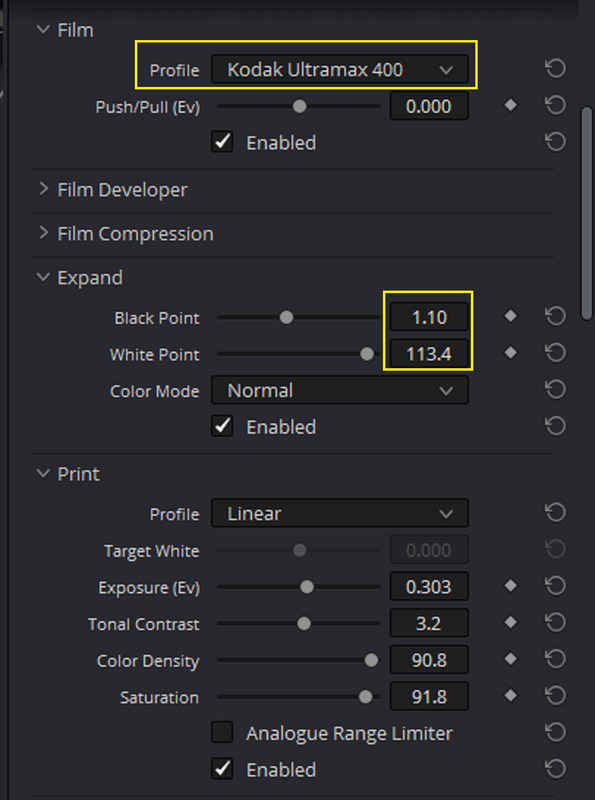
I chose the "KODAK ULTRAMAX 400" film emulation

7.png


8.png


9-aces-1.jpg

10-aces-2.jpg


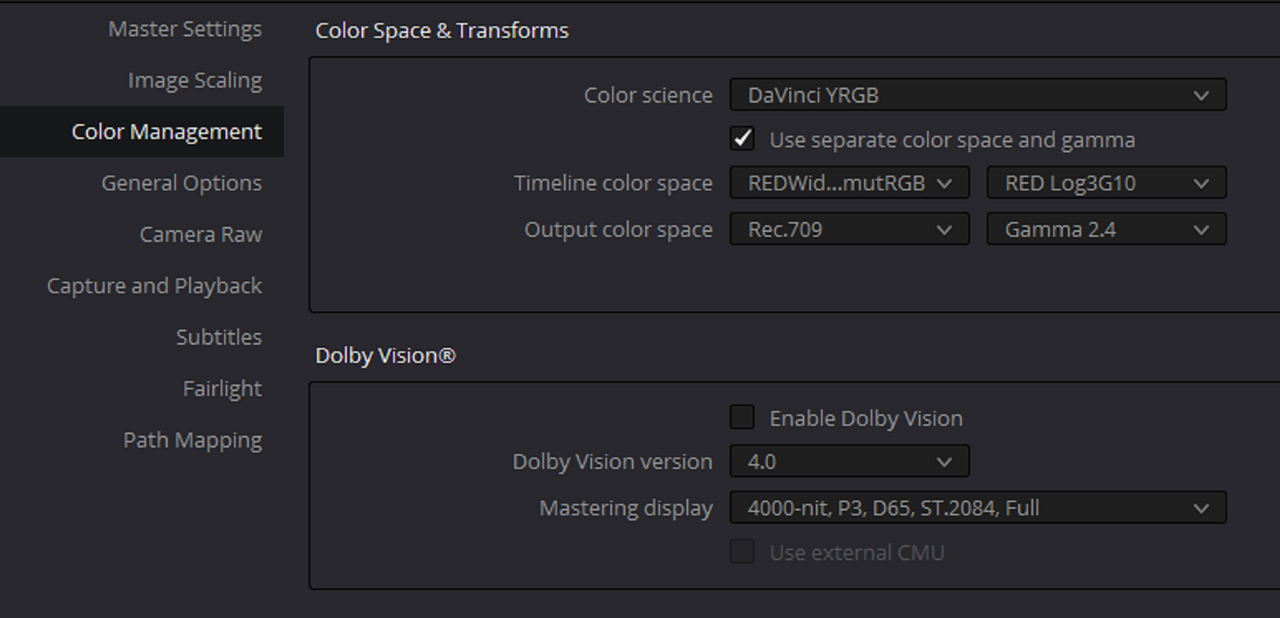
If I wanted to use a specific RED IPP2 Workflow I had to set it up this way.


RED IPP2

Screenshot-8696.png

Screenshot-8695.png


wergfrg.png


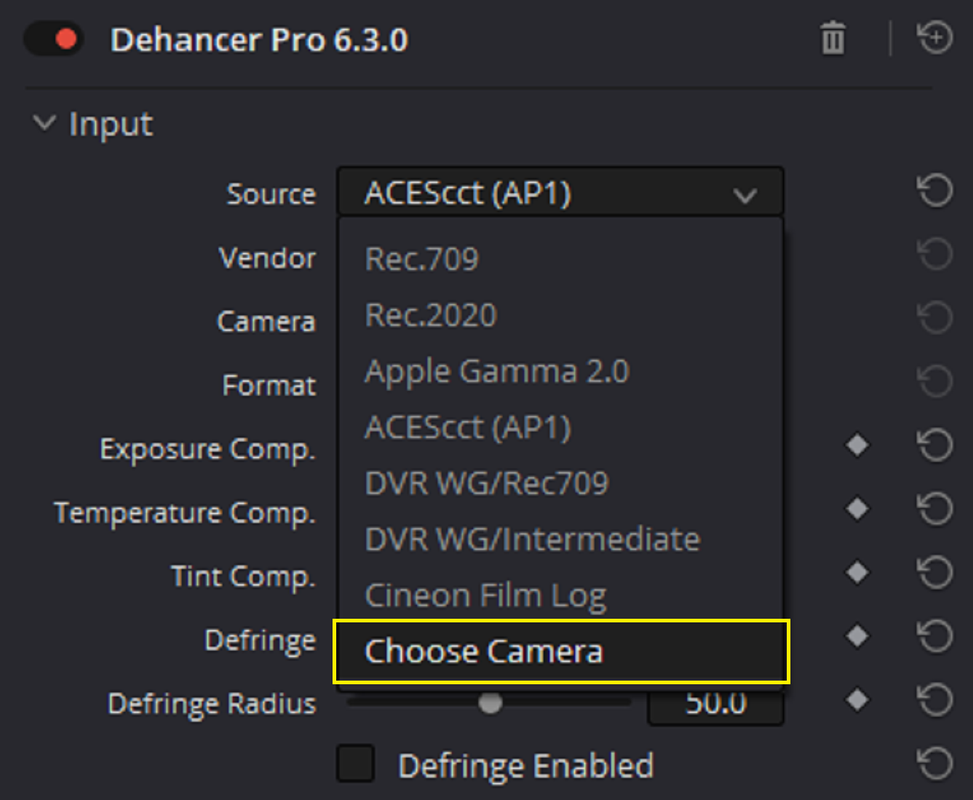
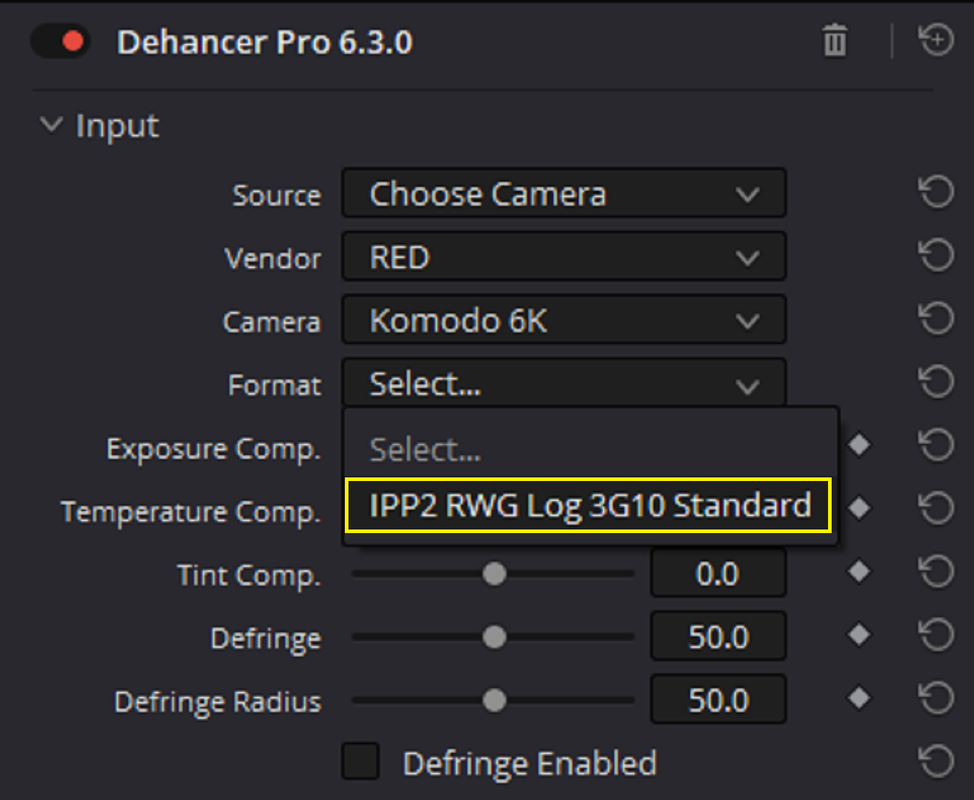
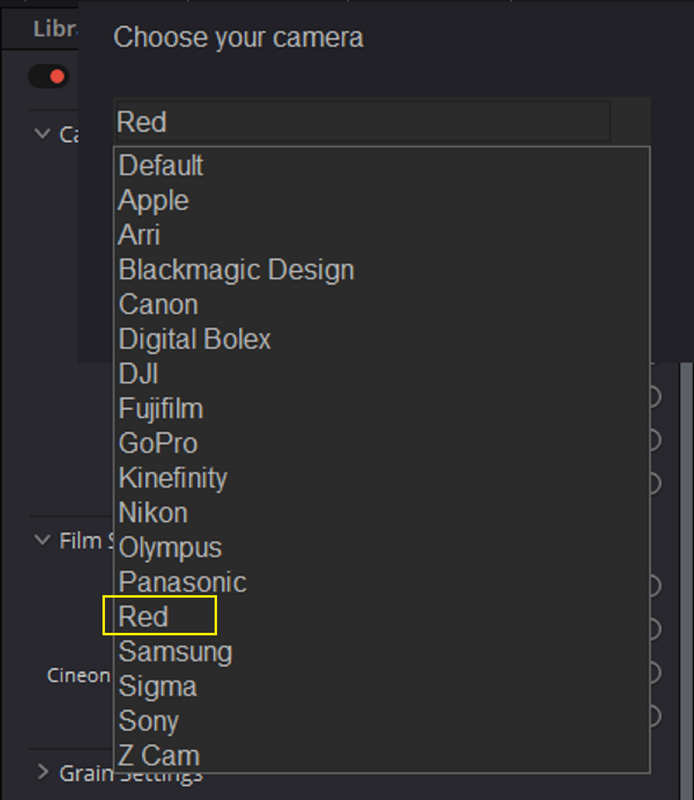
From "SOURCE" select "CHOOSE CAMERA"

3.png


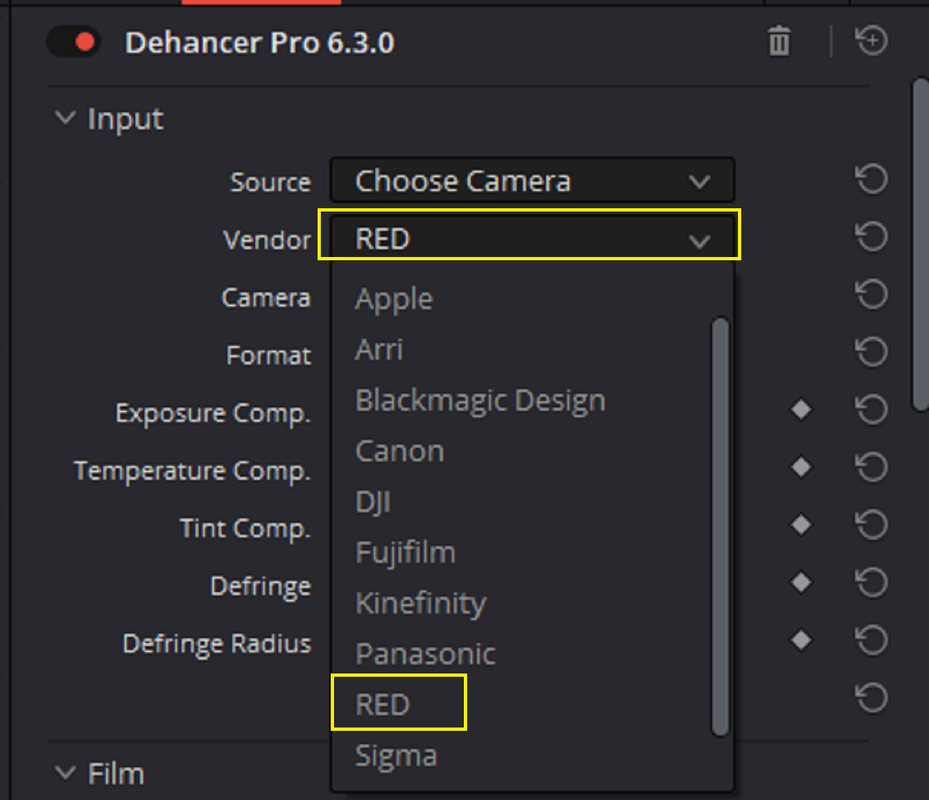
Then "VENDOR"


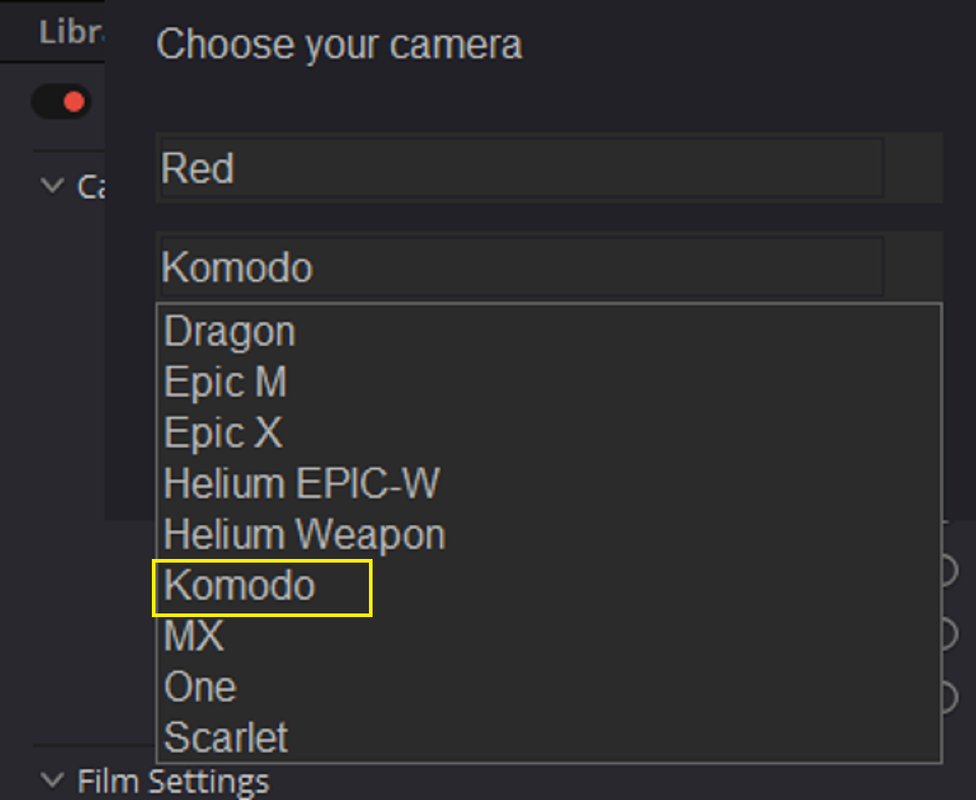
4.png


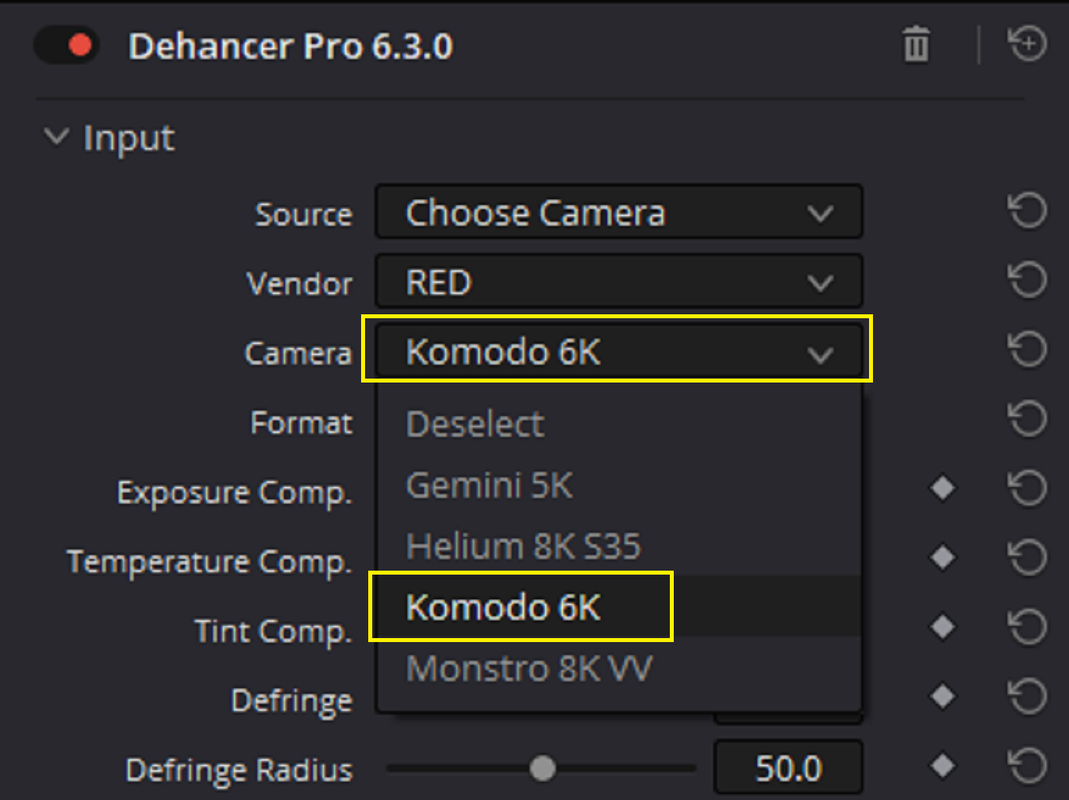
Then Choose "KOMODO" since it is a DSMC 3 Camera.


5.png


Finally, "IPP2 RWG Log 3G10 Standard"


6.png


I chose the same Print Film Emulation as before but had to change the parameters under the "EXPAND" tab to get the "ED LACHMAN ZONES" results to match those from the ACES workflow.

13.png


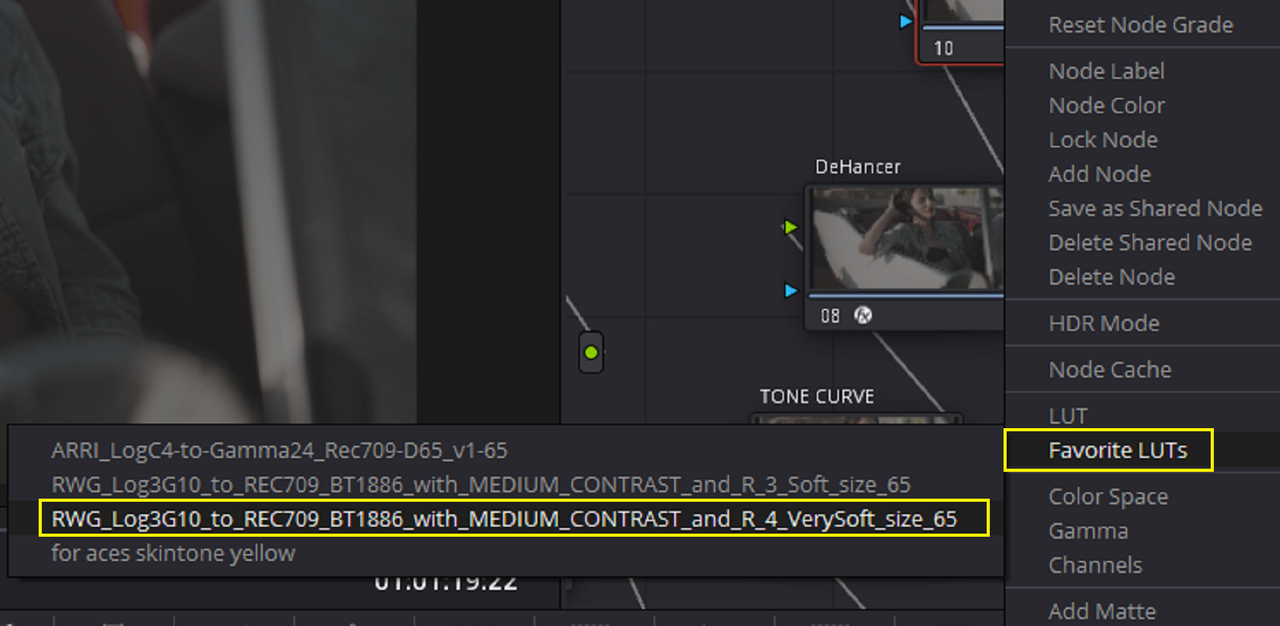
However, when I tried to add an IPP2 Output Transform of "MEDIUM CONTRAST/ VERY SOFT" at the end of the Node Chain after the "DEHANCER" Node, it seems that the "IPP2 RWG LOG 3G10 Standard" under "FORMAT" had already added an ODT. This was probably "MEDIUM CONTRAST/ SOFT" to REC709. So if you specifically wanted an IPP2 compatible workflow unless I'm missing something, please let me know if I did, you're stuck with a Film Emulation Lut from DEHANCER that will be in the RED IPP2 compatible format but with a Medium Con/Soft REC709 IPP2 OUTPUT Display Transform baked in. So you won't be able to use this Lut in a "LOG-to-LOG" workflow and be able to choose a REC2020 or P3-D65 ODT.


14.png


14A.png


15.png


16.jpg


17.jpg


18.png


19.png


20.jpg

21.jpg


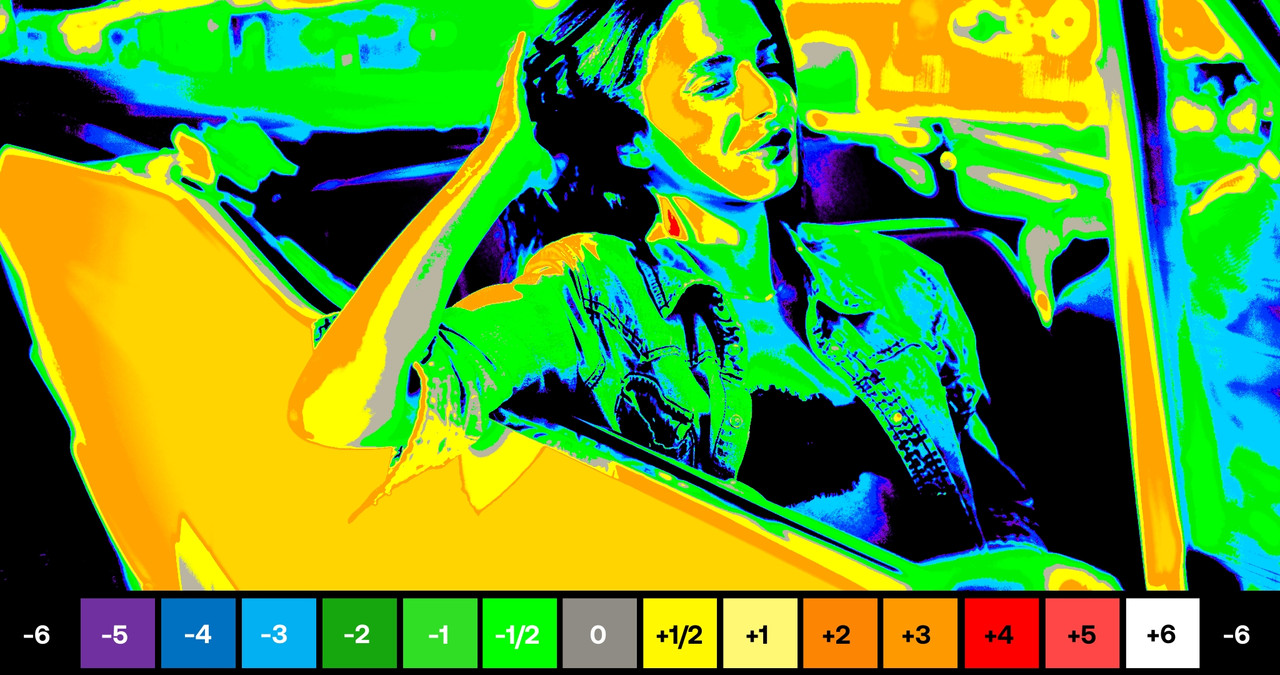
Here area few examples with the "IPP2 RWG LOG 3G10 Standard" ODT applied and with an "ED LACHMAN ZONES" graph of that look.


Konica Minolta

32-KONICA-MINOLTA-1-3-37.jpg


33-KONICA-MINOLTA-ED-1-3-38.jpg


Kodak Aerocolor

28-KODAK-AEROCOLOR-4-125-1-3-48.jpg


29-KODAK-AEROCOLOR-4-125-ED-1-3-49.jpg


Fujicolor Superia

26-FUJICOLOR-SUPERIA-1-3-46.jpg


27-FUJICOLR-SUPERIA-ED-1-3-47.jpg


Konica Impresa

30-KONICA-IMPREAS-50-1-3-39.jpg

31-KONICA-IMPRESA-50-ED-1-3-40.jpg


Agfa Scala

24-AGFA-SCALA-CON-2-1-3-44.jpg


25-AGFA-SCALA-CON-2-ED-1-3-45.jpg
 
Last edited:
RAVENGRADE
CINELOOKS
Cinelook - Ravengrade


Screenshot-9082.png

Screenshot-9083.png


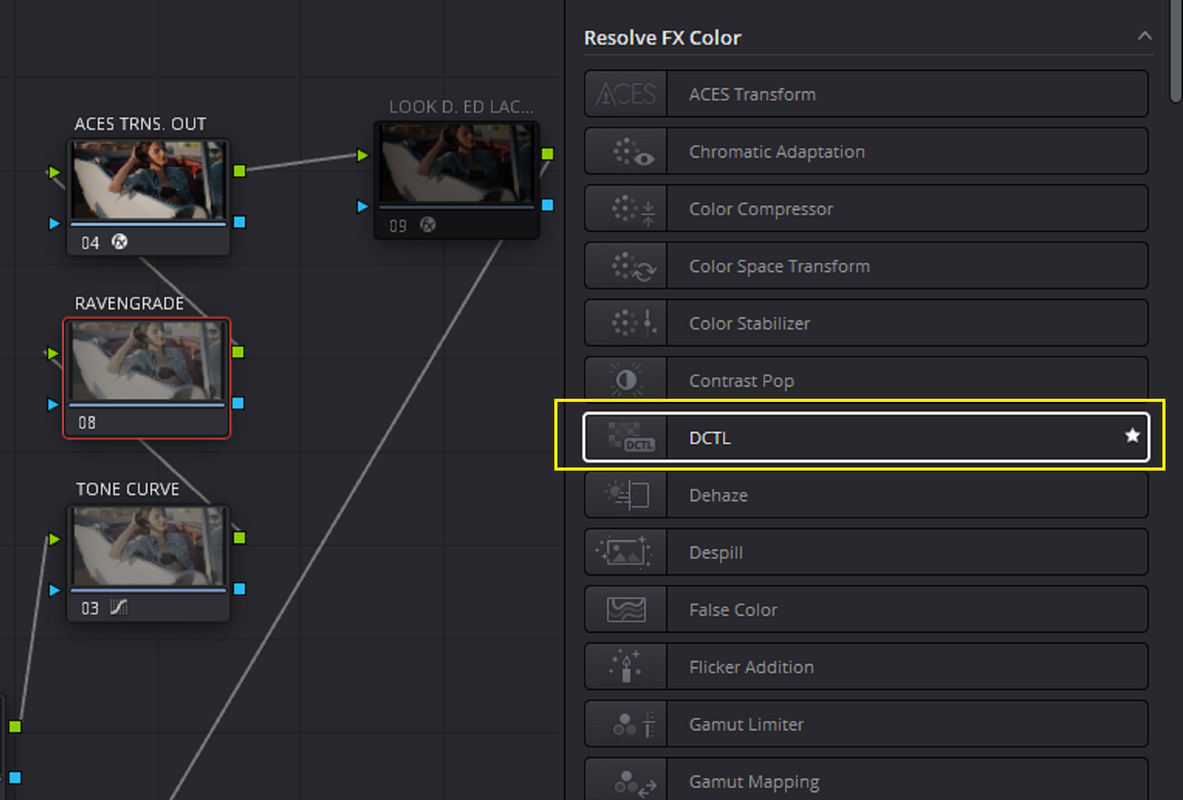
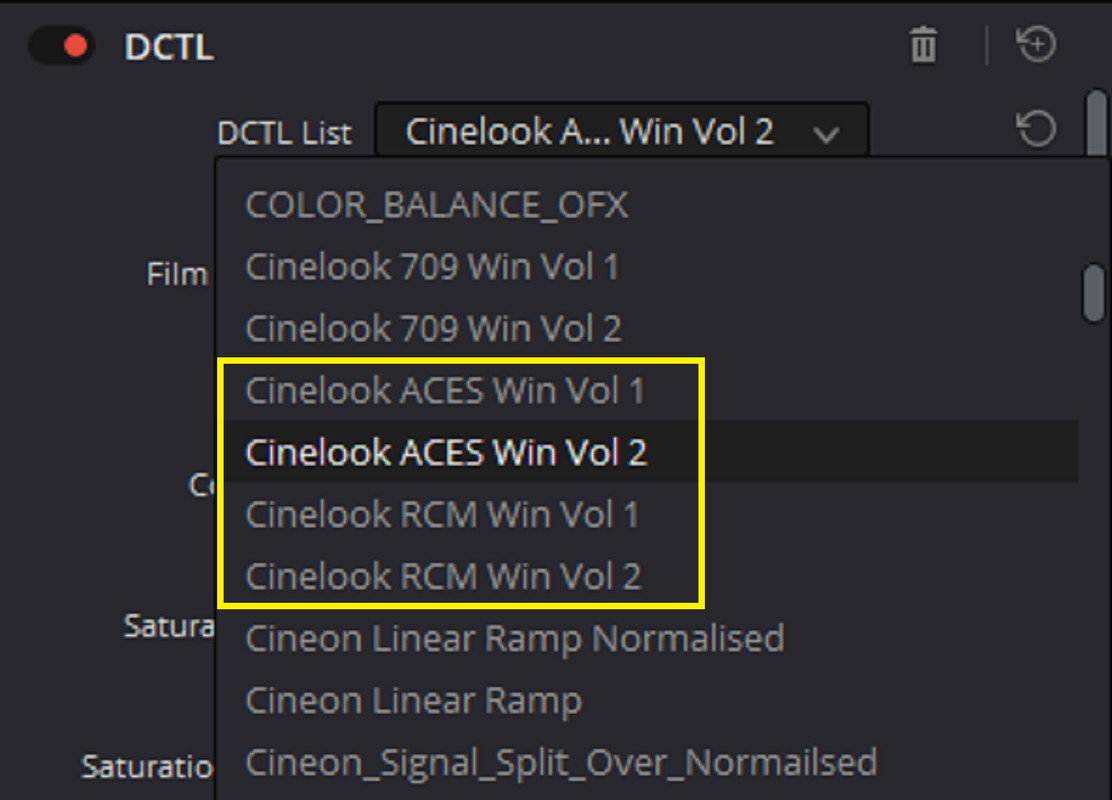
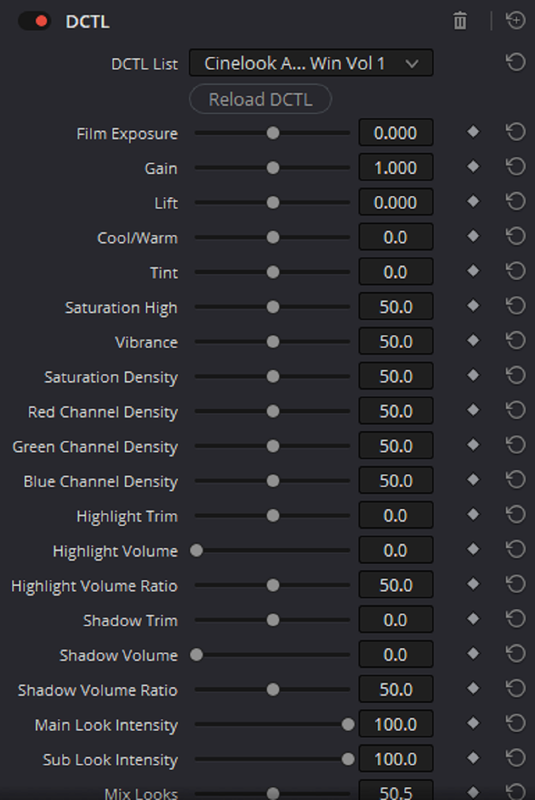
Another Great tool I use designed by Professional Colorists and Color Scientist inRAVENGRADE's CINELOOK

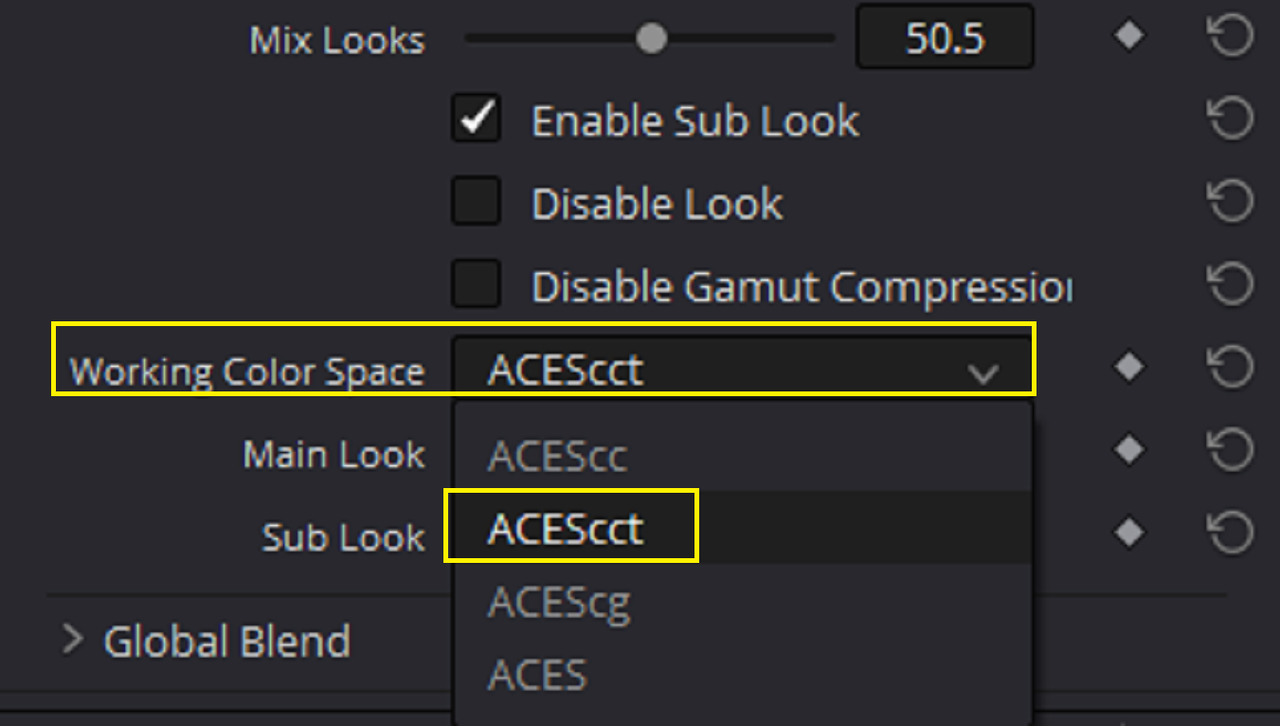
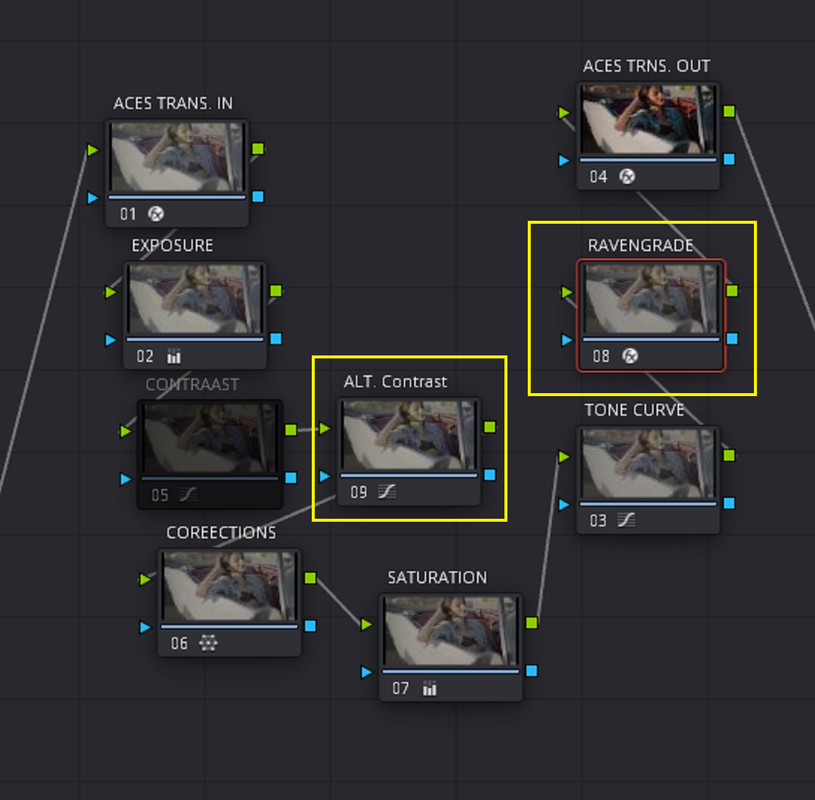
ACEScct Workflow

3.png

2.png

3.png

4.png

5.png

6.png

7.png

8.png

9.png


I use an "Alternative Contrast Curve" just incase one of the Cinelook combinations is too contrasty I can use a different curve so as to not have to modify the curve of the original grade.

10.png


Here's a few grading examples

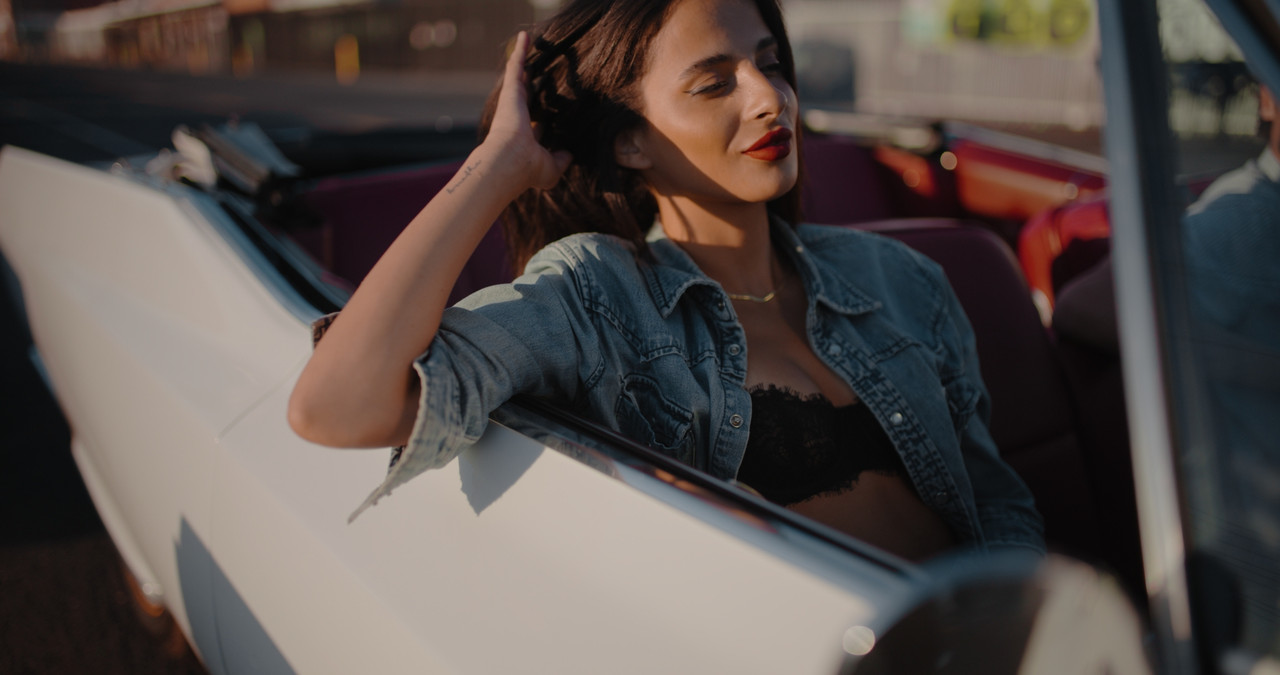
Original Grade

original-1-3-5.jpg

R036-W007-0628-WV-001-1-3-6.jpg


Original Grade
+
RAVENGRADE samples

test-1-1-3-1.jpg

t1-1-3-9.jpg


test-2-1-3-2.jpg

t2-1-3-8.jpg


test-3-1-3-3.jpg

t3-1-3-7.jpg


tes-4-1-3-4.jpg

t4-1-3-5.jpg
 
Last edited:
RAVENGRADE
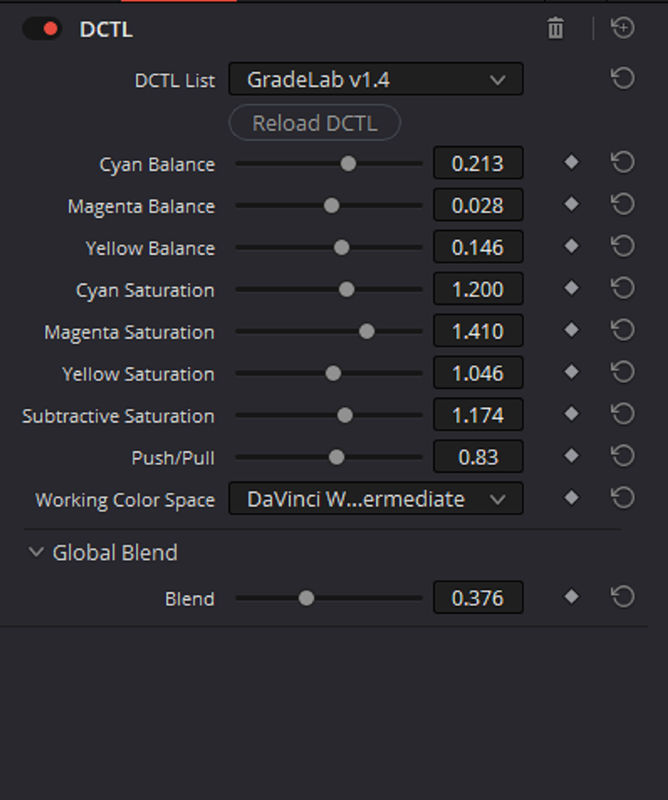
GRADELAB
Master Tone - Ravengrade


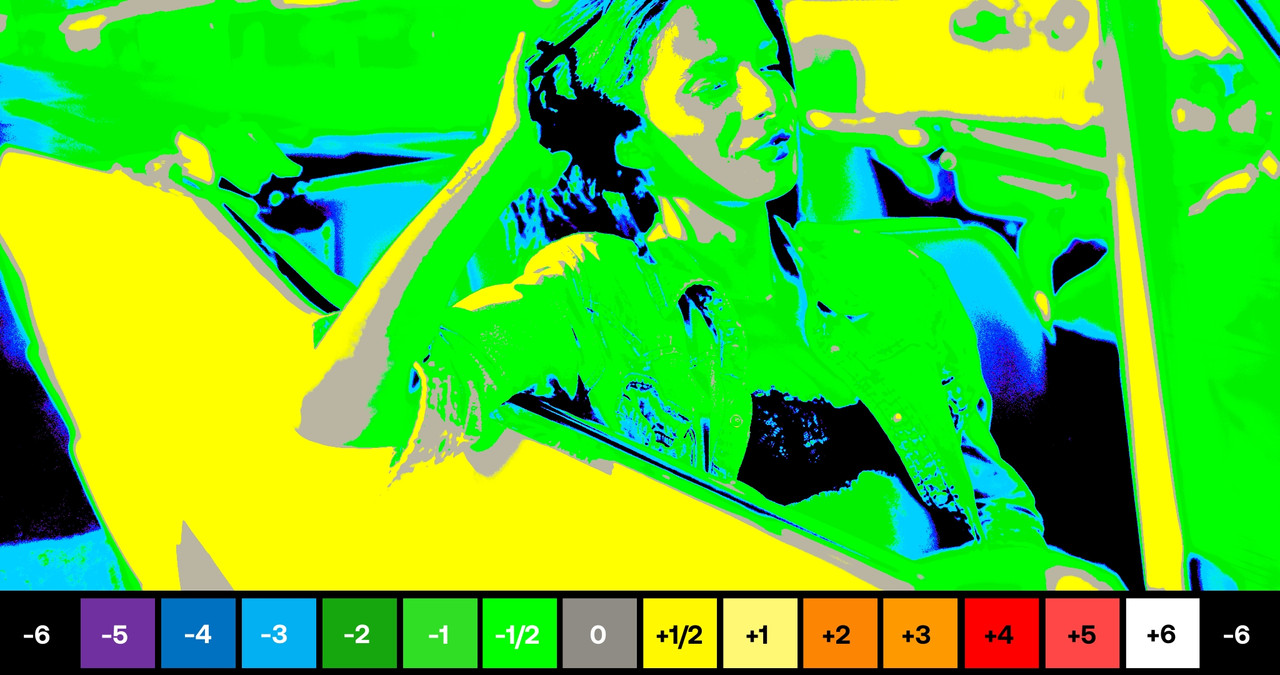
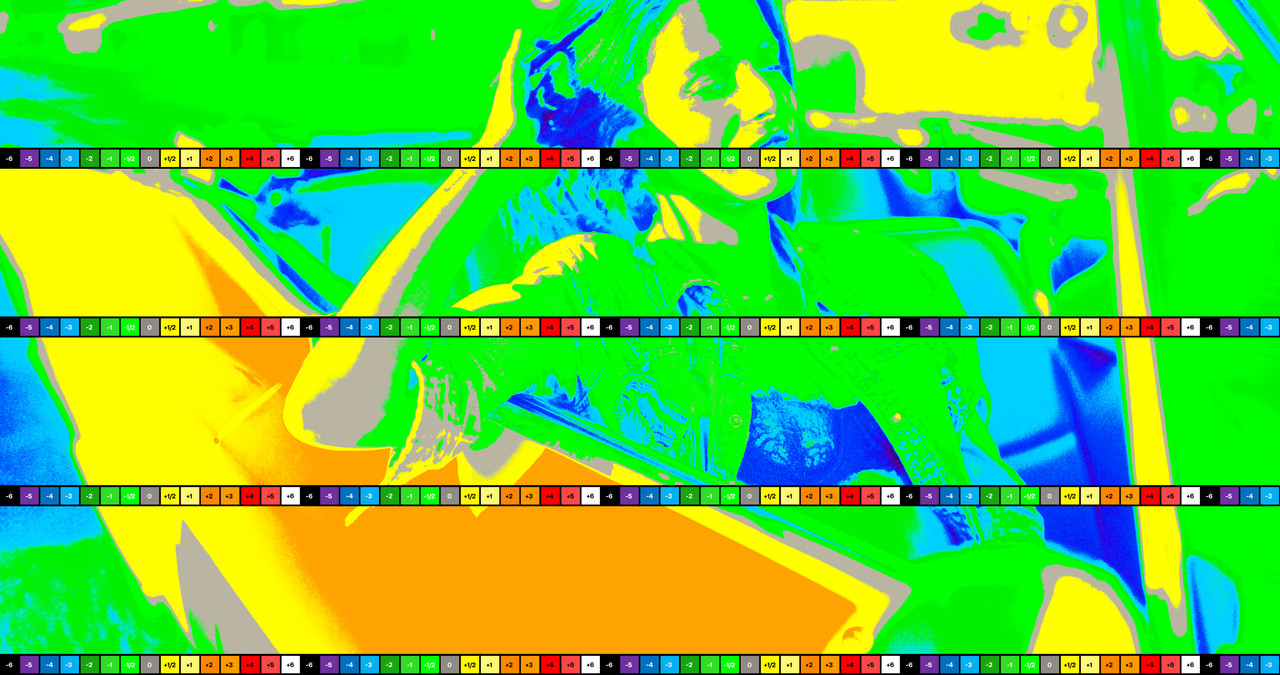
I like this grading tool because instead of manipulating RED, GREEN and BLUE to adjust the color of an image, it uses the CYAN, MAGENTA and YELLOW properties.


Workflow Setup

1.png


2.png


3.png


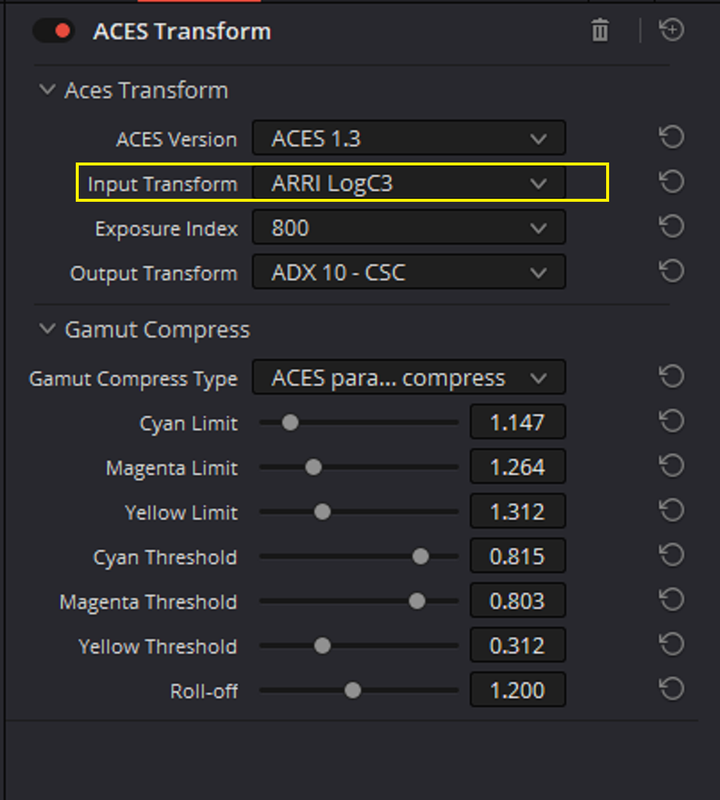
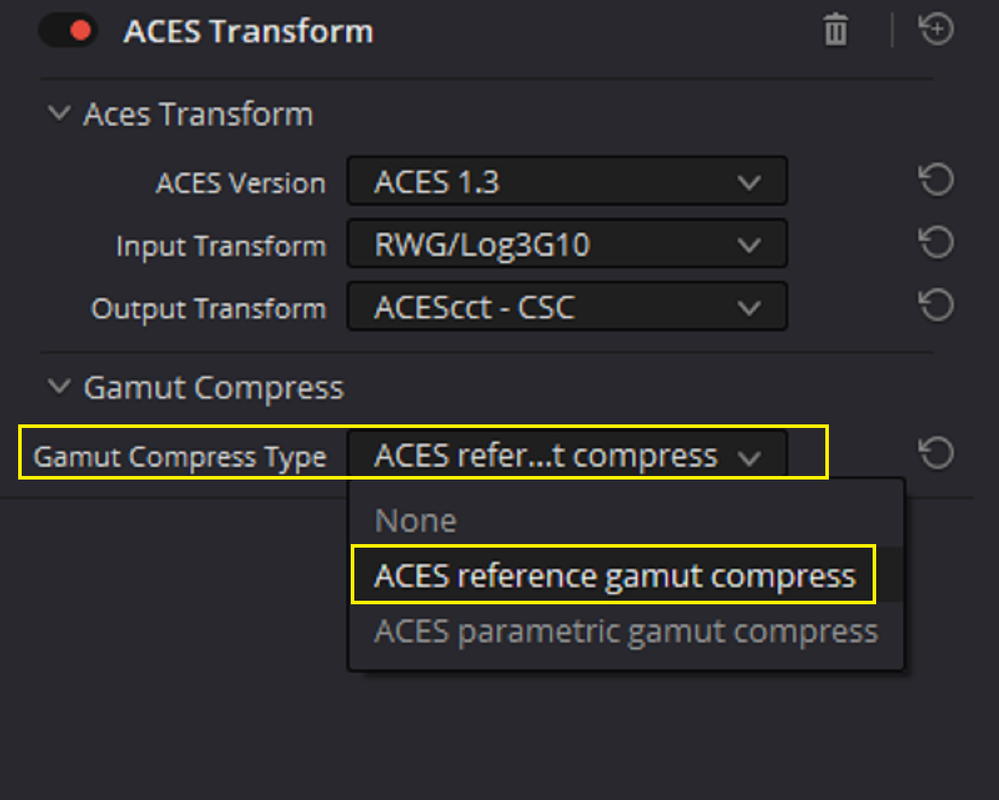
ACES Transform IN

4.png


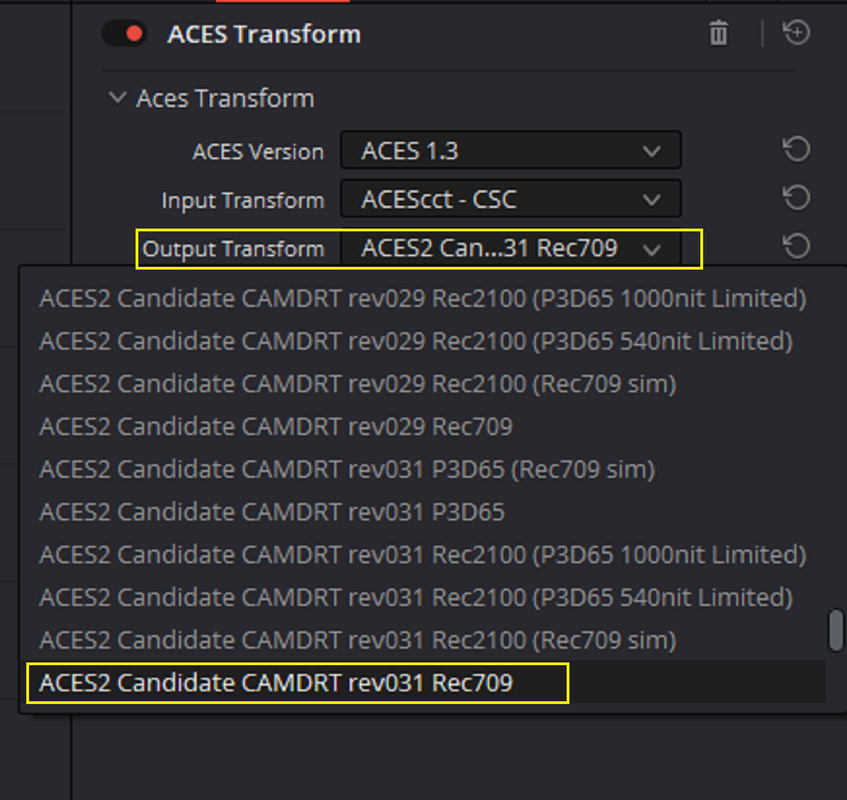
ACES Transform OUT

5.png


12.png

13.png


14.png


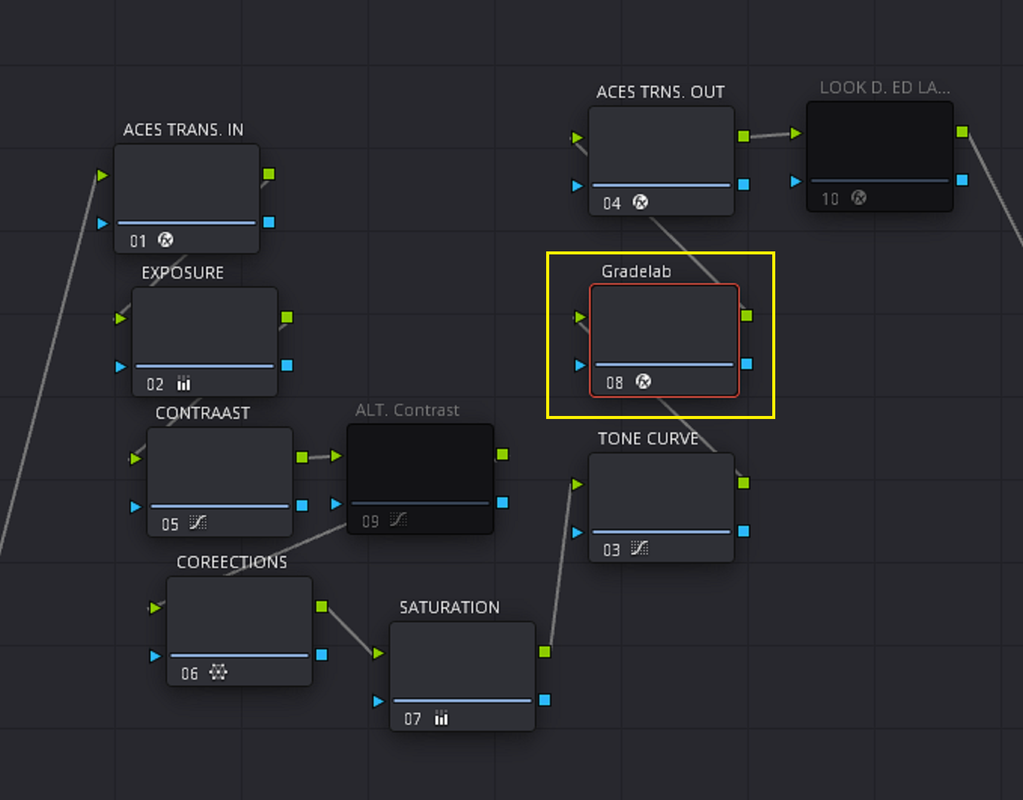
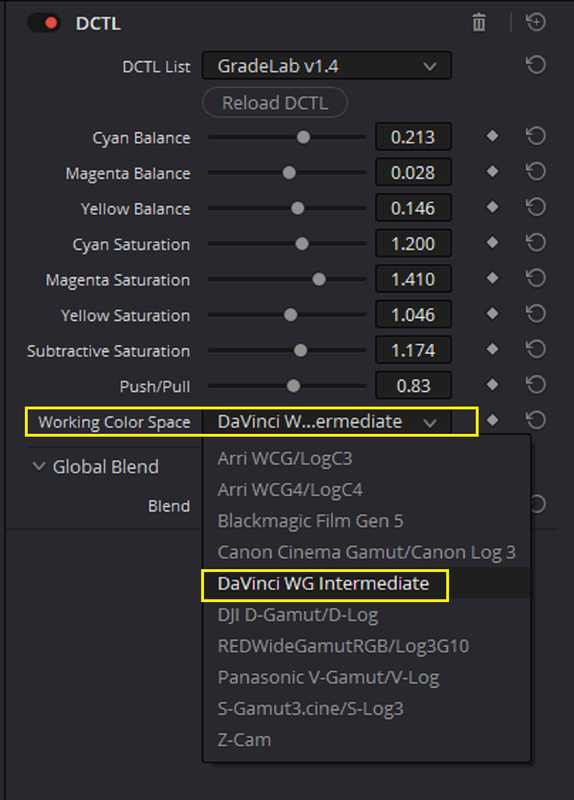
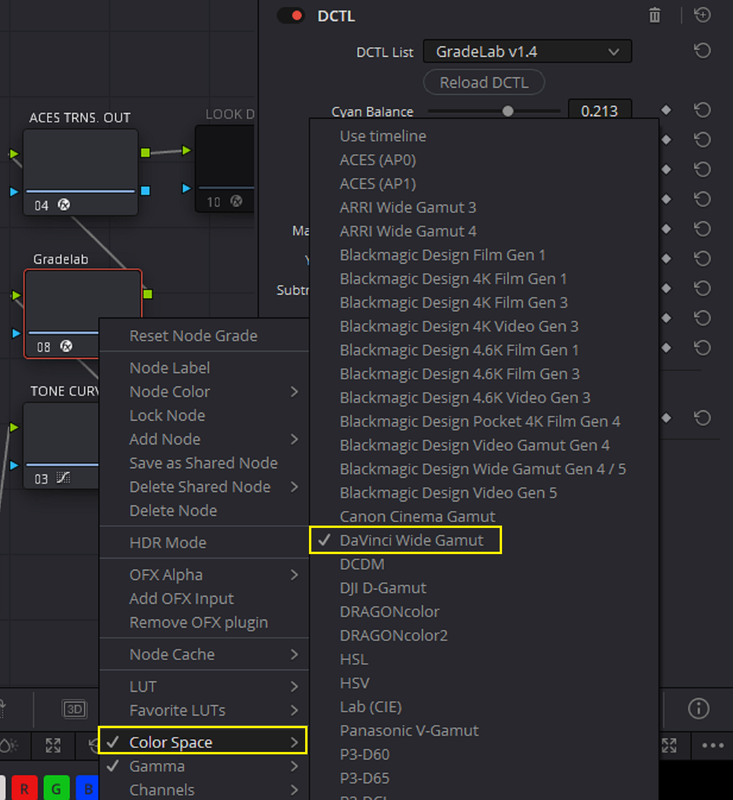
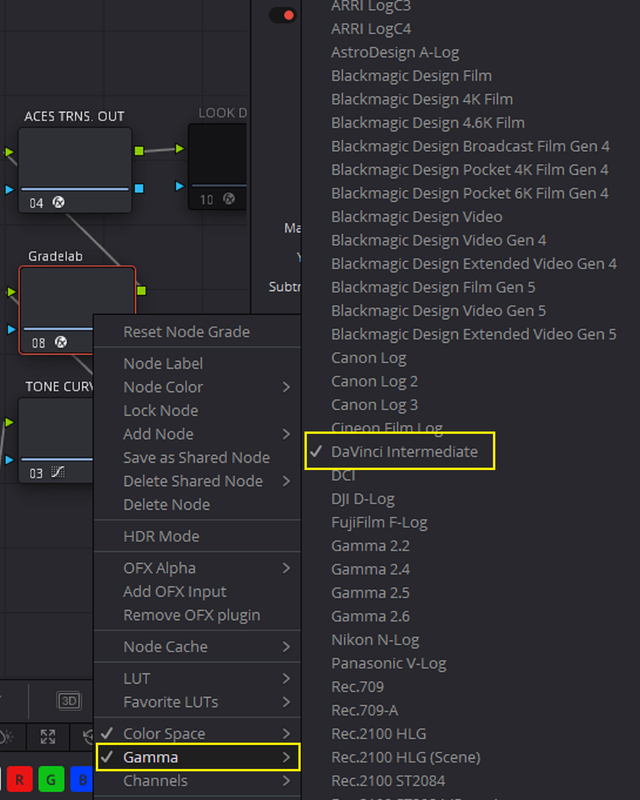
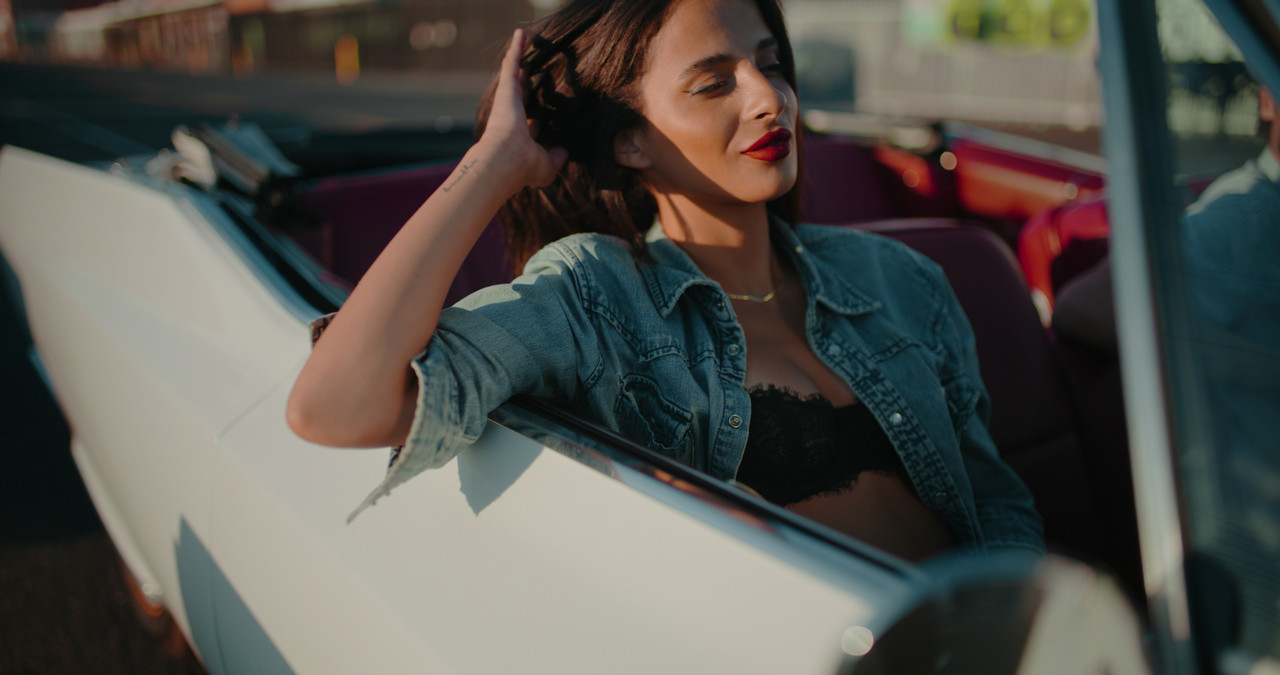
GRADELAB is not available in the ACES COLOR SPACE so i designated the NODE that I would be using it in as "DAVINCI WIDE GAMUT/ DAVINCI INTERMEDIATE" to accommodate one of the other SCENE- REFERRED Color Spaces that it does support.


15.png


16.png


17-gradelab-test-1-1-3-12.jpg

18-gradelab-test-1ed-ed-l-1-3-13.jpg


RAVENGRADE
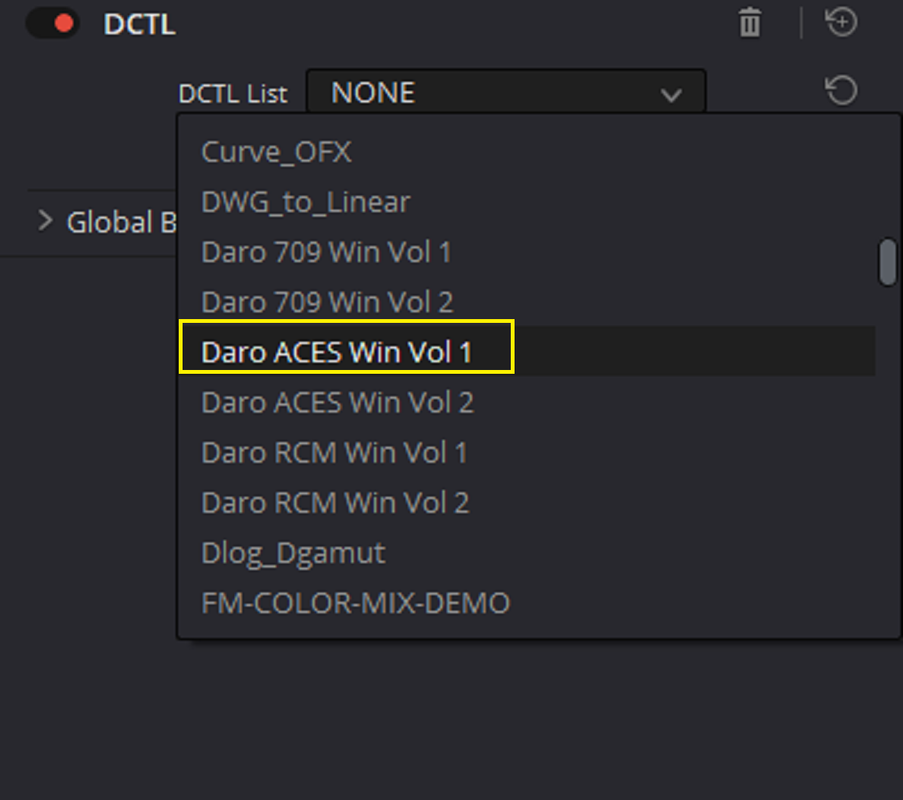
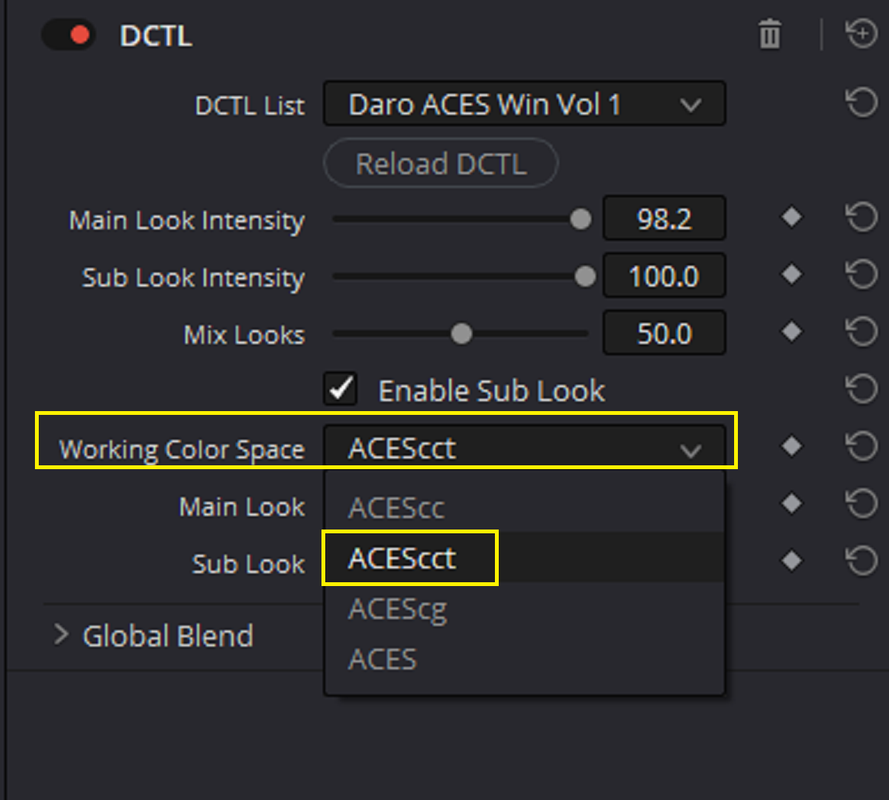
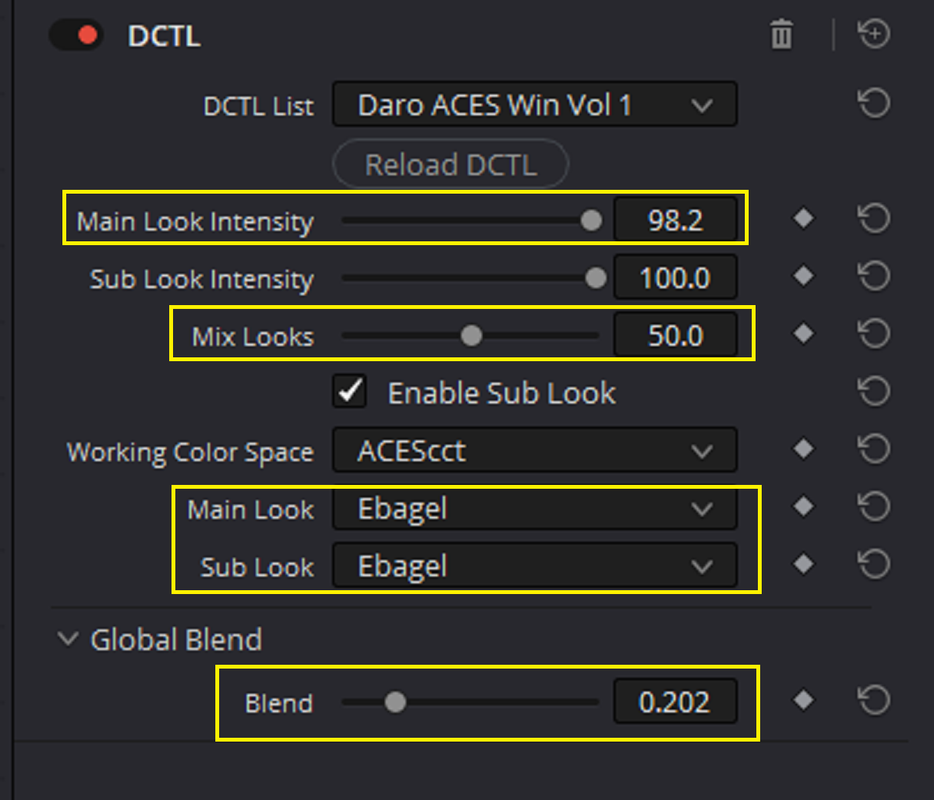
DARO


0B.png


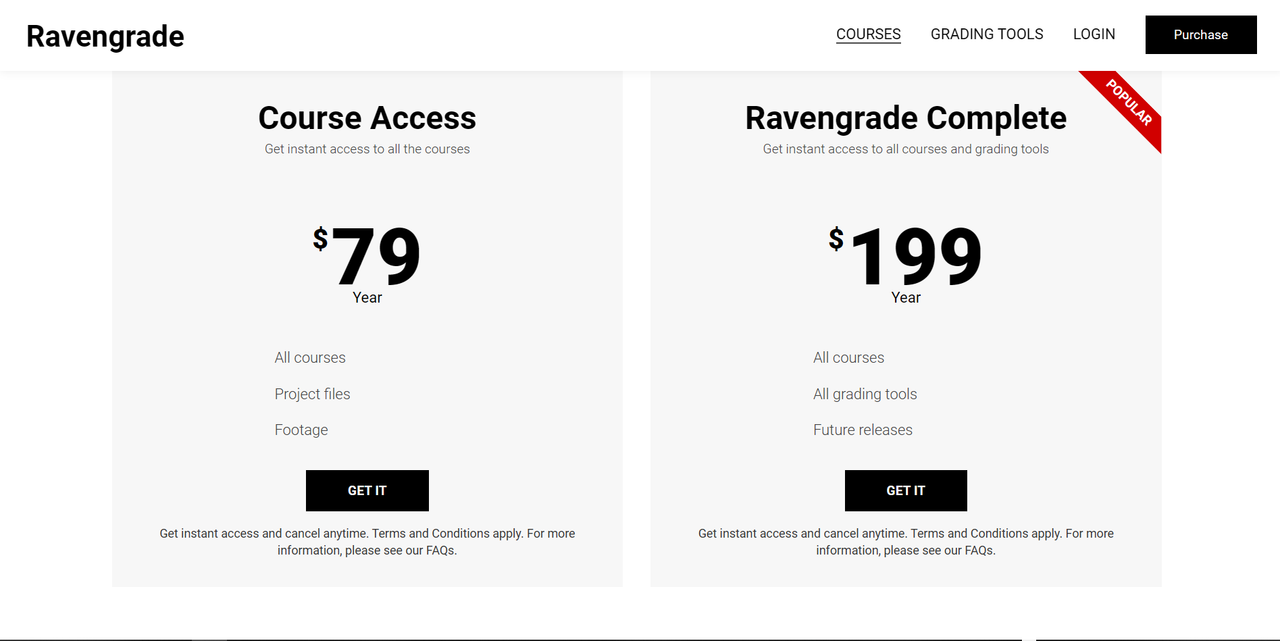
You get "CINELOOKS" , "GRADELAB" and "DARO" along with many other grading tools for the Yearly $199 RAVENGRADE Membership.


0C.png


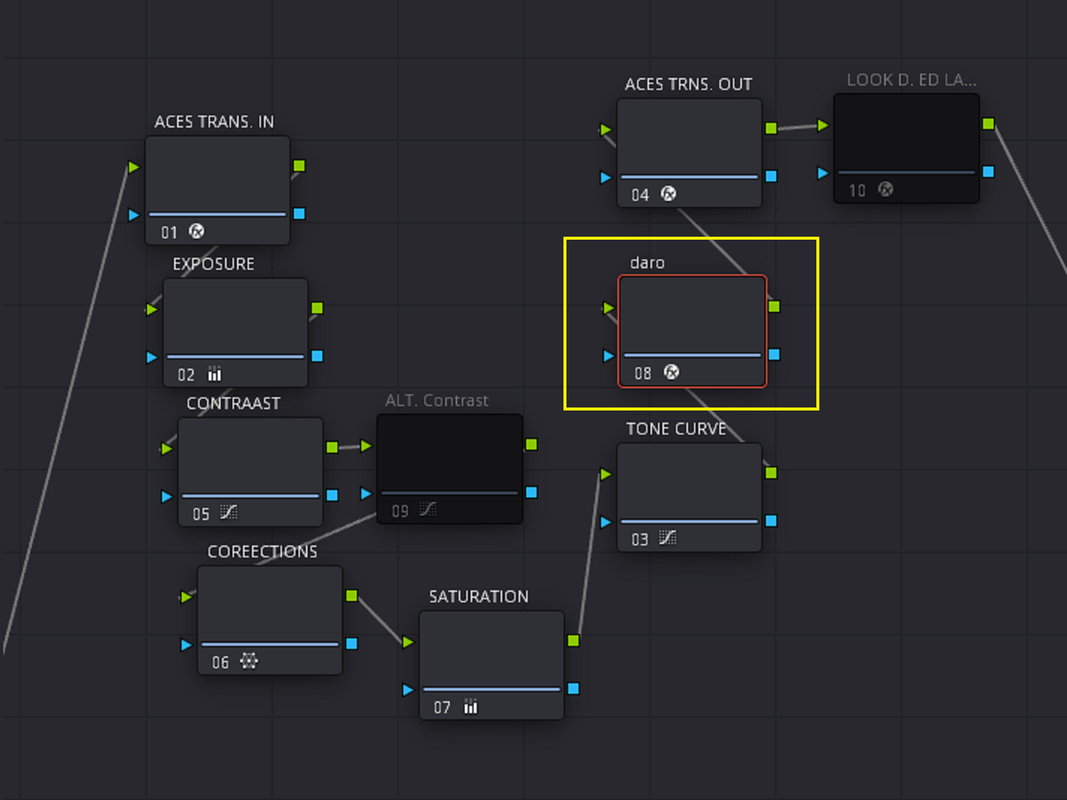
6-daro.png


7-daro-2.png


8.png


9.png


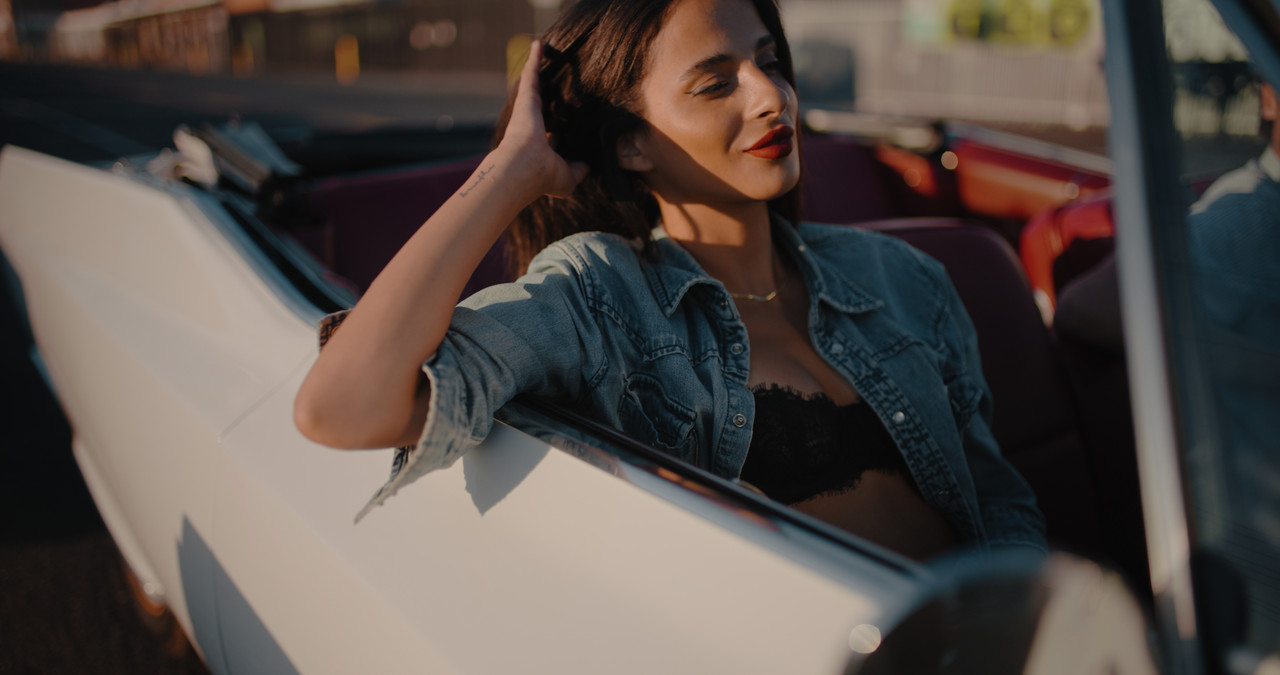
10-daro-test-1-1-3-10.jpg


11-daro-test-1-ed-l-1-3-14.jpg
 
Last edited:
FILM CONVERT NITRATE
Home Page - FilmConvert


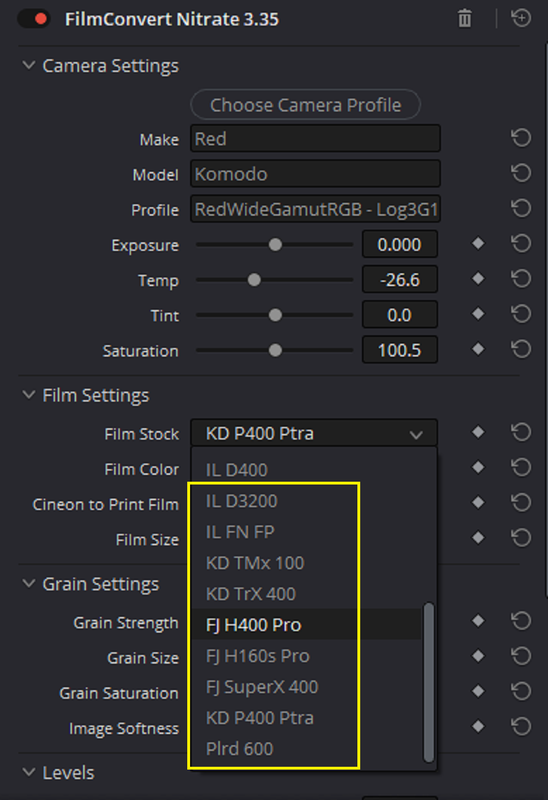
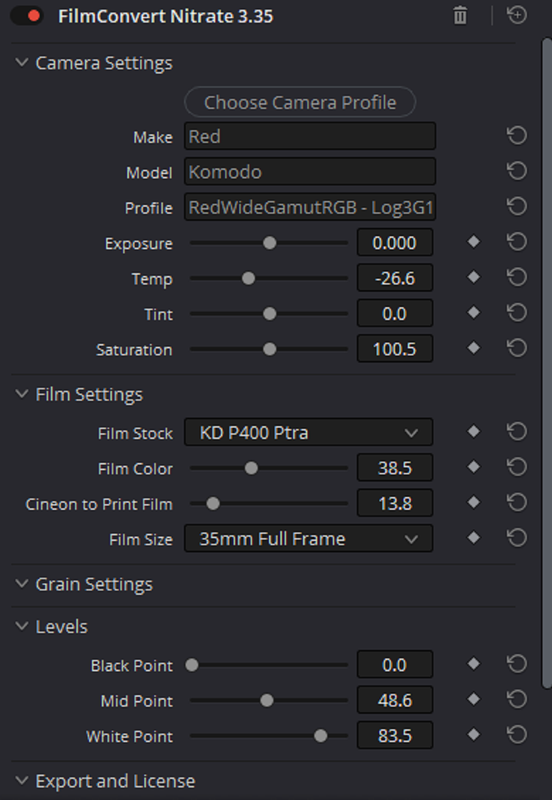
I wanted to try a "DEMO" version of FILMCONVERT NITRATE to see how it performed against other image developing software that I use. Frankly, I have never had to do so much initial pre-preparation work and never have I had to fight a program just to get a decent look. I mean first you have to download and install software for the specific Camera system you are using before you can start doing any work at all, shouldn't all of that be pre-installed already? Secondly, you have to disable and or decrease the initial preset settings that have a shit load of Grain added out of the box along with other preset settings you may want to "enable" yourself and not have it already enabled already.


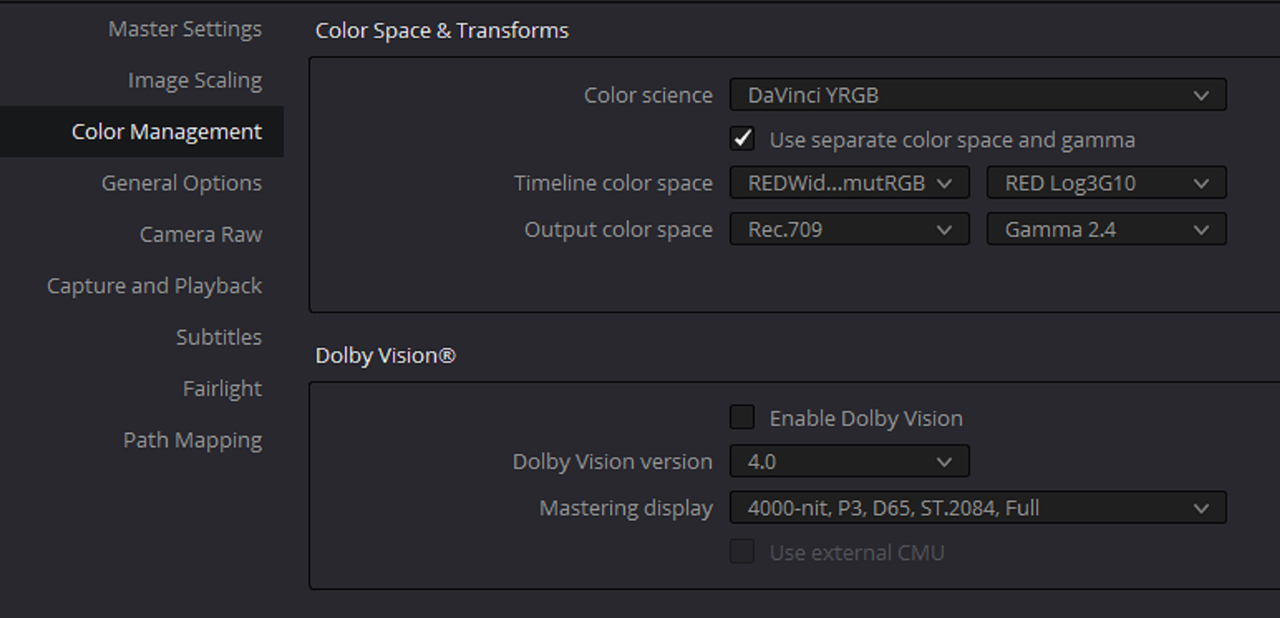
You can create a "LOG-to-LOG" look (Grade done inside of a "SCENE-REFERRED" Color Space like DWG/DI, RWG/LOG3G10 or ACES) with FILMCOVERT in RWG/LOG3G10 unlike DEHANCER.


Workflow


1.png


2.png


3.png


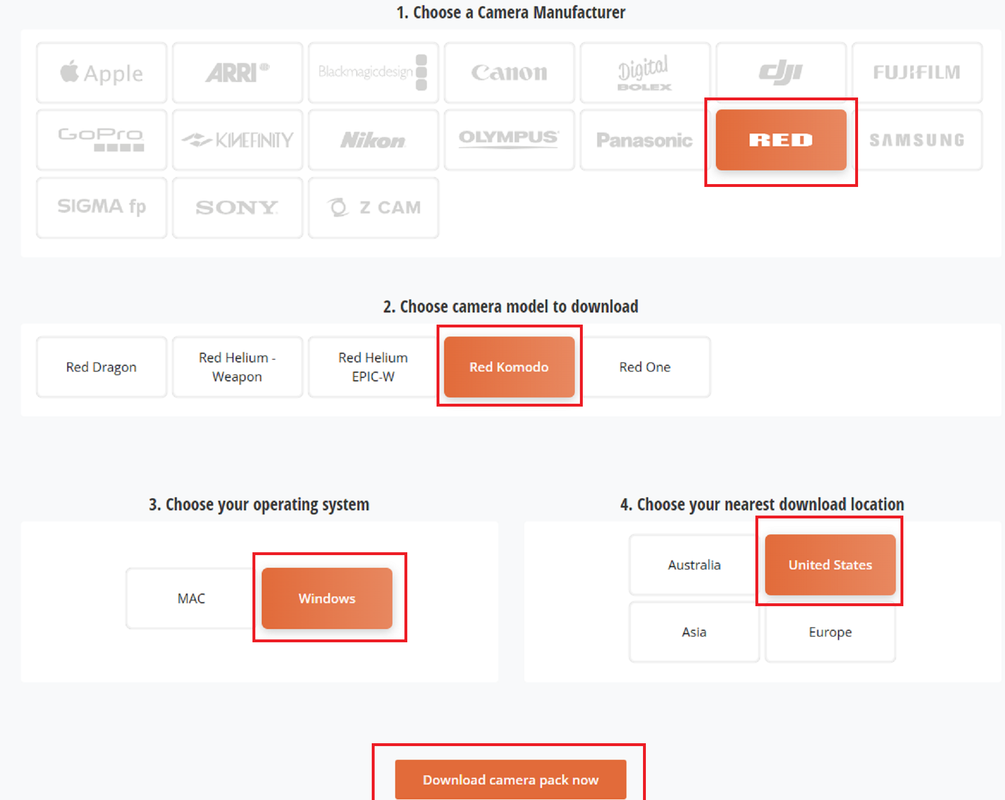
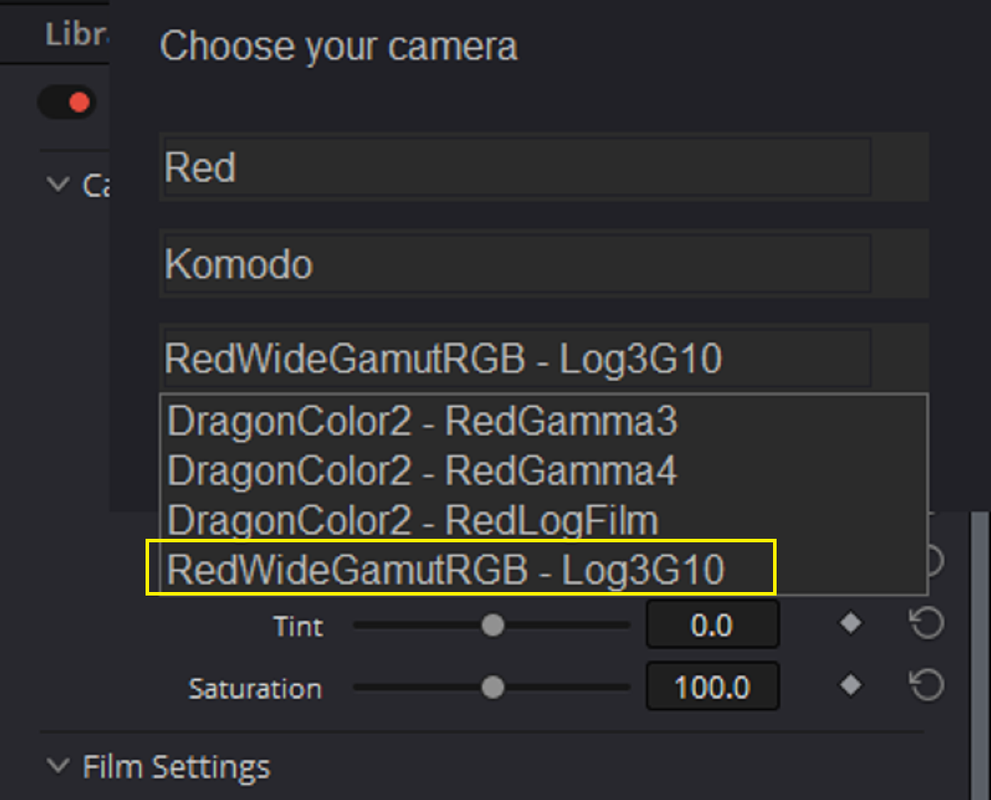
First you have to install the correct camera Profile before you can even start to do anything. Then in the program you can make the appropriate camera selection.

4.png


5.png


6.png


7.png


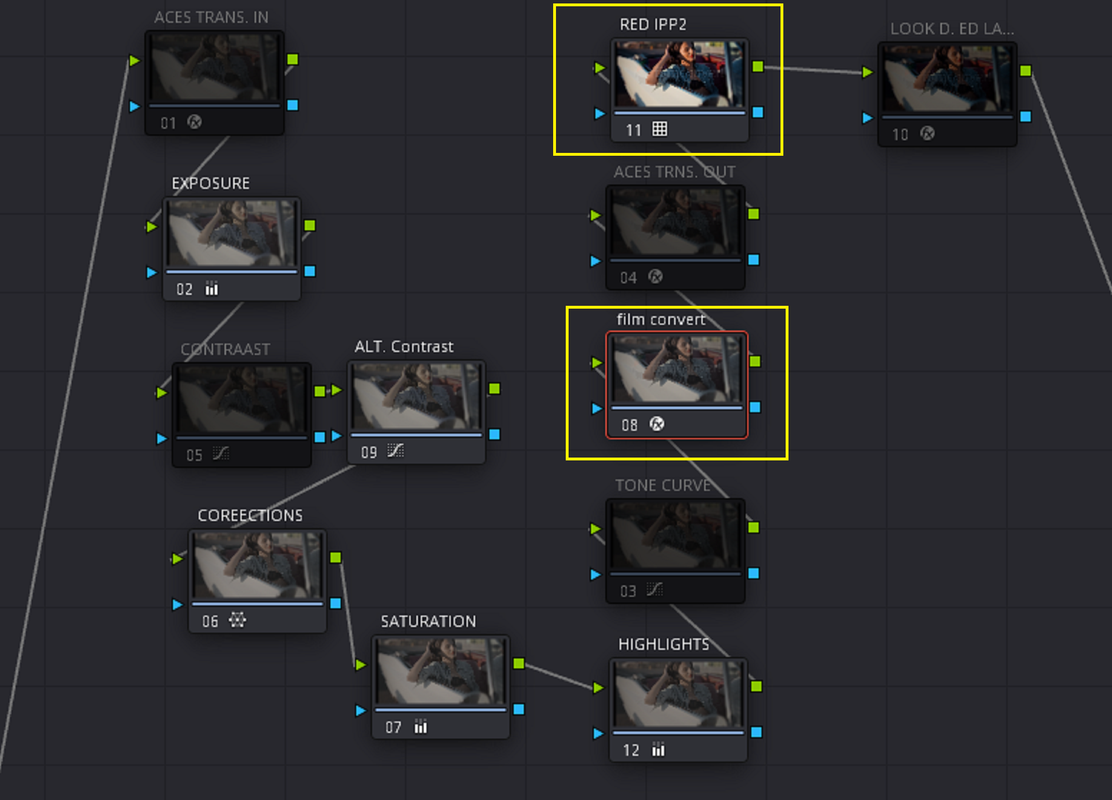
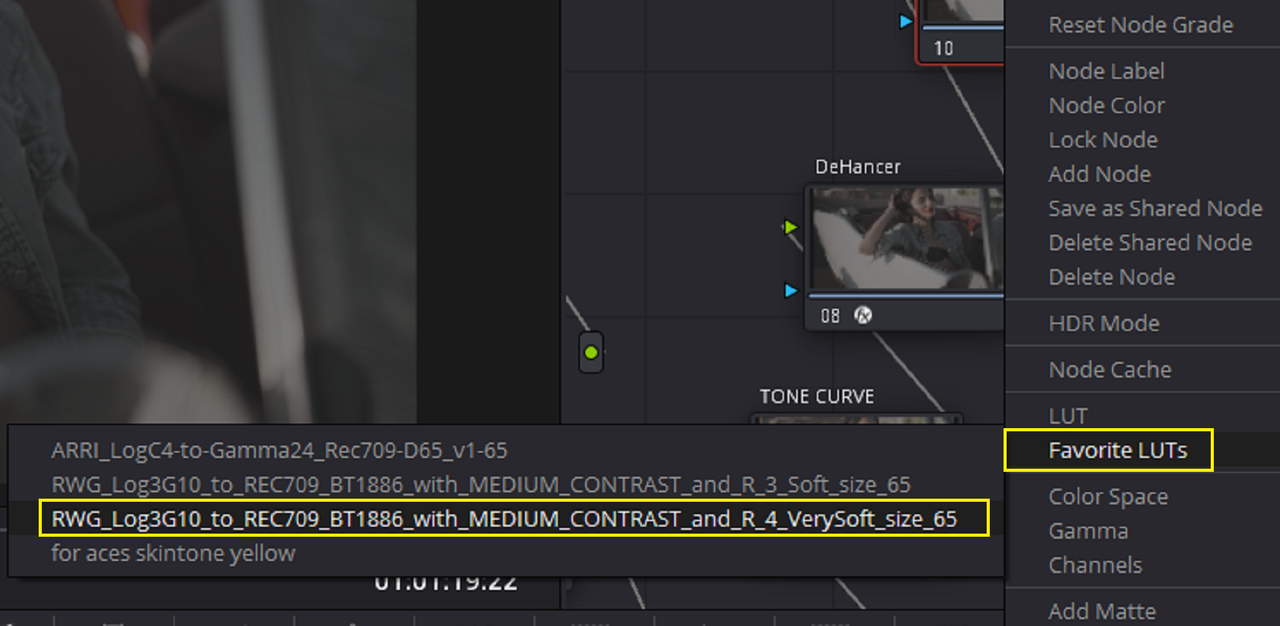
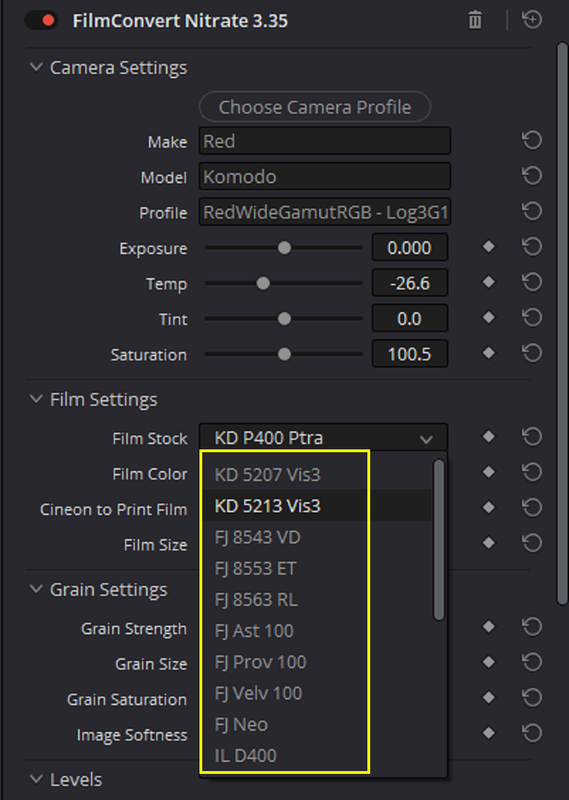
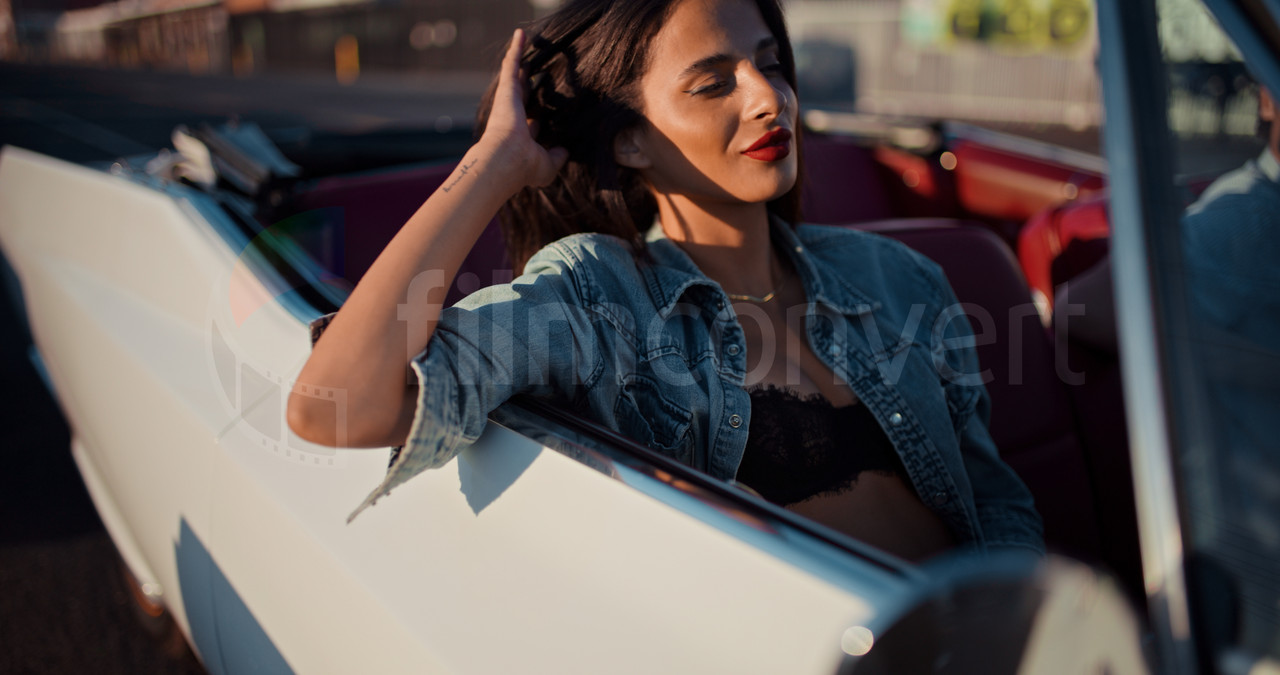
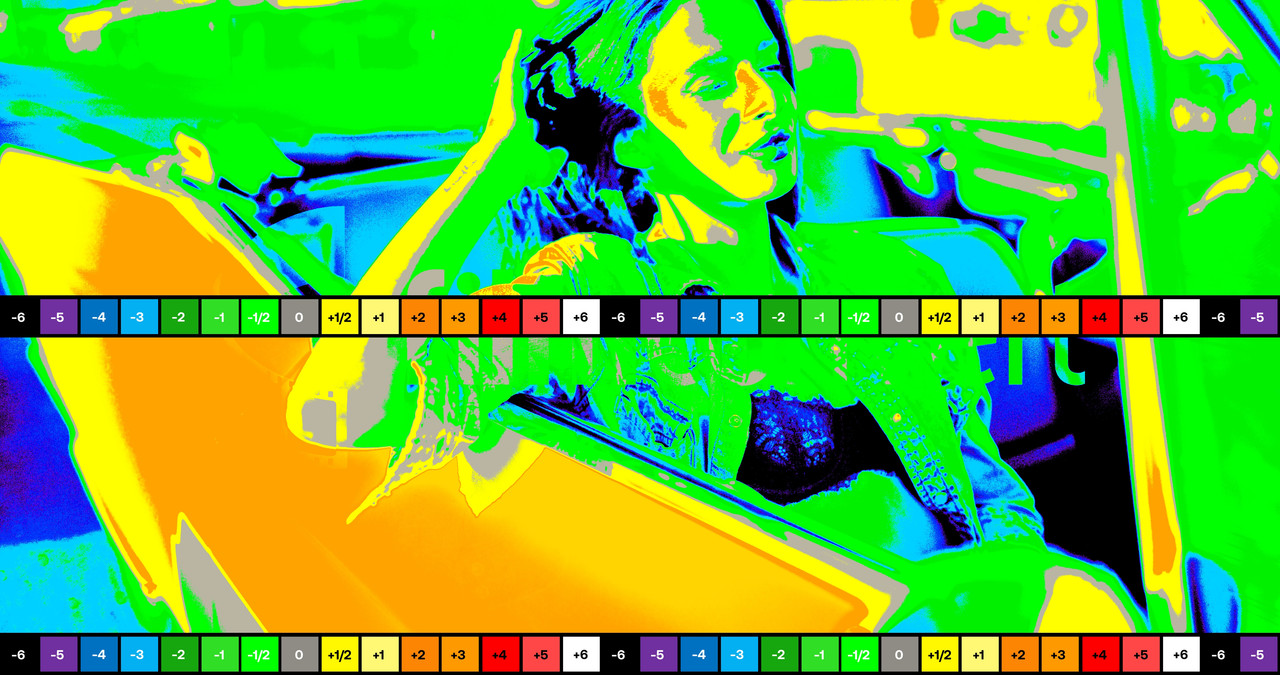
After disabling and or reducing the preset settings of a lot of shit, I added a "MEDIUM CONTRAST/ VERY SOFT" RED IPP2 Output Display Transform LUT at the end of the NODE TREE. I chose from one of the many PRINT FILM EMULATION settings in FILMCONVERT NITRATE and made a grade with it.

8.png

14A.png


9.png


10.png


10A.png


11.jpg


12.jpg
 
by
REMEDY


CAMERA OWNERS ❯❯

Alexa 35: Phil Stevens | https://www.philstevensdirector.com/r...
Alexa Mini LF: Phil Stevens | https://www.philstevensdirector.com/r...
Sony Venice I: PC&E | https://pce-atlanta.com/
RED V-Raptor XL: BP40 Creative | https://bp40creative.com/
RED Komodo: Mick Hawkins | http://www.mickhawkins.co/
Canon C500 II: REMEDY | https://remedyfilms.com/
Blackmagic Ursa Mini Pro 4.6K: N/A
Blackmagic Pocket 4K: N/A


0:00 - Intro
0:57 - Cameras
1:13 - Testing Parameters
2:11 - GenLock
2:42 - Why this Test?
3:08 - Daytime Scene Setup
3:16 - RED Komodo + BM Pocket
4:42 - Sony Venice I + Canon C500 II
6:45 - Alexa Mini LF + BM Ursa

8:21 - Alexa 35 + RED V-Raptor XL
9:38 - Night Scene Setup
9:53 - Canon C500 II + Sony Venice I
11:20 - RED Komodo + Alexa Mini LF

13:30 - Alexa 35 + RED V-Raptor XL
15:04 - Takeaways
 
rand thompson FilmConvert is archaic and there are better plugins now. Also FilmConvert looks nothing like actual film. Period.

I've also tried Cinematch years ago, their camera profiles did not match AT ALL.
 
rand thompson FilmConvert is archaic and there are better plugins now. Also FilmConvert looks nothing like actual film. Period.

I've also tried Cinematch years ago, their camera profiles did not match AT ALL.

Nick,


Yeah, I think when I first got into Print Film Emulations Iwanted to know which programs gave the most authentic reproduction of Old Film Stocks.I tried all of the methods of all of the programs I demonstrated here and a few others. You read on each program's Website about the extensive process they went through to get the most accurate film reproduction possible. Then you learn that the look of a specific Film Stock varied from different batches, from one another, from how they were processed, from what facilities processed them ......etc. So the best you can really hope for is a reproduction that captures the general"feel" or essence of what a specific Film Stock looked like. Film Print Emulation of dgital images is still a thing and it's always interesting to try to reproduce the look of film in a digital age. I think as long as you can create interesting "looks" with it and not spend so much time trying to get the most authentic or accurate reproduction of a film Stock it can be fun.
 
Back
Top