Welcome to our community

Be a part of something great, join today!

  • Hey all, just changed over the backend after 15 years I figured time to give it a bit of an update, its probably gonna be a bit weird for most of you and i am sure there is a few bugs to work out but it should kinda work the same as before... hopefully :)

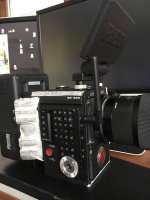
$16 Wifi side plate for DSMC2

Nathan,

Any idea on how to remove the original screws from the protective cover/plate so the newly acquired 4x 3M 18mm screws can then be put through both the original cover/plate and the printed piece? I am having problems getting the short screws out of the protective plate. I feel like this is a stupid question but what is the secret to removing them?

-Tim
 
Nathan,

Any idea on how to remove the original screws from the protective cover/plate so the newly acquired 4x 3M 18mm screws can then be put through both the original cover/plate and the printed piece? I am having problems getting the short screws out of the protective plate. I feel like this is a stupid question but what is the secret to removing them?

-Tim

Unscrew as far as you can, and then just hook your fingernail under the screw head to apply a little upward pressure as you unscrew it the rest of the way. :)
 
hahah.. 2 seconds later done. thanks Nathan.
 
Original solid part file

Original solid part file

Hi Nathan, your solution is exactly what I'm looking for to improve Weapon wifi reception.

I'm working with Keslow Camera to 3D print your part, but they'd like to make some adjustments.

If you're able too, could you upload a solid part file (.slrprt or .prt) for easy editing?

Thank you for creating this really helpful guide!

Chris
 
Hi Nathan, your solution is exactly what I'm looking for to improve Weapon wifi reception.

I'm working with Keslow Camera to 3D print your part, but they'd like to make some adjustments.

If you're able too, could you upload a solid part file (.slrprt or .prt) for easy editing?

Thank you for creating this really helpful guide!

Chris

Chris, I have the AutoCAD file if that's of any help:

http://runoutmedia.com/business/red_wifi_3d_v4_dwg.zip
 
I have seen a lot of people lately complaining about loosing wifi connections with their Epic-Ws.. this mod works the same on all DSMC2 cameras. Everyone should check out Nathan's Mod. It is great!
 
Hey all - just ordered my 3D printed plate, and am working on the rest of the parts. This may be a dumb question, but I've removed my side plate and am unsure where to attach the antenna cable to the brain, based off the photos of what I'm finding on eBay.
Any chance someone could post a photo of the connection?

Cheers!!
 
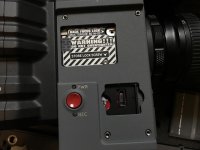
Do I need to remove the "STORE LOCK SCREW" torque? I don't have anything smaller than a T10 which is too large, so I haven't been able to try removing this yet.
 

Attachments

  • IMG_0732.jpg
    IMG_0732.jpg
    95.7 KB · Views: 2
Do I need to remove the "STORE LOCK SCREW" torque? I don't have anything smaller than a T10 which is too large, so I haven't been able to try removing this yet.

Nope the antenna connector is just under the RED sticker tape at top left on your photo..
 
And do I need to remove the antenna currently attached? How do I do this? I've been trying to gently take it off with tweezers but don't want to break it... not wanting to come off.
 
Be super gentle with that connector. It is not meant to be plugged and unplugged a lot... the matting cycle on this internal component is quite low so be careful. Always pull straight and never with an angle... i only removed it once but it was to install a woden camera sideplate that comes with specific tools like thin tweezers with protective plastic end.

There is a reason why RED added the sticker above antenna connector... if you break it it won't be RED's fault as it is not meant to be user accessible...
 
Hi Jackson

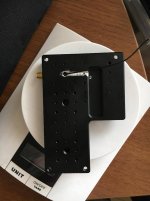
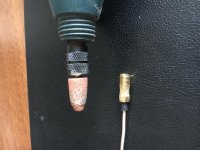
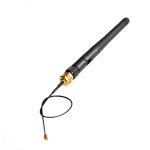
i just widened the front screw hole with a dremel. And also sanded the wifi threaded barrel so it can fit to that hole. And thats about it. Just try to choose the one with the softer antenna cable. otherwise it will put force to the connector on the camera. Be very very carefull while removing the internal antenna cable of the camera. You might have to act like a watchmaker but it is very fragile. Im using ESP8266 wifi module (see at the attachment.)
 

Attachments

  • 2017-03-16 14.24.52 116.jpg
    2017-03-16 14.24.52 116.jpg
    94.9 KB · Views: 1
  • ESP8266-serial-WIFI-wireless-transceiver-module-MT7681-3DBI-gain-antenna.jpg
    ESP8266-serial-WIFI-wireless-transceiver-module-MT7681-3DBI-gain-antenna.jpg
    37.4 KB · Views: 1
Yes... Need to be very gentle and pull the connector up straight without any wiggling / angling or anything. Use thin pliers with soft plastic protective ends and do not connect / reconnect it too often as this connector is really NOT meant for multiple matting cycle. RED added a warranty sticker to cover the connector so if you break anything do not expect it to be covered under normal camera use.
 
Hey Hurcan,

Cool mod you did on the Smallrig plate. I see you widened the hole with a dremel, but how did you fix the connector into the plate so that it's secure and doesn't fall off?

Hi Jackson

i just widened the front screw hole with a dremel. And also sanded the wifi threaded barrel so it can fit to that hole. And thats about it. Just try to choose the one with the softer antenna cable. otherwise it will put force to the connector on the camera. Be very very carefull while removing the internal antenna cable of the camera. You might have to act like a watchmaker but it is very fragile. Im using ESP8266 wifi module (see at the attachment.)
 
Back
Top