Welcome to our community

Be a part of something great, join today!

  • Hey all, just changed over the backend after 15 years I figured time to give it a bit of an update, its probably gonna be a bit weird for most of you and i am sure there is a few bugs to work out but it should kinda work the same as before... hopefully :)

Ask David Mullen ANYTHING

I accidentally posted this in the day-for-night thread, so in case someone wasn't reading that thread, I'm repeating the post here:

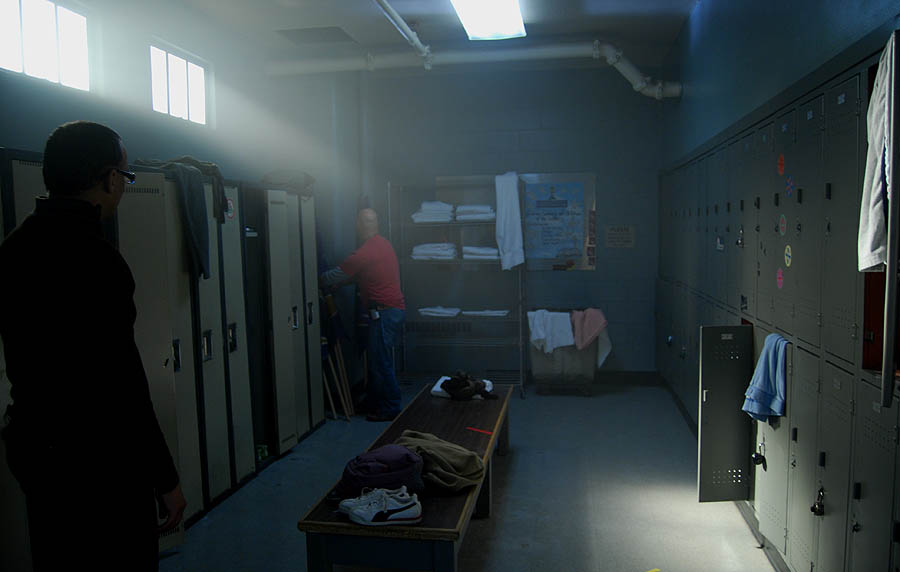
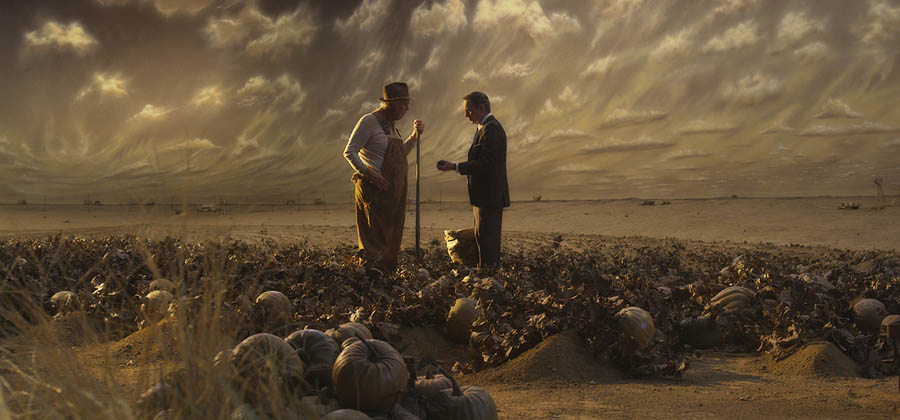
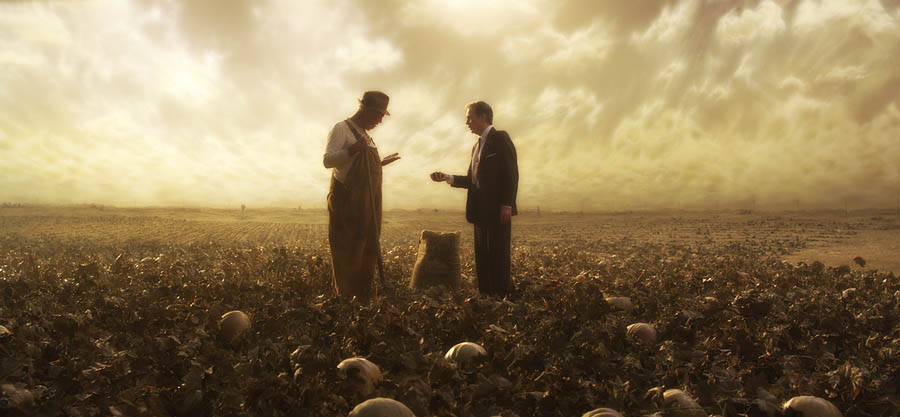
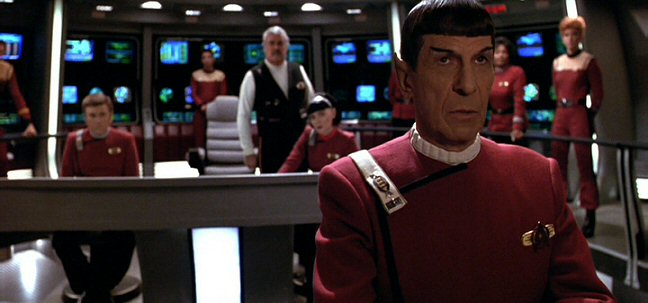
For those interested, I've updated my website with thumbnail frames from "Manure" and "Stay Cool", my two RED features:
http://www.davidmullenasc.com/page4/page4.html

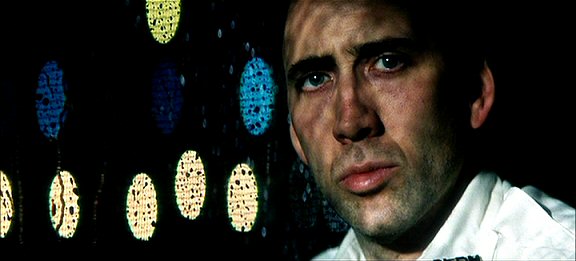
The first frame in the "Manure" selection is from the RED camera, the rest are from my Nikon on the set, but all the frames from "Stay Cool" are from the RED camera. But the frames are reduced and compressed, only 432 pixels across in size.
 
David,

First, thanks for being such an indispensable part of this forum. Your wealth of knowledge is more than a mere boon to the site, your posts are also fun to read. Informational and educational...it's great.

Okay, now I have a question for you, oh guru. Hopefully you have had time to get out and see Star Trek, as my query pertains to the latest installment. Simply put, there are a few times in the narrative where the image takes on a "squished" feel - possibly to reflect the chaotic nature of the moment - how are those shots achieved? I'm not sure how to better explain the instances, so with any luck you will have seen the film and realize what I'm referring to.

Thanks in advance for the insight.

Eryc
 
Ditto!!! I just thought to ask Mr. Mullen the exact question! At one point I thought it was a "deffect", but I doubd it. Also I noticed during the same shots a lot of lens breathing. Is that because of the use of wide anamorphic lenses?
 
I'd like to know the technique used to put that sky in on the Manure shots, without going into too much technical detail. You said most of them were from your Nikon, yet the sky looks like a composite so I'm not quite following.
 
No current plans to start one. Someday I'd like to write a book on "indie" cinematography, something aimed not at beginners, but more advanced shooters who are working on a small budget, basically about creating art with limited means. It would probably have a lot of interviews.

I'd buy that book if you made it, as there seems to be little written on the subject.

I love the pictures that you posted. :beer: Looks like great projects, and I look forward to seeing both of them. Cheers.
 
I'd like to know the technique used to put that sky in on the Manure shots, without going into too much technical detail. You said most of them were from your Nikon, yet the sky looks like a composite so I'm not quite following.

That sky was a painted backdrop on the set. The trick was lighting it -- it was a brown sky that was the same brightness as the ground, but I soon figured out that it looked best if it were overexposed a couple of stops, it became luminous. But that took blasting the sky with two 18K HMI's off-camera, flagged off of the ground and actors, just spotted into the sky (the set was 300' x 200', so I had to throw the lights quite a distance to hit the backdrop.)

In fact, I reshot the first scene I did on the farm set because by the second week of the movie, I felt I had gotten the lighting better. Here was the version from Day One:

900manure1.jpg


Here was the reshoot in Week Two:
900manure2.jpg
 
David, how much did you have to do with the white dress for Tea Leoni? I wonder what the motivation was behind it.

It was more of a cream-color through the movie -- I didn't design it, but I suspect it was that way because she ends up getting quite dirty, falling into mud, etc.
 
David,

Okay, now I have a question for you, oh guru. Hopefully you have had time to get out and see Star Trek, as my query pertains to the latest installment. Simply put, there are a few times in the narrative where the image takes on a "squished" feel - possibly to reflect the chaotic nature of the moment - how are those shots achieved? I'm not sure how to better explain the instances, so with any luck you will have seen the film and realize what I'm referring to.

I posted this elsewhere on RedUser, but this shows the difference between low-light anamorphic photography and spherical Super-35 photography:

anamorphic (Star Trek 5):
startrekfive4.jpg


spherical (Star Trek 6):
startreksix3.jpg


In fact, Star Trek 6 was the only Trek feature to be shot in Super-35, the rest were all anamorphic, including the new one. In low-light, the stretchiness of the background is more obvious as you open the stop. This also makes the focus racks "breathe" as you see the change in compression/squeezing.

It's a design issue with anamorphic lenses. The lenses are supposed to have a constant 2X squeeze, but they don't, it can change as you focus the lens. But the scope projection has a constant 2X unsqueezing. In early CinemaScope movies, as you focused close, the subject didn't get squeezed enough so when expanded by a constant 2X, they looked fat, what was called "anamorphic mumps". So Panavision solved the problem in the late 1950's by adding more cams inside the lens to move elements so that the subject always has a consistent 2X squeeze, but as you focus closer, the background now gets too squeezed -- this was considered better than having the subject not get enough of a squeeze. So the subject stays consistent but the background gets overly squeezed.

This is how it looks on the negative:
anamorphicbokeh2.jpg


And this is how it looks unsqueezed in the theaters:
anamorphicbokeh1.jpg
 
I posted this elsewhere on RedUser, but this shows the difference between low-light anamorphic photography and spherical Super-35 photography:

David,

You're right, I remember reading and possibly even commenting on the subject. In any case, thanks for offering the refresher; things are slow to stick with some of us (and by "us," I mean "me"). :)

Then again...this is a new occurrence of the aberration, and it was best that I ask rather than assume I knew the answer. So thanks again for taking the time. And yes, if you wrote that book, I would be all over it.

E
 
David, I'm looking at some Roger Deakins' diagrams here and I see that in some setups sometimes he bounces the light with a mirror (eg. He bounces a 7K onto a mirror to produce a hard sunlight coming through a window - according to the diagram).

What's the advantage of that? Does the mirror affect the light in any special way?

Thanks in advance.
David, I hope you don't mind me answering, but I would think a mirror would just be to allow you to put a light where there isn't room or a way to mount it. Similar to aiming a Source 4 at a bounce card. With a mirror, it would also make the rays more parallel, and the light would fall off more gradually, as if the light is farther away. Maybe there wasn't room to put the light a long way away outside the window.
 
Yes, a mirror may allow an effective "backing up" of a light to make it sharper, with more parallel rays, when you don't have room to back up the light along a direct line. Or it may help in getting certain angles.

I recently was in a windowless, high school locker room and we added a false wall to make the space smaller. We put some casement windows at the top of the false wall so I could have a light source, but the ceiling behind the false wall was too low to allow me to have lights high above the windows streaming downwards. So I put some 4'x4' mirrorboards outside of each window, more or less tabled against the ceiling so I could bounce a light on a low stand on the floor up into the mirror and then back down through the window. I took this photo as we were finishing setting up the shot -- you can see how the light looks like it is coming from a high angle outside the false windows (I used 1K PARCAN's for the beams. That's Arv, the production designer, watching our set decorator Kevin finish dressing the room...)

jb44.jpg
 
That sky was a painted backdrop on the set. The trick was lighting it -- it was a brown sky that was the same brightness as the ground, but I soon figured out that it looked best if it were overexposed a couple of stops, it became luminous. But that took blasting the sky with two 18K HMI's off-camera, flagged off of the ground and actors, just spotted into the sky (the set was 300' x 200', so I had to throw the lights quite a distance to hit the backdrop.)

In fact, I reshot the first scene I did on the farm set because by the second week of the movie, I felt I had gotten the lighting better. Here was the version from Day One:

900manure1.jpg


Here was the reshoot in Week Two:
900manure2.jpg

I wouldn't have guessed that in 100 years. I'd like to know why the choice was made to hire an artist to paint a 300x200 foot backdrop instead of doing the sky digitally. After all, it would have saved the expense of the reshoot of that first scene, wouldn't it? Does lighting a backdrop with an 18k lamp give you something you couldn't have accomplished in post?
 
Sure, it cuts the number of effects shots down from 500 or so to only two dozen in the movie... plus you aren't dealing with composites, mattes, match-moving, etc. You can get natural flares/halation from the bright sky into the lens and around the actors' heads, you get a close-up quickly and easily, etc.

Well over half of the movie was shot on that stage, with close-ups and wide shots against those sky backdrops -- that would be practically a "300" or "Sin City" situation of nothing but actors against green for three weeks. This was not that type of movie.

As it was, the two dozen or so composite effects we did do (like for car driving scenes, shot against greenscreen) practically broke our budget.

I think you're missing the point of my story, which is learning to light day exterior scenes on an interior soundstage.

Plus if you do it all in post, you're at the mercy of the skill of the post effects people, and their time and budget. On a low-budget movie, you sometimes have to accept less than perfect effects because of lack of time or budget to do it until you're completely satisfied.

Spending an hour reshooting a scene was not ultimately a burden on our budget.

The thing you learn about indie filmmaking is to try and get most of it in the can, not shoot a movie that needs months of post effects work to even be showable to distributors, etc. Because money runs out FAST in post. Whenever I've done an indie movie that relied on a lot of post work, inevitably it ends up sitting on a shelf, half-finished, or finished badly, temporarily, with hopes for more money to show up so the effects can be redone, which never happens. I'm not sure I'll ever sign on to do an efx-heavy low-budget movie again.

One guy with a ladder and a power spray-paint gun spending two days to create a giant sky backdrop is still ultimately cheaper than one guy spending three months at a workstation building up digital backgrounds and compositing it well with foreground action, for hundreds of shots.

Thanks for the thorough explanation. I guess I assumed there had been perfected some simple trick for compositing sky over shots digitally. I knew for a guy like me it'd be a daunting task, but I figured the folks in Hollywood had it down to a science. Sounds like it's difficult to do (to do well) for everyone.
 
That is so f'ing epic David.

Given the look, cast and subject matter this movie is such a must see for me.

And thank you for your last post, it is great to hear things like that coming from you.
 
David, I hope you don't mind me answering, but I would think a mirror would just be to allow you to put a light where there isn't room or a way to mount it. Similar to aiming a Source 4 at a bounce card. With a mirror, it would also make the rays more parallel, and the light would fall off more gradually, as if the light is farther away. Maybe there wasn't room to put the light a long way away outside the window.

Thanks for salvaging my question... :beer:

Yes, a mirror may allow an effective "backing up" of a light to make it sharper, with more parallel rays, when you don't have room to back up the light along a direct line. Or it may help in getting certain angles.

I recently was in a windowless, high school locker room and we added a false wall to make the space smaller. We put some casement windows at the top of the false wall so I could have a light source, but the ceiling behind the false wall was too low to allow me to have lights high above the windows streaming downwards. So I put some 4'x4' mirrorboards outside of each window, more or less tabled against the ceiling so I could bounce a light on a low stand on the floor up into the mirror and then back down through the window. I took this photo as we were finishing setting up the shot -- you can see how the light looks like it is coming from a high angle outside the false windows (I used 1K PARCAN's for the beams. That's Arv, the production designer, watching our set decorator Kevin finish dressing the room...)

http://www.davidmullenasc.com/jb44.jpg

David, that looks very nice.

The mirror concept sounds pretty simple and effective to me and yet I never thought of that.

And if you told me the production designer was a hitman coming to kill the school janitor I'd totally buy.

:rofl:

Here was the reshoot in Week Two:
900manure2.jpg

What kind of diffusion did you use for this shot, David?
From the looks, you didn't use it in the first shoot.

Thanks again.
 
Well, the first version was from my Nikon and the second is an actual RED frame, so there's a difference due to that. On the actual RED camera, I used a Smoque #1 for the wide shots in both versions (and Classic Black diffusion on the tighter shots) but when I reshot it, I added a light amount of smoke to the set as well.

So in the first version, you aren't seeing the effect of the Smoque filter, nor was there any set smoke.

I did also diffuse both photos a little in Photoshop.
 
David-

I recently caught "The Andromeda Strain" (1971) again after not having seen it for ~25+ years. It was on an HD movie channel.

I noticed that in a number of shots, the background bokeh seemed "uneven", or to only affect a portion of the frame. I re-wound and looked at a couple of these scenes, and it appers that the frames have some sort of dual-DOF.

That is: the actress on the left side of the frame near the camera is in-focus, but the back wall 15 feet behind her is out of focus, yet the actor against the back wall on the right side of the frame is also in focus, as is the wall behind him.

It amost appears like this may have been some sort of composite, with two different aperatures used to keep both people in focus.

Is that likely, or was I perhaps seeimg some other technique? And any idea why this would be done, rather than just shooting the whole thing with an aperature with a deep enough DOF to keep both actors infocus?

I wish I had a screen shot to illustrate this...


Thanks for any thoughts on this.

-Steve

I don't mean to butt into a thread where the questions aren't mine to answer, but this one seems pretty simple: they used a split diopter, which is basically a close-up (diopter) filter that only covers half the lens.

http://www.shutterbug.com/images/archivesart/403macro.9.jpg
 
Back
Top