jacob.schwarz
Well-known member
- Joined
- Jun 23, 2009
- Messages
- 876
- Reaction score
- 0
- Points
- 16
Phil,
Where can we download that LUT?
Where can we download that LUT?
Follow along with the video below to see how to install our site as a web app on your home screen.

Note: this_feature_currently_requires_accessing_site_using_safari
Phil,
Where can we download that LUT?
While grading by a LUT (pre-set transform made for other purpose and in this case based on other raw data) and sharpening of UHD motion imagery (from cameras made with intent of avoiding the need for sharpening) are better left perceived as subjective creative choice not to be debated on, in the context of skin tonality and first raw files made public it may be useful to mention that people usually don't have faces covered with green/blue/yellow paint.
One last for the night. Again a bit more saturated and contrasty.

Decided to have a play in Resolve. For anyone else with a RR make sure to disable it or the R3D's will have no info or image available to grade.
Went for a late afternoon, slightly more saturated look on this one. Can't get over how much latitude is there.


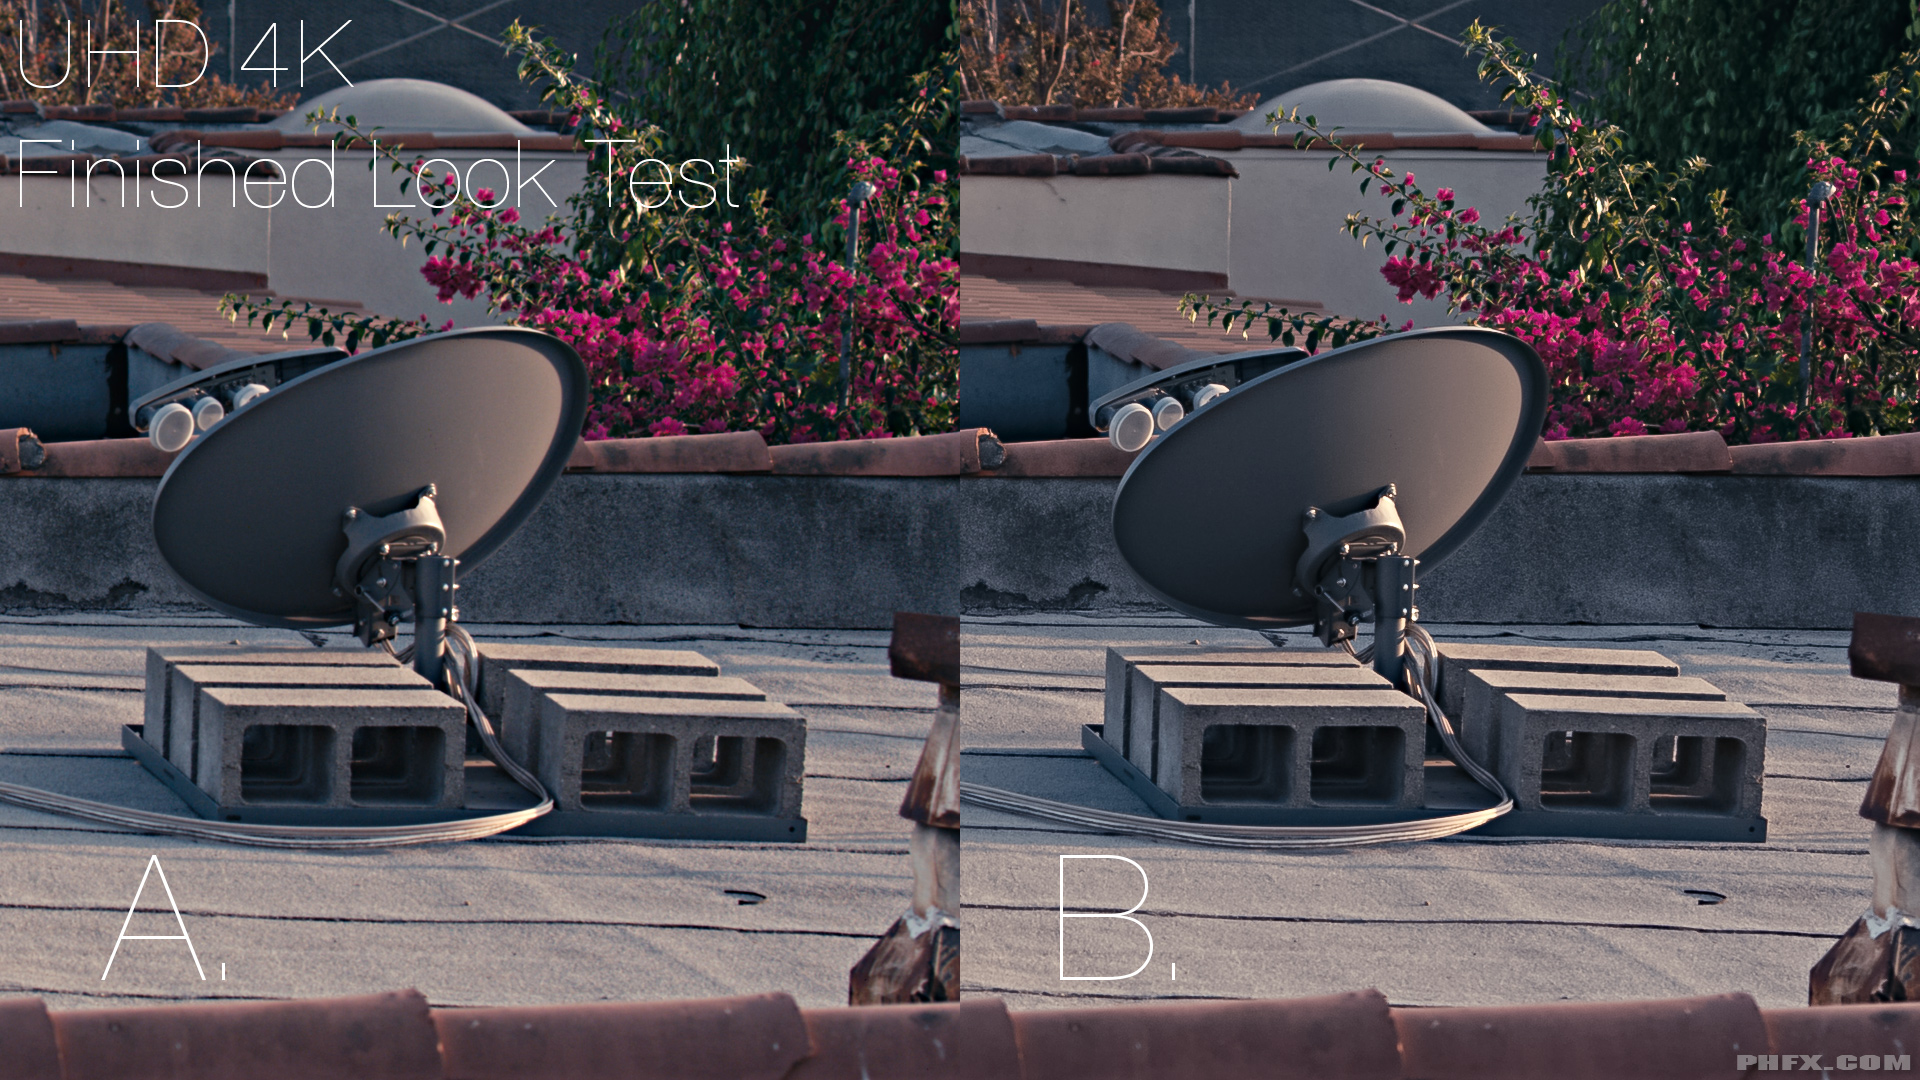
Back on topic. Here's a question and a choice.
I'm 99% sure I'm finishing this particular piece with option B for the UHD 4K finish:
Click for bigger.
Not razor sharp, but more of smooth approach. Reveal some detail without feeling too unnatural. Lock onto an edge without making detail too prickly.
Don't know if I'm going with the grain yet. I'm digging through my film scans to find something I like. Might use a digital option even.
How are you even getting Resolve 10 beta2 to work? I add my media to the pool, then switch to the color tab and I see nothing. No frame to color, nothing. I see a quick derezzing of the frames and some other chaos for a second then it disappears into black. :/
I like B as well. The texture of the roof just seems to feel more real. If feels like I would thrash my knee if I crawled around on it, as A does not feel that same way. Now if there was a CU of someone on the roof, I might choose A. But B just feels like I'm there on the roof with the more detailed textures.
How are you even getting Resolve 10 beta2 to work? I add my media to the pool, then switch to the color tab and I see nothing. No frame to color, nothing. I see a quick derezzing of the frames and some other chaos for a second then it disappears into black. :/
Back on topic. Here's a question and a choice.
I'm 99% sure I'm finishing this particular piece with option B for the UHD 4K finish:
Click for bigger.
Not razor sharp, but more of smooth approach. Reveal some detail without feeling too unnatural. Lock onto an edge without making detail too prickly.
Don't know if I'm going with the grain yet. I'm digging through my film scans to find something I like. Might use a digital option even.
How are you even getting Resolve 10 beta2 to work? I add my media to the pool, then switch to the color tab and I see nothing. No frame to color, nothing. I see a quick derezzing of the frames and some other chaos for a second then it disappears into black. :/


")
You have to create a timeline, in the edit window, and drag the clips into the timeline. Works for me anyway.
Completely non Dragon related for once:
Phil, I just noticed the new outrigger handle on the Jarred's Carbon Dragon. Can you share any info on that, too?
I took a tiff file from Phil's Dragon 6K set in Capture One 7 that is one of favourite application for the professional choice in imaging software.
Thanks for the footage Phil Holland. I color graded the video using Light Room and Film Convert.