Welcome to our community

Be a part of something great, join today!

  • Hey all, just changed over the backend after 15 years I figured time to give it a bit of an update, its probably gonna be a bit weird for most of you and i am sure there is a few bugs to work out but it should kinda work the same as before... hopefully :)

New Premiere integration

Loren,


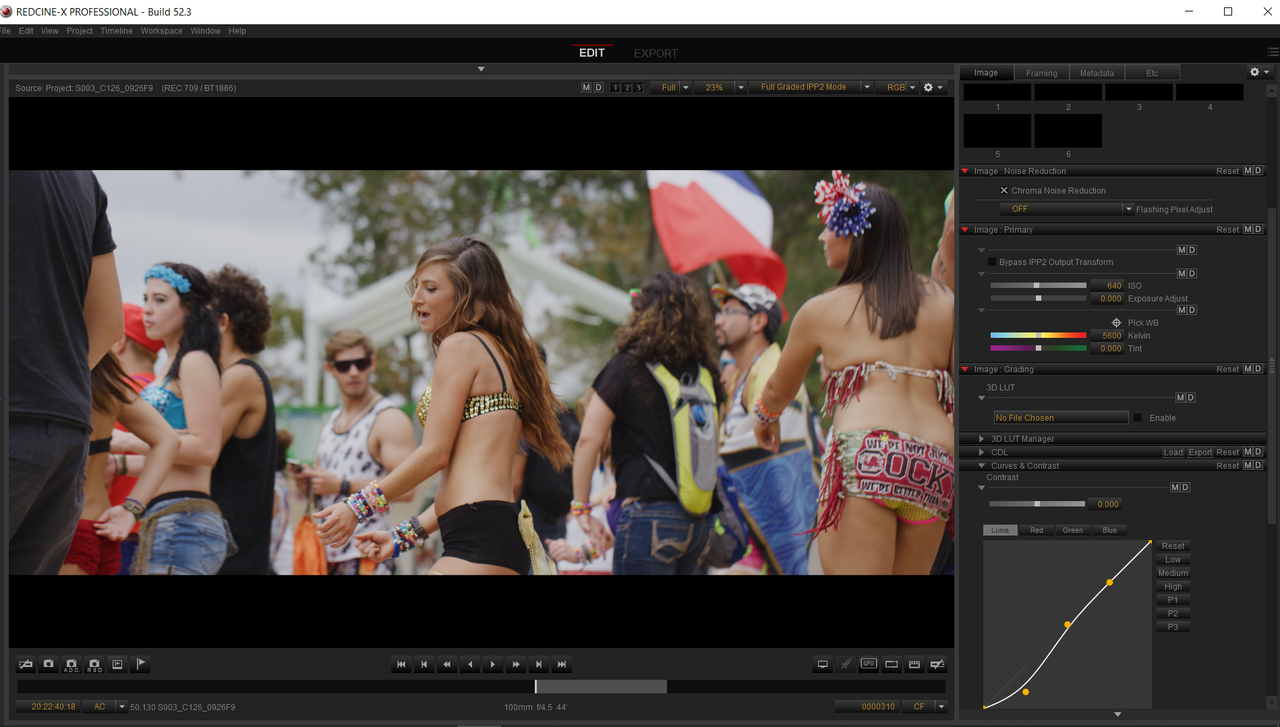
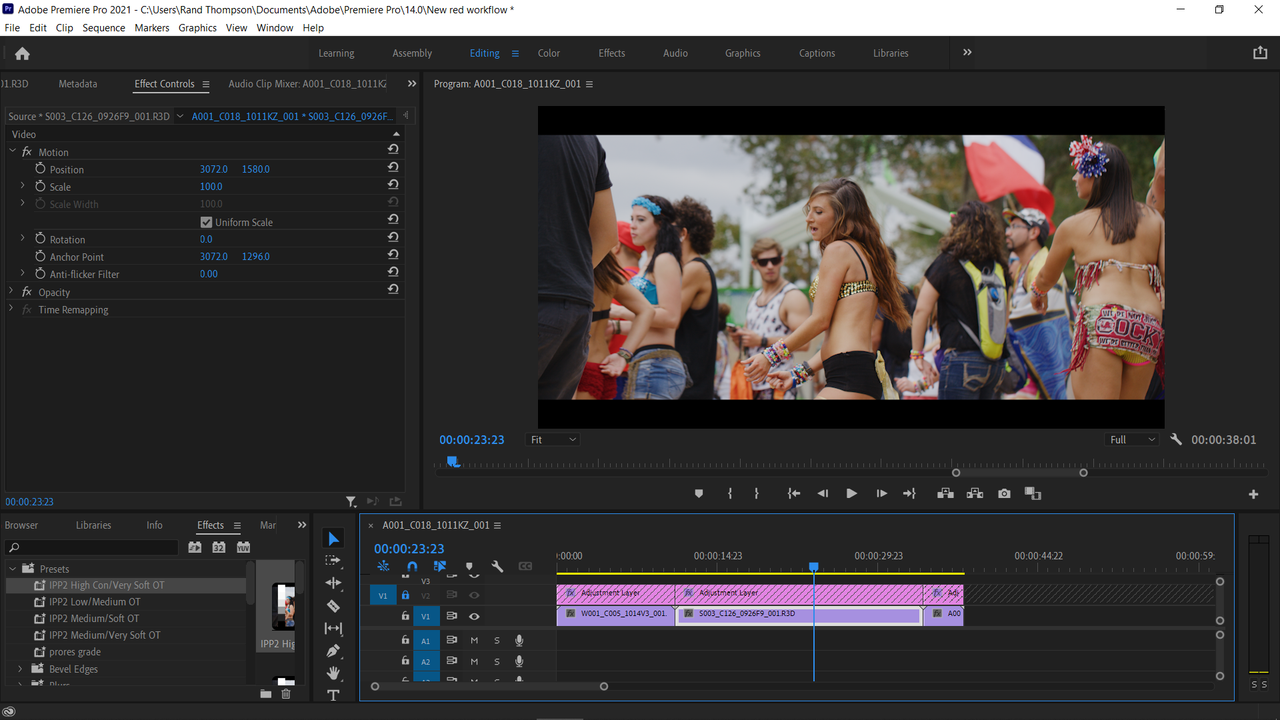
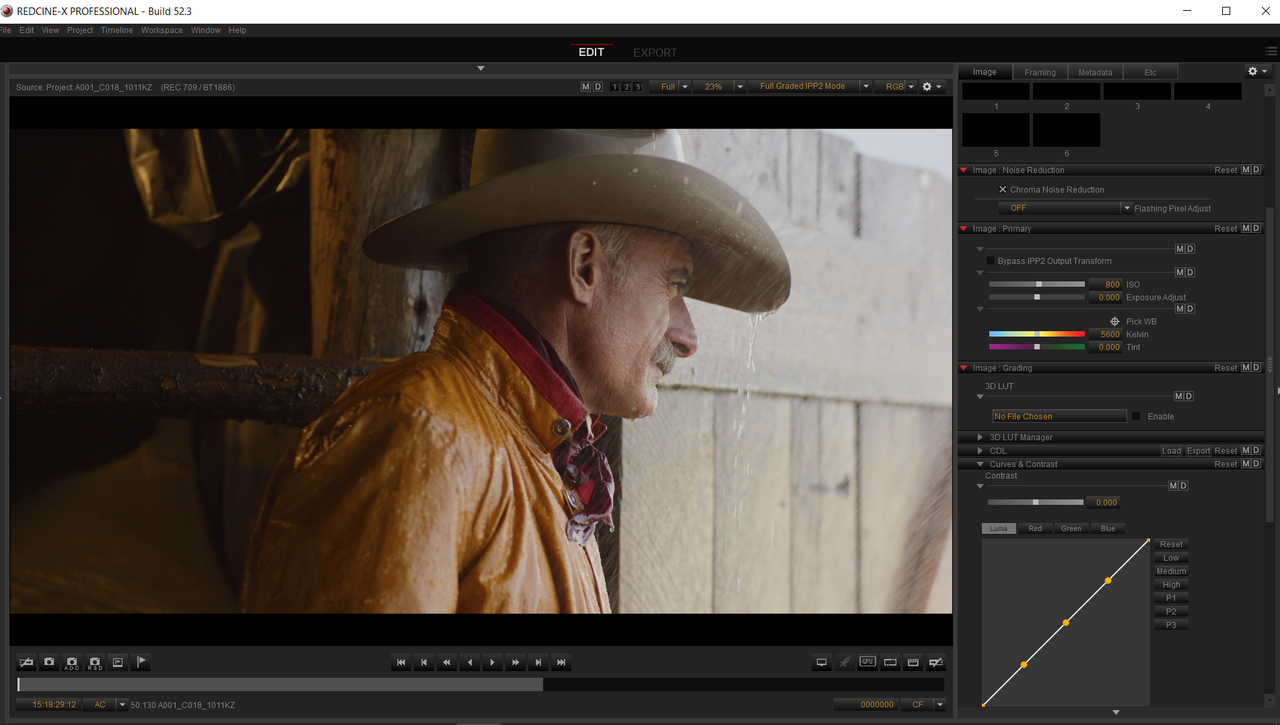
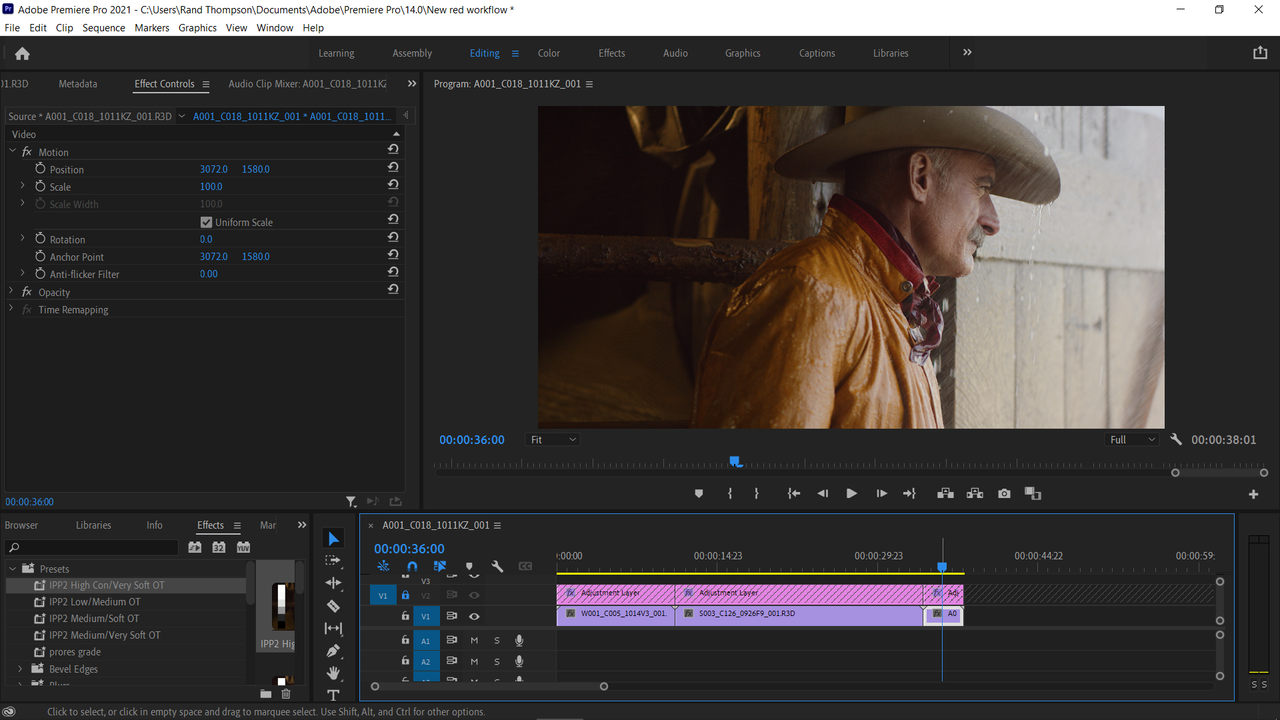
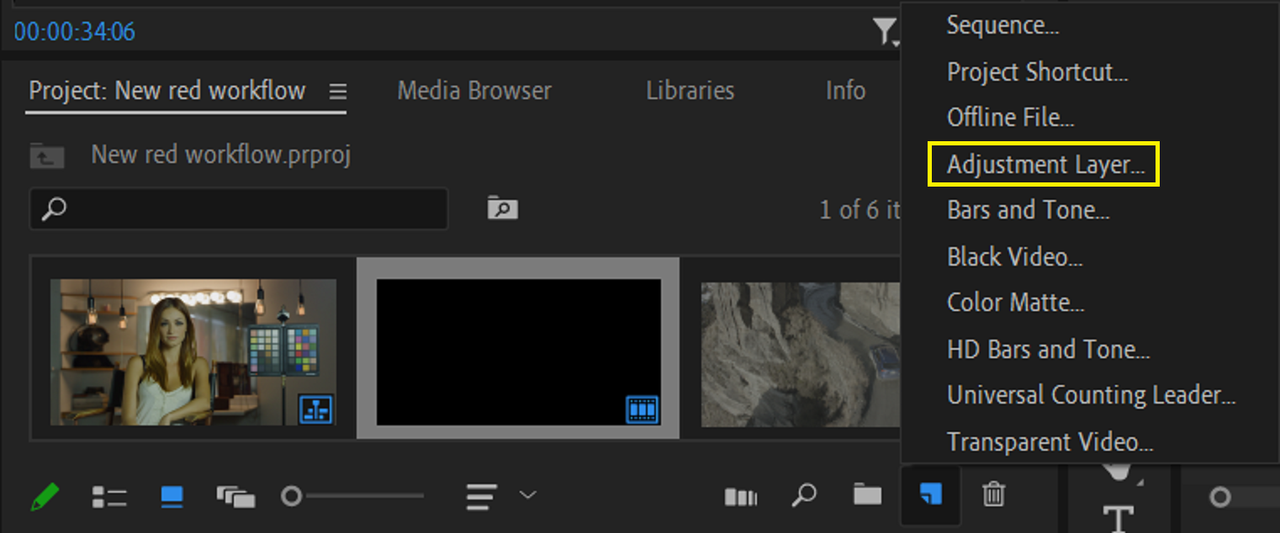
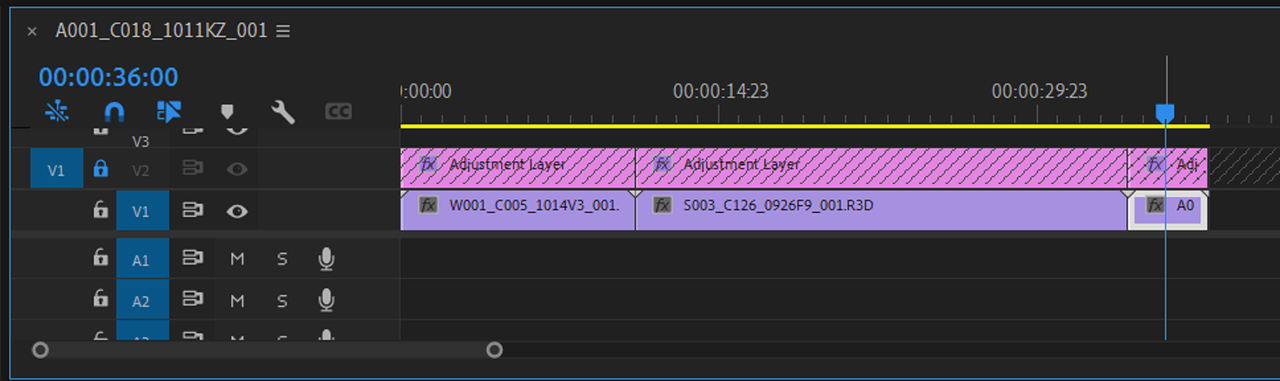
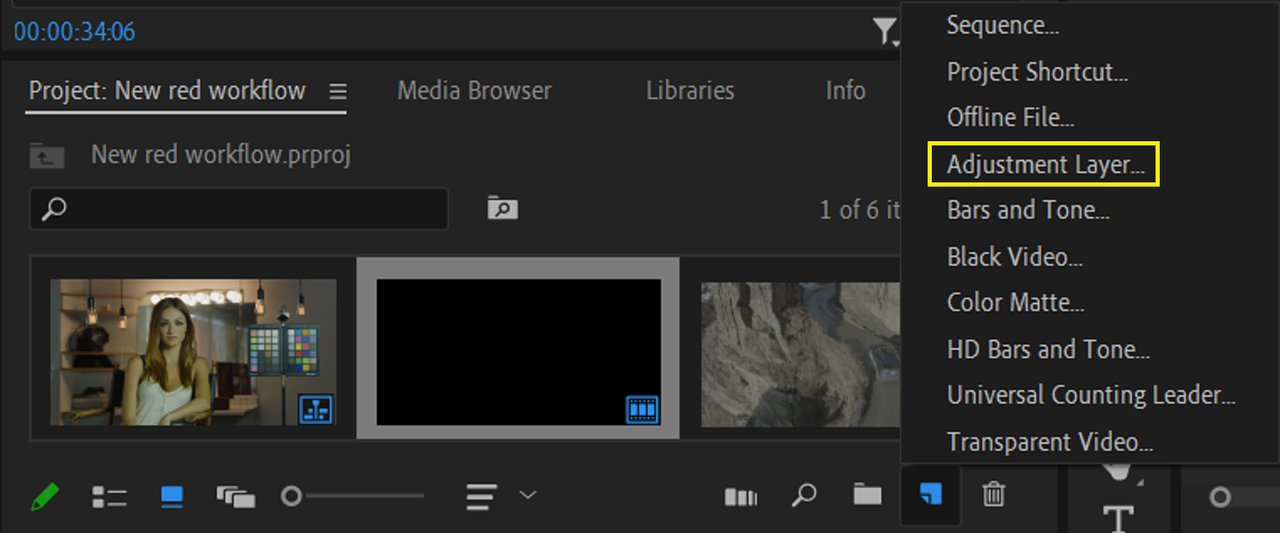
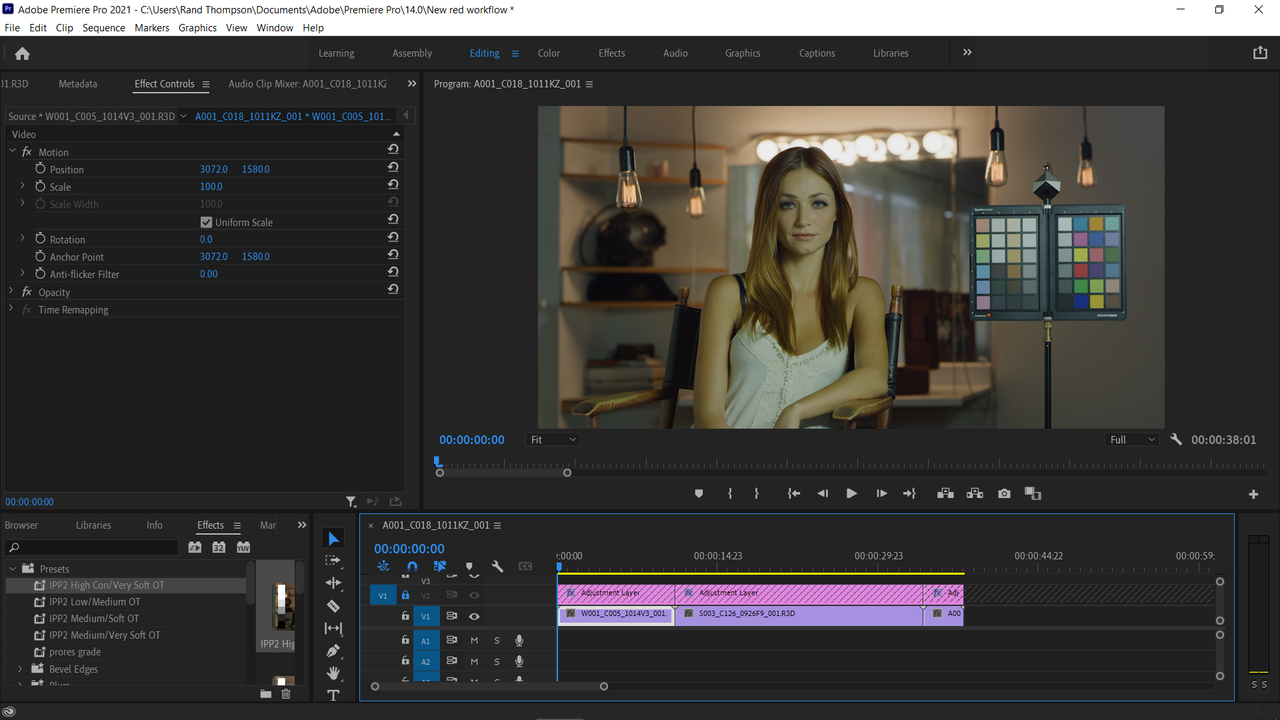
I think the simplest solution to this problem is an "Adjustment Layer". As you stated above, no changes where made to any of the settings in camera or from Redcine-X with the new workflow. It just comes into Premiere Pro with no IPP2 Output Transform attached to the clips, you don't have to start from scratch you just need to add the IPP2 Output Transform back.


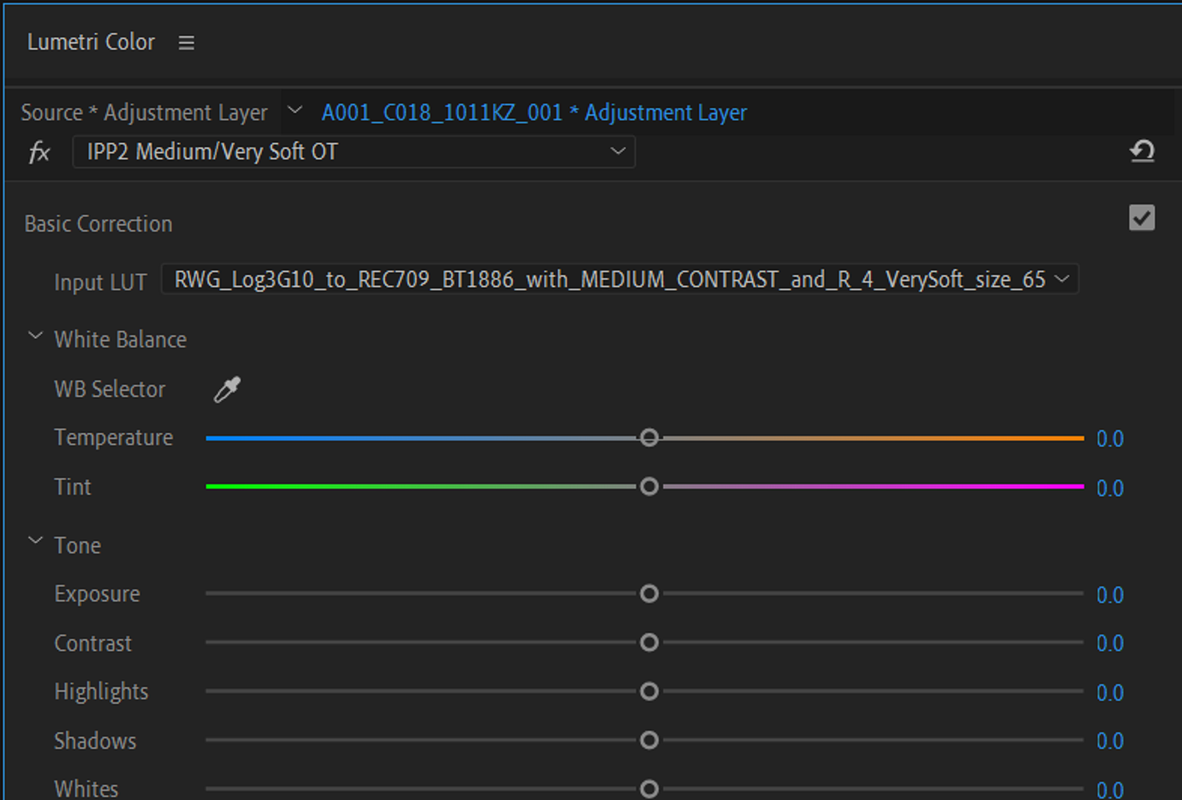
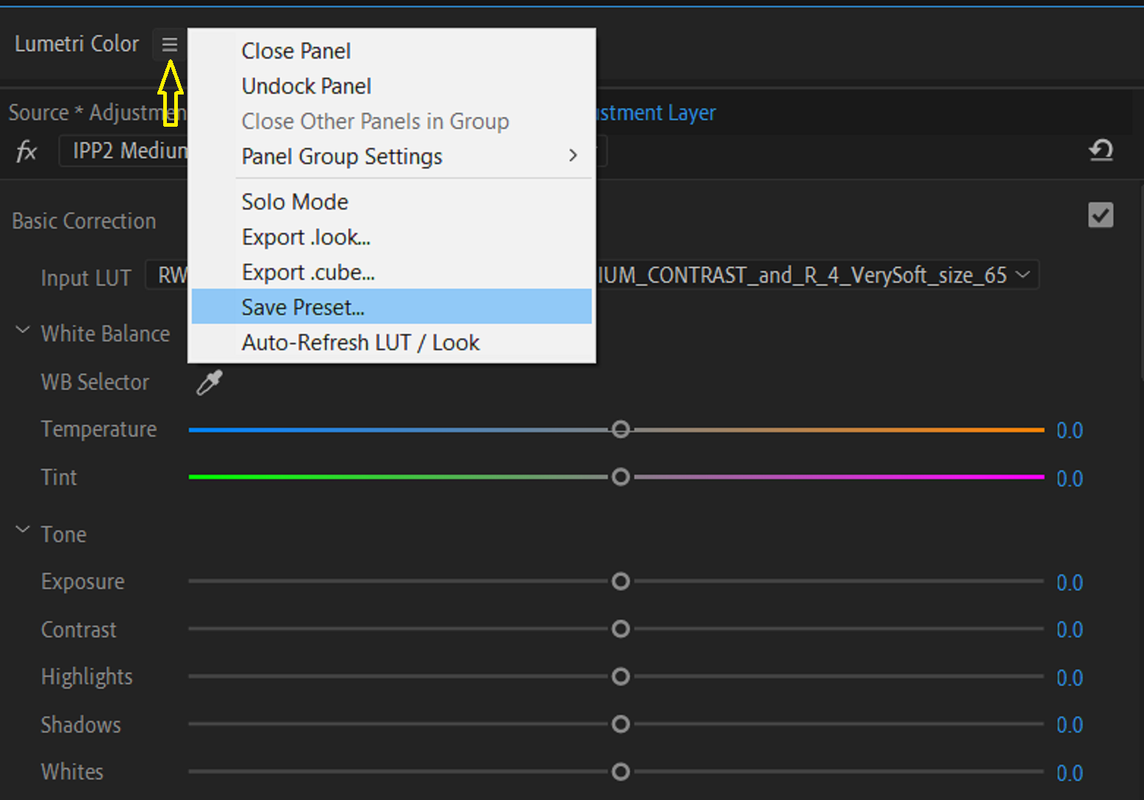
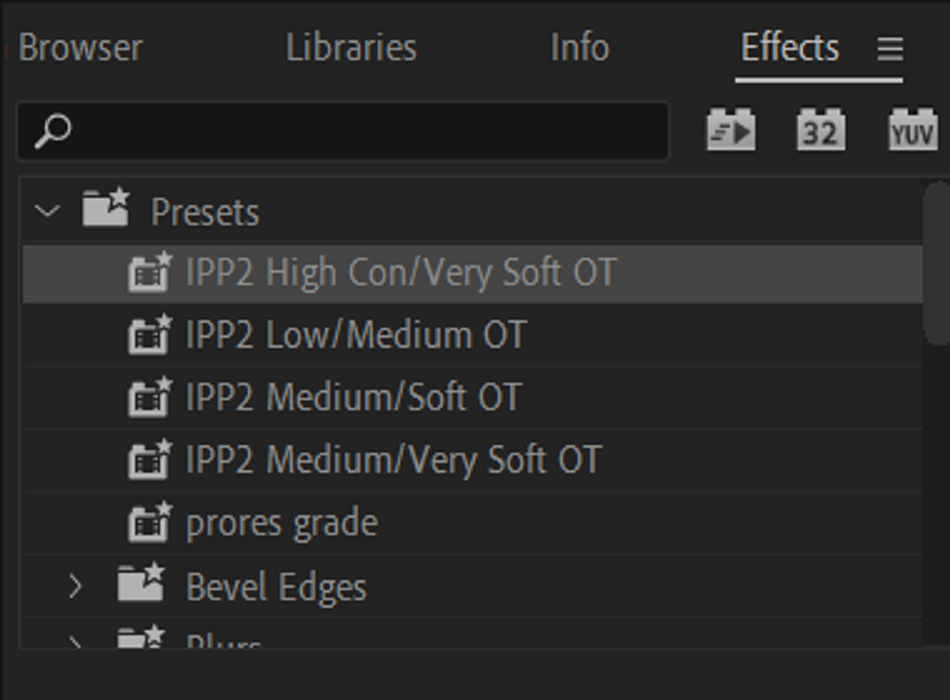
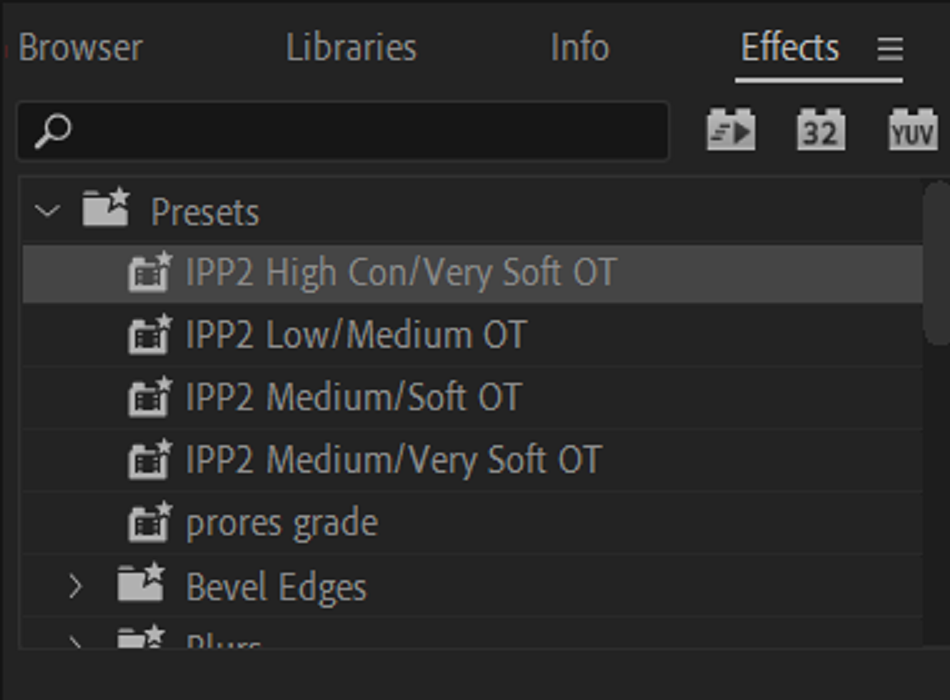
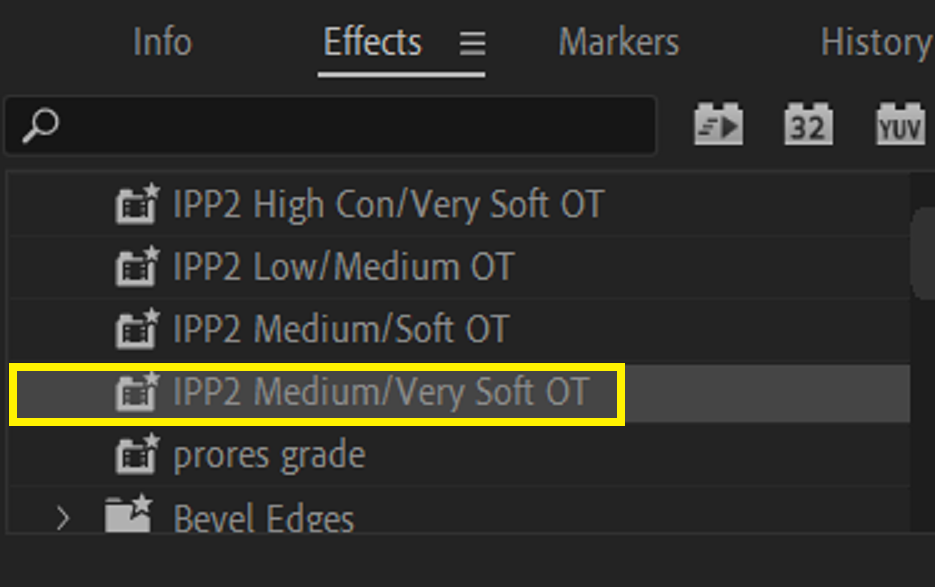
Since Adobe Premiere is "Layer Based" instead of "Node Based" like Resolve, what takes place on the highest track takes place last in the grading hierarchy. So if you make some IPP2 Output Transform Presets in Lumetri that will be stored under the "Effects" tab, you can simply add back the IPP2 Output Transforms that are missing from the clips to the Adjustment layer above the clips to make them look as they did. The IPP2 Workflows Requires that the IPP2 Output Transform be applied at the end of the grade and applying an Output Transform to the Layer above the R3D files in Premiere Pro would duplicate that.

You can segment the Adjustment Layer so that you can add Different IPP2 Output Transform Luts to different Red R3D files. However, if you use the same IPP2 Output Transform for everything, you can just apply that one over to the entire project.

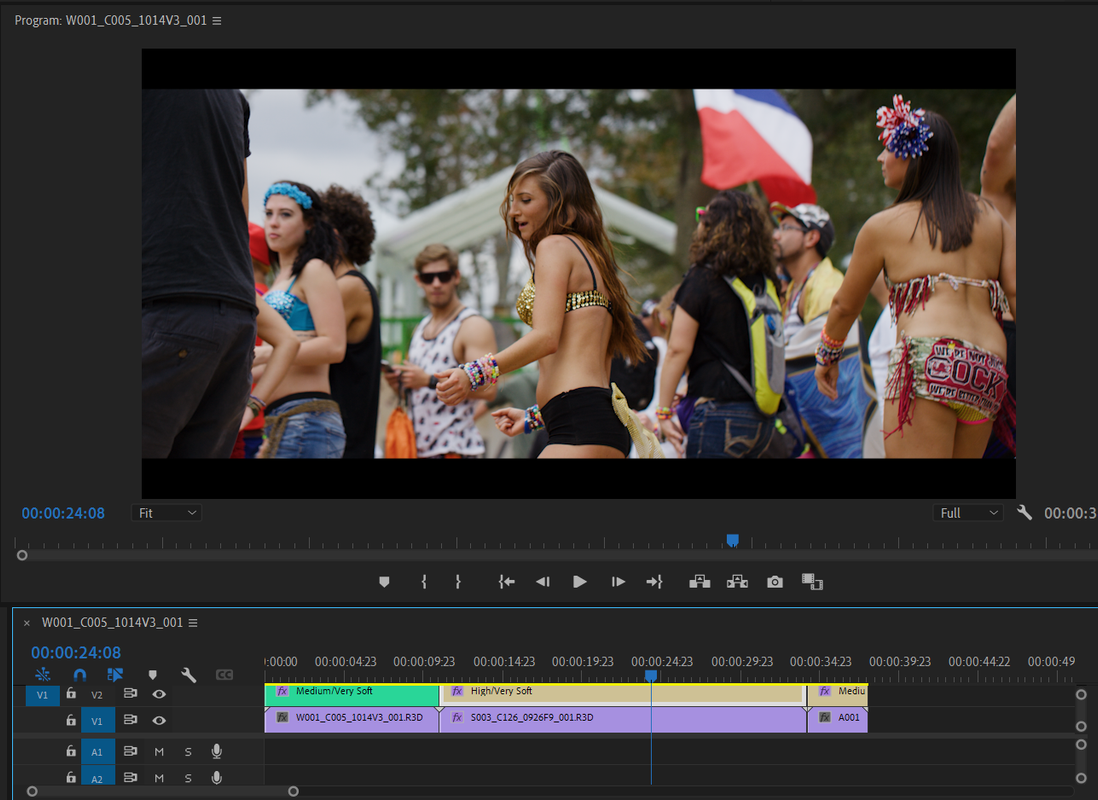
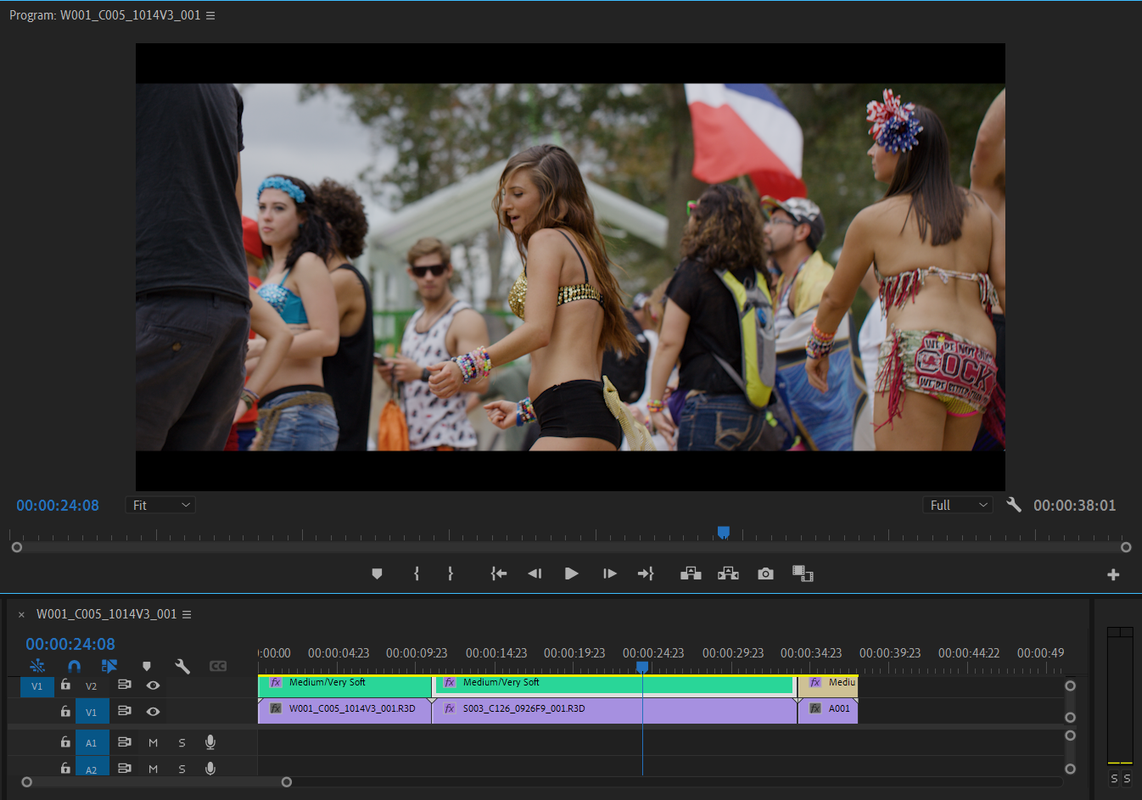
A "MEDIUM/VERY SOFT" IPP2 Output Transform Was applied to the Adjustment Layer Above The Clips, The IPP2 Output Transform that was used with all of the R3D files originally.
Screenshot-1888.png


Screenshot-1892.png


Screenshot-1889.png


Screenshot-1893.png


Screenshot-1887.png


Screenshot-1891.png


Screenshot-1896.png


Screenshot-1897.png


Screenshot-1893-Copy.png


Screenshot-1895.png


Screenshot-1891-Copy.png
 
Last edited:
Props to all for a constructive attitude in this thread. Tom and Chris were not shy about their frustrations, but they were willing to listen to Loren's rationale and reply with specifics - not vitriol.

FWIW, baked ProRes to client, with the R3Ds in a separate folder for backup and/or actual color pass is my usual strategy. YMMV.

Cheers - #19
 
Rand,

That is one of the better workflows for proper color management and maintaining full creative flexibility of your image. Essentially equivalent to a Timeline LUT in Resolve.

But I do understand the world Tom, Chris, and others are coming from and their clientele refuse to expand their knowledge base and learn. So there is a need to deliver "baked" images.

I understand this intimately, as my father is a 55+ year old broadcast Avid editor. He's called me with this very same question as to why some footage from a "Canon C" camera looked all screwed up. I walked him through downloading and applying a LUT in Avid (although I wish the shooter would have included one with the files) and now it's no problem for him when that stuff comes across his bin. Arri and RED are the simplest for him to deal with because it's always RWG/Log3G10 or AWG/Logc (although admittedly very uncommon), while Canon can be Log, Log 2, or Log 3, and Sony can be about 100 different combinations of S.Gamut2/3/cine and log gammas...

That is why I always recommend the courtesy of sending your viewing LUT with your footage (something our cameras do automatically if using a LUT)

But I get it - not everyone is as passionate about technology and eager to learn/optimize/expand their workflows.

For a lot of editors, good enough is well, good enough as they churn out segment after segment under deadline. And we need to accommodate that market. I feel like we've done that with the in-camera non-color-managed workflow option.

Like Blair says I appreciate the discourse, it's helped me get my paper in order.
 
Last edited:
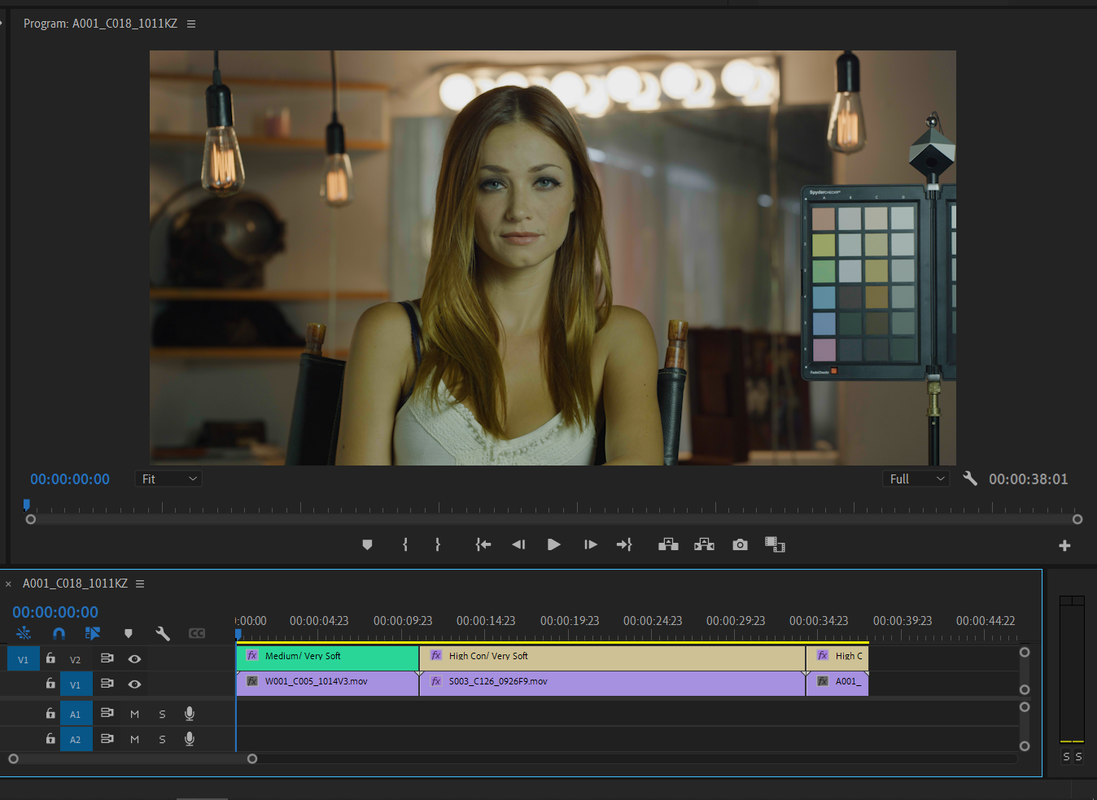
Loren,

Yeah, I Forget sometimes that not everyone is going to process/ grade their own footage. And also that the footage is not really their's to begin with and will be processed however the Client deems necessary for their own needs.

Thank you for creating alternatives that will better fit multiple users of Red camera footage.
 
DJ - why do you love it? I’m curious. How does it improve your workflow?


Loren's post sums it up pretty well. Setting up a proper color workflow in Premiere is a lot easier if everything comes in Log3G10, given the limitations of the NLE. It also kind of brings the issue to front of mind for the editor that may not know better. Opening it up and seeing log footage would, one hope, prompt some inquiry. Lazily slapping an exposure correction on top of a 709 transform happens all too often.

If I'm working with a post house that I know is too lazy to set up a proper color workflow then I just shit a basic LUT onto the clips in RCX and bake out a ProRes- or do it in camera.

Its pretty rare for me to run into a post house that both a) wants raw and b) doesn't know how to grade it properly.
 
(For Those whom will be grading their own footage)If You're Not going to use Red R3d Files and instead you want to use ProRes files but you still want the maximum Flexibility of Red R3d files in the IPP2 Workflow, Encode the ProRes Files into "RWG/LOG3G10"


Part 1- Redcine-X Pro


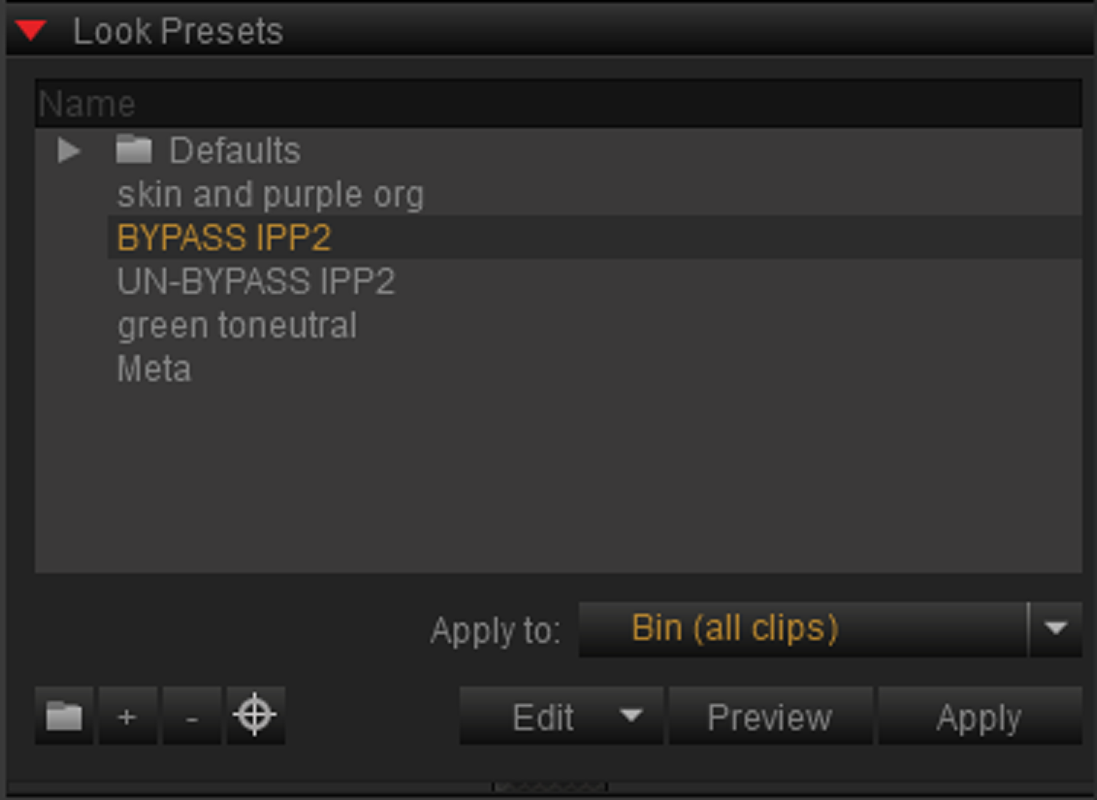
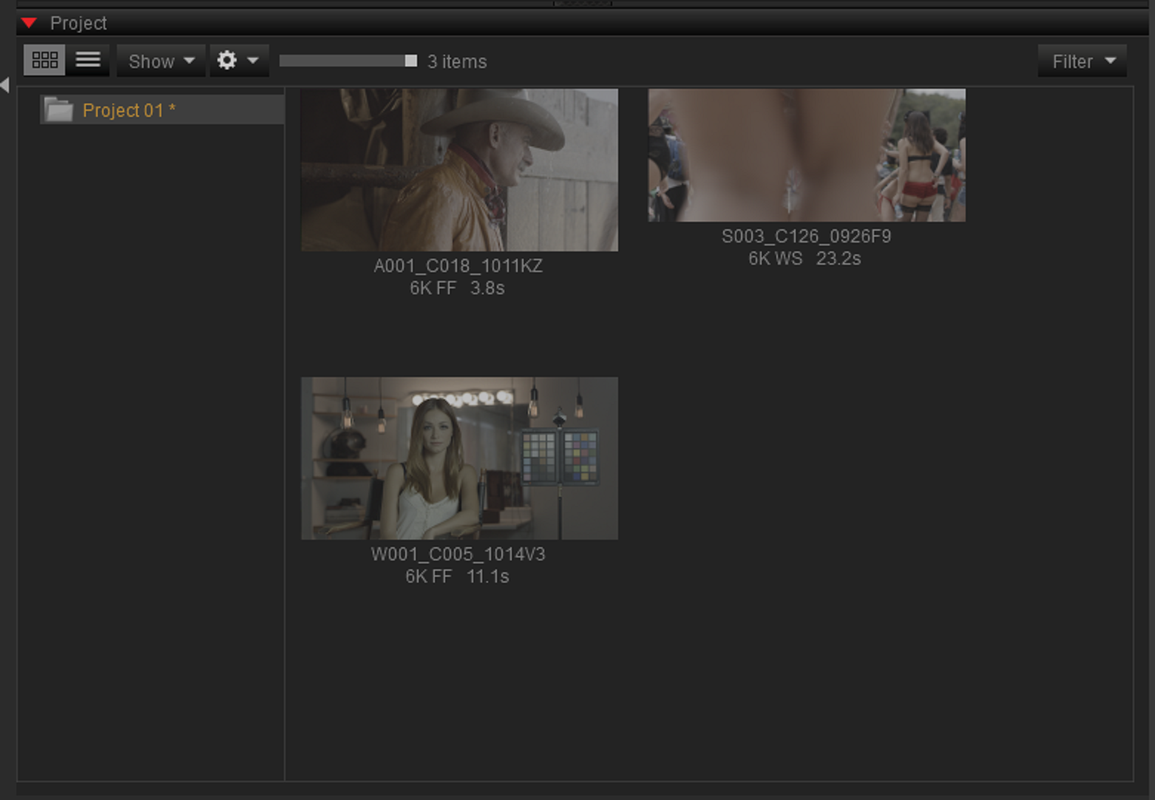
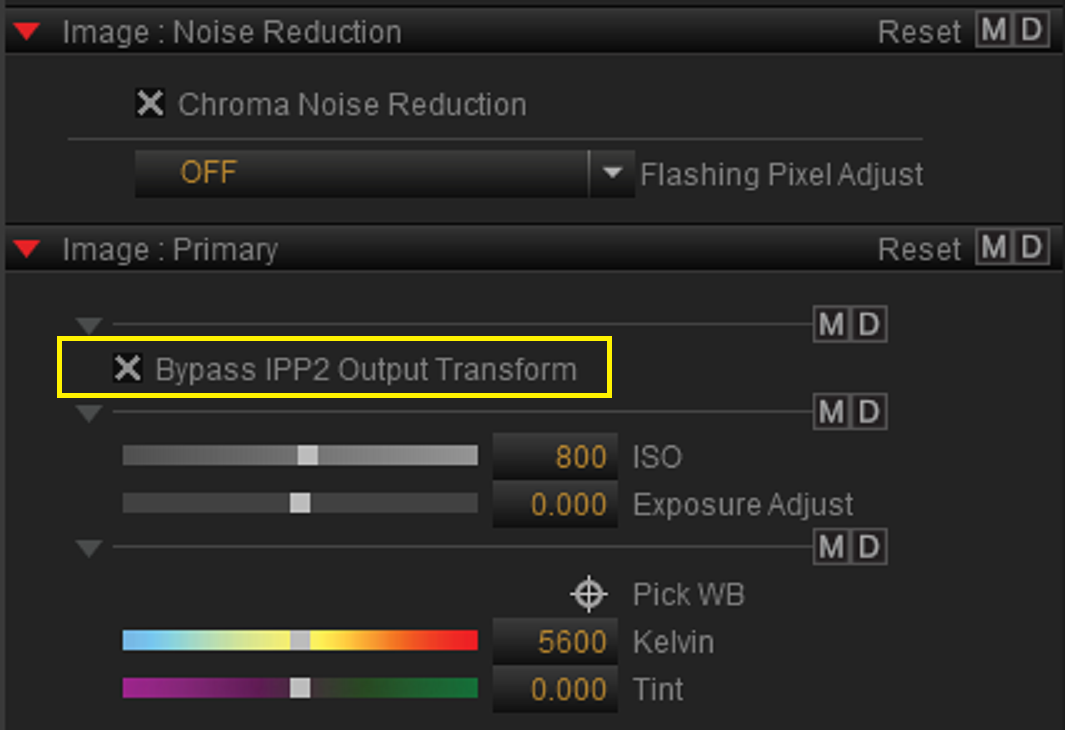
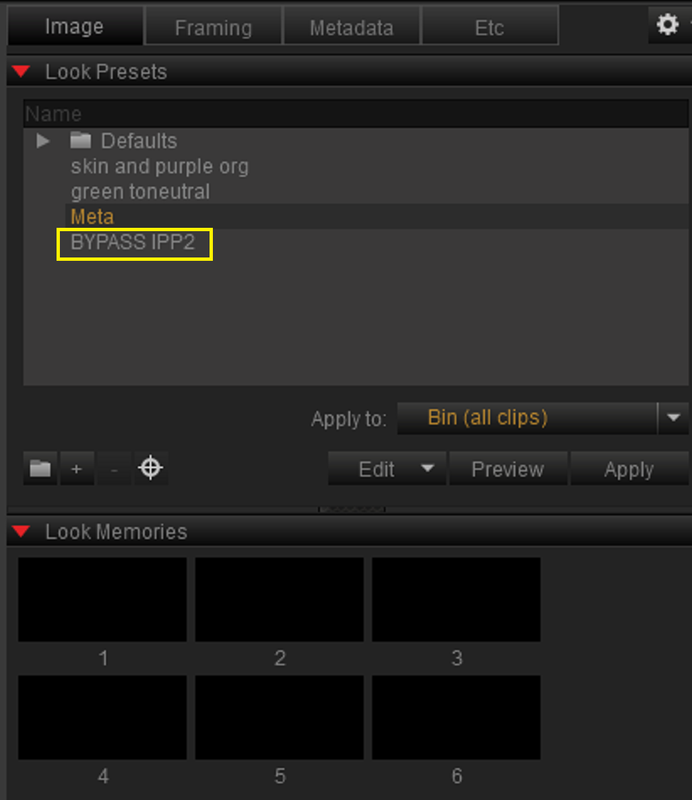
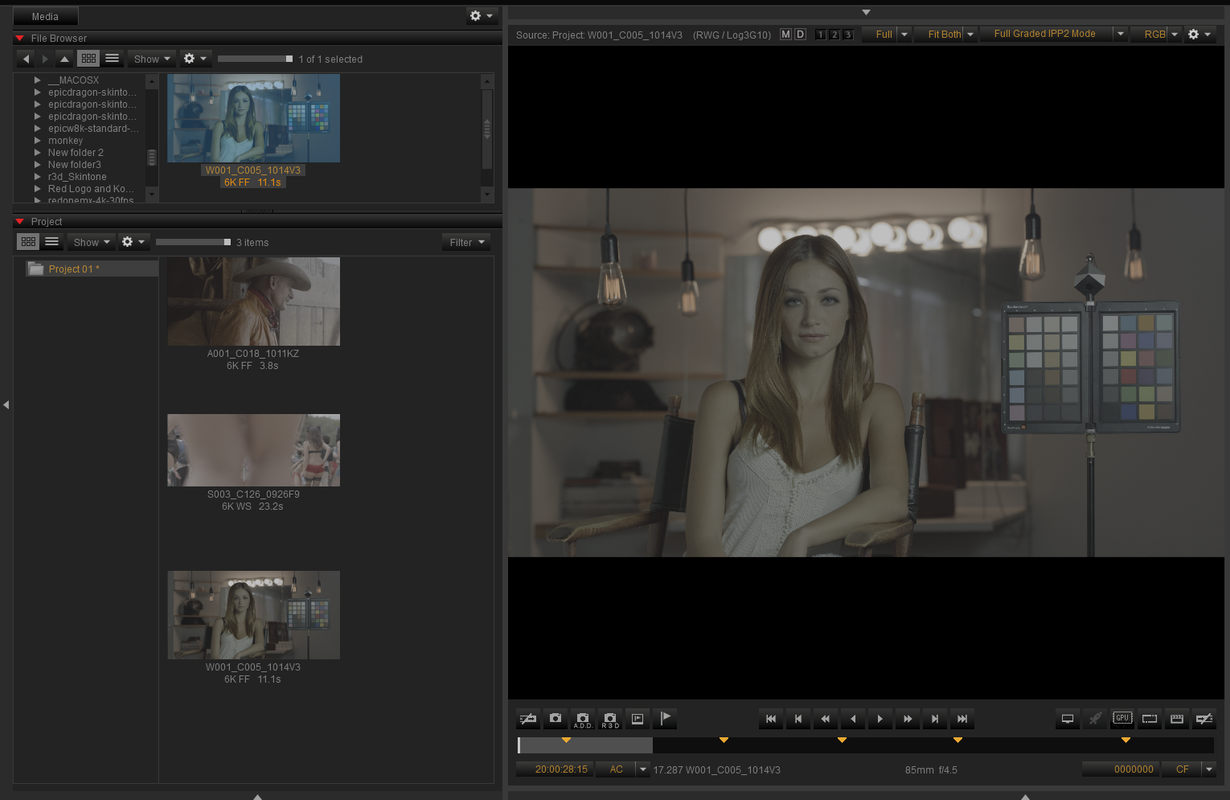
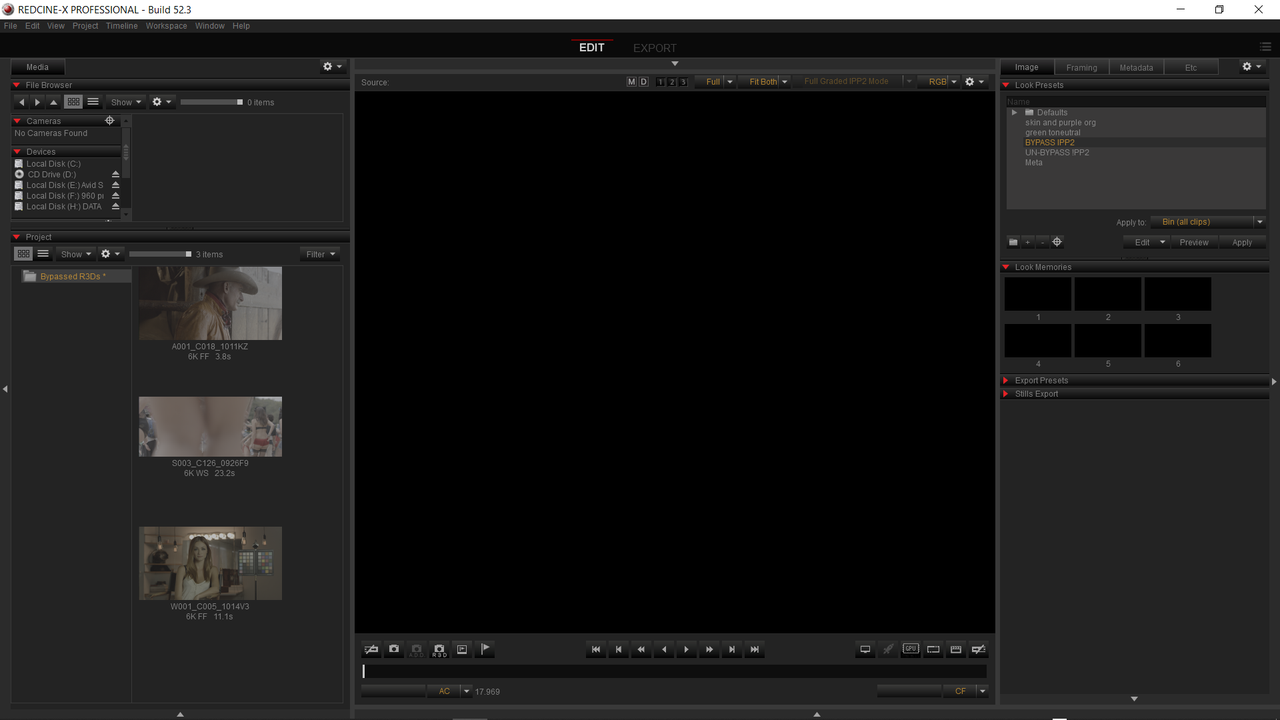
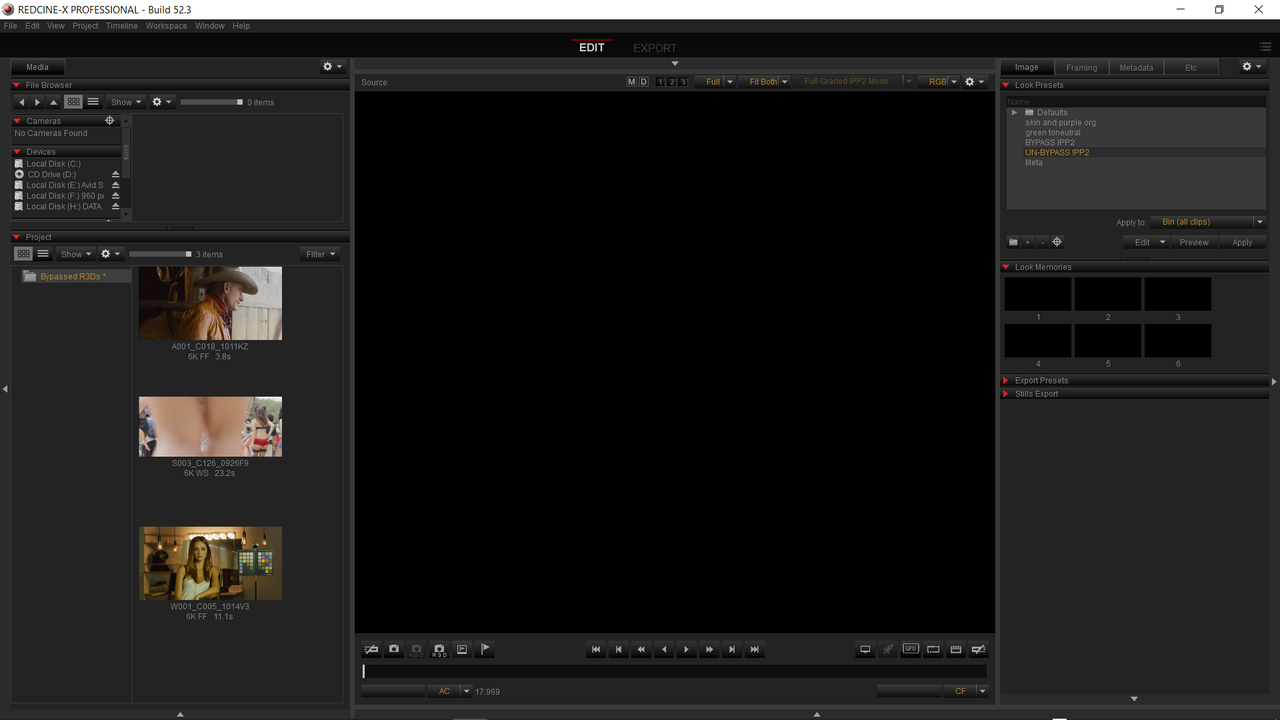
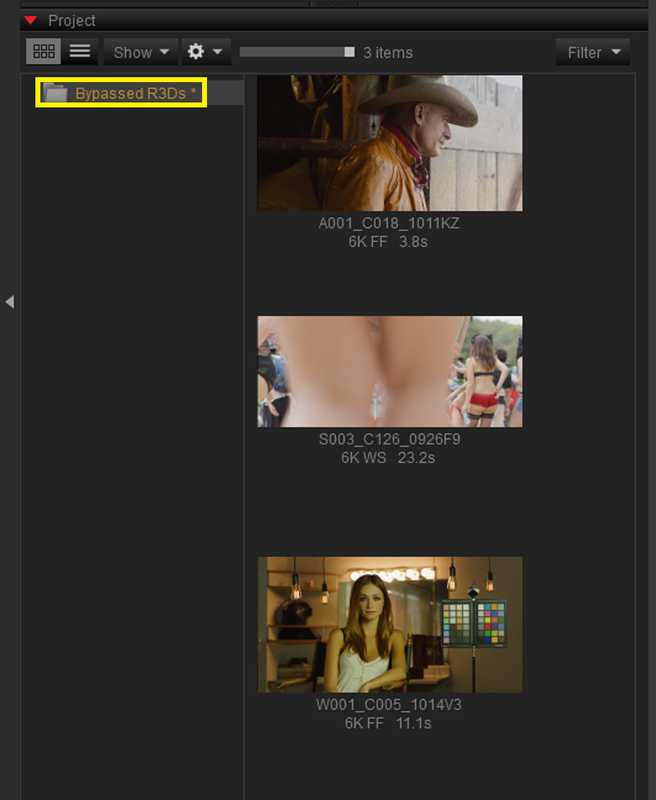
1) First, I created both a "BYPASS IPP2" and UN-BYPASS IPP2" Preset in Redcine-X. I then applied the "BYPASS IPP2" Preset to all of the R3D files in the bin


Screenshot-1927.png


Screenshot-1926.png


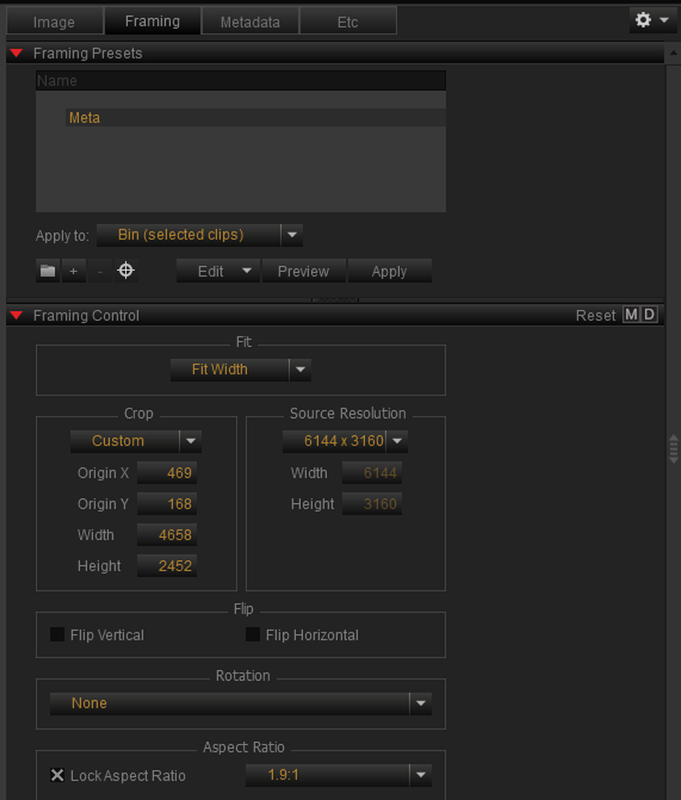
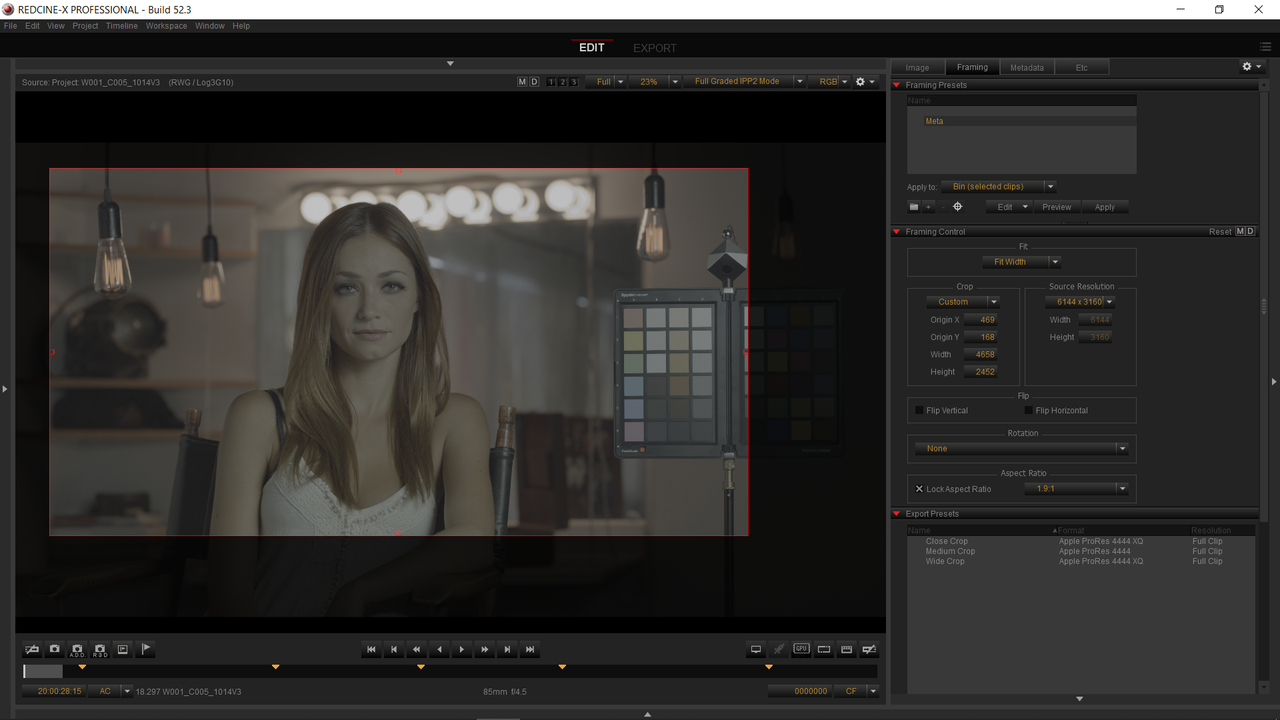
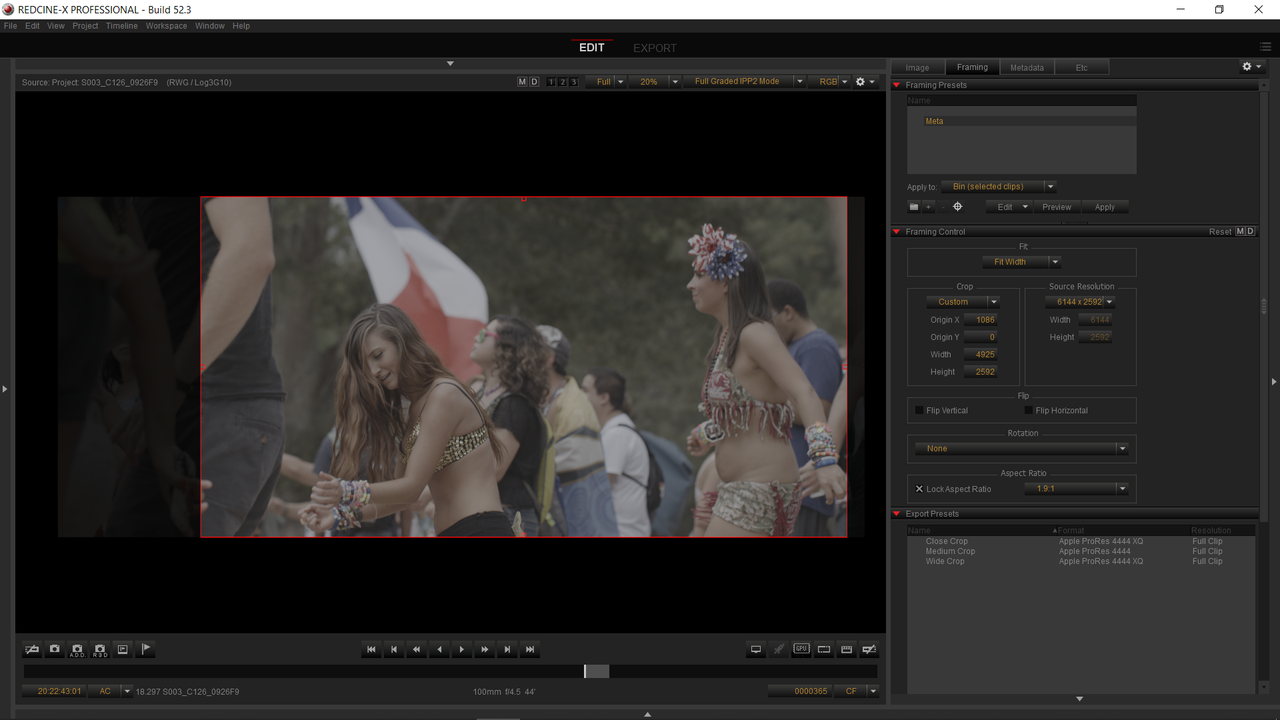
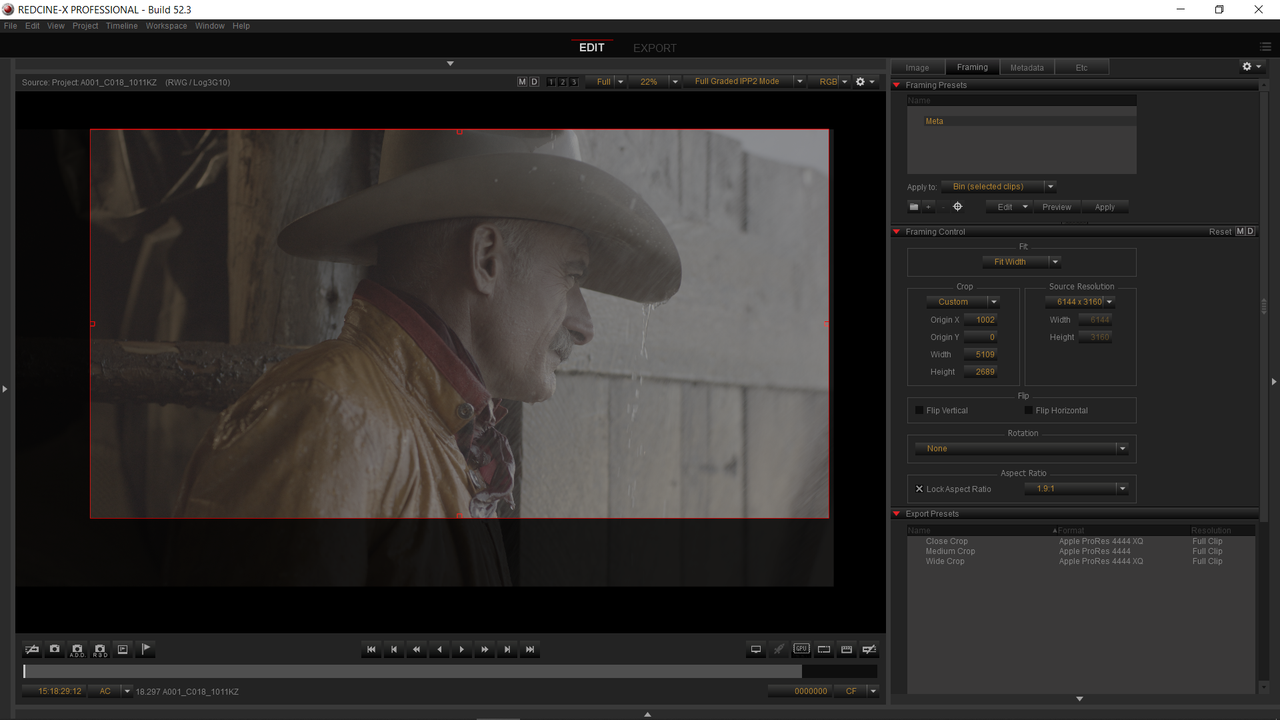
2) I Chose to Crop the R3D files for ProRes Export using the "Framing"Tool. I Locked the cropping aspect to a "1.91:1" aspect ratio so that no matter how large or small I made the crop it would always maintain that ratio.


Screenshot-1913-2.png


Screenshot-1913.png


Screenshot-1914.png


Screenshot-1912.png


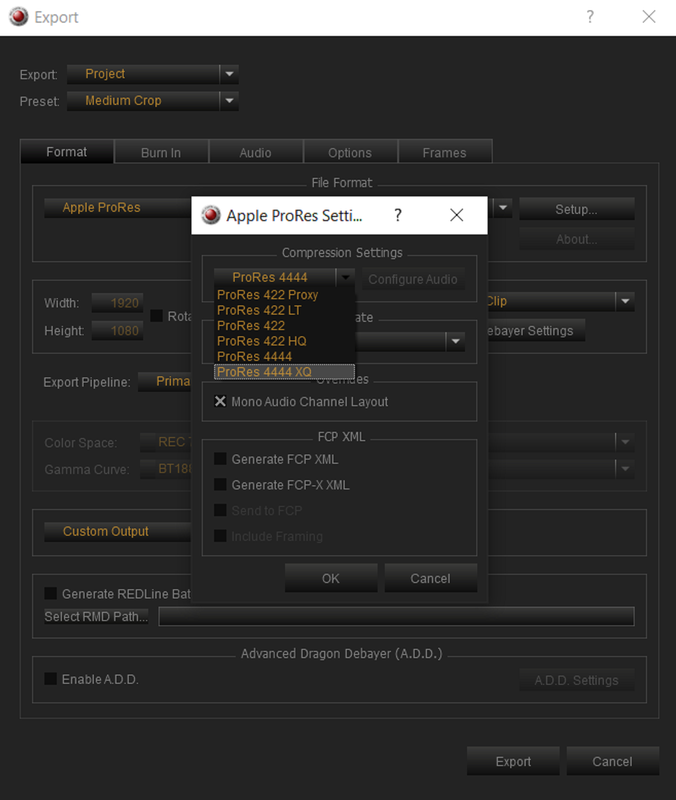
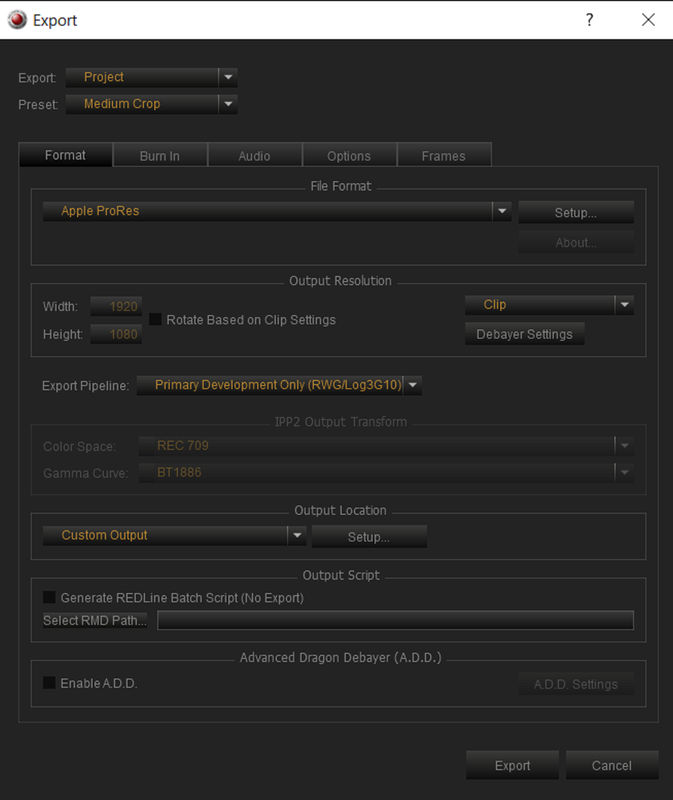
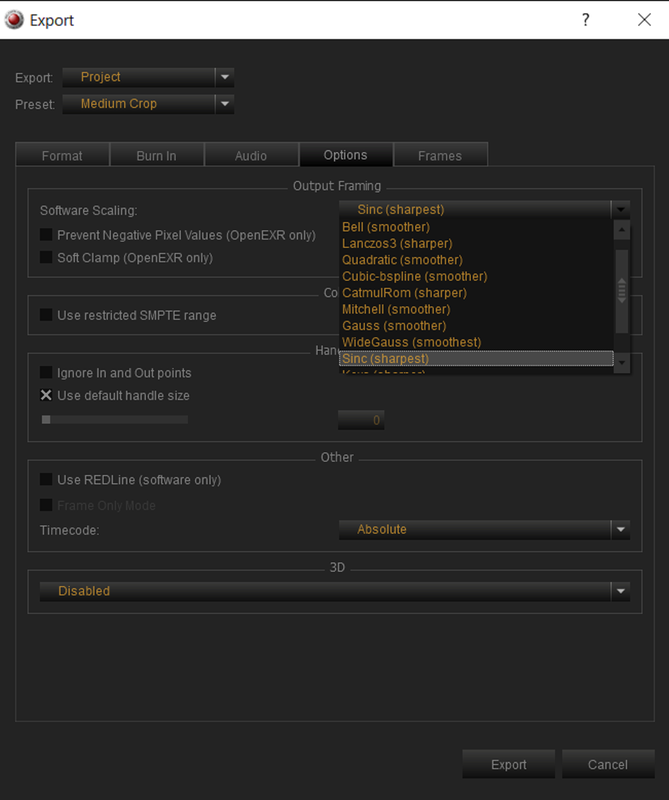
3) At Export, I chose to export all three R3D files as "Prores 4444 XQ". Next, I Chose a "PRIMARY DEVELOPMENT ONLY(RWG/LOG3G10)" 'Export Pipeline". And since I was rescaling the R3D files, I chose a "SINC" Scaling Algorithm to keep them relatively sharp.


Screenshot-1915.png


Screenshot-1916.png


Screenshot-1925.png


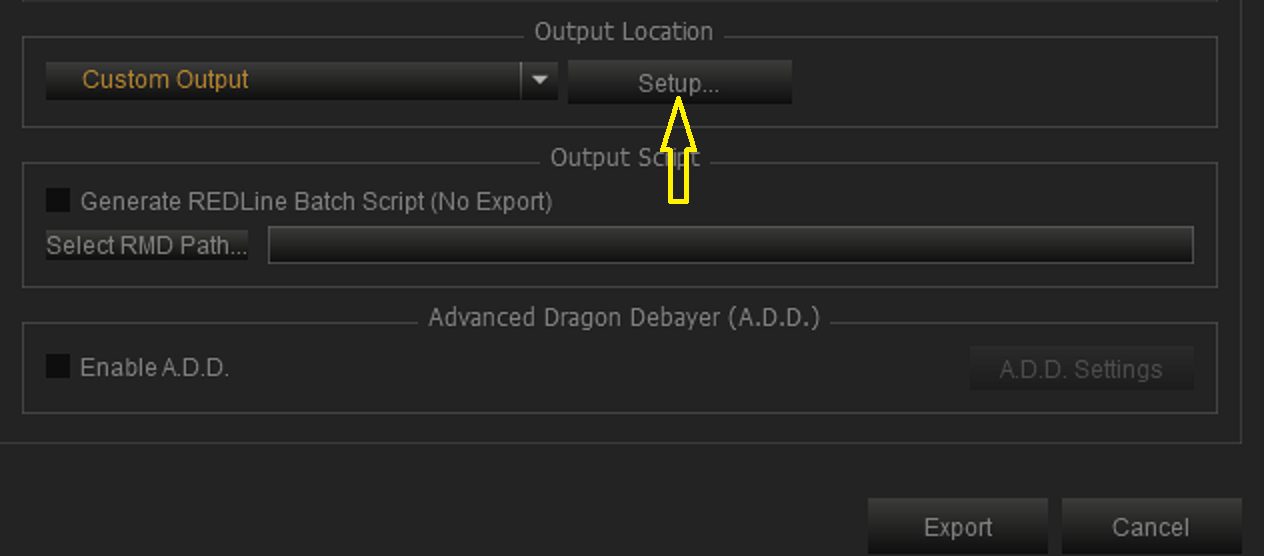
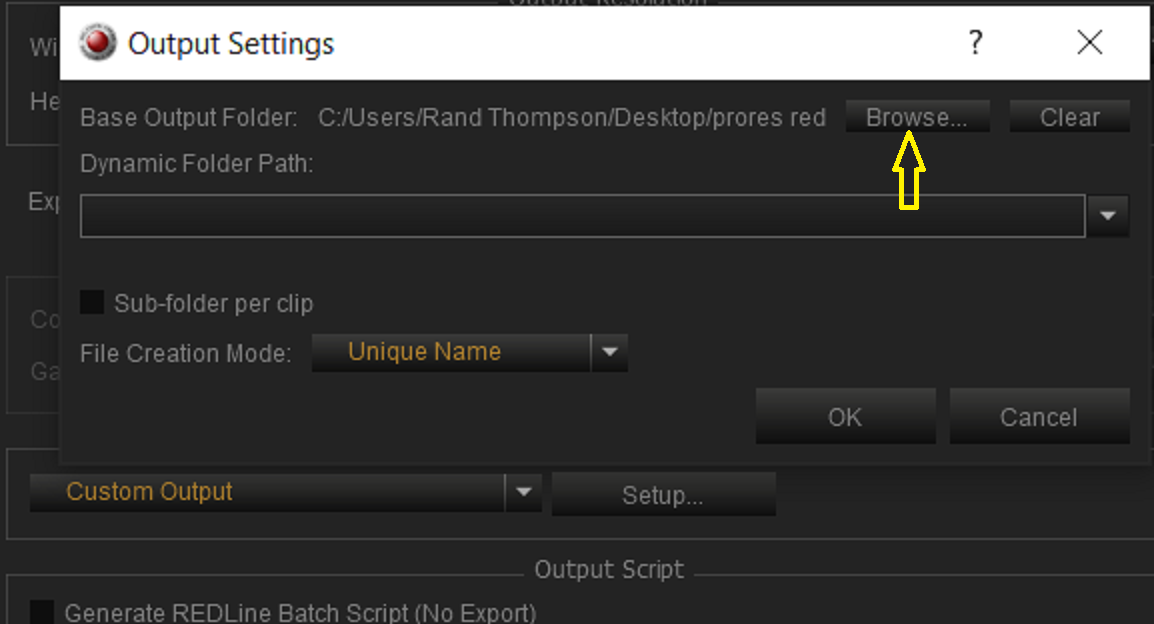
4) Lastly, To choose an output location for the PRORES files:

A) Choose "SETUP" next to "Custom Output"

Screenshot-1946.png


B) Then "Browse"

Screenshot-1947.png


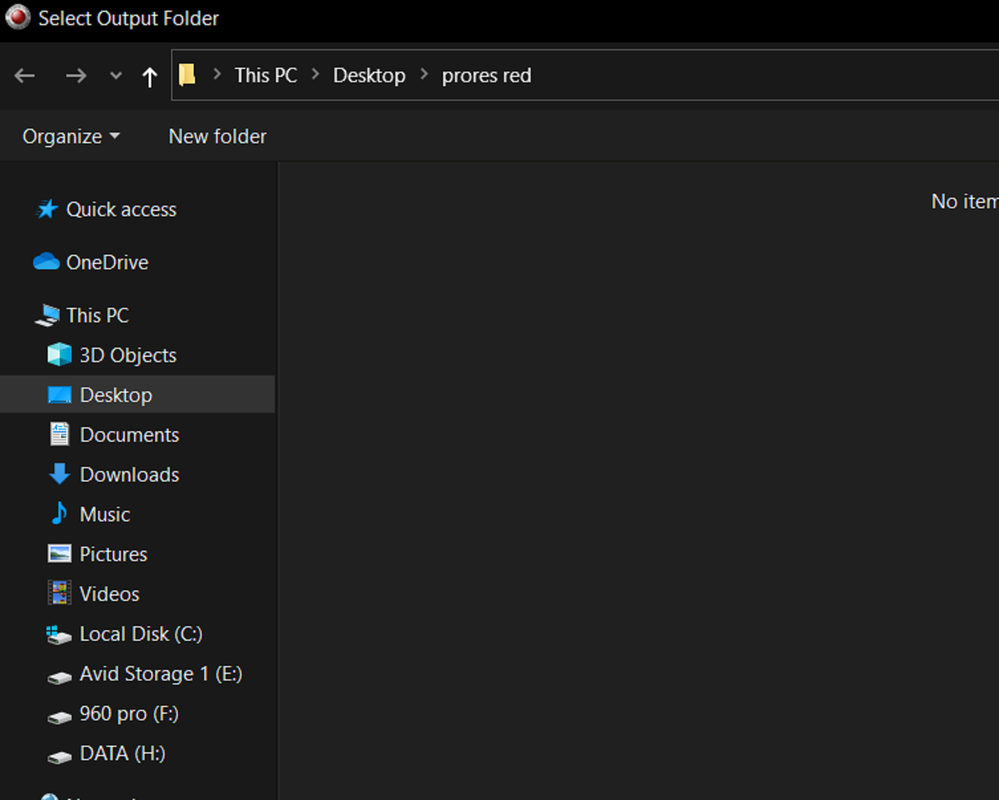
C) Then select a File Location

Screenshot-1948.png


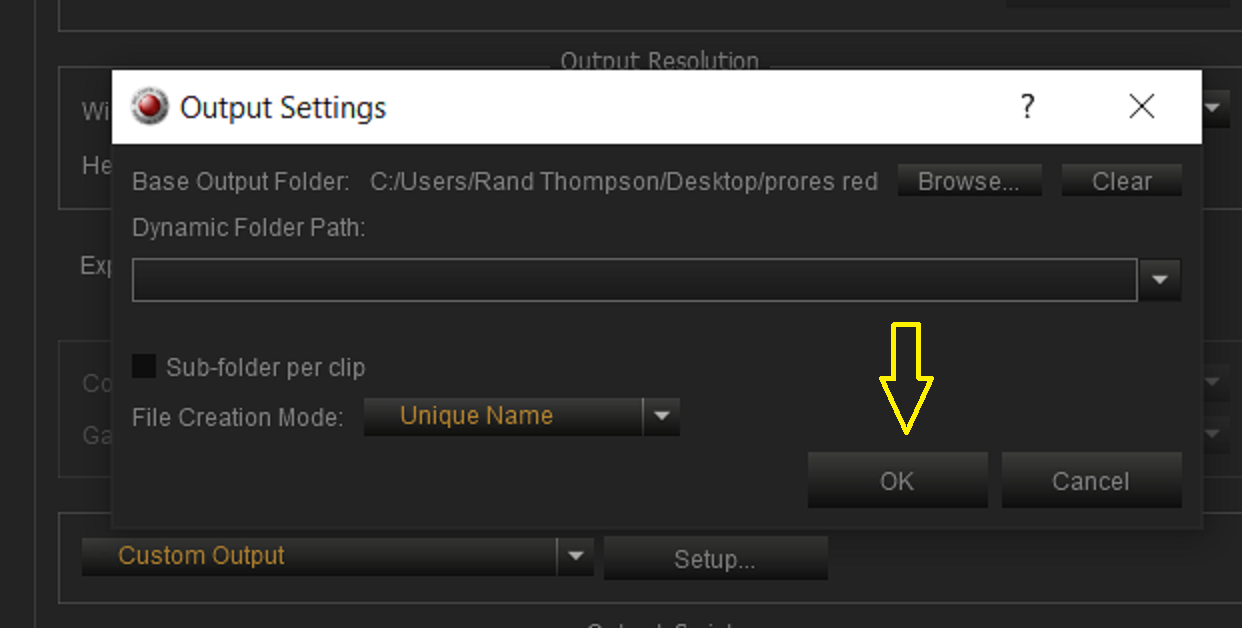
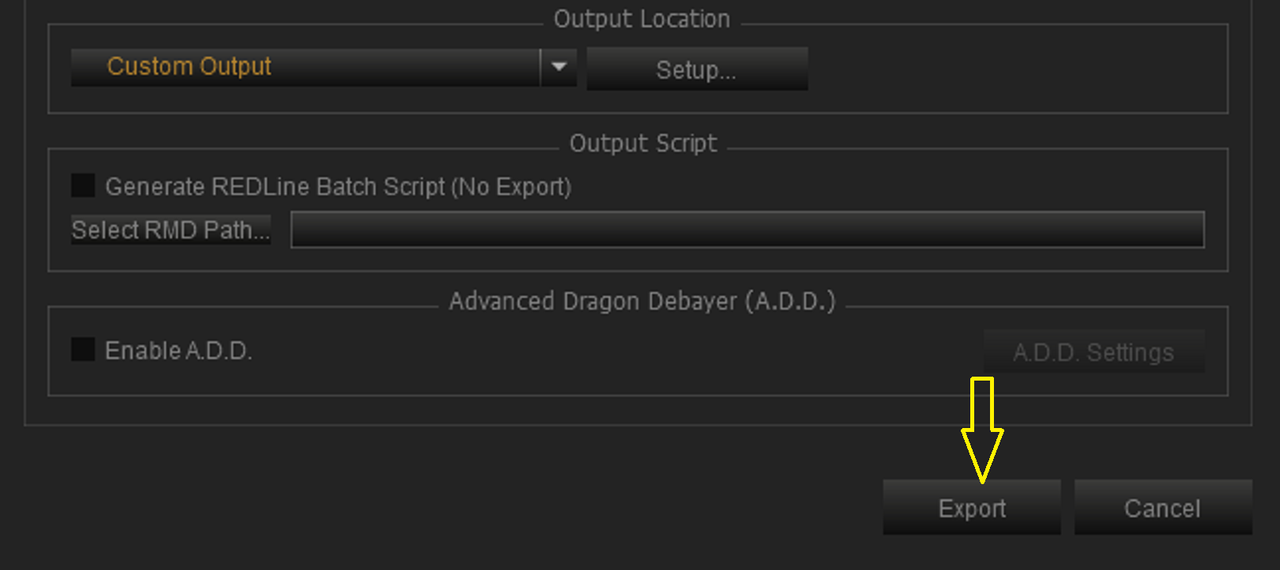
D) Then "OK", then "Export"

Screenshot-1949.png


Screenshot-1956.png

Next, Part 2 Adobe Premiere Pro......
 
Last edited:
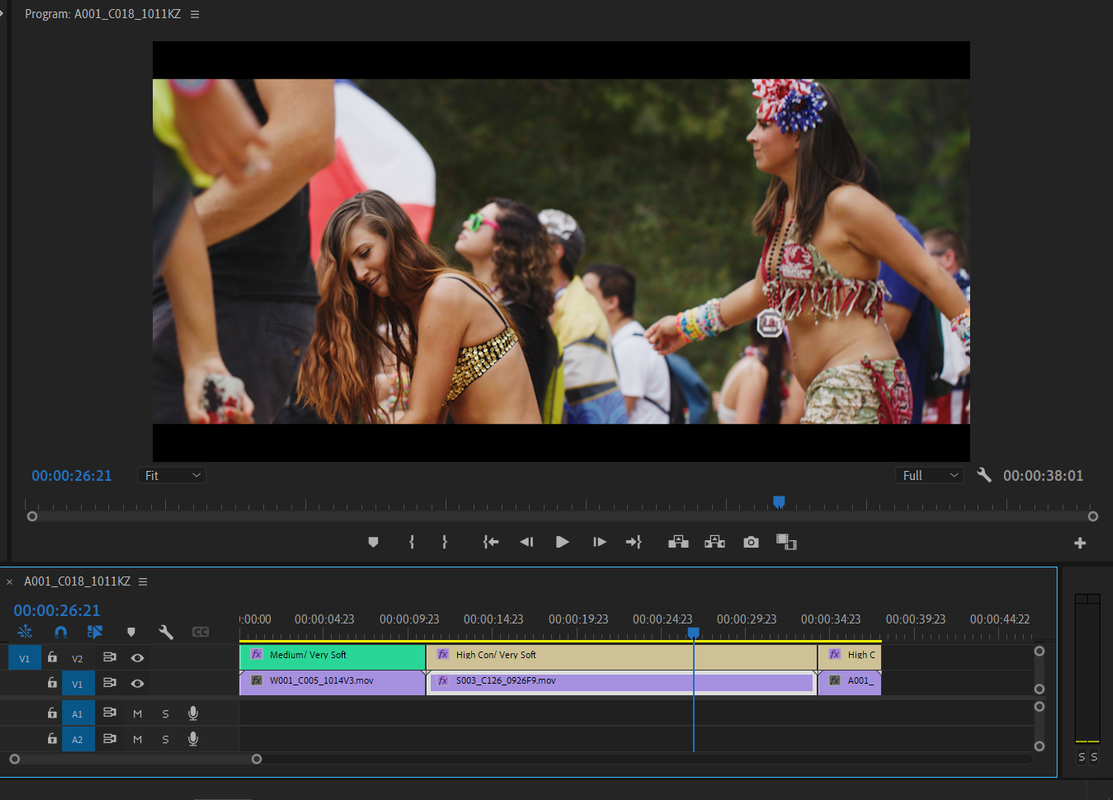
Part 2- Adobe Premiere Pro


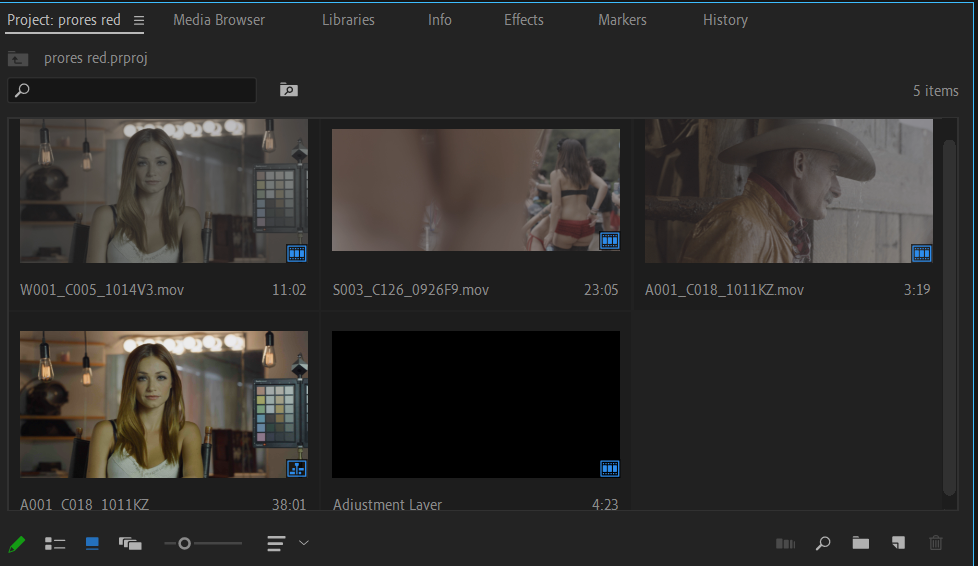
1) All three ProRes 4444XQ files came in as the "RWG/LOG3G10" encoded format. I next created an "ADJUSTMENT LAYER"

Screenshot-1921.png


Screenshot-1895.png


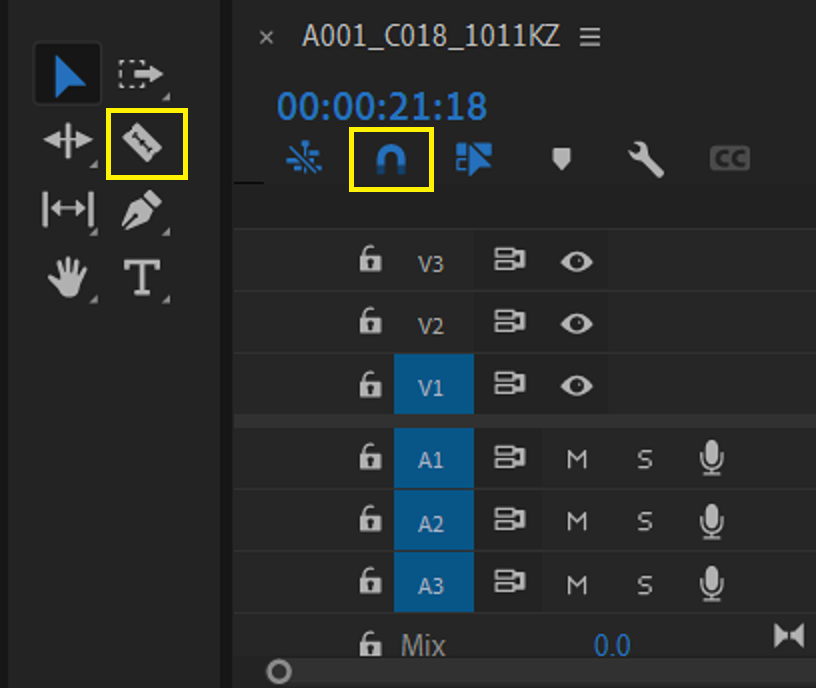
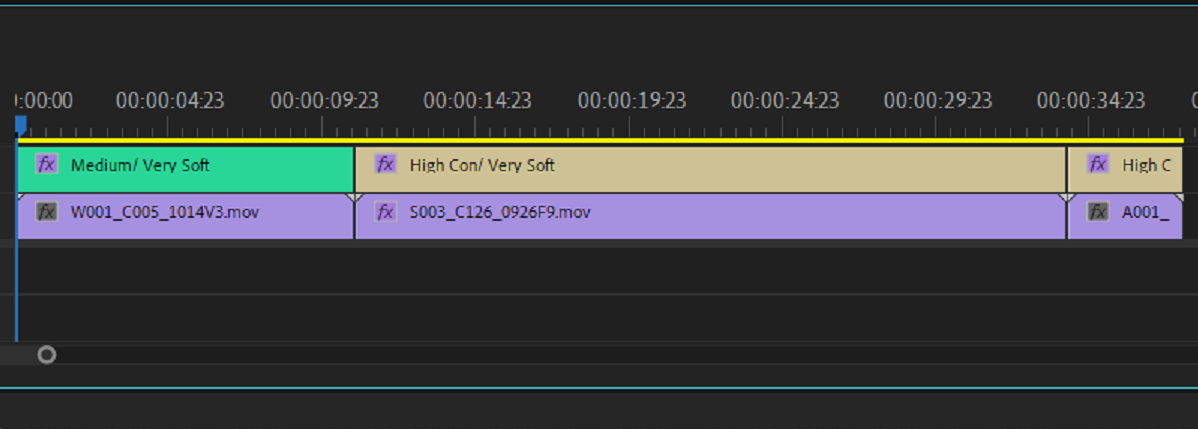
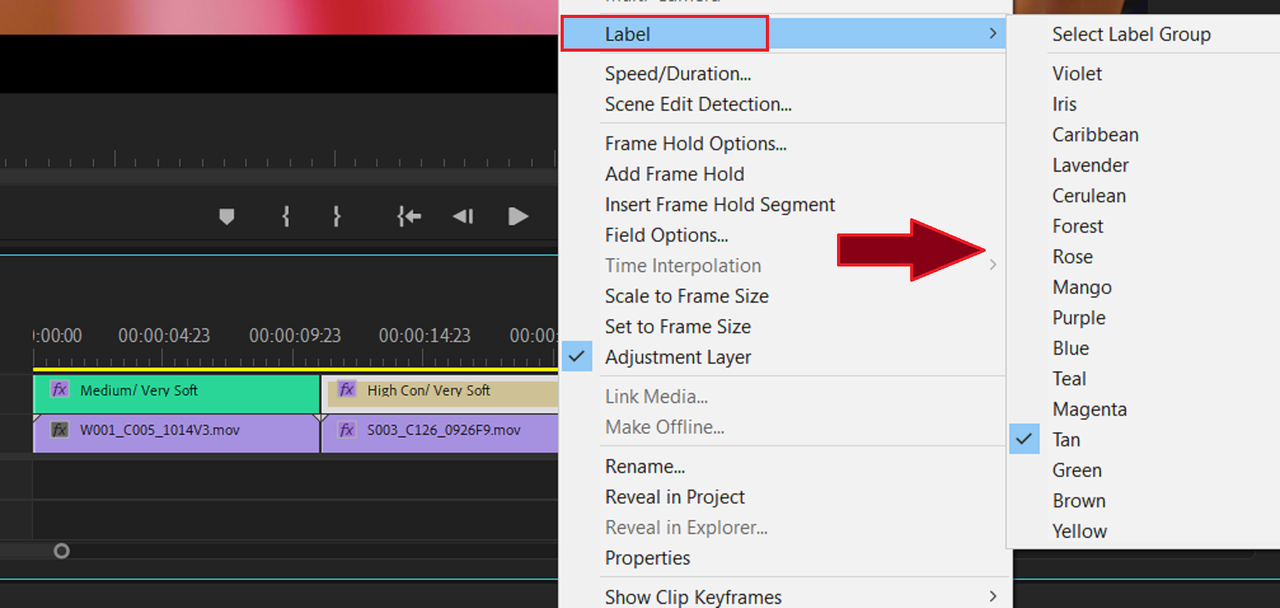
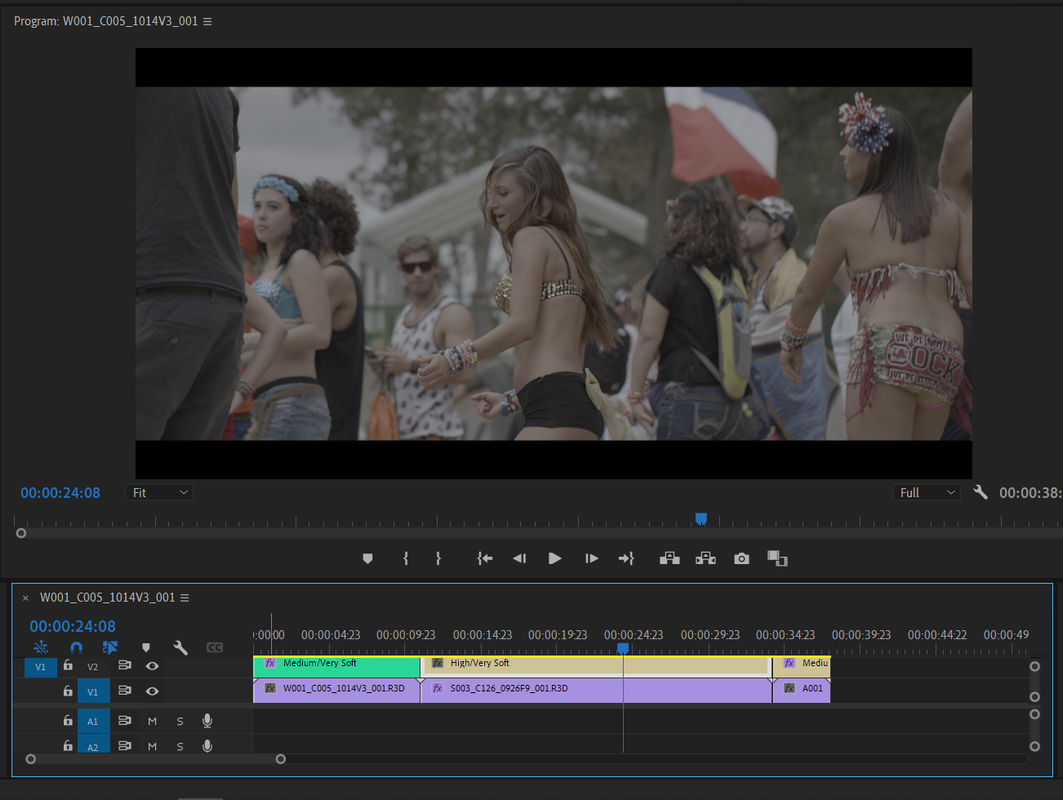
2) Next, I added all three ProRes 4444XQ "RWG/LOG3G10"encoded files to the timeline and added one Adjustment Layer over the three clips. I then segmented the Adjustment Layer into three parts using the " Razor" tool and enabling the " Magnet" icon's snap to in and out functionality, for the possibility that I would add three different IPP2 Output Transforms ( I didn't, I only used two different IPP2 Transforms). I used the Presets that I had Already Made to do this


Screenshot-1960.png


Screenshot-1922-2.png


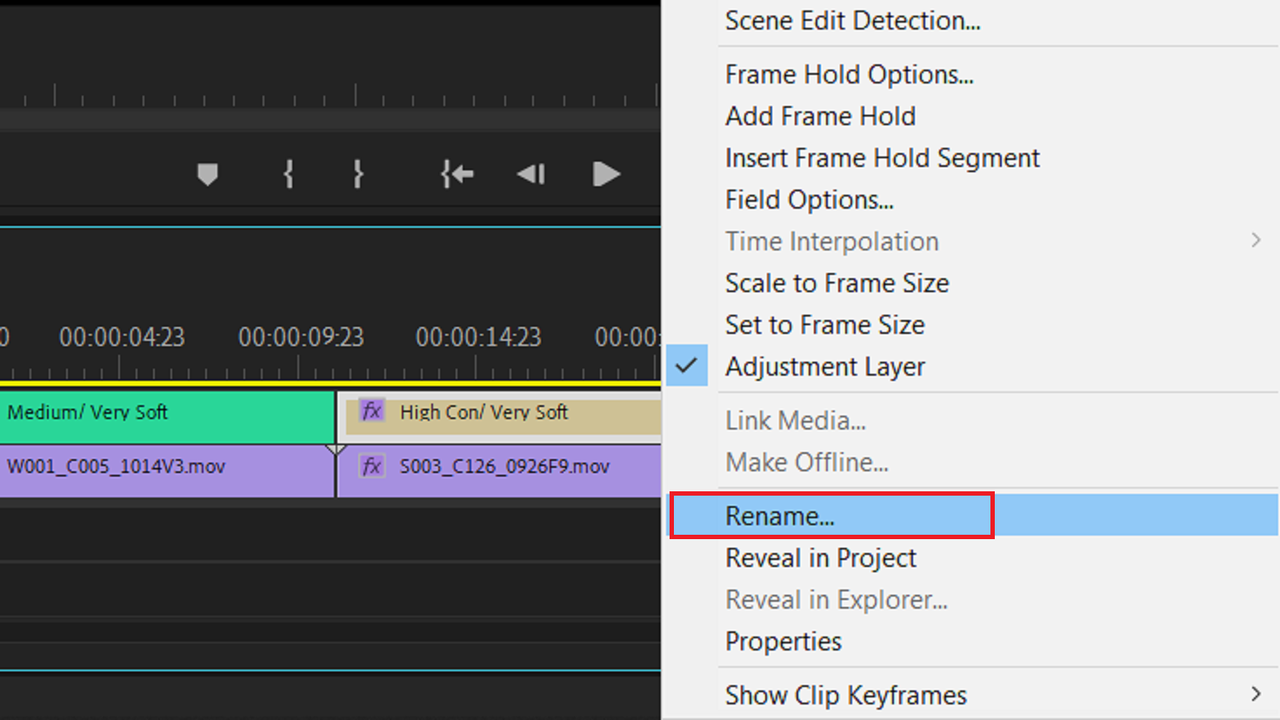
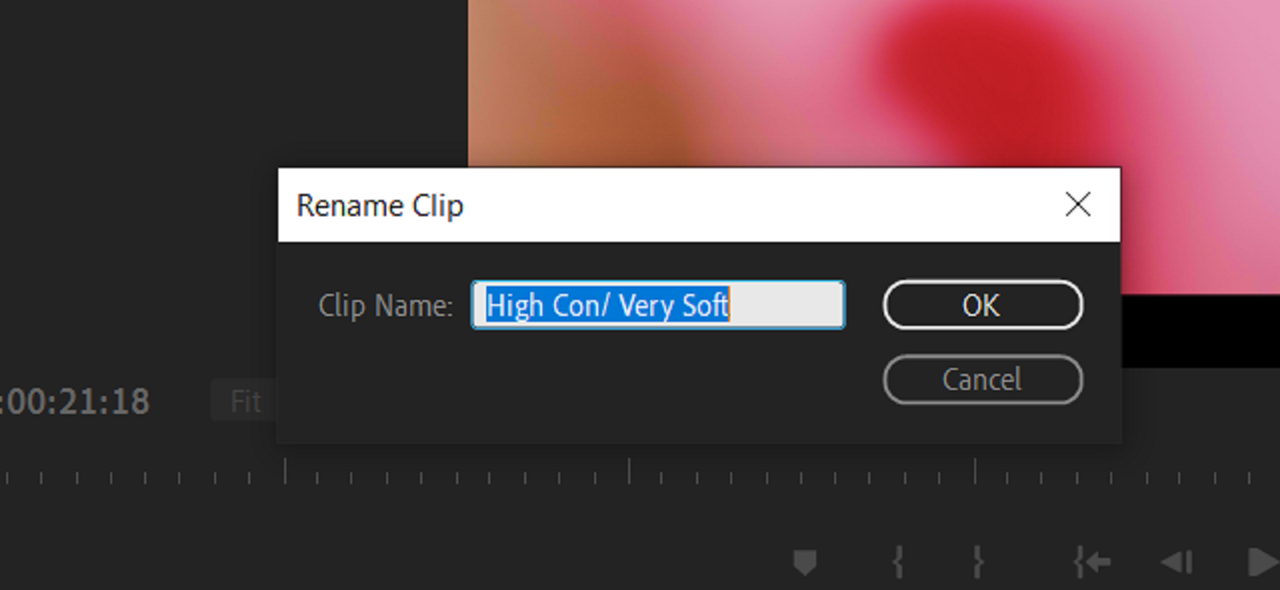
I "Right-Clicked" on each of the segmented Adjustment Layers and both "Renamed" them and gave them different "Label" colors to identify the different IPP2 Output Transforms I used on each


Screenshot-1957.png


Screenshot-1961.png


Screenshot-1958.png


Screenshot-1893-Copy.png


I placed a "Medium/Very Soft" IPP2 Output Transform over the First clip

Screenshot-1922.png


I placed a "High/Very Soft" IPP2 Output Transform over the Second clip

Screenshot-1923.png


I placed a "High/Very Soft" IPP2 Output Transform over the Third clip

Screenshot-1924.png
 
Last edited:
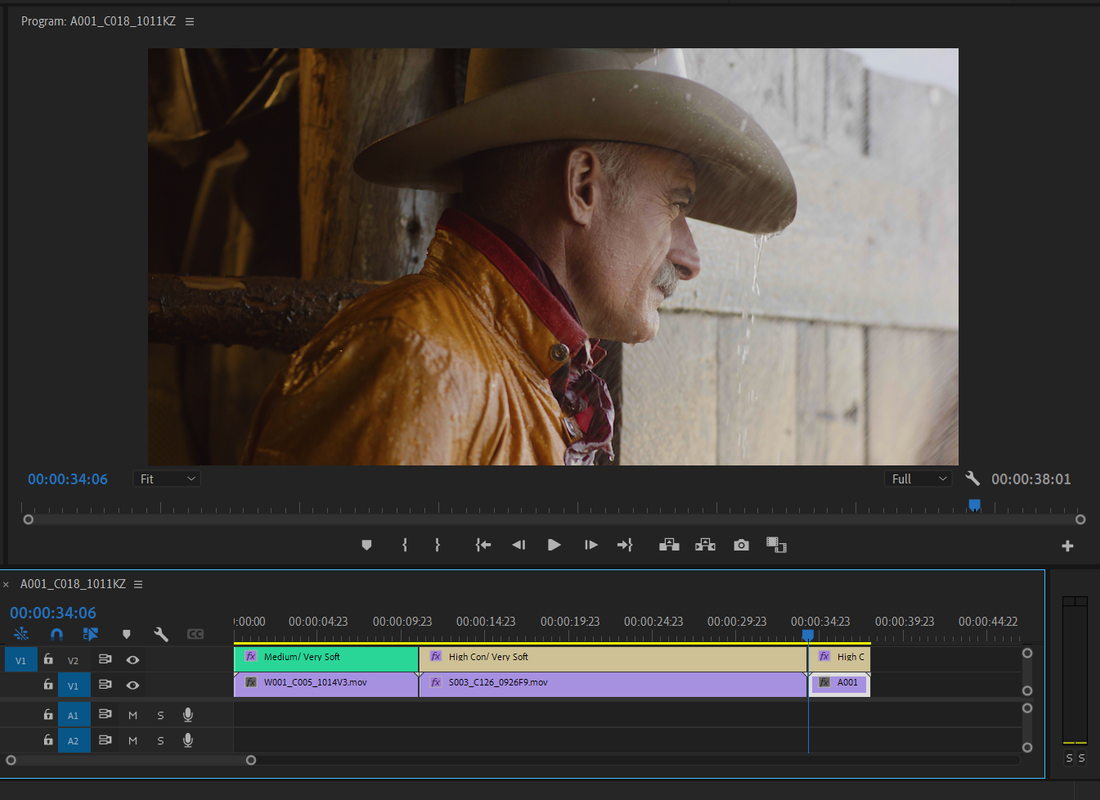
For those who don't know how to create a "Preset" in Redcine-X.This will show you how to create and apply the preset to some or all of your Red .R3D files.

How to create a "BYPASS" And "UN-BYPASS" IPP2 Preset


1) Open up Redcine-X.

Screenshot-1945.png


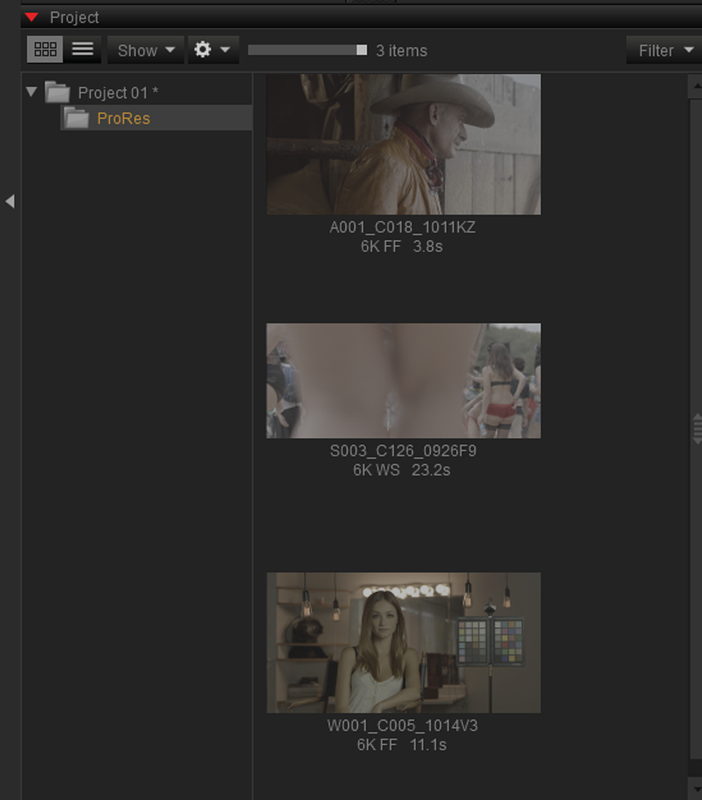
2) "Right-Click" in the "Project" area to create a new "BIN". I called this one "Pro Res" and added three clips.

Screenshot-1940.png


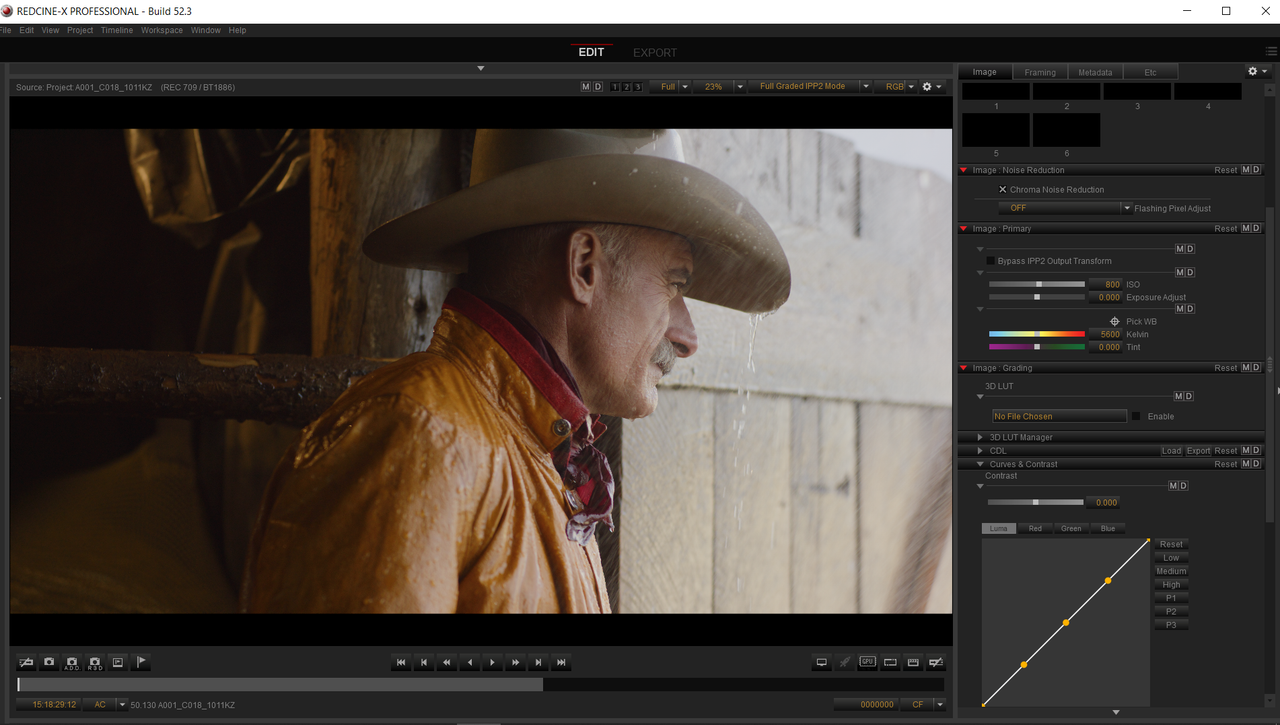
3) Next, "Drag and Drop" or "Double-Click" on one of the clips in the BIN so that it shows up in the "Viewer Window" and activates the Grading controls.

Screenshot-1887.png


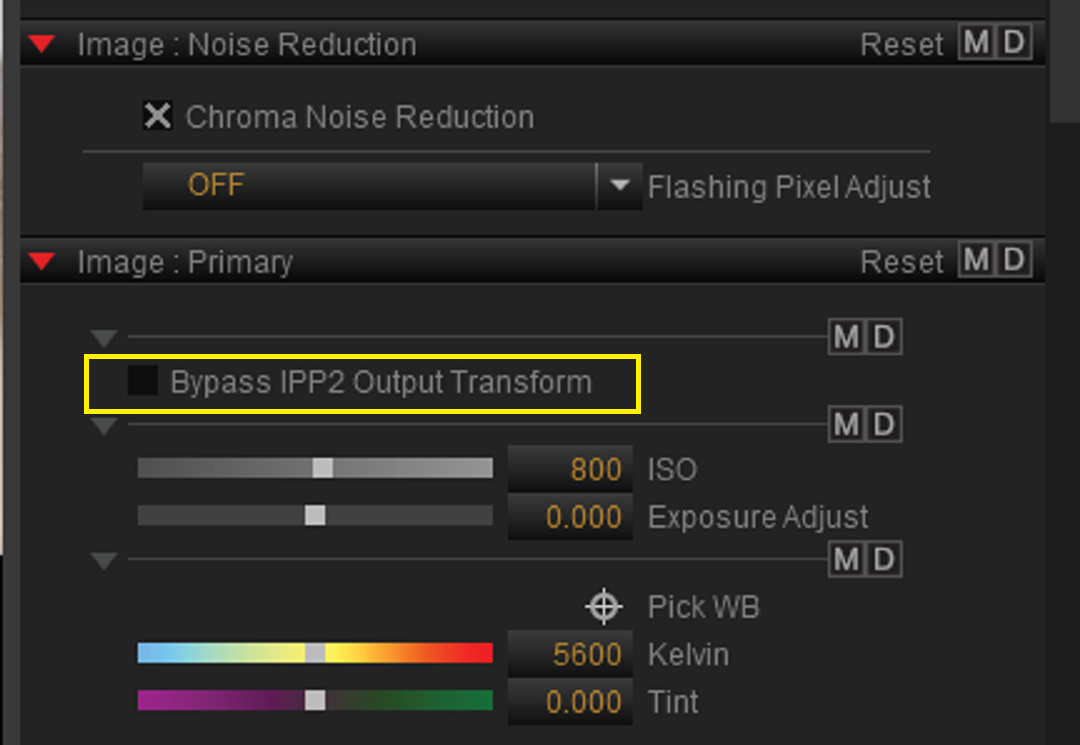
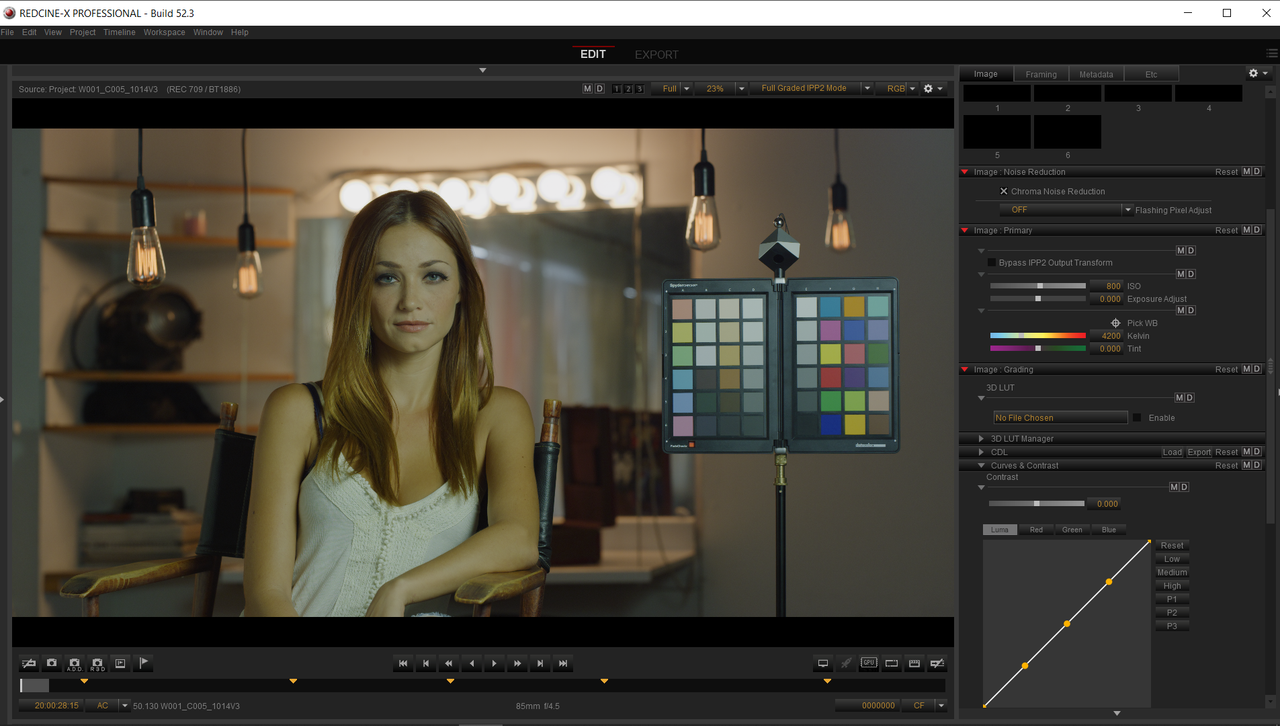
4) Under "IMAGE:PRIMARY" Select "BYPASS IPP2 OUTPUT TRANSFORM"

Screenshot-1932.png


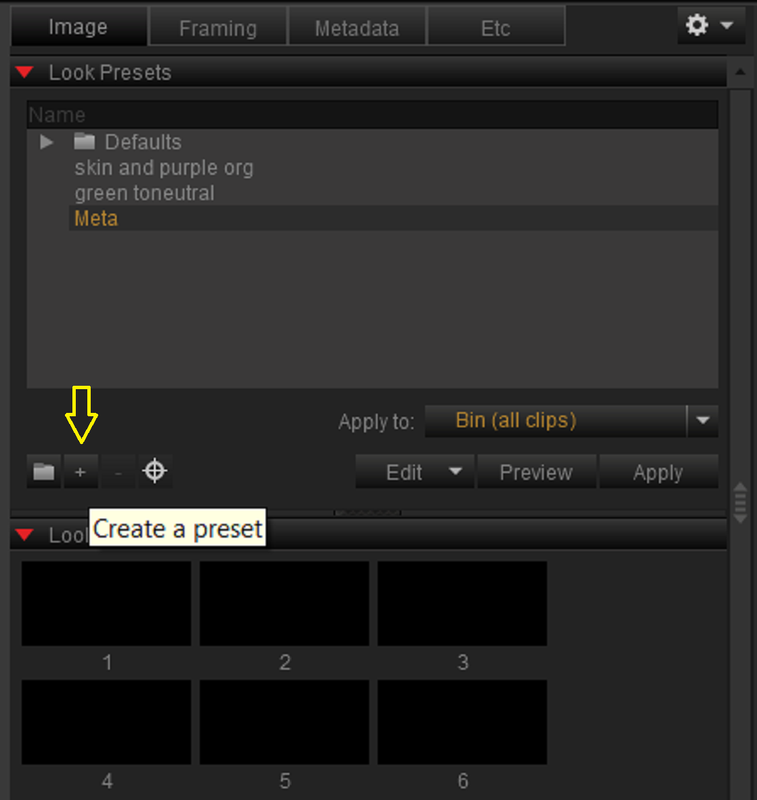
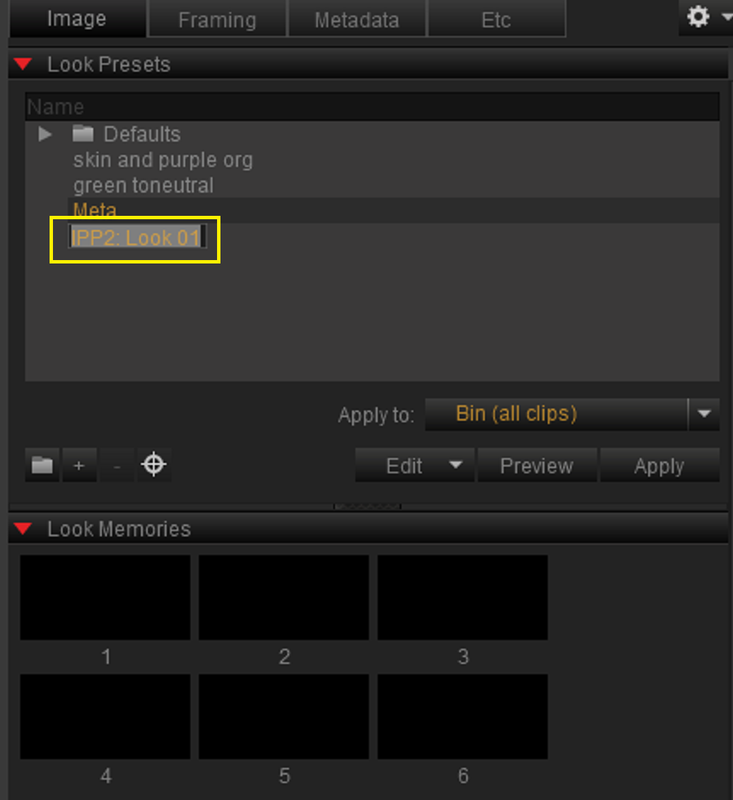
5) In the top Right-Hand corner under "LOOK PRESETs", Click on the "+" sign to CREATE a new Preset to "BYPASS" any and all IPP2 Output Transforms for whatever range of R3D files you want. I called mine "BYPASS IPP2"

Screenshot-1933.png


Screenshot-1934.png


Screenshot-1935.png


Uncheck the box next to "BYPASS IPP2 OUTPUT TRANSFORM" and follow the same procedure that was used to create the "BYPASS IPP2" PRESET to create the 'UN-BYPASS IPP2' PRESET

Screenshot-1939.png


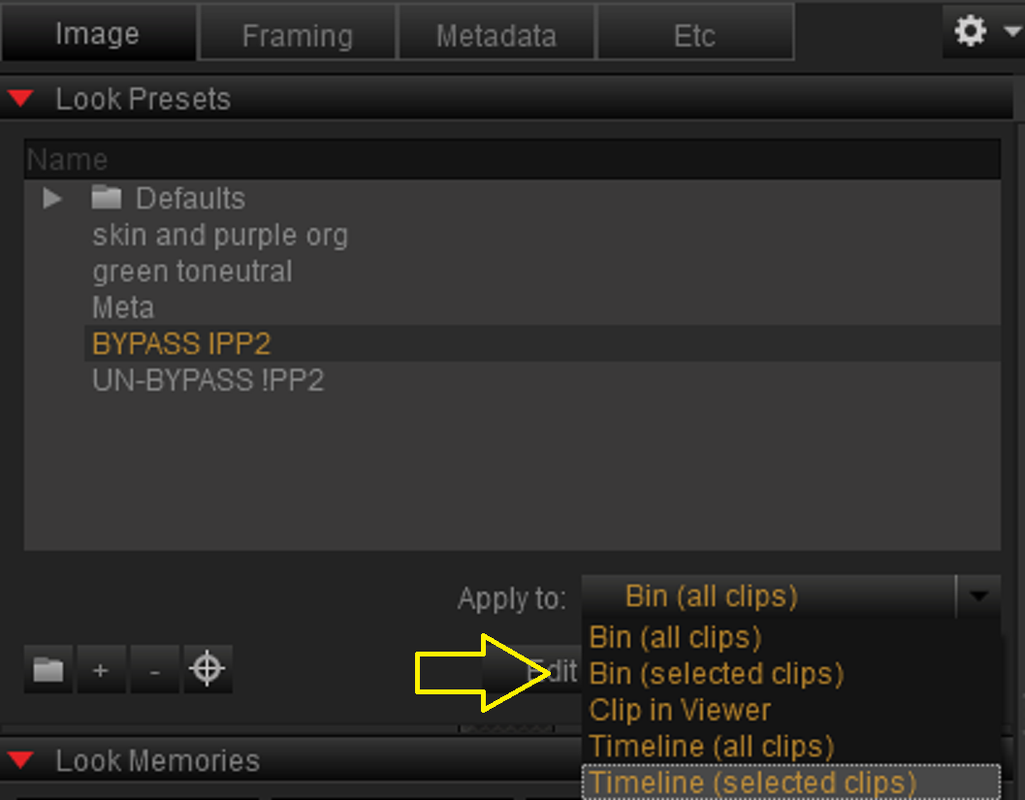
6) You have Multiple ways in which to apply "LOOK PRESETS" in Redcine-X. Here is a list of those methods.

Screenshot-1944.png


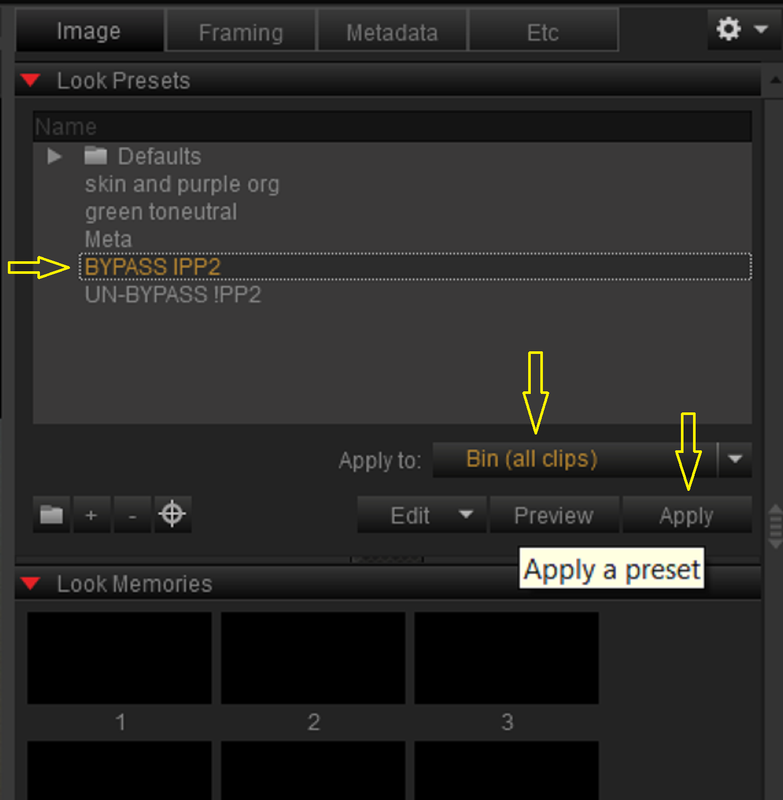
7) To apply The "BYPASS IPP2" Preset to all of the clips in the "PRORES" Bin, First select the "BYPASS IPP2" Preset you just made then choose "BIN(All Clips)" then press "APPLY"

Screenshot-1940.png


Screenshot-1941.png


Screenshot-1943.png
 
Last edited:
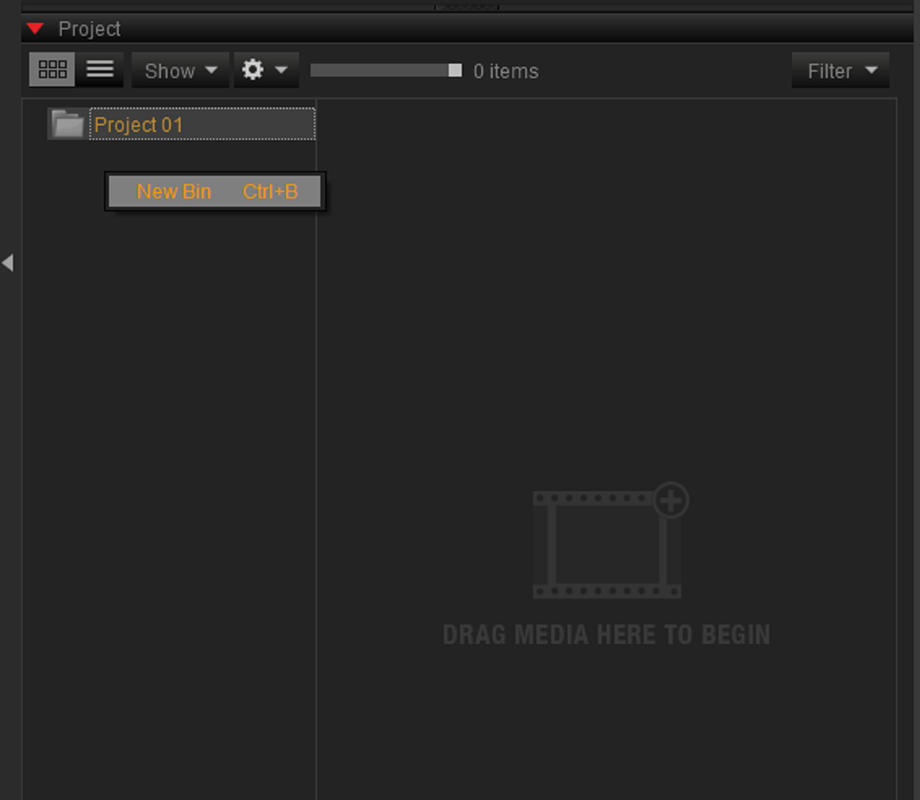
Switching Out Different IPP2 Output Transforms to replace them with another


Unlike Resolve where you simply add another IPP2 Output Transform over the existing one in the Node thereby kicking out the Previous one, In Adobe Premiere doing the same thing will add both the Previous one and the new one together making for a crappy look.

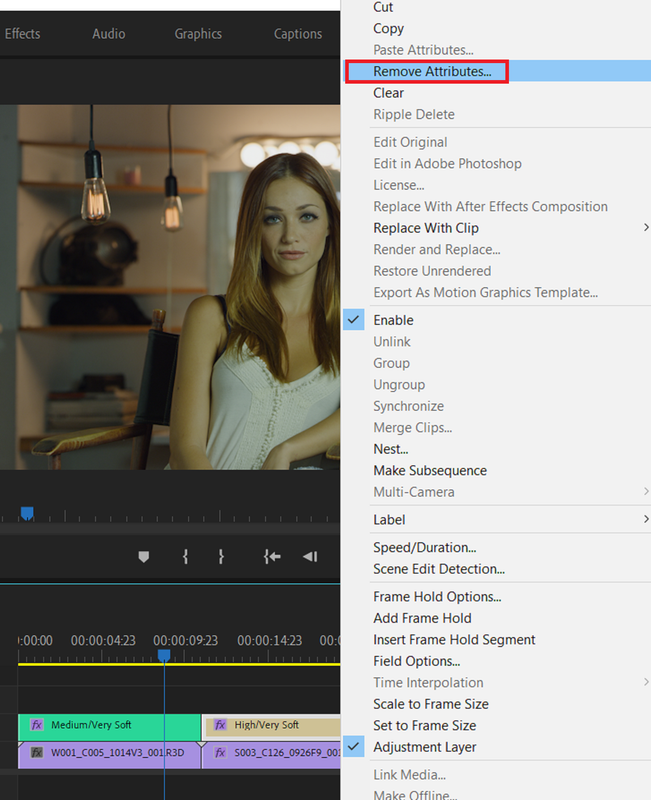
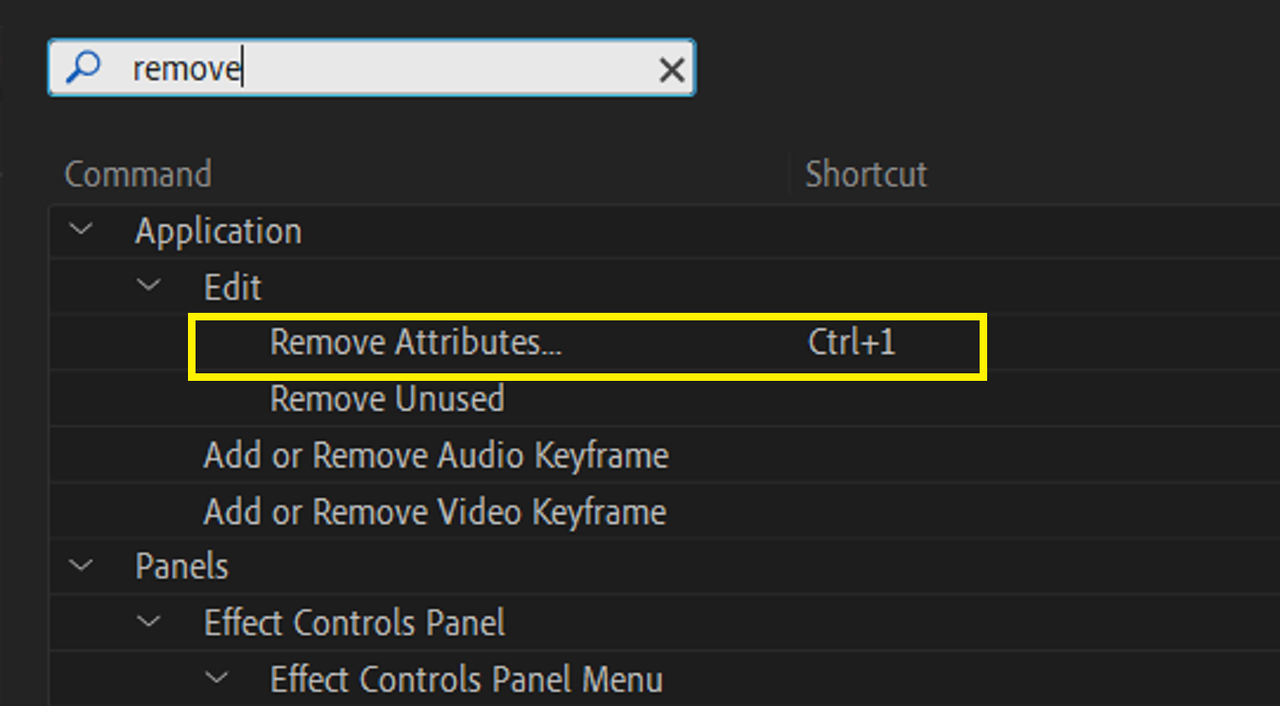
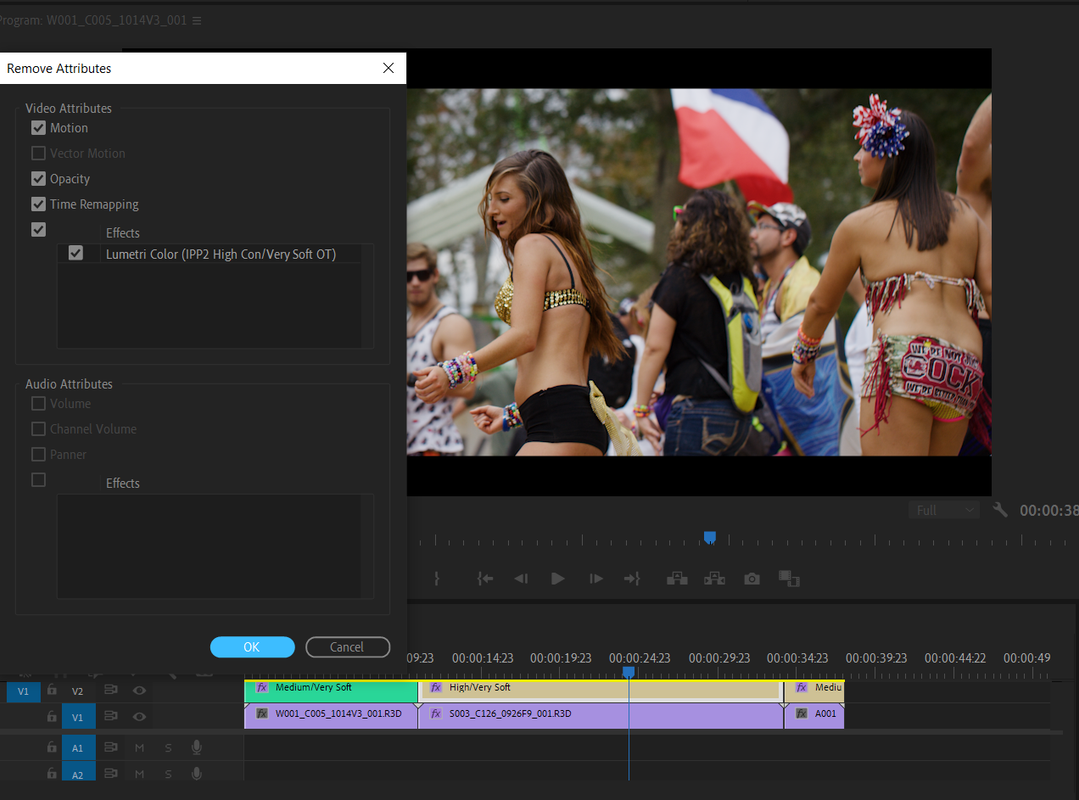
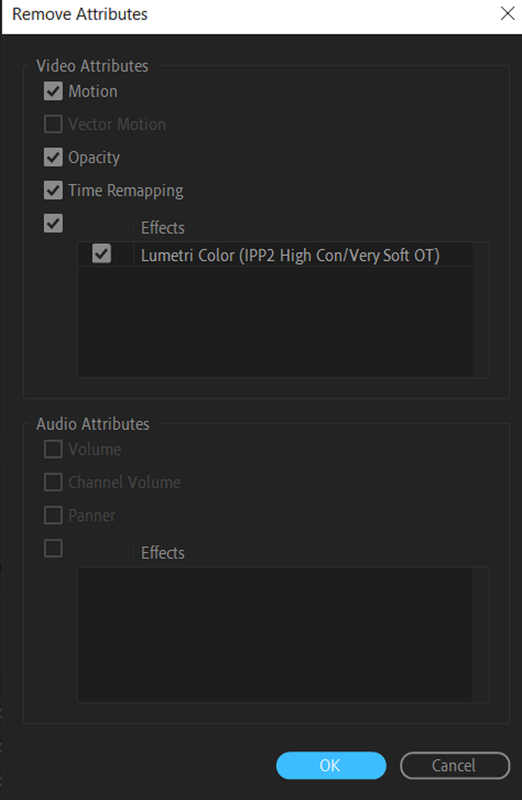
In Adobe Premiere you have to remove the existing IPP2 Output Transform before you can replace it with a new one. You'll have to do this by the "Remove Attribute" function.


You can do this one of two ways:

1) by "Right-Clicking" on the Adjustment layer and chosing "REMOVE ATTRIBUTE" from the "Drop-Down" Menu

Screenshot-1972.png


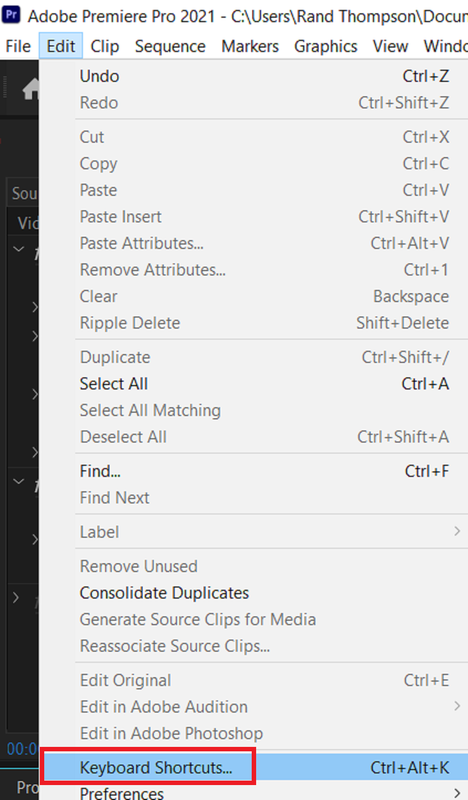
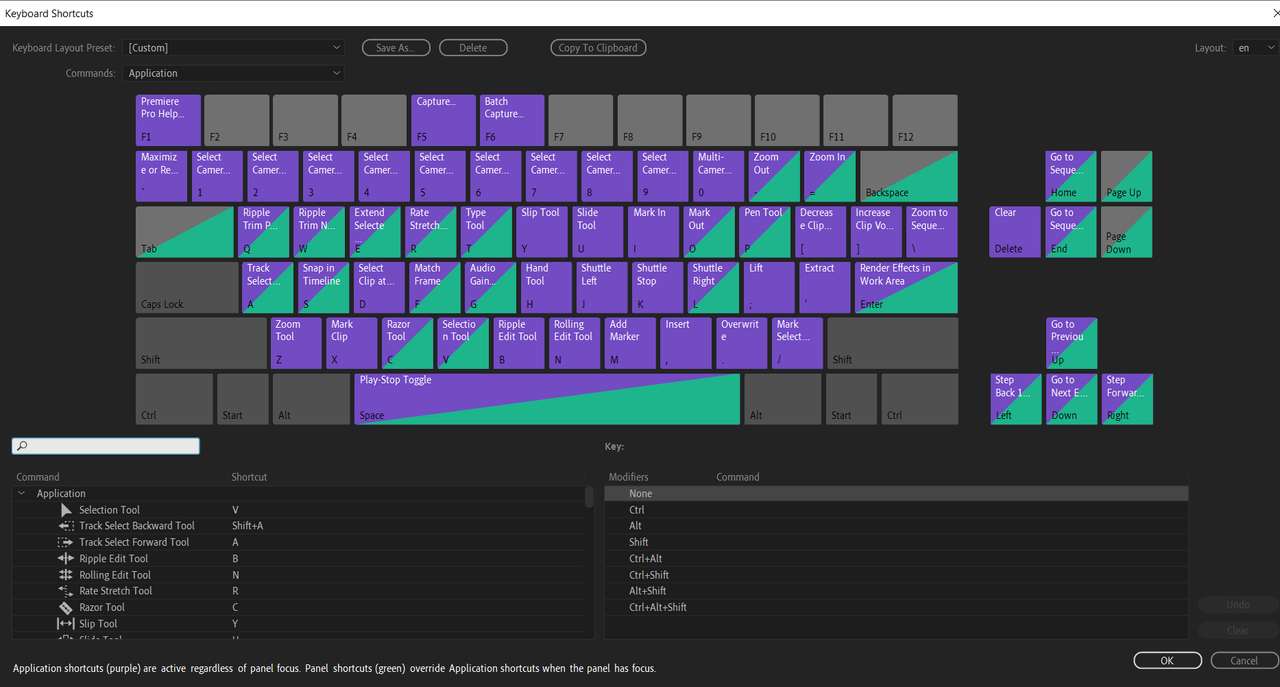
2) By Creating a "Keyboard Shortcut"

I chose to make a Keyboard Shortcut, I used "CTRL + 1" for "REMOVE ATTRIBUTE"

Screenshot-1971.png


Screenshot-1974.png


Screenshot-1970.png


So to Remove the "High/Very Soft' IPP2 Output Transform from the Second Clip in the Timeline

1) Highlight the Adjustment Layer Segment with the IPP2 Output Transform on it you want to change

2) Either "Right-Click" or use whatever "Keyboard Shortcut" you made to remove the Existing IPP2 Output Transform you previously used to replace it with a new one.


High/Very Soft

Screenshot-1975.png


Screenshot-1976.png


Screenshot-1973.png


Screenshot-1977.png


Screenshot-1979.png


Medium/ Very Soft

Screenshot-1981.png
 
Last edited:
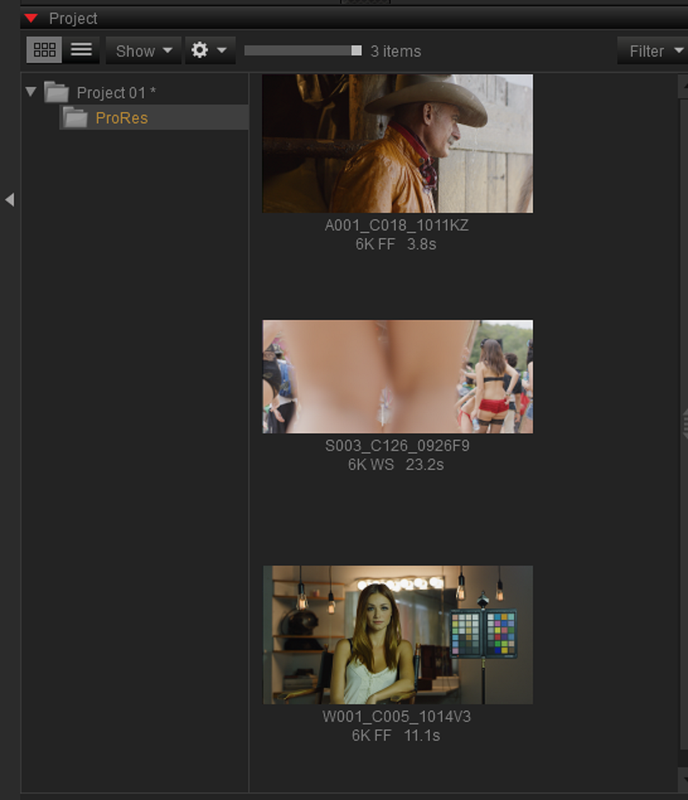
How to Remember/Know which Red R3D files you 'Bypassed" to "Un-Bypass" later, Save the Redcine-X Project.


If you Bypassed the IPP2 Output Transforms of a large number of Red R3D files in Redcine-X and you want to know which ones they where so that you can "Un-Bypass" them later for yourself or the Client whom they actually belong to before handing them back, Save the Redcine-X Project before you Exist the Program.


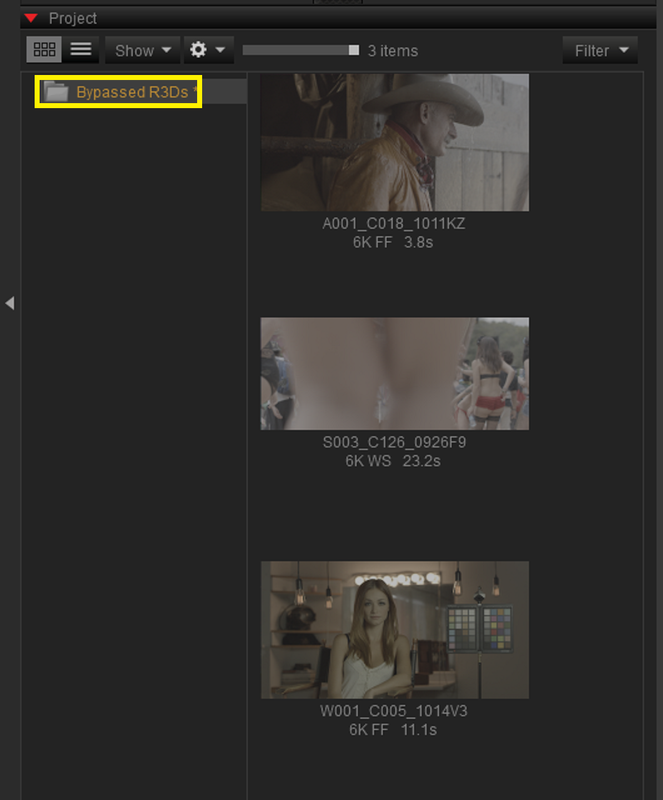
Before you exist out of a Project with R3D files that have had their IPP2 Output Transforms "Bypassed", save that specific project so that you can recall it later with the exact R3D files that you bypassed


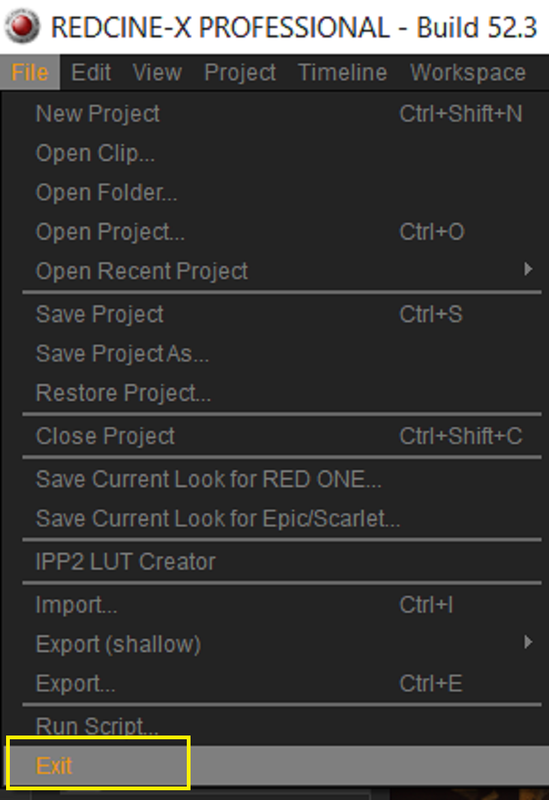
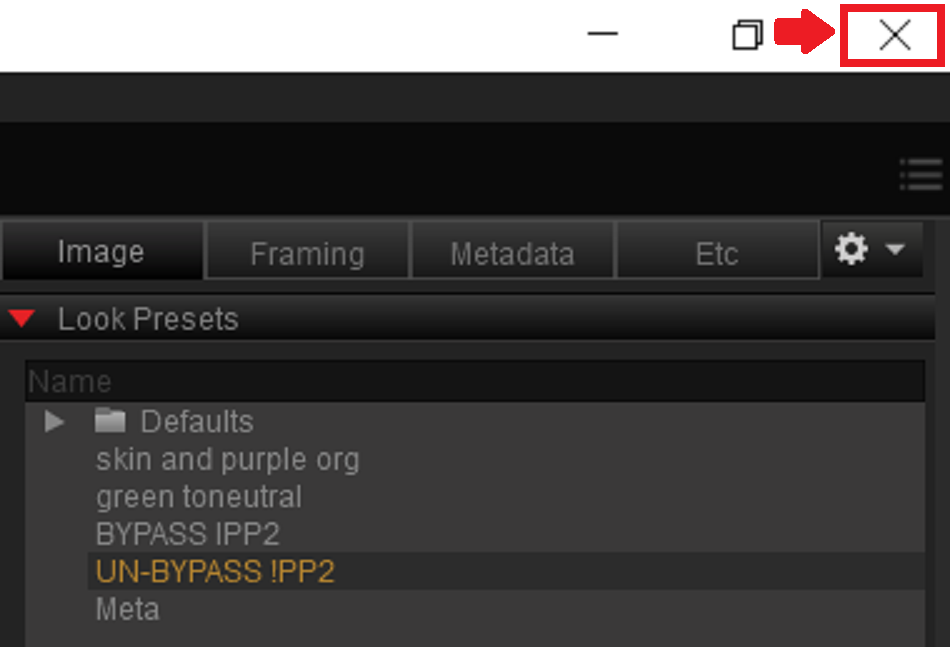
1) Exist out of the Project by either the "FILE MENU" or the "X" in the top Right-Hand of the Program

1.png


2.png


3.png


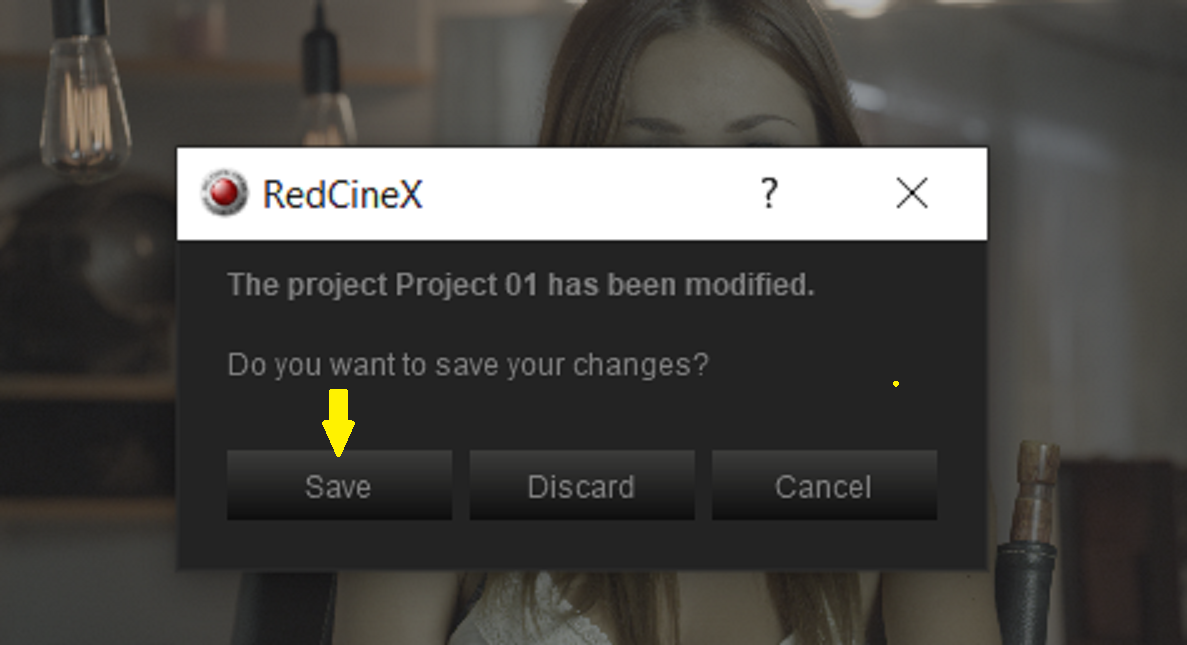
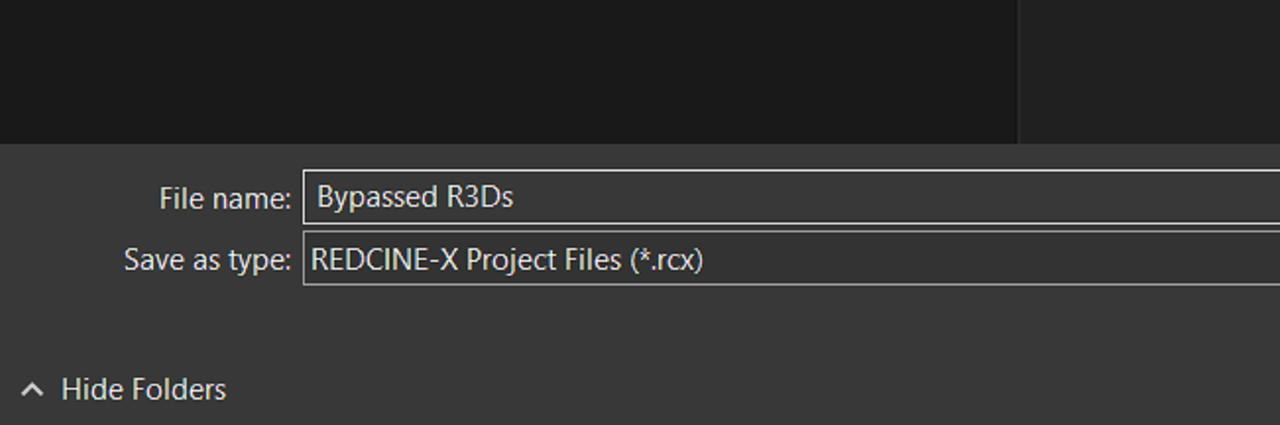
2) When you do this, a "Pop-Up" box will appear giving you the option to either "SAVE' or "DISCARD" the project, Choose "SAVE". Then Select a Location to place it in.


4.png


5.png


6.png


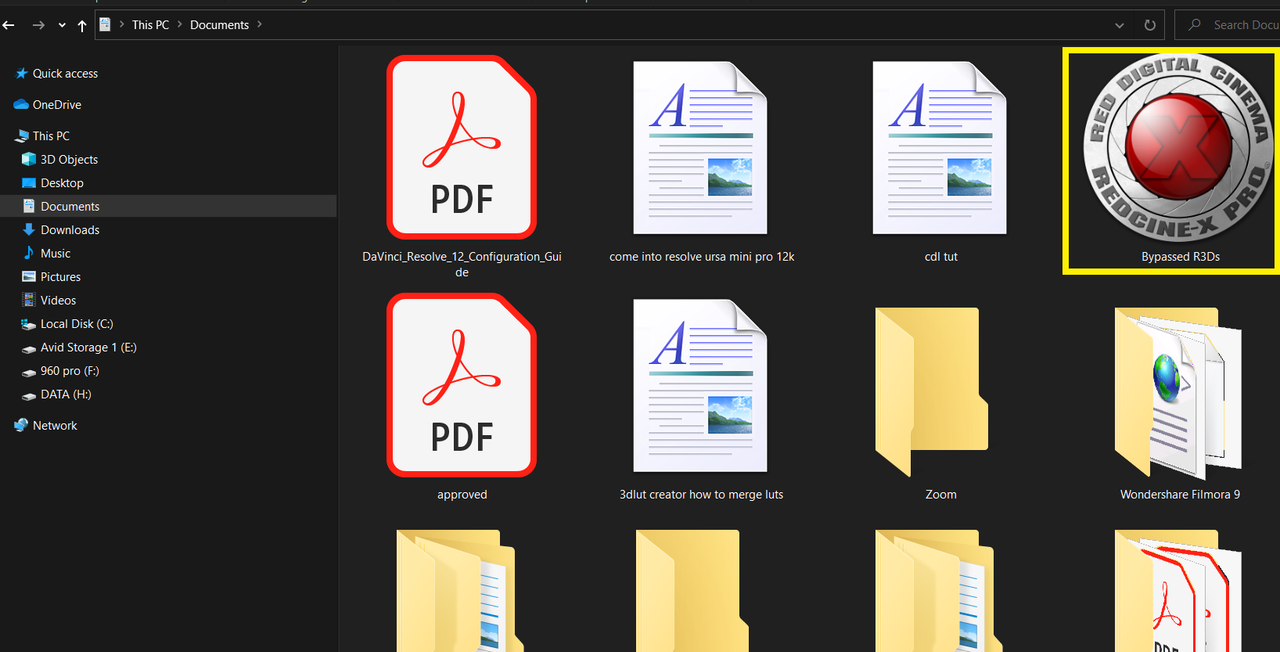
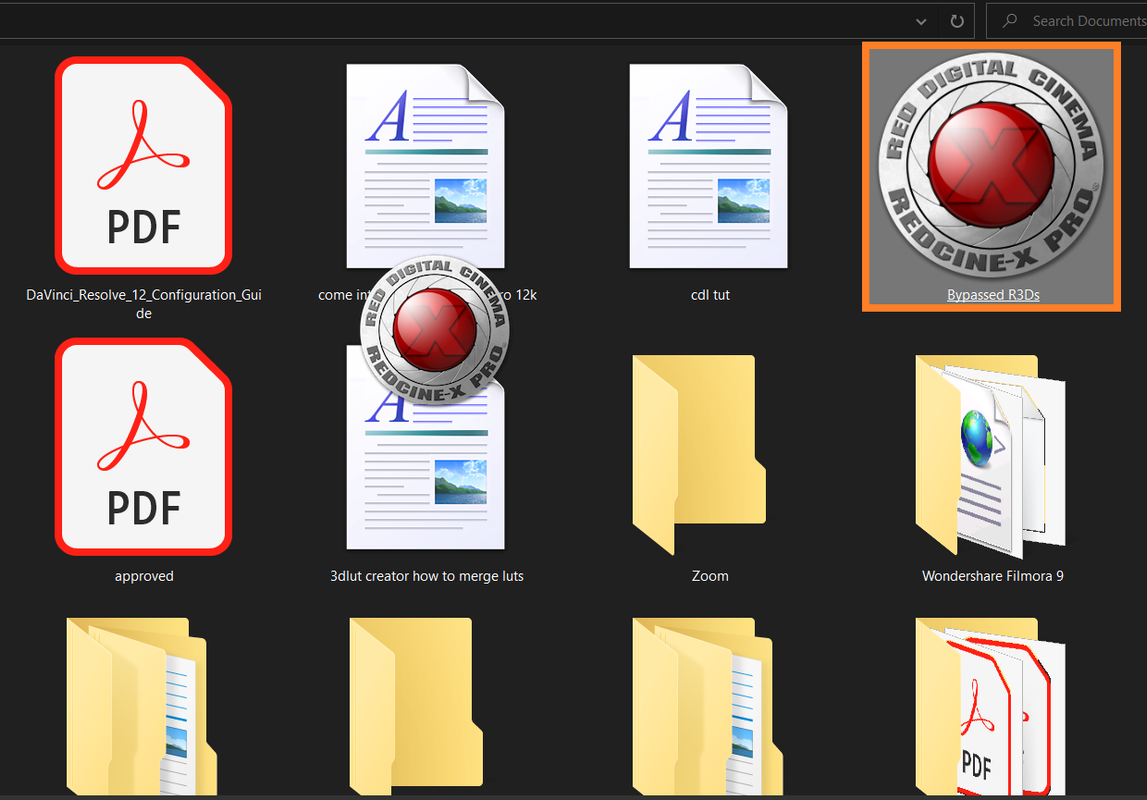
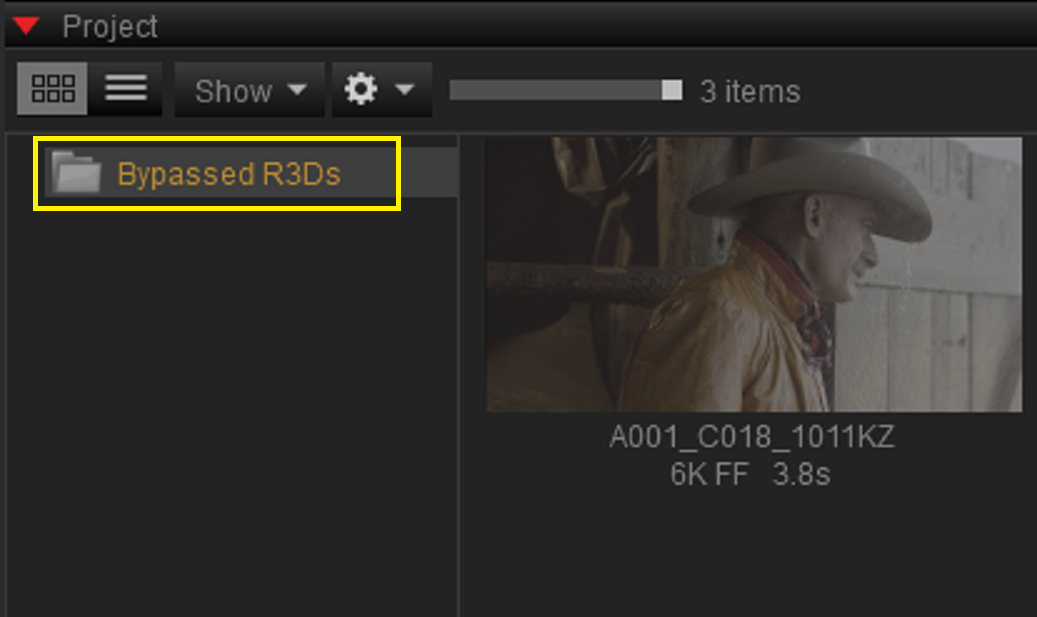
3) Later, to "UN-BYPASS" all of the specific R3D files you "BYPASSED" to restore them back to normal with their Correct IPP2 Output Transforms, Go to place where you stored the REDCINE-X project file and open it back up. You will see that the R3D file you Bypassed under the "PROJECT" window in a folder the same name as you saved the REDCINE-X project file.

7.png


8.png


9.png


Screenshot-2003.png


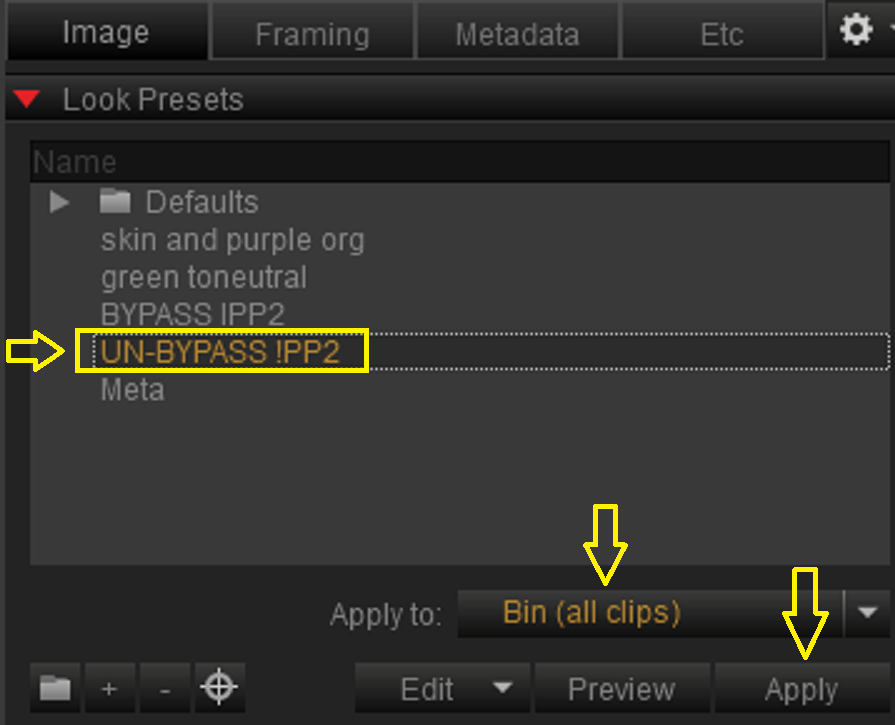
4) To restore the R3D's IPP2 Output Transforms back to them you don't even need to open up one from the bin to the "VIEWER WINDOW", Just select the "UN_BYPASS IPP2" preset you made earlier then choose "BIN(All Clips)" then press "APPLY"

10.png


11.png


12.png
 
Last edited:
RED TECH | Post Workflow | Adobe Premiere Pro


By RED Digital Cinema


I like having OPTIONS. Personally, I really enjoyed importing my footage right into Premiere and having it look like I shot it without any fuss. Made for a smooth editing process and when I grade in the end I can take it to Resolve or mess with settings all I want. But yes, this is a very annoying change that shouldn't be forced on everyone.

It just feels broken.
 
If I had just bought a RED camera second hand - especially a DSMC1 - I would definitely think its broken.

Another big part of the problem is this seems to only have been implemented in Adobe, this hasn't become an issue in Resolve or Final Cut. So its not truly a RED workflow issue its an Adobe integration issue.
 
Back
Top