Welcome to our community

Be a part of something great, join today!

  • Hey all, just changed over the backend after 15 years I figured time to give it a bit of an update, its probably gonna be a bit weird for most of you and i am sure there is a few bugs to work out but it should kinda work the same as before... hopefully :)

Inexpensive gadgets and accessories you can't do without.

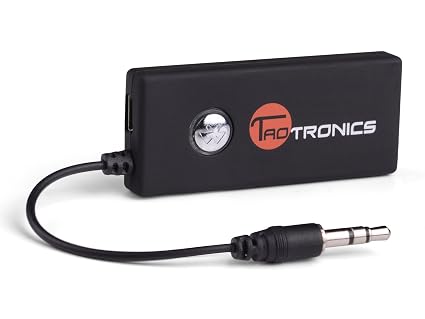
Tao Tronics Bluetooth transmitter has been awesome to work with when monitoring sound out of the Epic. There's a slight delay in the audio but it's worth it when I'm free to step away from the camera with my bluetooth headset on. $30 on amazon!

http://www.amazon.com/TaoTronics-TT...17458945&sr=8-1&keywords=taotronics+bluetooth
61PH3XO%2BSuL._SX425_.jpg
 
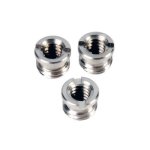
I also use those 1/4-20 Cold Shoes and they're as awesome/bullet-proof/simple as you'd expect. Very low-profile and can be mounted all over a cage.
 
Possibly the lighest EVF setup, this is great. Thanks Dane.

$30 EVF mount:

When shooting in remote or difficult outdoor locations a small, quickly shootable camera configuration becomes very important. I have tried and tried to figure out the smallest configuration to make the camera. I feel the smaller and more convenient to get the camera out of the bag the more you end up shooting....less hassle with the equipment equals more time being creative and developing your shot.


Mounted to the EVF:
http://x.com/Bent-Rail-Mount.html
- I Drilled out the bottom hole because it is threaded, you do not want it to be threaded. This way you can use a 1/4-20 knobbed bolt to tighten it to the Red Side Rail. This allows you to move the EVF to your desired angle one handed!


Screen Shot 2014-01-26 at 8.34.15 AM by Dane Henry, on Flickr

Hand Tightenable 1/4-20 scew. This connects the EVF to Camera/RED Rib
http://www.kesslercrane.com/product-p/cmra_scrw.htm


Screen Shot 2014-01-26 at 8.54.59 AM by Dane Henry, on Flickr

Rubber washer goes between bent rail bracket and camera/red side rail: http://www.ebay.com/itm/Three-15mm-Rubber-Washer-with-1-4-Hole-Tripod-Bracket-/170890765151


Screen Shot 2014-01-26 at 9.04.09 AM by Dane Henry, on Flickr

If you want up Height adjustability you get: http://www.red.com/store/products/bolt-on-camera-guide-clampn

You can go even smaller configuration with only about an 1/8" between camera and EVF, if you get a 1/4-20 male to female 1/4-20 adapter you can put the WC Bent Rail arm straight into the Red Tactical Left Aadater http://www.red.com/store/products/tactical-bottom-adaptor-left


photo 3 by Dane Henry, on Flickr


photo 2 by Dane Henry, on Flickr


Camera can be pulled straight out of the pack, without pluging in cables, putting on batter backs or monitors...just press the power button and start rolling:

DRM-Tilopa1_image by Dane Henry, on Flickr


Hope this is useful to anyone trying to make the camera small and quickly shootable!

Cheers!

-dane
 
Links to products?

Links to products?

Curt,

Where did you buy the corrugated plastic cardboard and foam for your DIY TrekPak? Any links?


Yup! It's pretty easy! I made my own! I bought some... didn't like the 'length' of what they provided... so I made my own from corrugated plastic cardboard and 1/8" foam... Takes me about an hour per case! Pretty easy to do too!
 
Ok... I've received a few PMs about it... so here's what I can share:I bought the corrugated plastic cardboard from a metal shop, believe it or not... you can get them in 4'x8' sheets, (just like plywood) from places like that or sign places. Many 'signs' are made out of this stuff, and it comes in a boat load of colors too. I just looked it up on the net for my city and bought a sheet of it for like $8; unfortunately, I bought this stuff to make a road case about 5 years ago, (and never got around to it!) so pricing may have changed. I've found that you can get this stuff at Home Depot ( http://www.homedepot.com/p/Unbrande...Twinwall-Sheets-15-Pack-COR-2418-15/202038093 ).

You can get it from other places too! You might want to check 'art supply' stores in your area. If you want to 'order it online', you can get it from places like these: (https://www.interstateplastics.com/...fbffMJLAG3gUlaI4Elzr_THFEEWKQ1XSQDBoCbFLw_wcB) or (http://www.farmtek.com/farm/supplies/prod1;ft_corrugated_sheets_panels;pg103140W.html)

For most cases, you'll have TWO outer lining pieces. It helps if you make them identical! This way they fit in the case perfectly!

As for the foam... I went to a place locally called "Fabric Depot." I had purchased a "Store bought" kit and took a piece with me... they measured it and said it was 1/8" of an inch thick. Unfortunately, all they had in stock, in 'closed cell foam' was white... I initially bought 2 yards of it to see if I could do it...

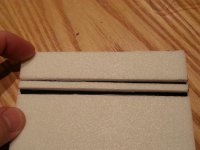
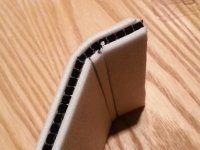
I then used the "Store bought" piece as a pattern... I laid it on top of the plastic, got a T square and an exacto knife... I laid the piece in the correct orientation, so that the 'dividers' or corrugated parts are up and down, so the stake pieces will keep everything together... then I cut it. I can measure if if you'd like... I realized at a particular spot, they cut a 'slit' or pierced the top layer of the corrugated plastic and removed a small 'rectangle,' (the 'corrugated part' basically 'connects' small compartments.... essentially, you're removing the TOP only of a single compartment/rectangle.) Then, the next section is left in place. Finally the third section is then cut out the next rectangle slot, so that they could BEND the pieces. (So if you have three of the 'compartments' in the plastic... the middle is left standing and you cut the TOP LAYER only out of the book ends.) Clever... Very clever.

For my 1550 Pelicans, I cut them identical to the "Store bought" pieces. For other cases, like a 1610 and a 1510 I just figured it out on my own... I held the foam into the case... figured where the corners went and then cut them appropriately.

There is a place that sells the corrugated plastic sheets WITH foam on it! I think this would be the way to go, barring the price! Unfortunately, none of my local dealers returned my phone call. I was anxious to get this done, so I moved on without investigating further! (http://www.coroplast.com/catalog/crosslinked-foam-lamination/)

I took a can of 3M spray adhesive (I bought at Home Depot) and sprayed one side of the plastic. I then took it and laid it on the foam. I left about an inch all the way around. I put some batteries on top of it and let it sit for a few minutes. then I put a piece of cardboard under the foam, and using the exacto knife, I cut the plastic from the foam... Voila! One side done. I repeated for the other side...

Once I got the hang of it... I was spraying and gluing several pieces at once... I think I've made about 15 cases or so now for about $40 in materials!

The little stakes are the hardest part! (Thanks to Jed Ivie) I bought these 'sprinkler' stakes... I actually ordered them from here: ( http://www.irrigationdirect.com/irr...ire-stake-baby-j-style-fits-1-8-to-1-4-tubing )

I found out you can get them at Lowes too! (Same exact thing!) ( http://www.lowes.com/pd_306407-7498...L=?Ns=p_product_qty_sales_dollar|1&facetInfo= ) I thought they were a touch thin, which allowed the pieces to move around a bit... so I went out and got some PlastiDip... I have a few pair of vice grips... so I would dip the stakes into the PlastiDip... pull them out slowly, and now they were a bit bigger in diameter! (The trick was to orient the stakes in a manner that I could let them dry in the vice grips with the round part facing up... a few minutes did wonders! I did this while watching TV at night... I would do six at a time, as that's how many vice grips I own... and then say, 10 minutes or so later, another six...) Works GREAT! They are longer than the "store bought" ones.... but I've found that to be an advantage!

I got to the point where I could make an entire case in about 45 minutes to an hour! I typically made them while watching TV at night. For the 'inner' pieces, I cut them to size, depending on my needs. I like that they fit EXACTLY as I need them, and I didn't have to frankenstein them together the way I had to for the 'store bought' kind.

To create the 'inner pieces' I would create say a 'third' piece the exact same height as the two outer pieces. I would cover that with foam too. Typically it was about 4 feet wide before I started cutting it down for my needs!

I made the mistake once... so let me share... you need to be CAREFUL that you orient the corrugated plastic so that the corrugated parts are up and down... NOT left and right! If you do that latter, you can't 'join' them at the top with the sprinkler stakes! I had a Homer "D'oh!" moment when I made a single 'divider' section piece like that... So I wasted about 6" of materials that way...

I hope that gives some insight... let me know if I can be of further help!
 
Last edited:
Pictures Curt?
 
picked up one of these recently. it can be used for any gear, but it was especially good for packing my Coollights - or any other 1x1 panel. I was able to fit 4 panels in their carrying cases with AC power supplies, barn doors, and CTOs, along with brick batts, stingers, and some light stands quite comfortably a single wheeled box, for a very nice price.

http://www.homedepot.com/p/Husky-35...205053257?keyword=Husky+35+in.+Mobile+Job+Box
 
Curt,

Thanks so much for the write up. Really appreciate it. However, I can't quite picture the part where you cut the top of one side where it bends... Can you illustrate or elucidate a little bit more?
 
Great Little Audio Solution

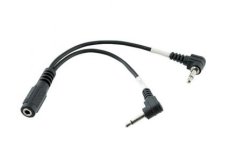
Stereo 3.5mm Mini Female to 2 Mini Mono Right-Angle Male Y-Cable $3.42
attachment.php


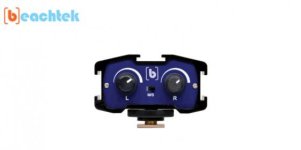
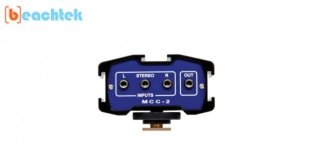
Beachtek MCC-2 2-Channel Audio Adapter $89.00
attachment.php

attachment.php
 

Attachments

  • Beachtek MCC.jpg
    Beachtek MCC.jpg
    9.4 KB · Views: 0
  • Beachtek MCC2.jpg
    Beachtek MCC2.jpg
    10.3 KB · Views: 0
  • Stereo 3.5mm Mini Female to 2 Mini Mono Right-Angle Male.jpg
    Stereo 3.5mm Mini Female to 2 Mini Mono Right-Angle Male.jpg
    7.4 KB · Views: 0
Curt,Thanks so much for the write up. Really appreciate it. However, I can't quite picture the part where you cut the top of one side where it bends... Can you illustrate or elucidate a little bit more?
Pictures Curt?
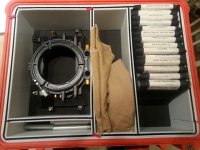
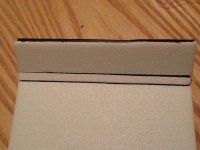
Herbert, Will Kier, and anyone else interested....Please excuse the crude photos, they are from a cell phone in bad lighting...You'll notice that I'm showing you the 'gaps' necessary to get the corrugated cardboard to 'bend.'

K5tAqf8.png


I also straighten it out (this was pulled from a case) and show you what that looks like.

hZ4lhiC.png


Finally you'll see it from the TOP, in which you should really understand what is happening...

SimLQor.png


Essentially, you're cutting the top half of a 'tube/rectangle' out of the cardboard, so that when you try to bend it, the section left in the middle gets mashed or smooshed against the missing piece, and since it's now smaller, it bends. (I hope I explained that right.)

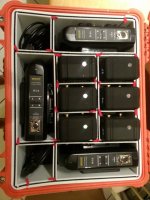
I'm including the pictures of the finished cases again, so it's all in one spot.

MVTc7XZ.png


Typically, I make the 'cut off' of one piece right after a 'curve.' Don't ask why... that's the way the "store bought company" did it, I made my pattern after theirs, so...

U6av90X.png

You might notice the "pull tabs" from the "store bought insert" company... I had some left over, so I used them in a few cases... On the 'stakes' that don't have the tabs, like on the right side above, those are still the longer sprinkler stakes, I just don't have pull tabs on them. You can see a few more under the mattebox on each side. This is also a good image to see how the 'curve' works and how one cuts the piece just after the curve too.


Included are pictures for my 1550 cases. I've made some for 1610s too. I've even made some for some HPRC cases I use too! It's kind of easy and fun when you get the hang of it!
 

Attachments

  • CurtPak1.jpg
    CurtPak1.jpg
    66.5 KB · Views: 0
  • CurtPak2.jpg
    CurtPak2.jpg
    81.1 KB · Views: 0
  • InnerliningGap1.jpg
    InnerliningGap1.jpg
    93.4 KB · Views: 0
  • InnerliningGap2.jpg
    InnerliningGap2.jpg
    92.1 KB · Views: 0
  • InnerliningCurve.jpg
    InnerliningCurve.jpg
    80.2 KB · Views: 0
Last edited:
picked up one of these recently. it can be used for any gear, but it was especially good for packing my Coollights - or any other 1x1 panel. I was able to fit 4 panels in their carrying cases with AC power supplies, barn doors, and CTOs, along with brick batts, stingers, and some light stands quite comfortably a single wheeled box, for a very nice price.

http://www.homedepot.com/p/Husky-35...205053257?keyword=Husky+35+in.+Mobile+Job+Box

Looks great. Thanks!!
 
picked up one of these recently. it can be used for any gear, but it was especially good for packing my Coollights - or any other 1x1 panel. I was able to fit 4 panels in their carrying cases with AC power supplies, barn doors, and CTOs, along with brick batts, stingers, and some light stands quite comfortably a single wheeled box, for a very nice price.

http://www.homedepot.com/p/Husky-35...205053257?keyword=Husky+35+in.+Mobile+Job+Box

With the power cord access, this might (! or might not ;) ) be a cool thing to use as a charge box for batteries. Too bad I don't live in the states :)

584d747c-1198-46c1-910d-e9aef33697ed_400.jpg
 
Back
Top