Welcome to our community

Be a part of something great, join today!

  • Hey all, just changed over the backend after 15 years I figured time to give it a bit of an update, its probably gonna be a bit weird for most of you and i am sure there is a few bugs to work out but it should kinda work the same as before... hopefully :)

In over my head… a question on reframing.

Adam Heath

Member
Joined
Nov 16, 2008
Messages
18
Reaction score
0
Points
0
Age
41
Location
London
Website
www.vivacreative.co.uk
After years following the RED community I felt I was prepared for my Komodo’s arrival.

Infact I’ve realised I’m in way over my head and have almost no clue what I’m doing! I’d love if someone might be kind enough to explain something about reframing for me? I’ve been excited by the prospect of being able to punch in on shots to get a closeup from what’s otherwise a wide or medium shot.

I’m shooting 6k 16:9.

Now if I create a 1080p project in FCPX given I’ll only be delivering a 1080p file, I can of course scale up the footage but I don’t feel I’m getting the most from it. When I play the footage full screen it looks nowhere near as clean as I’d expect. I assume this is because no matter my source material a 1080p project will always be stretched to fill a 4K screen.


But then I’m conscious if I make a 6k timeline and drop my clips on, I can’t zoom in to reframe as now I’m asking a lot of the files that were only ever the same size as the project to start.

When folks speak of reframing are they typically referring to something like a 4K crop of a 6k image? Or am I missing something here? How should I be approaching a punch in on a shot?

Such a daft question I know but I can’t figure out what the intent is when I see mention of this kind of thing.

I’d be forever grateful for any help or guidance!
 
Reframing is done a variety of ways. The critical thing is if you are planning it from the get go or not.

Often a production will setup a frame guide for a frame extraction, while will be within the capture format. For example shooting 6K 17:9 with 5K 2.39:1 frame guide. This allows for extracting and repositioning that 5K "frame" within the full 6K image as needed, like if a character's headroom feels a bit tight or whatever. Also pretty common is integrating digital pans, tilts, and zooms as needed if you have the freedom to do so. And popular in recent years is to add camera shake even.

Cropping in after the fact is common. If delivering a 4K project and capturing in 6K you ideally don't crop in beyond the 4K delivery resolution if you can avoid it, otherwise you're up sampling. That said, whatever makes the shot "better" is likely what you should be aiming at.
 
How does one do a digital pan or tilt? I mean, you'd need to see the top (or bottom) of something that wasn't actually in the original shot there to pull off a tilt.

Thanks.

Stephen
 
Adam and Stephen,

let me get some screen grabs together and I'll show you how to do it in both Redcine-X and Resolve.
 
Last edited:
How does one do a digital pan or tilt? I mean, you'd need to see the top (or bottom) of something that wasn't actually in the original shot there to pull off a tilt.

If you shoot for a 4K extraction within a 6K frame you will have extra image area top, bottom, left, and right that you can tap into.

To do this you use an animation position adjustment.

If you are very good at it, you also integrate the appropriate motion blue and potentially a slight geometric transformation depending on the move.

If you are attempting a digital move and there's "no frame information there", that is a VFX fix more commonly known as a background extension. Rather costly though if you have a main subject like a human you need to extend out of frame. Could be as easy as a simple tracked paint fix, could be as complicated as a full 3D reconstruction of subject and set.

Note that above is one of the cost considerations of choosing a frame extraction/guide workflow. It can save you money if something goes weird.

Another process that's been wrangled into "reframing" is doing performance composites occasionally if you have multiple actors in frame and choosing between a performance from one take or even editing in a bit earlier from the same shot. This is more commonly referred to as a composite VFX fix.
 
This little Padowan has much to learn.

I would love to see some examples.

Thanks guys!

Stephen
 
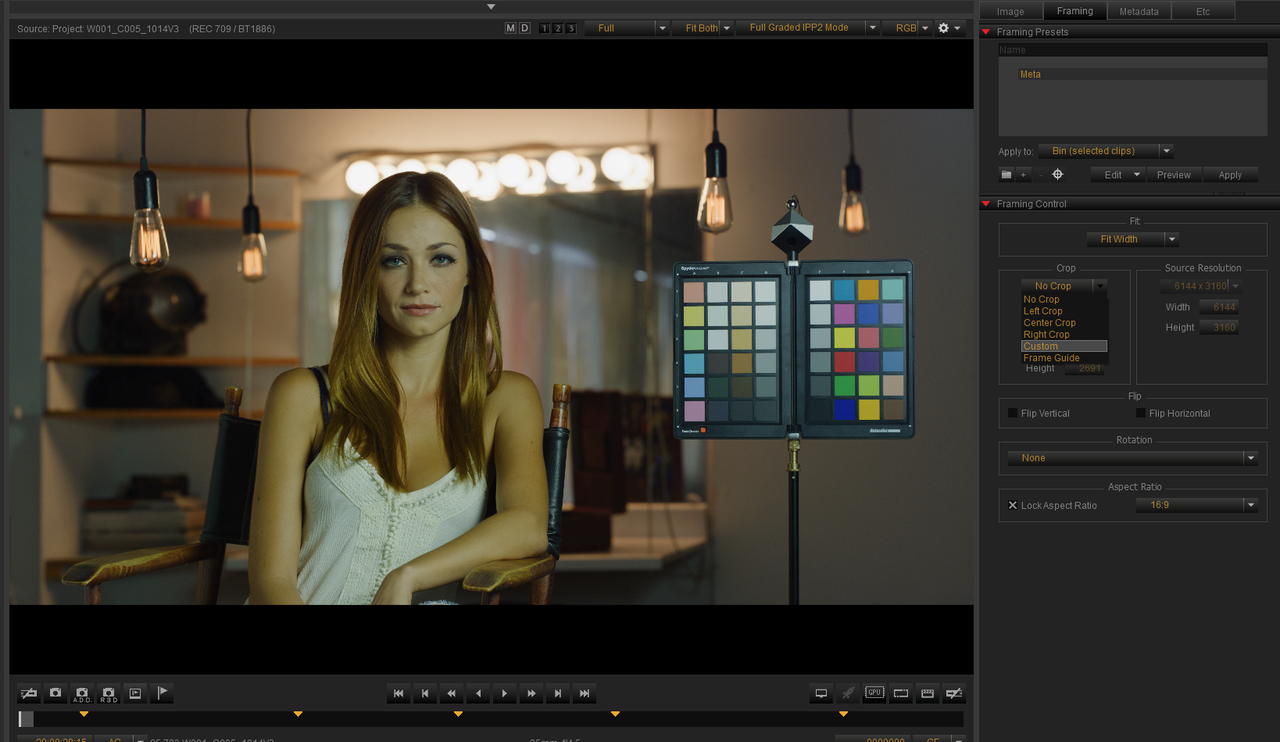
In Redcine-X Part 1

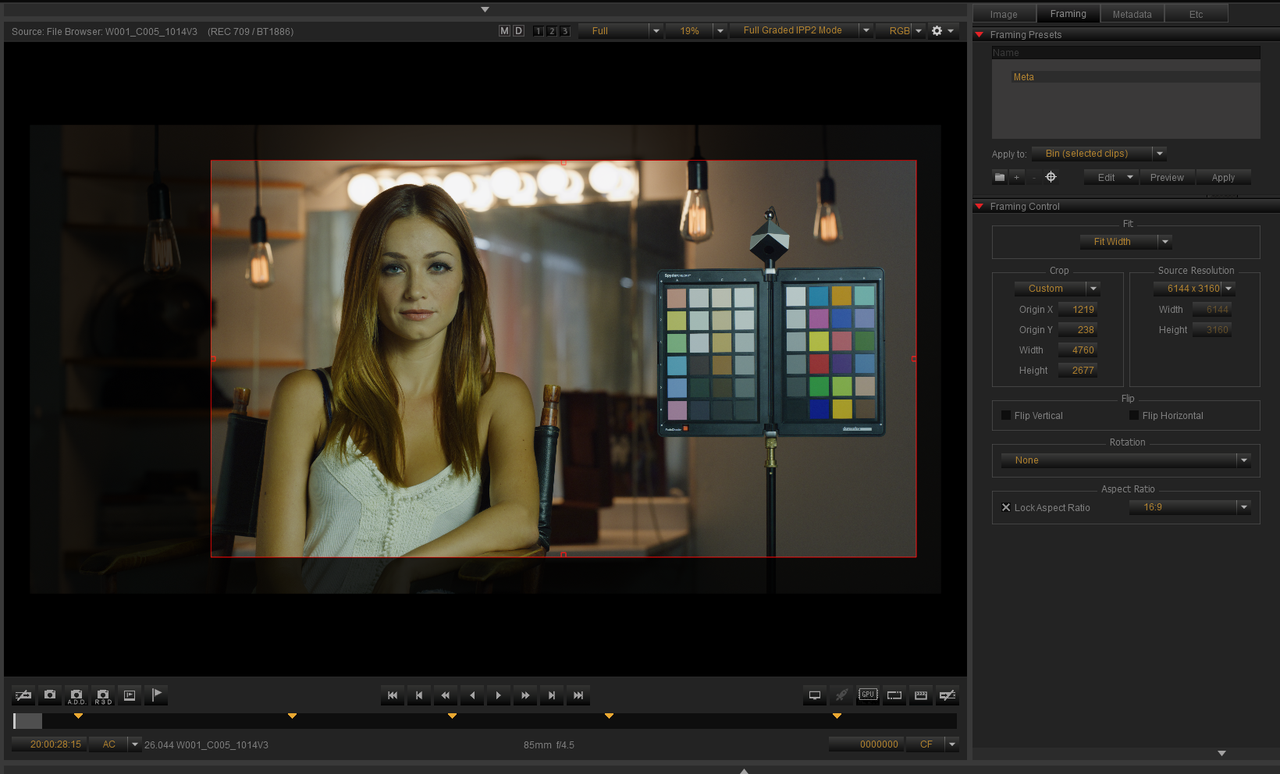
Use "Framing Tab

Screenshot-2945.png


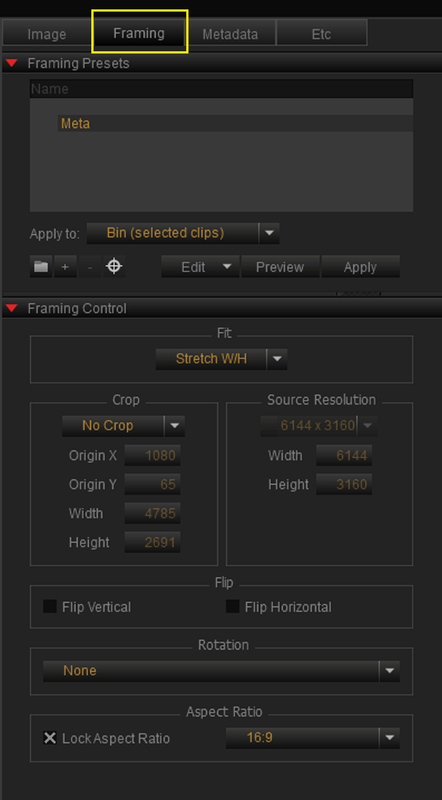
Choose "Framing" Tab

Screenshot-2944.png


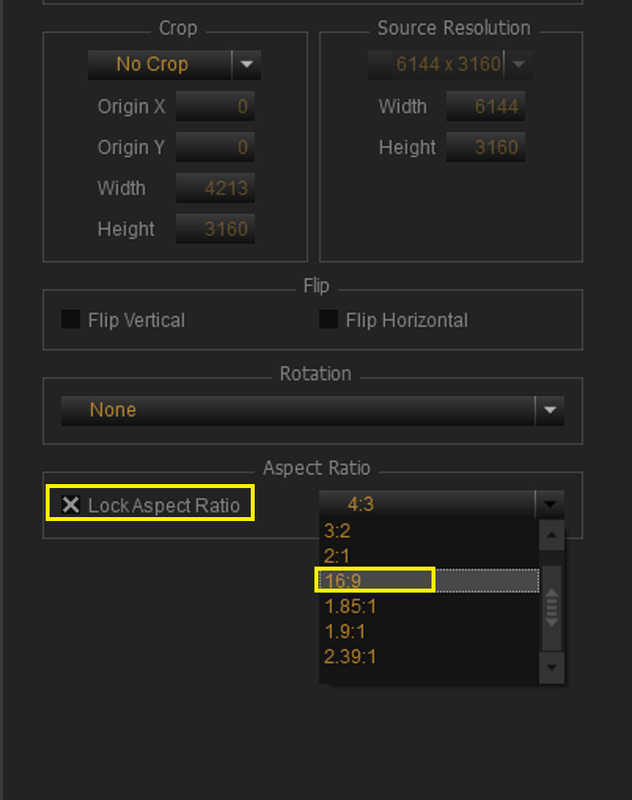
You can Choose to "Lock" the Aspect of the Crop to a specific Ratio

Screenshot-2941.png


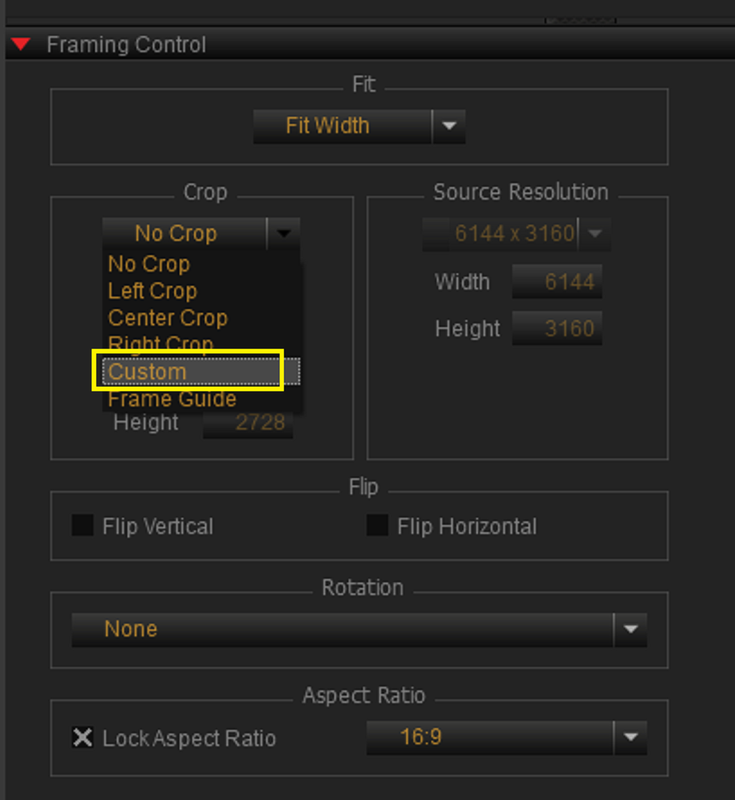
"Custom" will allow you to move the "Crop" box around in the Frame by holding down the "CTRL" button and dragging in the center of the Crop Box. It will also allow you to shrink or enlarge the size of the Crop Box by pulling on the left or right side of the Crop Box or the Top or Bottom of the Crop Box.

Screenshot-2948.png


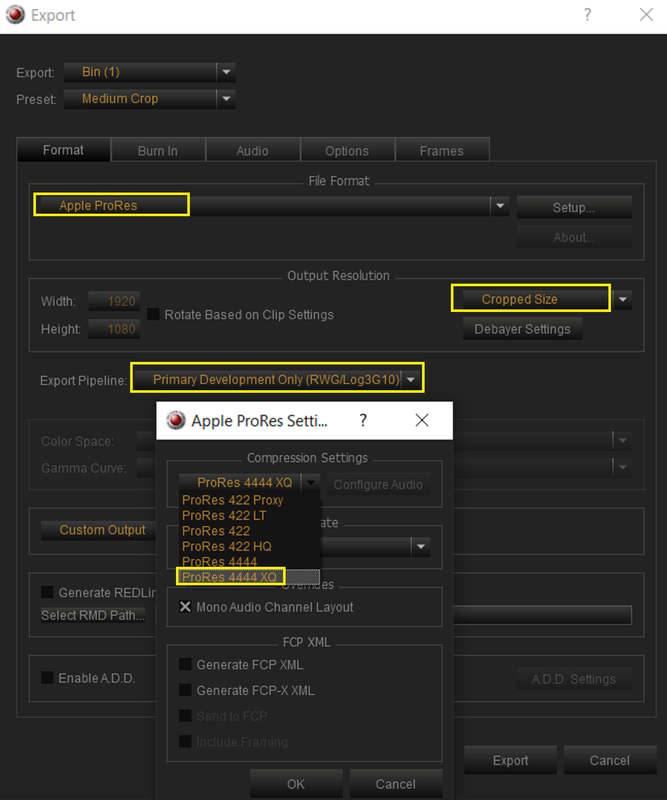
Once you decide on the 16:9 frame crop you wanted then you will have to make some additional decisions.

Screenshot-2952.png


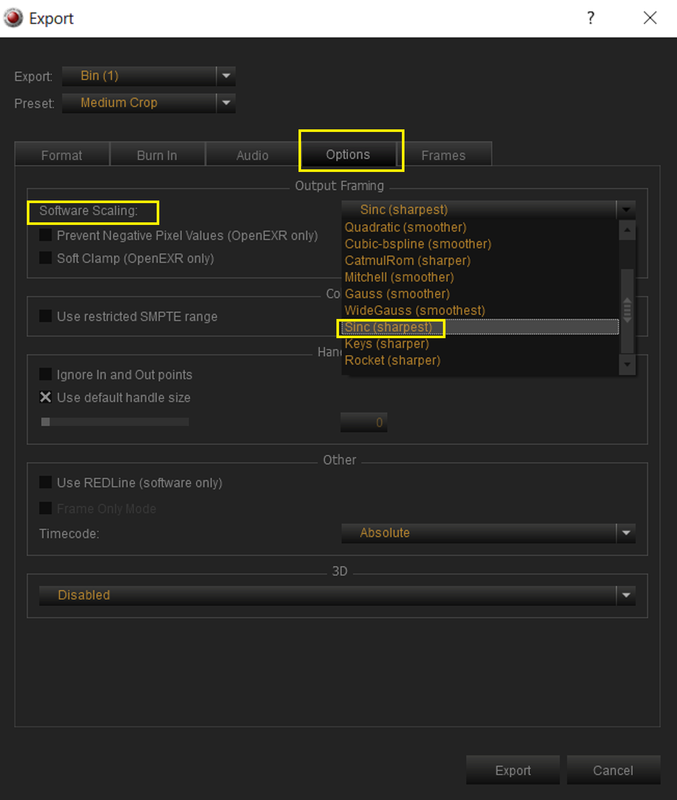
first, what compressed codec you want to export it in, You can't save a cropped R3D file back as a R3D file. And what Scaling Algorithm you want to use. Then export.

Screenshot-2955.png


Screenshot-2956.png


Part 2 Davinci Resolve....Next
 

Attachments

  • Screenshot-2945.png
    Screenshot-2945.png
    26.9 KB · Views: 0
Davinci Resolve Part 2

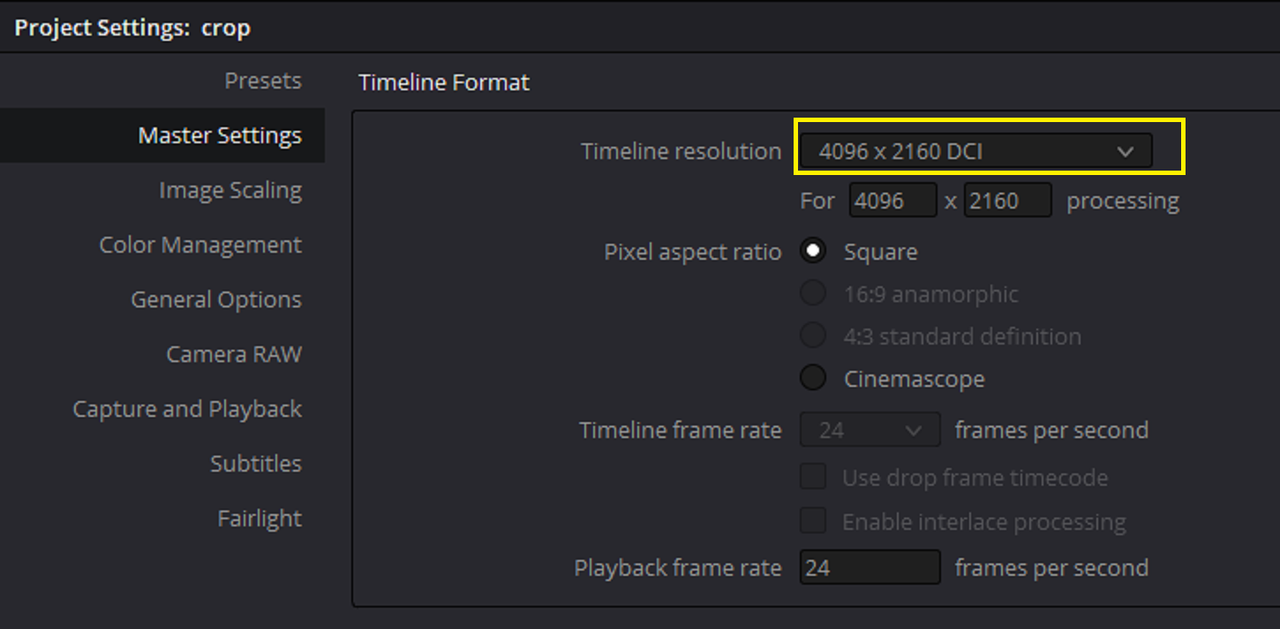
There are a couple of settings you need to make first before you begin

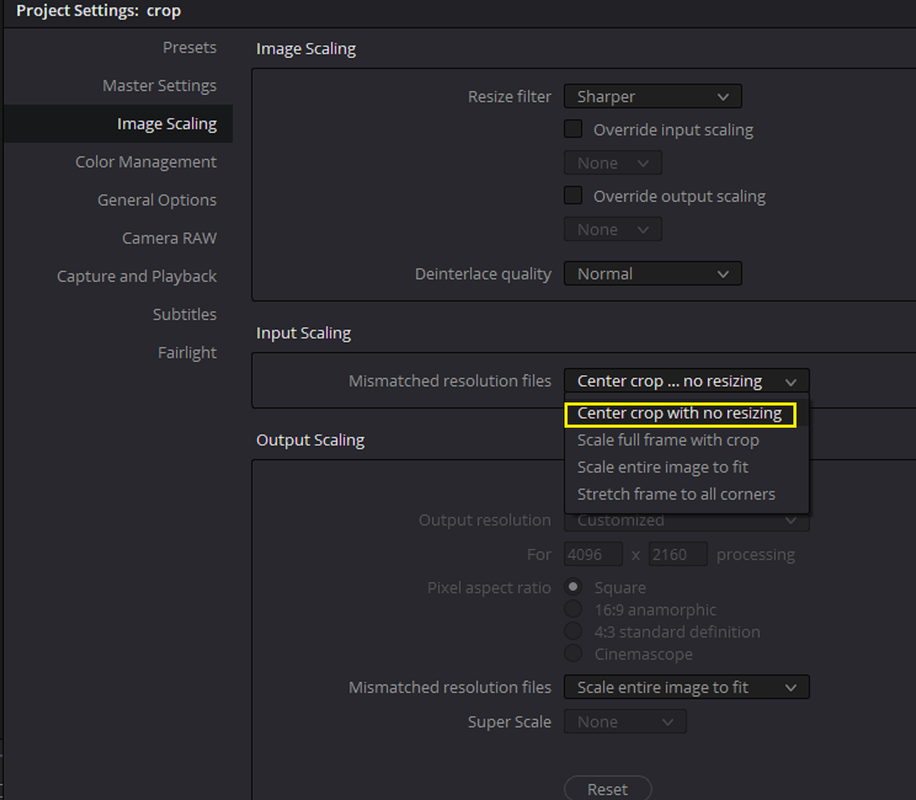
1) the image of Phil's sample file is 6144 x 3160 but I want to crop that image for a 4090 x 2160 DCI frame.

Screenshot-2957.png


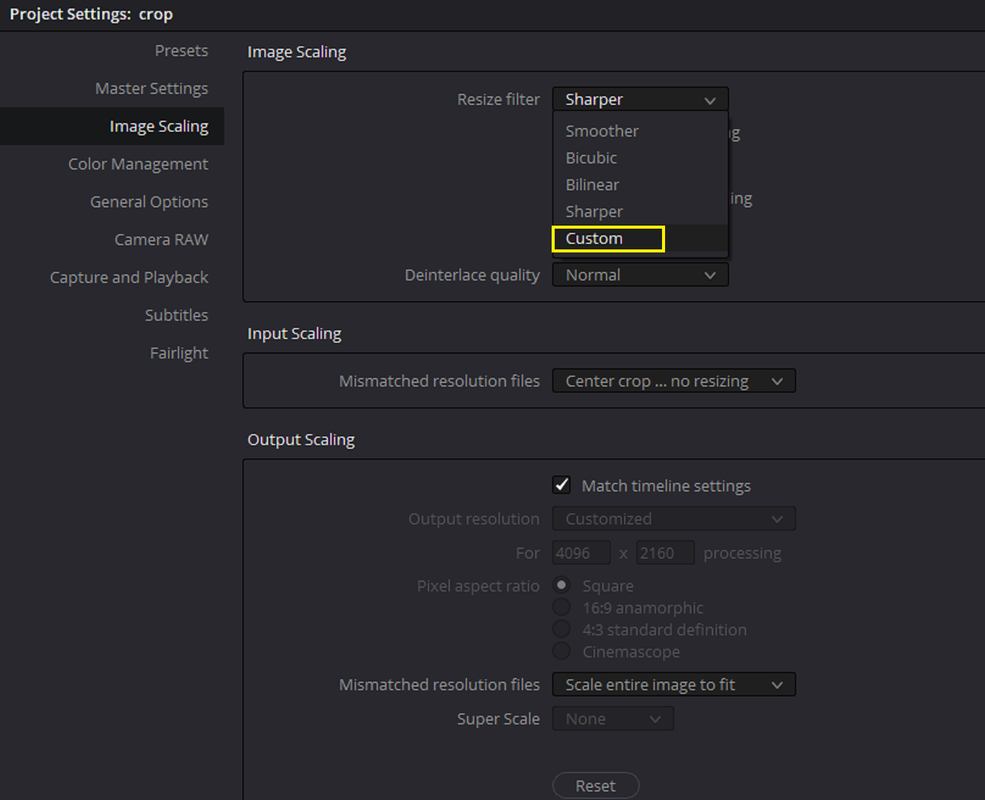
2) Next, I want to choose "Center Crop with No Resize "from the "Input Scaling" menu

Screenshot-2967.png


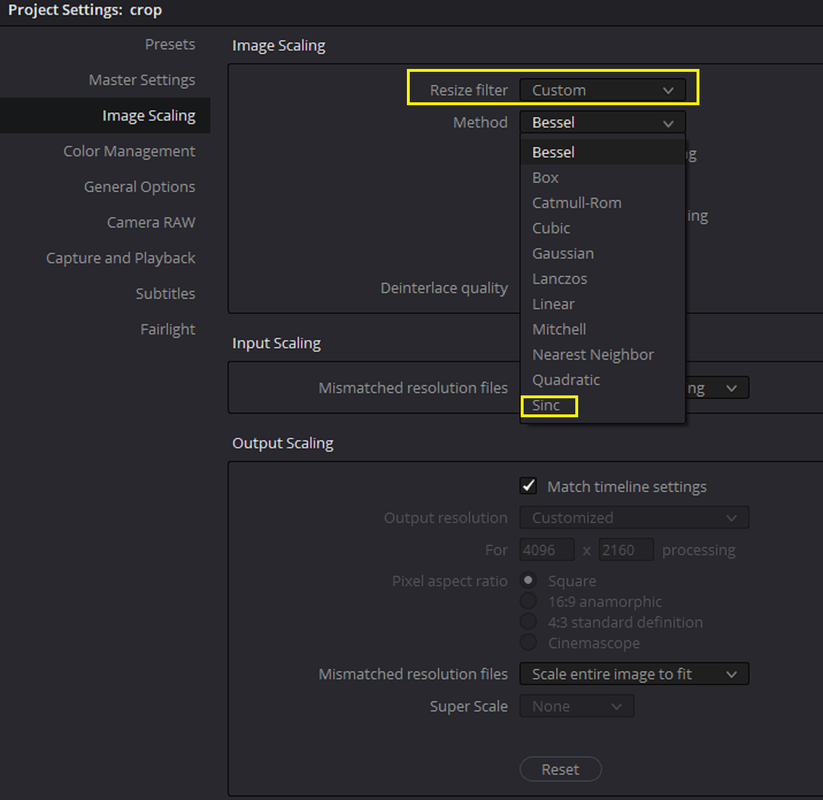
3) Under "Image Scaling", You can choose to use one of the Default Scaling modes or use a "Custom" Scaling Algorithm

Screenshot-2959.png


Screenshot-2958.png

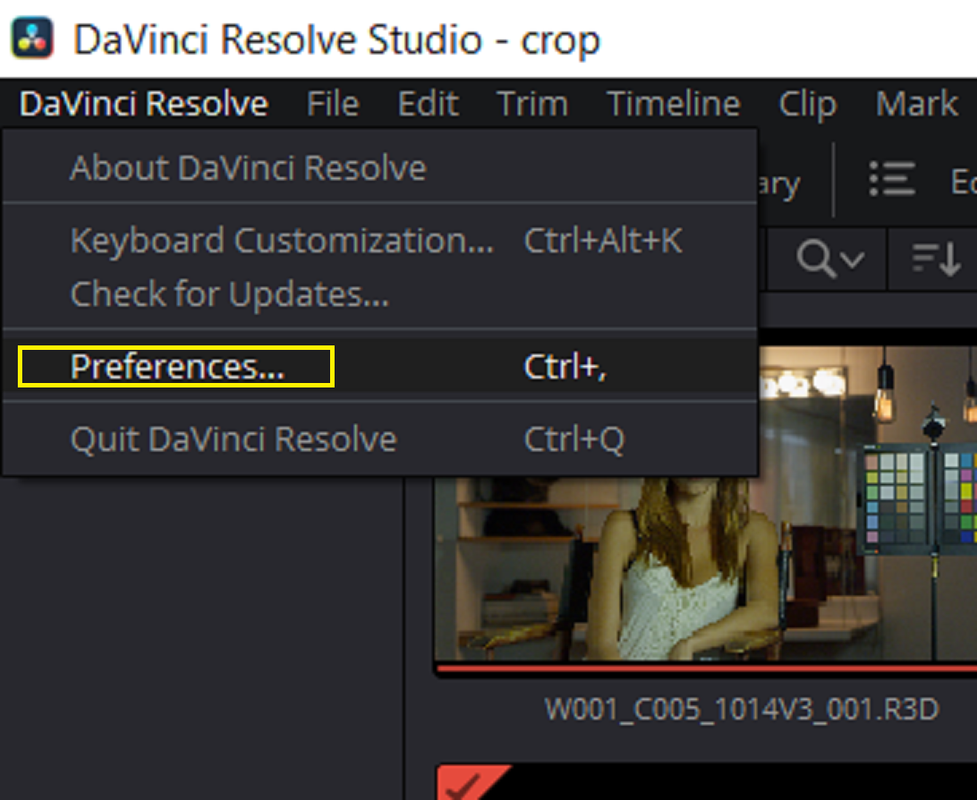
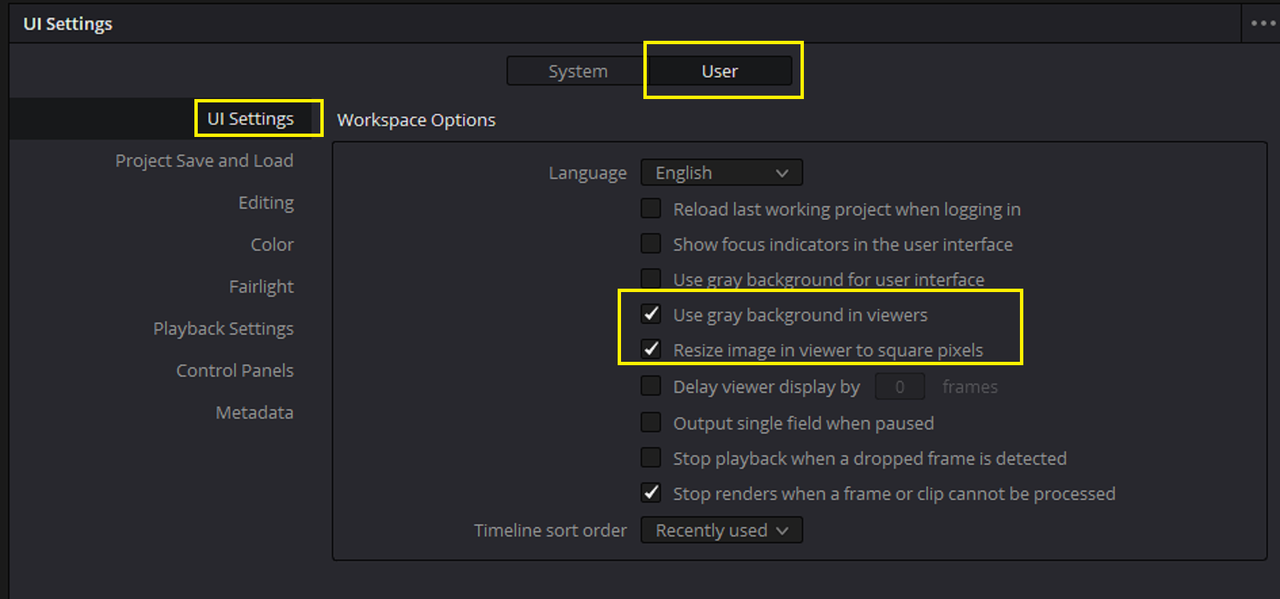
4) Under "Preferences" Under "User" in "UI" settings, you want to choose a "Gray Background" so that you will know that you have filled your cropped frame in the " Viewer Window"


Screenshot-2960.png


Screenshot-2961.png


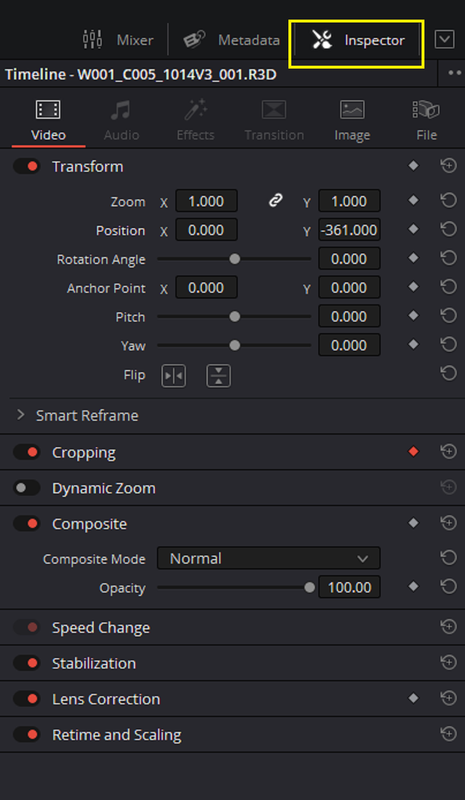
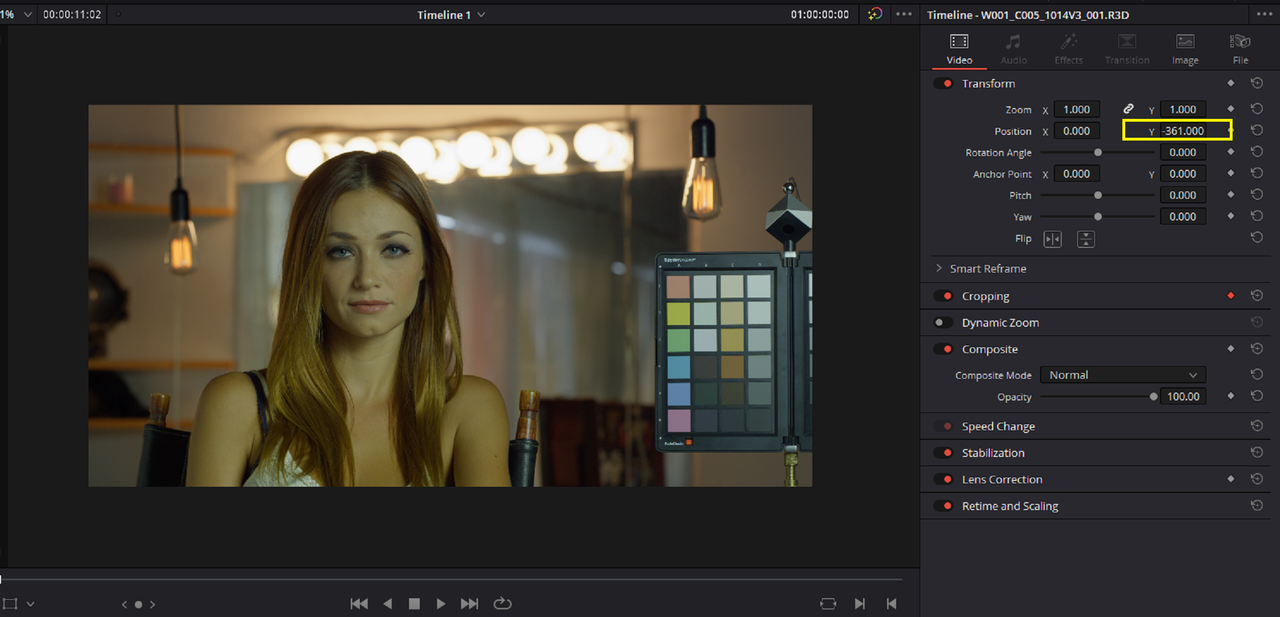
Inspector Tab

Screenshot-2970.png


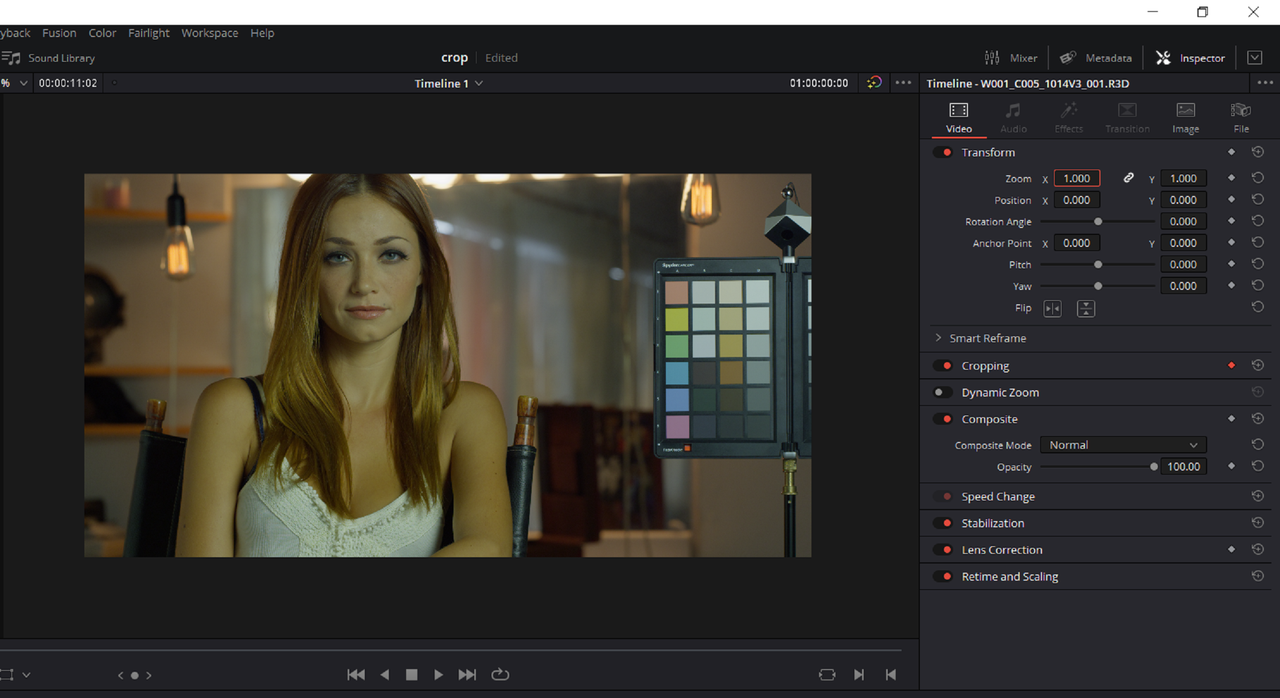
5) Here is the "Center Cropped" frame

Screenshot-2968.png


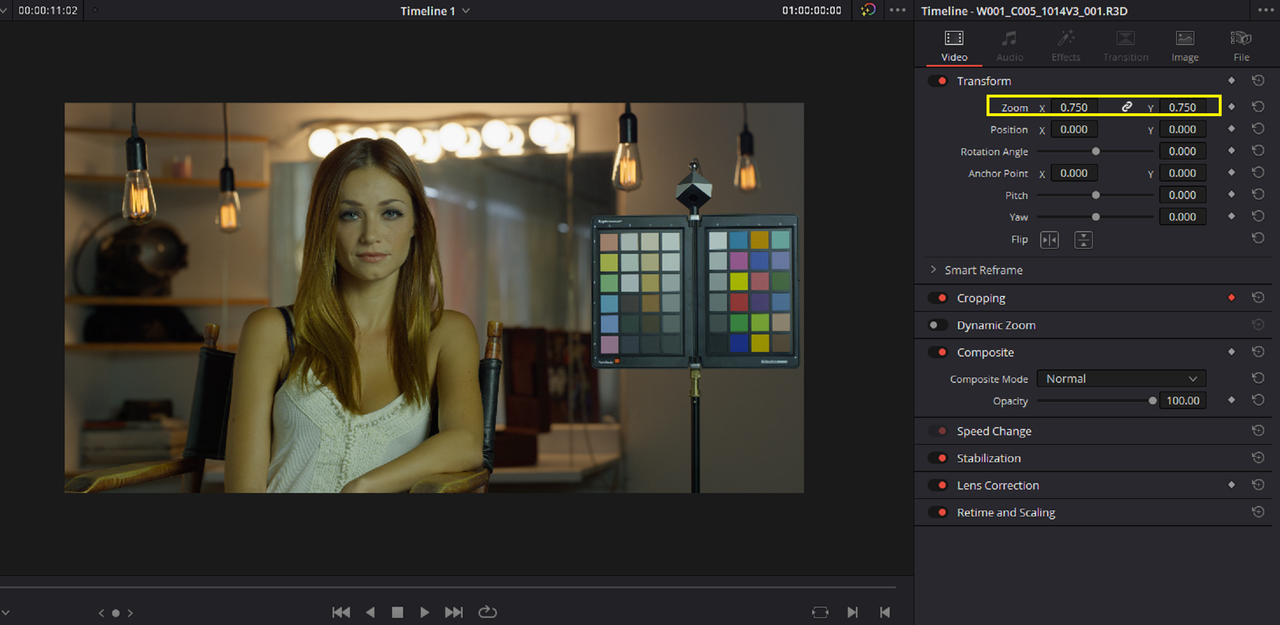
To Zoom Out

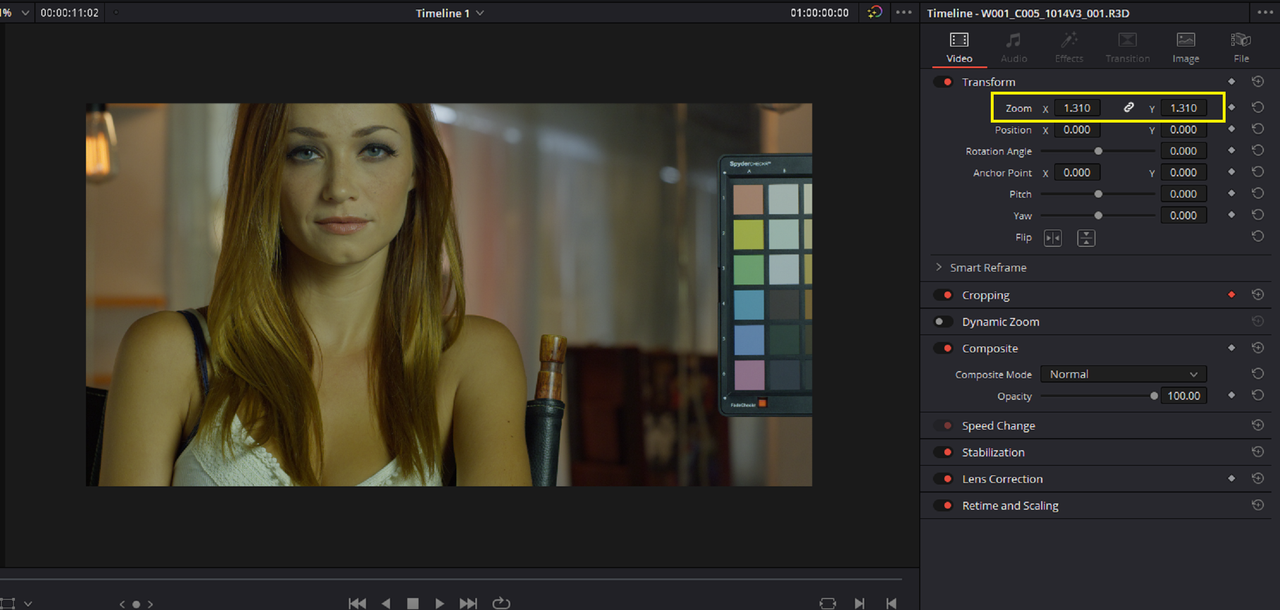
Screenshot-2963.png


To Zoom In

Screenshot-2964.png


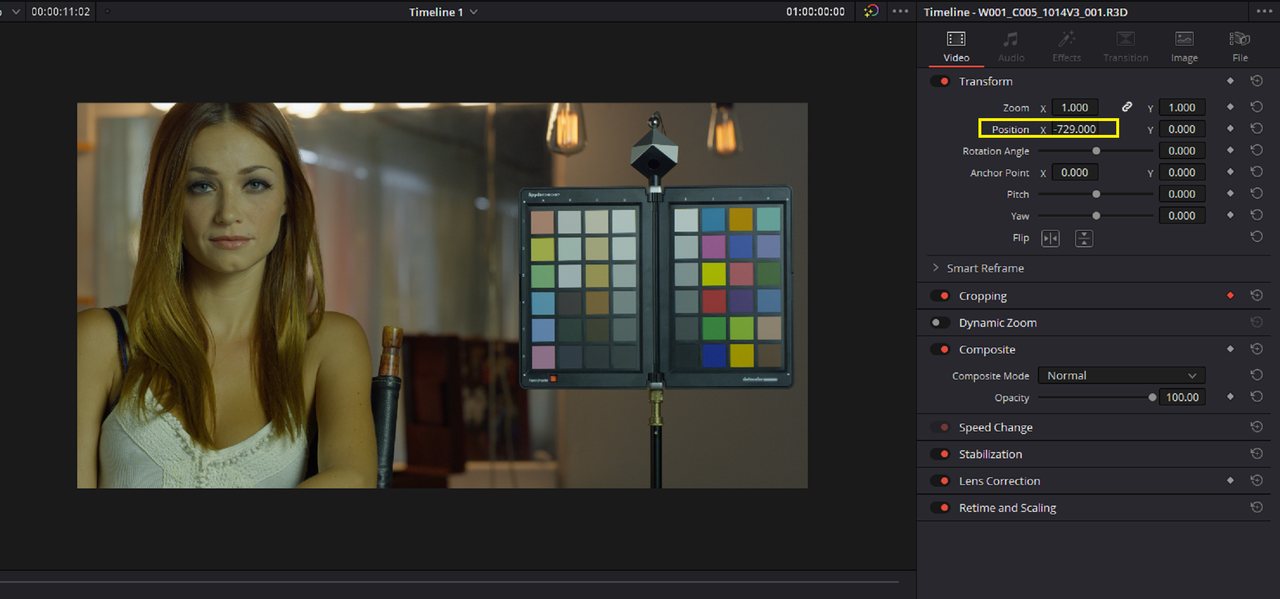
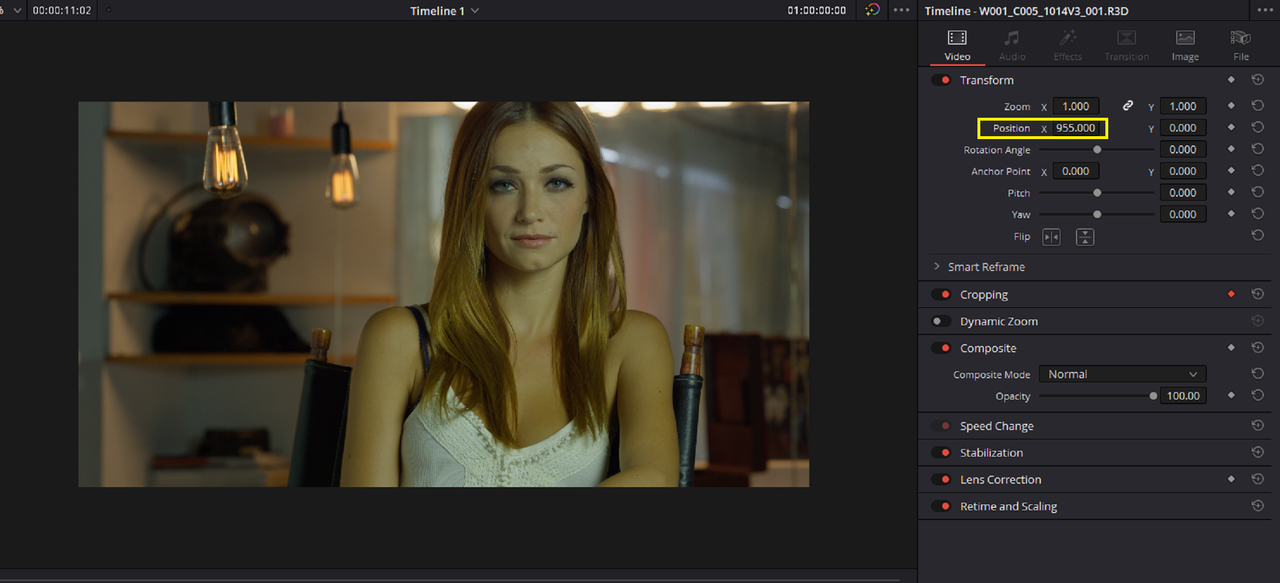
To Pan Right

Screenshot-2965.png


To Pan Left

Screenshot-2966.png


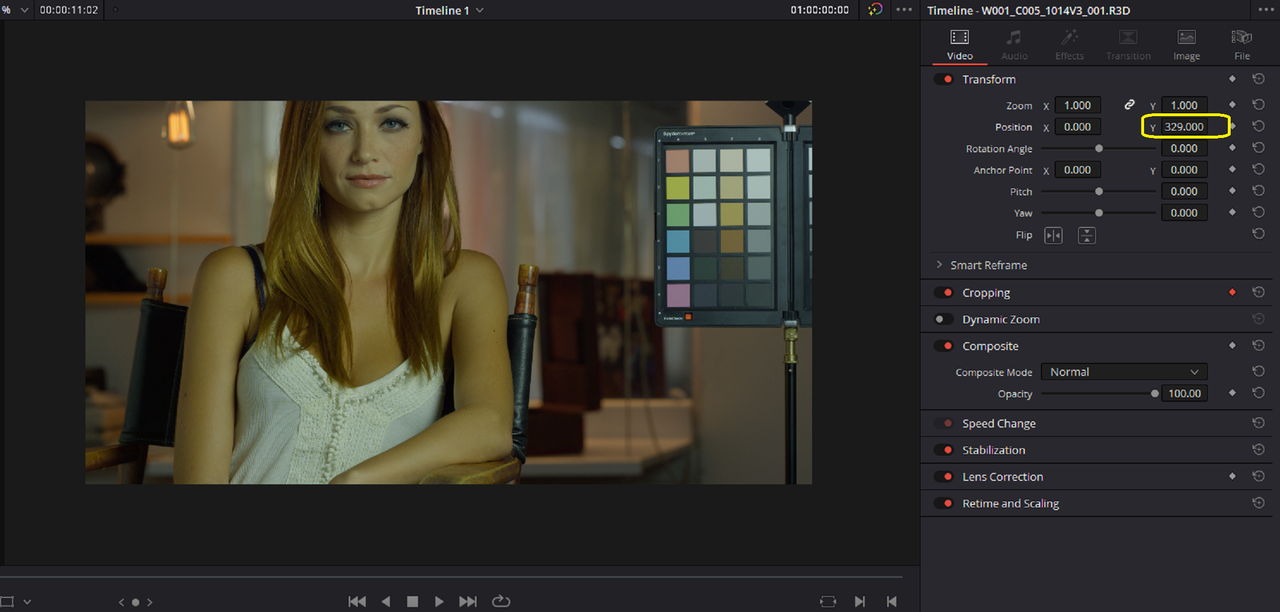
Tilt Up

Screenshot-2968.png


Tilt Down

Screenshot-2969.png


Finally, Export your Cropped video File
 
Last edited:
Super detailed instructions, but I wouldn't call those pans or tilts any more than I would call a push in or pull out a dolly shot. All you are doing is just moving the image around inside the frame, which looks very different than a true pan or tilt. There is no relative movement.
 
Stephen,

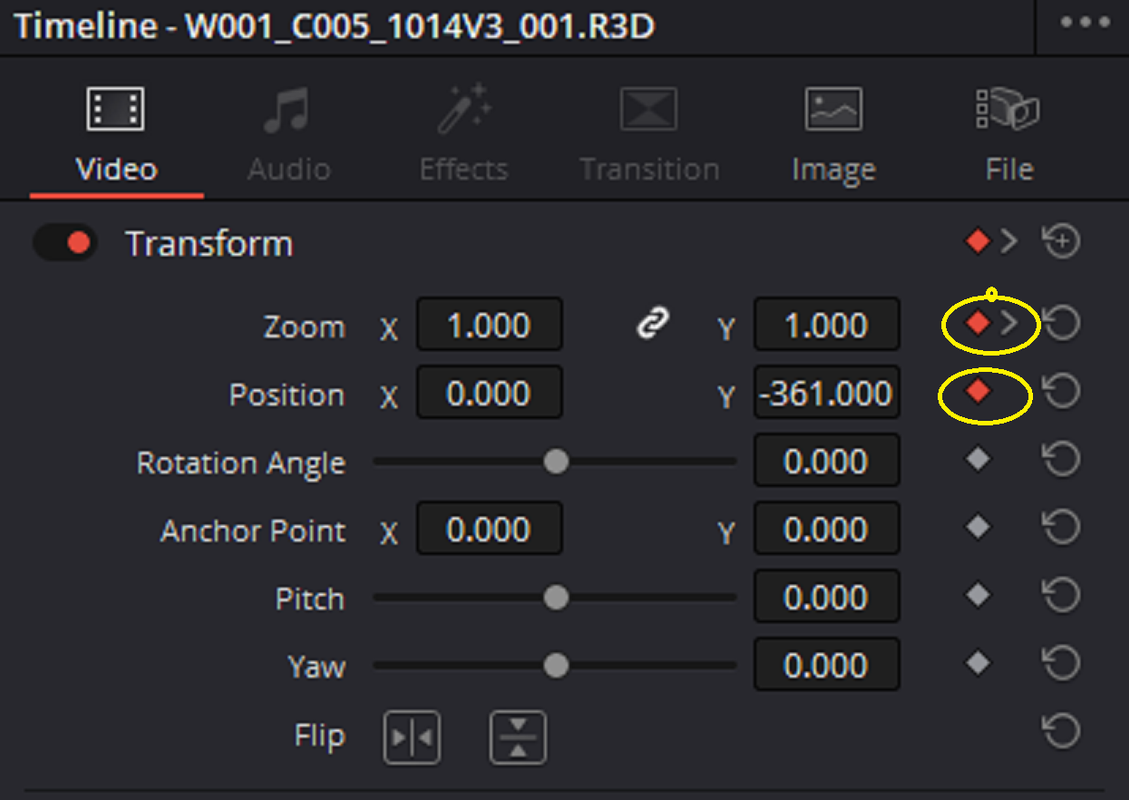
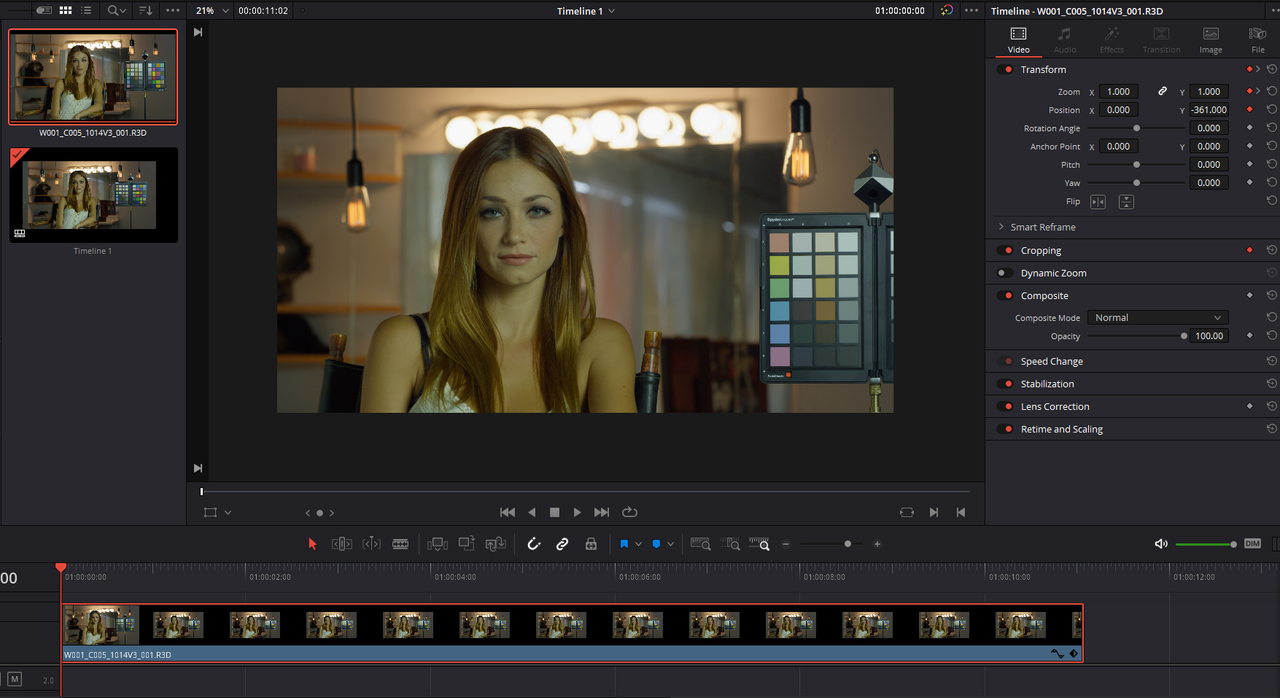
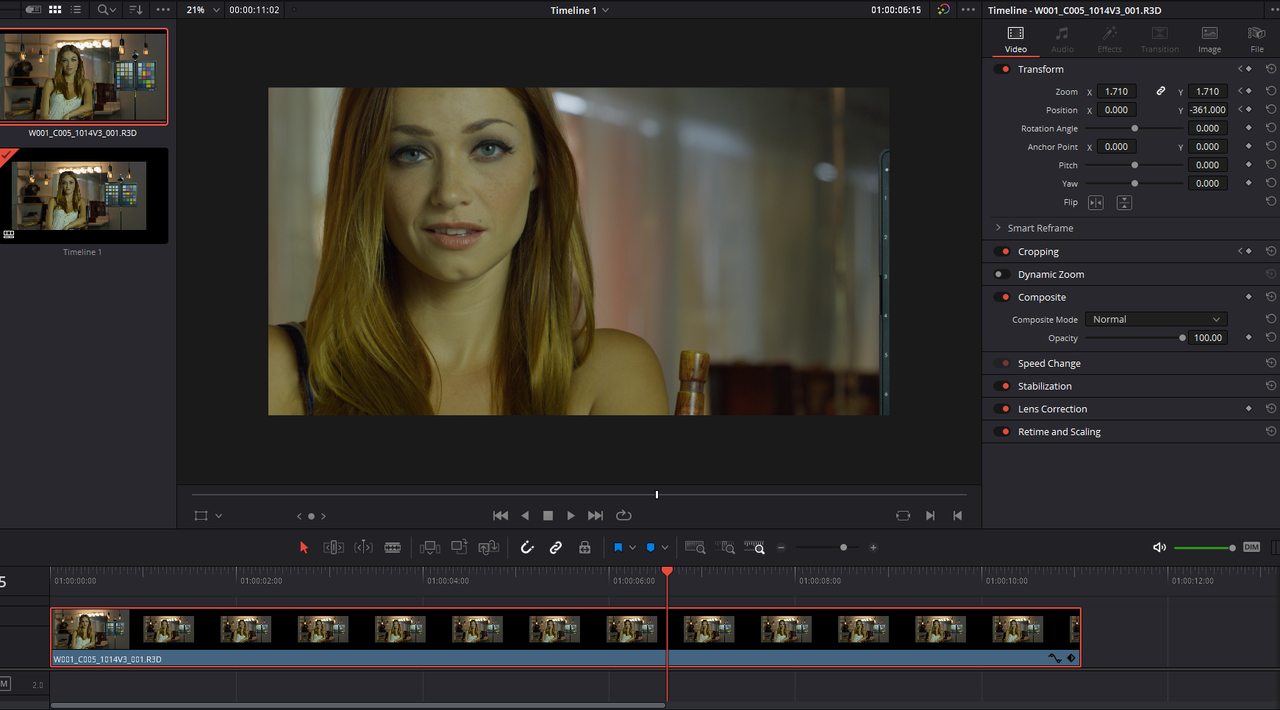
Those where just the settings to use for a crop but you would have to "Keyframe" those movements you wanted by enabling those little diamond shaped buttons to right of those settings for Different "Start" and "Stop" points within each scene.

Screenshot-2971.png


Start Keyframe

Screenshot-2974.png


End Keyframe

Screenshot-2973.png
 
Last edited:
Here are some really rough examples of Zoom, Pan and Tilt movements with two keyframes within the sample image using the "Inspector" Properties. You could use a full frame 3:2 Open Gate aspect ratio frame for a more pronounced Tilt.

SendGB Files
https://sendgb.com/nDEGrcX30eb
 
I was actually surprised how effective the pan and tilt was despite the lack of relative movement. The zoom was, of course, nothing like a dolly shot. I have done a number of very slow zooms and think they work better than quicker movements.

Thanks much!

Stephen
 
I was actually surprised how effective the pan and tilt was despite the lack of relative movement. The zoom was, of course, nothing like a dolly shot. I have done a number of very slow zooms and think they work better than quicker movements.

Thanks much!

Stephen

You're welcome Stephen!
 
What does "Smart Reframing" supposedly do? Thanks.

BTW, the model is beautiful. Is she an actress?

Stephen
 
What does "Smart Reframing" supposedly do? Thanks.

BTW, the model is beautiful. Is she an actress?

Stephen

Stephen,

The footage I used here was sample footage provided by Phil Holland for Red.com. Phil selected this model for his test so unfortunately I wouldn't know.

The Smart Reframe basically tries to track a particular subject within a frame to keep it prominent within that frame for the entirety of that scene. The downside to this is that it always attempts to keep that subject "Centered" within whatever aspect ratio the video was shot in or cropped to. Thats great for a Dolly in or Dolly Out shot. However, when you are trying to adhere to the " Rule of Thirds" within your framing , that can be counterproductive.
 
Okay. Thanks!
 
The Smart Reframe basically tries to track a particular subject within a frame to keep it prominent within that frame for the entirety of that scene. The downside to this is that it always attempts to keep that subject "Centered" within whatever aspect ratio the video was shot in or cropped to. Thats great for a Dolly in or Dolly Out shot. However, when you are trying to adhere to the " Rule of Thirds" within your framing , that can be counterproductive.
Smart Reframe in Resolve is intended for very quick & dirty exports for social media and things like that. I wouldn't even for a second consider using it for a feature.

I was just telling a friend of mine a few days ago, "I think in the hundreds and hundreds of films that I've worked on in the past 10 years, not one of them has had no reframes. Some have had extensive reframes, repos, zooms, pans, tilts, you name it." Ideally, the DP approves all of it, but in some cases I have to go by gut instinct and just fix what looks like a mistake (camera bump, shooting off the set, actor's head cut off, etc.). And all of that was done manually with keyframes and the PTZR controls in Resolve.
 
Smart Reframe in Resolve is intended for very quick & dirty exports for social media and things like that. I wouldn't even for a second consider using it for a feature.

I was just telling a friend of mine a few days ago, "I think in the hundreds and hundreds of films that I've worked on in the past 10 years, not one of them has had no reframes. Some have had extensive reframes, repos, zooms, pans, tilts, you name it." Ideally, the DP approves all of it, but in some cases I have to go by gut instinct and just fix what looks like a mistake (camera bump, shooting off the set, actor's head cut off, etc.). And all of that was done manually with keyframes and the PTZR controls in Resolve.

Marc,

Yeah, For the Dolly in and Out shots demos the smart reframe eats up some of the size of the image leaving you with less image to use. For the Dolly in and out, it would only give you a certain amount of dolly in or dolly out range. You couldn't do very long dolly in or dolly out shots. As you mentioned most scenes have their composition and framing approved by the higher-ups and you will probably not be given much room to change that in post. But I would think it would be much more easy to plan for all pans, zooms, tilts and Dolly shots in a shot list before you even shot your first scenes than having to make stressful calculations at the acquisition stage for creating Pans, Tilts, Zooms and Dolly shots in post to the image.

I haven't worked at your level Marc, So I can imagine that the work would be both time consuming and intensive.
 
Back
Top