Welcome to our community

Be a part of something great, join today!

  • Hey all, just changed over the backend after 15 years I figured time to give it a bit of an update, its probably gonna be a bit weird for most of you and i am sure there is a few bugs to work out but it should kinda work the same as before... hopefully :)

Lighting night interior with all practicals turned off

Abo Jassin

Member
Joined
Oct 23, 2013
Messages
21
Reaction score
0
Points
0
Location
Cologne, Germany
Website
www.jkvisuals.de
Hello friends,

I need some advice and help on lighting an interior night scene. I basically set up all my lights in a way, that´s justified by the practicals in the scene. However this setup requires all practicals to be off, as the talent is going to walk inside of a dark living room in the middle of the night. Any ideas how to light that? day for night to fake moonlight coming through windows? Or even setting up HMI´s outside? Mood: Horror, suspense.
I also noticed in the extra DVD with Rob Zombie´s Halloween, they´d been shooting their night interiors with really bright sources. That left me with a few questions, as I tend to underexpose my night interiors a bit on purpose, depending on the mood.

Thanks in advance for your time!
 
Please do not accept this clip as a representative template of what to do. I am a mug at this game so please pay heed to the words of others who comment rather than my prognostications. The following clip depicts two time periods. - The present day when an investigative journalist ( young female in the intended project ) searches through a haunted house with only her I-phone and a small flashlight to help. Flashback to 1852 when the house was lived in and the murder was enacted. The camera lens iris was set so that exposure was favourable to avoid sensor noise. The camera was also allowed to temperature-stabilise and then a black calibration was done. The following clip was lit :-

 
Passageway - 1.2K HMI gelled with 1/2 CTB, set about 12 feet ( 3.5M ) away from exterior wall on flood directed through disruptive patterned bathroom exterior window and laundry doorway where entry occurs. The passageway was another 8 feet ( 2.2M ) inside of the exterior wall which is parallel to the passageway direction. Fill light on subject was a 500 x LED panel gelled with 1/4 CTB.

Clock on wall dark - 500 x LED panel gelled with 1/4 CTB.

Clock on wall 1852 - 1 x 650 ARRI-style Chinese tungsten fresnel gelled with 1/4 CTO.

Violin man silhouette 1852 - 1.2K HMI gelled with 1/2 CTB, set about 15 feet back from the open-weave curtains out of camera view.

Bible reading man 1852 - 1.2K HMI gelled with 1/2 CTB, set about 15 feet ( 4.5M ) back from the open-weave curtains out of camera view. 1 x 650watt ARRI-style Chinese tungsten fresnel gelled with 1/4 CTO and a styro bounceboard to left of reading man.

This final lighting scheme patently did not work, partially because I am slightly colour-blind in red-green and tend to kill off a bit too much green in feeble attempts at colour-grading but also and please do not laugh, - because the sun came out of cloudcover and was shining bright through a huge violet-coloured bougainvillea in full bloom, the biggest natural violet gel in the entire universe.

I was trying for a sallow kerosene ( Americans call it paraffin I think ) lamp look which is evident on the bible pages but the violet hue is totally wrong. As I said, I am a mug at this game. This test footage was also shot on a SI2K which may behave differently to the RED camera family.

http://www.youtube.com/watch?v=1r5nMDHdxks
 
Last edited:
Robert, thank you so much for your detailed reply. The 1.2K HMI flooding into windows sounds good, and I tend to go that way. Just have to figure out if 1.2K is enough.. I thought about bringing overall illumination up with a few chinese lanterns in the ceiling.. guess gotta test it just as you did.
Definitely challanging, at least for me. I rarely have problems lighting a scene if there are practicals that justify the direction... but never did anything of that kind.

Did you have a specific reason cooling down the daylight-balanced HMIs even more and warming the tungstens even more with gels instead of doing that in post? Those shots look a bit monochromatic, almost like sepia toned or blueish b+w..?
 
Abo. The HMI is supposed to be closer to daylight than warm. Cooling the lighting towards blue is something I do with the SI2K which like the REDs tends to generate gain noise in the blue channel before the others. The blue hue on the HMI was intended to confer a look we tend to popularly attribute as moonlight in movies. As for the desaturated look, it is the nature of our eyesight that as light levels lower, we lose some of our colour acuity which is why I did not increase the colour saturation much from the flat RAW image. The sepia tone was intended to replicate the sickly colour of kerosene (paraffin) fuelled light from a wick lamp. More modern kerosene pressure lamps with a preheat vaporiser system and an incandescent mantle produce a brighter light. I understand these may not have been around in the 1850's. My personal preference might be not to have the china lanterns up in the ceiling but to place them off to the side to replicate the reflected moon glow through windows. As for the HMI through the window for the passageway walkthrough, the bathroom glass has a stippled pattern which seemed to break up the hard shadow of the Fresnel light nicely. The laundry did not so I directed the beam more towards the bathroom window so that the intensity through the laundry doorway and the bathroom doorway was a closer match. The LED lamp was positioned near to the camera but from memory it was above it and pointing directly down the passageqway, but tilted and barned to cut off at the boundary of the HMI light. --- In case you have not encountered the thread, here is a link to one called Ask David Mullen anything. ----------------------------- http://www.reduser.net/forum/showthread.php?2714-Ask-David-Mullen-ANYTHING/page500 --------------- David is a proper accredited DP and knows his stuff as you would expect no less of. He is very generous with his knowledge. Have a look back through the older posts in the thread first before posting your query. There may be something helpful there already which answers your question and will save him having to munch the same meal twice in replying. I would hope that he strikes down any suggestion I have given which is wrong or misleading.
 
Last edited:
Robert, thank you once again for taking the time to clarify, makes perfect sense now. So a CTB gelled HMI from outside sounds right. My idea to bring up illumination with china balls came up, as I fear I´ll have too much contrast inside of the room with the HMIs from outside being the only light source. So china balls might help a bit controlling contrast, especially with a dimmer to dial in to taste. Thanks for the link to the David Mullen thread, awesome load of knowledge there, been about half way through all posts and will shoot my question there once more if my lighting test fails.. Thanks again!
 
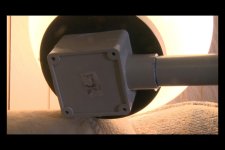
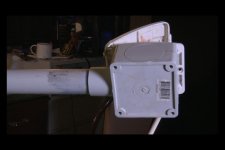
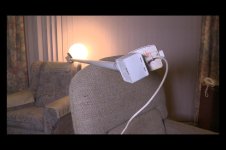
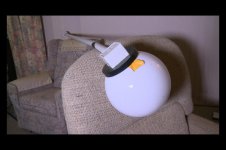
Abo. As for china balls, I have made a couple of similar style lamps on poles for hand-holding. They are not as softly diffused as proper large china balls but work in a similar way. I use two globe-shaped porch lights. They are about 9" in diameter, just big enough to fit a CFL "daylight" globe into. There is also enough space to shove a piece of colour correction gel into. It is not tidy but it mostly works. The lamp-holder fittings are attached with pipe glue onto pieces of PVC electrical conduit. On the far end is an outdoors caravan plug with a flap cover attached to a junction box, which is itsel glued onto the conduit. They are a little more outdoors weather-safe but using them in the rain? - Definitely not recommended. Because they are a practical lamp, they can be handheld fairly steadily out of shot up against a wall or a ceiling for quick setups. I probably should also have a local power switch but have not got round to doing that. They are a little more robust than the paper china balls but need the scratches polished off the outside every once in a while. I tie a calico shopping bag around them when transporting to avoid rubbing against hard surfaces.
 
Last edited:
Robert, that sounds like a cool idea. Up to now, I´ve always used a lightweight light stand with "constant lighting" sockets you get on ebay. I throwed 2 fluorescent 36w bulbs on it and wrapped the china ball around it, did the job... but always fun to try new stuff!
 
Hi Abo, for horror/suspense I would find a way to emphasize the backlight and go for a higher ratio. It works well and is probably why you saw the bigger sources on the Rob Zombie film. In general, front light isn't that suspenseful. You'll need to motivate light through the windows or elsewhere, but I've had success with an implied light source even though it may not be fully motivated within the shot. Depends on how much of the scene you need to see. With a strong edge light and a subtle soft source raising the level that should be a start. A kino with a grid or a skirted china ball / space light works great. Then maybe a smaller soft source to bring up any close-ups. Think as few lights as possible. Good luck!
 
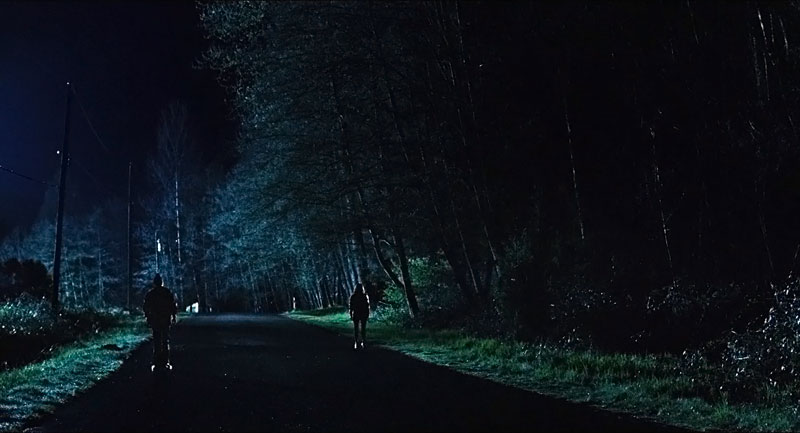
Often big lights are used at night but on cranes at great distances to cover a large area, so the amount of light actually hitting the actors is not necessarily a lot. I had a road to light in "Jennifer's Body" where I had two 18K HMI's on a condor down the road as a backlight and I still had to push the 500 ASA film one-stop and open up the lens to T/2.0 just to get an exposure:

jenbody2.jpg
 
Hal, thank you for that genre- related thoughts. It´s exactly what I´m after, and I get the point of creating suspense through a higher ratio. Guess I´ll motivate couple HMI´s as moonlight through the windows. There are a few super wides, those should be the most challenging shots. I just saw "The Conjuring" and noticed the same moonlight-motivated lighting through windows in a few scenes and really liked the idea of not seeing parts of the room. Thank you!
As a general rule, would you shoot those scenes at an exposure level you´d end up with in the final edit or go for "usual" levels and bring it down in post?
 
David, thanks a lot for taking the time and giving us some input. That shot looks fantastic yet simple, and again the higher ratio Hal mentioned, and a nice edge/rim. That really helps getting an idea how to handle wide night exteriors.
 
Abo, my instinct is to always go for a dense negative. So, I'd shoot it per usual but maybe back off a touch to protect your highlights. I try to light it so it looks great and if there's enough light to open up from there, great. If not, but the shot looks great then go for it.

Cheers!

H
 
As a general rule, would you shoot those scenes at an exposure level you´d end up with in the final edit or go for "usual" levels and bring it down in post?

Split the difference, underexpose for the look but less than the final amount so you have some flexibility to adjust the level.
 
Abo. Here's some happy snaps of the porchlight arrangement. I made two of them. I expected one to fail fairly quickly and had a second ready to modify for when the first one broke. So far it has stayed together. The original small wire and paper china lantern a crew was using frightened the tripes out of me. It was very much home made. It was a broomstick, a loose globe holder gaffer-taped onto the broomstick. The china ball hung off the loose globe holder and much of the time it hung swinging from the inner coloured wires which had exposeded by stretch, when the gaffer tape became loose after a lot of use. My porchlight is far from ideal but safer than the broomstick. Where you are the electrical product will be different. The tube was 32mm electrical conduit and onto each end is glued a single inlet junction box. On one junction box the lampholder was fastened by drilling four new screwholes in the lampholder base to match the existing four cover plate screw holes. The lamp base which is flat replaces the cover plate. The other junction box cover plate has been replaced by a caravan weather-resistant power input socket with flap. New holes had to be drilled in the power input socket mounting face to match the screw holes for the cover plate. There is no provision in the lampholder for an earth connection. The parts except screws are all electrical grade plastic. Except for poking a finger into the lamp socket itself with the power switched on, no one should get themselves shocked. If you make one of these it will be wise to enquire if the arrangement passes code in your country. I may fit a local weather proof on-off switch in the future so that there is less chance of some clown shoving a finger in the lamp socket onto the bare live pins and being electrocuted. The piece of yellow tape on the ball where it attaches into the black base is to stop the ball from working loose in use or in shipping. If compact CFL globes are used, they should be removed when transporting the lamp. Because it is a domestic household fitting, it is not designed for movement and has no positive latch for the ball which inserts into the base and then is rotated about 120degrees to a stop point. I originally taped the ball and base together with the yellow tape but it got folded under by someone else. I found it worked just as well there by taking up looseness and adding a bit of friction. I had two handgrips cut from black foam pipe lagging but they are long gone. I can't slip new ones onto the tube because it is permanently glued into the junction boxes.
 

Attachments

  • LAMP  01.jpg
    LAMP 01.jpg
    89.4 KB · Views: 0
  • LAMP  02.jpg
    LAMP 02.jpg
    77.3 KB · Views: 0
  • LAMP  03.jpg
    LAMP 03.jpg
    91.7 KB · Views: 0
  • LAMP  04.jpg
    LAMP 04.jpg
    93.5 KB · Views: 0
Last edited:
Robert, that looks like a solid piece of helpful and handy light! Thanks for the detailed description and the pictures!
 
Eric. The CFL globes are indeed breakable as are incandescants or other practicals which might be plugged inside. The ball itself is plastic so all that happens is that it gets scratched unless of course it suffers a severe insult in which case any other lamp will also be likely broken. If the ball was not plastic, I would not go anywhere near my actors or crew with it. In the event of a good smack and the CFL inside shatters, it remains contained within the ball for safe disposal and cleaning off set. The paper china ball does not do that for you. - That said, the product you have linked to certainly appears worthwhile and is very cost competitive with rolling one's own from electrical trade components and will be more efficient as the plastic globe does lose some light. - Thanks for that link.
 
Last edited:
Eric. The CFL globes are indeed breakable as are incandescants or other practicals which might be plugged inside. The ball itself is plastic so all that happens is that it gets scratched unless of course it suffers a severe insult in which case any other lamp will also be likely broken. If the ball was not plastic, I would not go anywhere near my actors or crew with it. In the event of a good smack and the CFL inside shatters, it remains contained within the ball for safe disposal and cleaning off set. The paper china ball does not do that for you. - That said, the product you have linked to certainly appears worthwhile and is very cost competitive with rolling one's own from electrical trade components and will be more efficient as the plastic globe does lose some light. - Thanks for that link.

Got ya, nice, the plastic could be useful since you could easily scrim or skirt the unit to control the light. We do that with the china balls, but the plastic would hold up a bit better.
 
Back
Top