David Birdy
Well-known member
- Joined
- Dec 21, 2007
- Messages
- 1,059
- Reaction score
- 0
- Points
- 0
I like to use the IRE meter!
Keep the Whites @100-105 & Black at Zero......
Dave
Keep the Whites @100-105 & Black at Zero......
Dave
Follow along with the video below to see how to install our site as a web app on your home screen.

Note: this_feature_currently_requires_accessing_site_using_safari
I like to use the IRE meter!
Keep the Whites @100-105 & Black at Zero......
Dave
... what a novel idea... I really like the ansel adams zone system as it is something i understand without needing to read a ton on reduser. no that that would stop me from reading a ton on reduser. The biggest confusion for me deals with the eight thousand different ways people describe to use these meters. Everytime i start to think i understand the camera, another person describes their method. Personally i am in the all meters in RAW crowd. i think the best idea given has been the histogram with a line for veiw mode peaking, but measured for raw.Apologies to our color challenged cohorts but I think this is the holy grail. I actually printed out the page from the manual with the color key for false color, laminated it and keep it at camera. Not only would I love to see false color based on RAW but also charted to IRE values or Ansel Adams Zones.
HI Jannard
We are planning to shoot a longlenth movie with the red. But I didnt have any ezperience with the red, what would you recommen to me,Which one is good 2k or 4k, where we should eddit, with fin. cut or avi. What format you rcomment for final print its goint to be film print, or any tips for this camera its goint to be so helpfull. I usually work 35mm 16mm, thats why I have so many unknown things for me.
Thanks
Also , wellcome to any one who have experience with red one.
No, just because an area is dark doesn't mean it has to be noisy. Obviously an image will normally contain tones below 18% grey value -- it would look pretty boring if it didn't!
Basically at the extreme bottom end of exposure, there is information being captured... but it lies in the noise floor, so if you can live without seeing that faint detail in the murk, you are better off letting it go to black in the final color-correction and thus hiding the noise there.
As for noise in general shadow areas above black, it all depends on the overall level and your color-correcting decisions -- if you have enough exposure in the shadows to push them "down" a little in brightness, then they will look fairly clean, but if you don't have enough exposure and have to lift them "up" at all, then noise will also appear. So you can light for mood all you want as long as you don't change your mind and attempt to bright up low-level detail in the final color-correction, and if you want even cleaner, less noisy shadows, add some weak fill to them and basically crush the bottom end down a little to darken it.
")
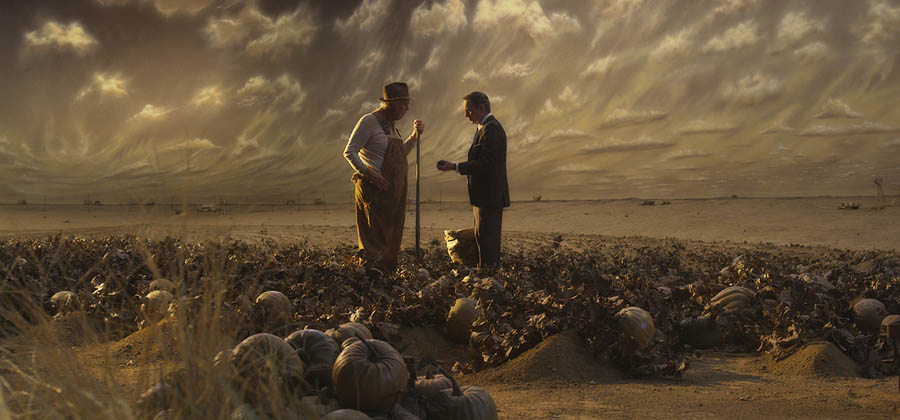
That was all shot on a soundstage and I deliberately clipped parts of the sky backing to make it look more real. It was painted medium brown and I found that it looked more realistic overexposed so I pounded it with light.
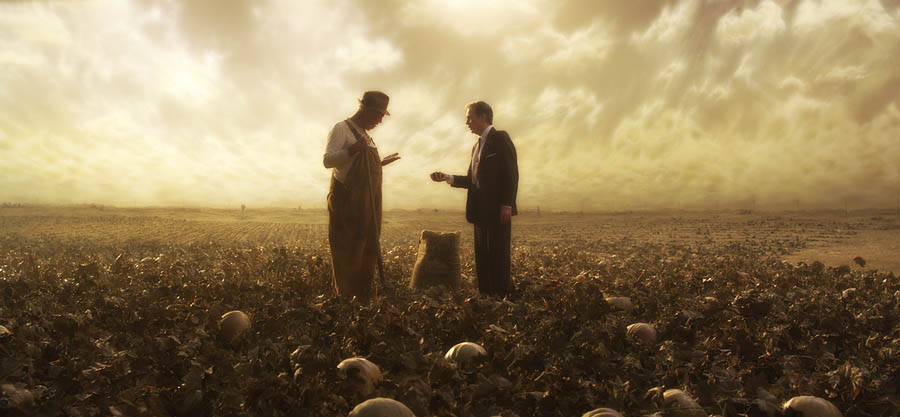
This was the only scene we shot twice because it was the first scene shot on Day One and by Day Ten I had learned so much that me and the production designer Clark Hunter asked for a second attempt. Here was the first version where you can see the true brightness of the sky backing:
And here was the reshoot where I overexposed the sky by spotlighting it from the ground:
Yes, there is some clipping in the sky but that would happen in real life which is the point, you don't always want a perfectly balanced image because it can (A) be boring, and (B) not always be realistic.
I mainly used my light meter and the set monitor, occasionally looking at the histogram in the camera, but since I was not operating, it was not easy seeing that. I also looked at TIFF frames every night of each set-up and made adjustments to my exposure technique the next day.
Now if I were really outside shooting into a hot sky, I'd probably use an ND grad or attentuator to control the brightness to something manageable, plus adjust my exposure, but in this case, I could control it with lighting to the level I wanted.
Remember, clipping just means that something has gone white with no detail in it, just white. That's not always a mistake as long as you remember that no detail means no detail, there's nothing there that can be pulled out in post.