Welcome to our community

Be a part of something great, join today!

  • Hey all, just changed over the backend after 15 years I figured time to give it a bit of an update, its probably gonna be a bit weird for most of you and i am sure there is a few bugs to work out but it should kinda work the same as before... hopefully :)

Exposing + Native ISO

ISO is a static, reference value (or it should be... hint, hint RED). ISO doesn't dictate your exposure choices. You do.


Say you're shooting a high-key day exterior shot. Maybe something in the desert. 21mm lens. Sun clearly visible in your frame. Sand dunes in the distance. And your main character front and center. Maybe something like this but with the sun in the shot as well:


Lawrence-of-Arabia-600x362.jpg


Your incident meter tells you that proper exposure for your leading actor's face is T8. OK. You take a meter reading of the sun. Unsurprisingly it's 10 stops over "key" or your nominal scene referenced exposure based on subject matter (your actor) and ISO (800 via DRAGON). The bummer is you've only got 8 Stops over Key. What to do? Well you can easily close the lens down 2 stops to a T16. Problem is that now your Key or actor or scene referenced middle-grey/18% Grey is now 2 Stops underexposed. To get your Key back to proper exposure (creatively defined by you, the DP, not technically defined by ISO) you'll need to bring out a couple of 18K HMI's and punch in some fill light into your actor's face. Problem solved. You expose at T16. Your shot looks amazing.

Same scene, different approach: It's the desert. It's hot. Really hot. You're sweating. Your actor is sweating. You've just climbed up this stupid sand dune to get your incredible shot. It's gonna look amazing. But you'd really like a bottle of water. You take a meter reading of your actor. T8. OK. But you don't want to shoot with such a deep stop. You prefer shallow depth of field. You want to shoot at a T2. So you call to your trusty AC, "Throw in a N12!" Ooops. He left the filters back on the camera truck. It's gonna be 30min to get them. "Forget about it", you decide. My DRAGON is a 200-2000 ISO shooting machine! You'll just compensate for the exposure change in camera. Who wants to shoot day exteriors at 800 or 2000 ISO anyway? So you set your DRAGON to 200 ISO. That's only 2 Stops. Now according to your meter you should expose at T4. But you wanted to expose at a T2! Well, DRAGON has awesome dynamic range and it really has super nice highlight fall-off. You think to yourself, "I bet even if I overexpose by 2 whole stops it'll still be OK. After all DRAGON's got like 16+ Stops of DR!" If you're only left with 6 Stops over Key instead of 8 you think you'll still be fine. Maybe the sun does blow out a bit but the surrounding clouds should hold. You'll be fine. Problem is you've already shifted your DR via changing your camera and meter ISO. You don't have 6 Stops over Key, you probably have less than 3 or 4.

When you get the footage back home and pump it into RCX, approach 1 is perfect. You haven't clipped any highlight detail. You've got some range in the sun and surrounding clouds. And your actor's face is perfectly exposed. You can shift the developmental ISO from 200-2000 and it still looks great. It's all about how you want the scene to play: bright and hot or a bit more silhouette-y. It's another creative decision.

Approach 2 doesn't turn out so well. You realize you totally forgot to pump in 2 more stops of light into your actor's face. But it's cool cause you can just change your development ISO in RCX. Go from 200 back to 800. Though this helps your actor's exposure you also notice that the sun is completely blown out. As are most of the surrounding clouds. Totally clipped. Completely white. Zero detail. You take development ISO back down to 200. It's a compromise. Your actor is a bit too dark. You can probably help that out a bit later with a proper grade in Resolve. But surprisingly, the sun and surrounding clouds are still blown out. Still clipped. You see a bit more detail there but nowhere near enough to call your shot properly exposed. Worst of all is when your actor turns back into the sun to walk off into the distance. When his face hits the sun it goes completely nuclear. No hope.


This is just one example where ISO ranges like 200-2000 can be more confusing than helpful when one is learning how to expose properly in digital cinema.


Actually Adrian, You will be able to get the sun "within" and the actors face at "right" levels with that ISO change in post. As RLF (like LogC) is constructed to "hold the top" even when pushed in post. As long as you do not actually overexpose, you get an emulated "roll-off" when you push the top.

So it seems like I disagree, but I do not... :)

Because your actors face will not look like you want it to, because of the underexposure.

So we agree... :)
NOT because you lose the top (as RED/ARRI and probably Sony/Canon have thought a lot about that and gone full circle back to Cineon or "cineon-like" logs to solve that), but because two stops underexposure does not LOOK the same when lifted up, as the "right" exposure does.

A couple of reflectors sounds easier to carry in that desert than that genny-truck truck and the 18k's, though... :)

I like this example. :)
 
Last edited:
When I was at Brooks Institute in the 90s and taking "The Zone system" from Chris Rainer and Bob Smith (Chris was one of Ansel's last assistants) one of the first things we did was test the EI (Exposure Index) of our film. The reason was that despite the number on the box almost all films have a slightly different sensitivity depending on the developer and temperature used. I bought 100 rolls of the same lot of medium format Tmax 100 and I spent two weeks nailing down the exact EI and DR (which turned out to be EI 125 once processed). I have an entire 50 page book of various exposure and dynamic range tests that I had to produce before we were allowed to go out and shoot any real subjects.

This is not any different than the approach you should take finding the EI you feel most appropriately matches your vision for the project you have on hand, regardless of the camera. I have tested the MX and the Dragon and happily expose those cameras at EIs from 320-1280 on the MX and 400-4000 on the Dragon depending on the look and needs of the scene. The rated EI/ISO on the camera are dead on accurate to 18% grey when checked with both incident and spot meters (which need occasional calibration too BTW).

However you look at it you have considerably more DR and control over your exposure than any previous group of filmmakers up to this point.
Deal with it!


Hi Evan,

Great image. JPEGS NEVER do prints justice.

The interesting thing is that when you tested the TMAX100 you "discovered" a rating very close (almost exactly) to what the manufacturer suggested. With that knowledge you could move things around. You are fortunate to have had such great teachers who would force that kind of knowing into your image making. But the films rating and the one you discovered did not deviate much from a starting point or "set standard" under know circumstances. From that point you could rate that film wherever you wanted to for whatever creative choices you could make.

But the baseline exists to test against.

If that TMX was labeled 250-2000 it's your guess. You still would have needed to 100 rolls to figure out that it was about 125.

I'm just saying that very few people are going to go into that journey of discovery and many in RED's pool aren't going to take the time to do that kind of extensive testing, which is why my point in this thread is about establishing and having baselines.

Thank you! (even accidentally) because your post identifies the need for this perfectly.

Even after attacking TMAX on a technical level, your result was pretty darn close to what Kodak was telling you. From then on it's of to the creative races. While I would advocate ever single RED cutover and eyery single DP do this for every shoot, we know that not everyone is going to be the diligent student you were, blessed with those teachers.

Battistella

BTW: check out this trailer for a film I made about photographer George Tatge last year http://www.georgetatge.com (was nice to be in the darkroom again).
https://vimeo.com/52810195
 
As part of the real world testing I've mentioned above I have been looking at what it means to "Hard clip" the Dragon's highlights, one thing for sure is it handles it with aplomb...
(This is the current "old" OLPF)

Both shot at ISO 500 (it's actually pretty difficult to hard clip at higher ISOs)

The window frames are in direct sun, subject is lit by a window with blinds about 10 feet away.
ADR.jpg


this should be pretty self explanatory, sun behind thin clouds, no fill whatsoever.
ODDR.jpg

The crunchy-ness is all Jpeg BTW.

You can download R3d frames & 1/4 Rez Tiffs here to play with...
http://www.evingrant.com/pics/DragonHL

This is obviously hard testing, but even without any DR bump the considerably more natural clipped highlight handling and organic grain structure make the Dragon upgrade a must for me.
 
Last edited:
Adrian,

I like this graph, much better and more intuntive than Phil's version. Sorry Phil, your graphs are great but that one I didn't visualize as well as this one. The bars being vertical does something special.


Glad it worked for you. I know it's almost considered sacrilegious around here but I pulled that graph off of ARRI's ALEXA FAQ page. If anyone is so inclined I'd recommend a visit or two over to "the dark side" as there is a ton of useful material to be found there (as is in their downloadable white papers).

http://www.arri.com/camera/digital_cameras/learn/alexa_faq/

The truth is both the EPIC and the ALEXA are basically the same camera by design. They're both just high-end video cameras. Just because they can shoot raw doesn't make them intrinsically better than a camera that can't. The ALEXA practically proves this point: if you run exposure and DR tests between recording compressed ProRes Log vs uncompressed raw the differences are amazingly subtle. Everything you can learn about digital cinema from ARRI's site applies directly to the EPIC or DRAGON. And everything you can learn from RedUser applies directly to the ALEXA. The only difference between the two is that I find ARRI to be a bit more transparent. But perhaps that is due to their history and experience as a company. Perhaps they are a bit more pragmatic when it comes to specs and definitions concerning their products.
 
Adrians above example illustrates another somewhat confusing point, that ISO may not necessarily be used equally in post and on set...

True, but with film development you could never slide ISO the way you slide it around as metadata now. I ever find I have to swing ISO more than a stop to stop and a half at the very most. But it comes down to correct exposure at the start.

then you have all the other stuff there too. lift gamma gain, individual channel control, brightness, exposure, flut, photoshops style tools, resolve style tools, all in there to further "mess" things up.

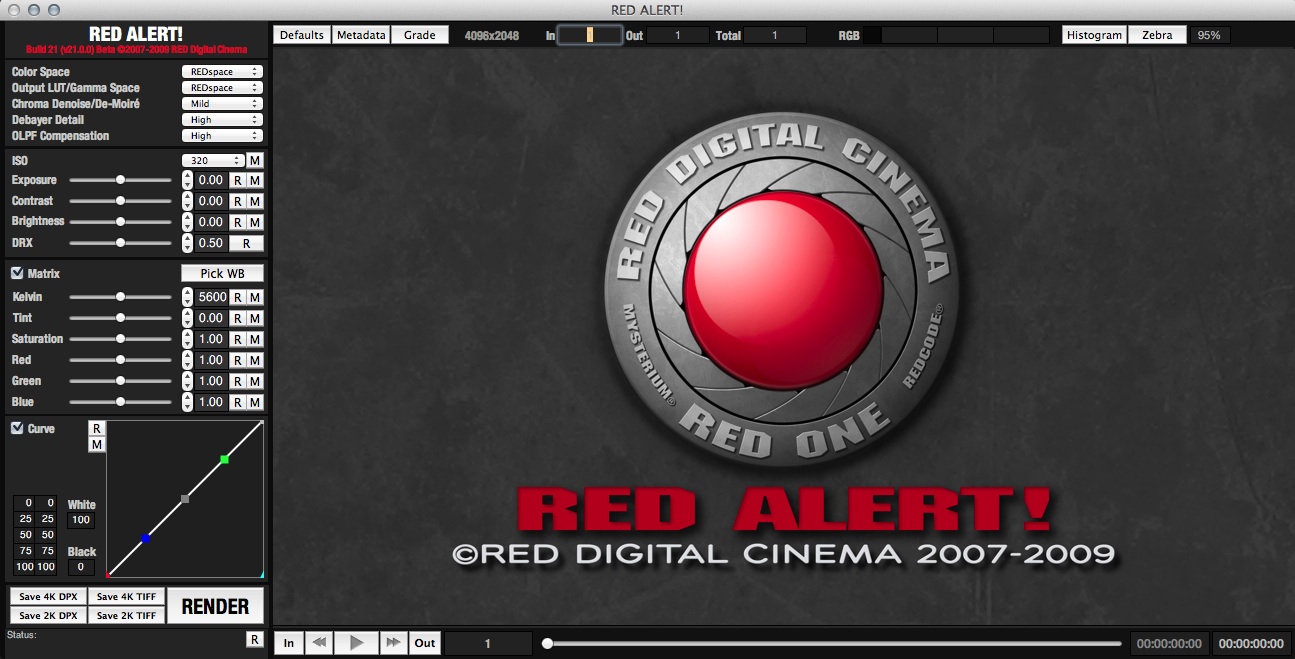
that is another thread Gunleik! The one about simplifying post. You have me longing for the days of RED ALERT, which they should bring back fro about 90% of users.

Battistella

redalert.jpg
 
Glad it worked for you. I know it's almost considered sacrilegious around here but I pulled that graph off of ARRI's ALEXA FAQ page. If anyone is so inclined I'd recommend a visit or two over to "the dark side" as there is a ton of useful material to be found there (as is in their downloadable white papers).

http://www.arri.com/camera/digital_cameras/learn/alexa_faq/

The truth is both the EPIC and the ALEXA are basically the same camera by design. They're both just high-end video cameras. Just because they can shoot raw doesn't make them intrinsically better than a camera that can't. The ALEXA practically proves this point: if you run exposure and DR tests between recording compressed ProRes Log vs uncompressed raw the differences are amazingly subtle. Everything you can learn about digital cinema from ARRI's site applies directly to the EPIC or DRAGON. And everything you can learn from RedUser applies directly to the ALEXA. The only difference between the two is that I find ARRI to be a bit more transparent. But perhaps that is due to their history and experience as a company. Perhaps they are a bit more pragmatic when it comes to specs and definitions concerning their products.

LOL, I knew where you got it. hahahahaha

I have seen it a couple of times.

You are right, the cameras work in many ways around the same principles. They are more similar than different. In fact, the more I know, the more similar do I find all digital cameras, RAW or not.
You just have to take "codec" into consideration, in addition to all the above... :)

And as mentioned, one of the things arri and red do share, is that they will keep whatever info is in the top available in post, no matter what iso adjustments you do to get things back to where you want them.

Problem with the at approach is as mentioned that skin 2 stops under does not look like skin at intended exposure. On the Dragon the cost - image-wise - is "smaller" than on MX. That is not to say it is not there.

A lot of things outside luma-levels change when you over/underexpose. The Character of the image basically changes, and while you can use ISO adjustments (in post) to correct for that AND keep the highlights, you do not necessarily get the image you intended.
 
As part of the real world testing I've mentioned above I have been looking at what it means to "Hard clip" the Dragon's highlights, one thing for sure is it handles it with aplomb...
(This is the current "old" OLPF)

Both shot at ISO 500 (it's actually pretty difficult to hard clip at higher ISOs)

The window frames are in direct sun, subject is lit by a window with blinds about 10 feet away.


this should be pretty self explanatory, sun behind thin clouds, no fill whatsoever.

The crunchy-ness is all Jpeg BTW.

You can download R3d frames & 1/4 Rez Tiffs here to play with...
http://www.evingrant.com/pics/DragonHL

This is obviously hard testing, but even without any DR bump the considerably more natural clipped highlight handling and organic grain structure make the Dragon upgrade a must for me.

Thanks Evin. I could see the highlights holding so much better in Gunleik's hardcore R3D stress tests, such friendly rolloff which got better with the new olpf.

Battistella
 
Actually Adrian, You will be able to get the sun "within" and the actors face at "right" levels with that ISO change in post. As RLF (like LogC) is constructed to "hold the top" even when pushed in post. As long as you do not actually overexpose, you get an emulated "roll-off" when you push the top.

So it seems like I disagree, but I do not... :)

Because your actors face will not look like you want it to, because of the underexposure.

So we agree... :)
NOT because you lose the top (as RED/ARRI and probably Sony/Canon have thought a lot about that and gone full circle back to Cineon or "cineon-like" logs to solve that), but because two stops underexposure does not LOOK the same when lifted up, as the "right" exposure does.

A couple of reflectors sounds easier to carry in that desert than that genny-truck truck and the 18k's, though... :)

I like this example. :)


I always enjoy a good convo w/ you, GG.

In my above example I made it clear that the sun was metered 2 full stops above the intended creative exposure value. To expose the actor's face at the intended exposure of T8 you would have invariably overexposed the sun by 2 full stops. There was only 8 stops of DR over middle-grey (the actor's face) available. The sun was 10 stops over. That is why one needs to close down the lens by 2 stops and expose at a T16 to hold detail in the sun (I know this is a bit far-fetched as what does "hold detail in the sun" even mean! It's just an example, go with it). If you instead kept your exposure at T8 and then brought it down 2 stops later with development ISO in RCX the sun would still be overexposed by 2 stops. The development ISO gamma curve may stretch or pull the top end of your exposure values a bit and create a different sense of the top-end tonal curve but any actual detail would still be 100% lost and unrecoverable.
 
Ta-Da !!! Mind Blown !!!


:emote_22_yikes:

I tried to explain... :)

It is not all hard, and I have seen it be used like that on both Alexas and REDs

You do not blow the top IN POST by lifting it two stops to get the levels right in the face.

Problem with this method (which I have seen DPs rely on) is that the face will not look the same, even though the levels will be the same.

So we agree.

Exposure is about light, even WHEN the top holds. due to post-ISO adjustments. :)

It is a nice security, but I really hate the unequal results people get when they "expose for the top" because you can do these adjustments, instead of exposing for "what is important".

It is BTW easy to test for this claim...
 
OK. Let's not go post, here... :)
Or let us make that a different thread. I introduced it, and just understood how that might not be good for the understanding of "ISO when exposing" :)

I think I might open another thread on the post side of these exact issues, though... :)

Signalchains... Each part of the chain is different and important to understand, but the one being discussed here, is the first... Photons hitting sensor. :)

Where it all starts and how to get it right.

I am so glad noone has not mentioned ETTR! :) hahahahahahahaha
 
I'd prefer ISO to be what it has always been: a discreet value based on a digital camera's dynamic range where ISO represents the mid-point or 18% Grey within that DR.

As for Post ISO, I'd get rid of it entirely. It's just confusing everyone more than it should. It would be better to simply redefine development ISO as a +/- numerical scale. IE: +1 Stop, -1 Stop. This is exactly how it used to work when we shot film negative by the way. You never shot a 500T film stock and then wrote "expose at 2000 ISO" on the can before you sent it to the lab. You simply wrote "Pull 1 Stop" or "Push Process 2 Stops".

I like that thought.
Now, there are a couple of controls in RCX that do exactly the same, but with different names... :)
Even the curves are ruled by the same main maths.

We are getting into terminology issues here, and in a way, I think that is not a bad idea.

But for the matter of clearity, I think this thread should stay in the "photons hitting sensors" domain... :)

NOW I have to get some work done...
 
I'd prefer ISO to be what it has always been: a discreet value based on a digital camera's dynamic range where ISO represents the mid-point or 18% Grey within that DR.

As for Post ISO, I'd get rid of it entirely. It's just confusing everyone more than it should. It would be better to simply redefine development ISO as a +/- numerical scale. IE: +1 Stop, -1 Stop. This is exactly how it used to work when we shot film negative by the way. You never shot a 500T film stock and then wrote "expose at 2000 ISO" on the can before you sent it to the lab. You simply wrote "Pull 1 Stop" or "Push Process 2 Stops".

Yes.

This would avoid a lot of confusion, underexposed imagery and "Red skintone" threads.

I'd also suggest putting that in the camera setting instead of making people believe they have a variable ISO medium. ISO is related to captured density depending on sensitivity. Which is not variable.

16 bits, RAW, higher DR and very clean shadows do not entail a variable sensitivity, they merely bring less penalties for missing a sweet spot. This is not an equivalent to variable ISO film stock, it is just more "flexible".

In this example changing ISO setting is not changing sensitivity of the medium or adding overall density but serves as a tool for re-destributing that density within the achievable DR.

Base ISO > evenly distributed around a mid point,
+ ISO > more density in the highlights, less in the shadows,
- ISO > vice versa
 
I'd prefer ISO to be what it has always been: a discreet value based on a digital camera's dynamic range where ISO represents the mid-point or 18% Grey within that DR.

As for Post ISO, I'd get rid of it entirely. It's just confusing everyone more than it should. It would be better to simply redefine development ISO as a +/- numerical scale. IE: +1 Stop, -1 Stop. This is exactly how it used to work when we shot film negative by the way. You never shot a 500T film stock and then wrote "expose at 2000 ISO" on the can before you sent it to the lab. You simply wrote "Pull 1 Stop" or "Push Process 2 Stops".

Adrian you have some excellent posts while I was sleeping :)

And I now think I really understand what David has been driving at this whole time.

No. ISO is a technical, fixed value. Exposure is a creative choice. If you change your development ISO in Post it would be an intentional creative choice. One that you hopefully thought of in advance when you were on-set setting your scene referenced exposure. ISO tells you how to expose for an equal distribution of dynamic range both above and below middle-grey. Where you actually set your exposure defines what you find important in the scene.

Okay - you guys want ONE ISO "rating" for the camera - like the ISO on the film can. Then, based on user preference and testing - they rate it any way they want - and of course - it does change where 18% grey is relative to the total dynamic range - and sometimes that's a choice.

What I was trying to say - is that creatively - I would not want to use one ISO rating for my exposure method because I would not want to shoot all things with the dynamic range equally distributed over/under 18% middle-grey.

So ... my example posted earlier is better expressed as Dragon = one film stock. I rate it how I want it based on what I want driving my exposure method. So ... my three ISOs for one film example is not three "film stocks" - but one film stock "rated three different ways".

Now ... I'm pretty damn sure based on my tests (OLD OLPF) on Dragon that the ISO that has equal dynamic range above and below is over 800 but below 1280 - the BIG question I have if you and David - if we do it this way - what constitutes dynamic range at the bottom with respect to noise tolerance? Are we talking about "usable dynamic range" - and if so - what sets the definition of "usable"?

Let's just say that it's ISO900 (800 and some Flut :)) - but I still like to rate at ISO 640 as my personal base. That is the same as how many DPs would rate a film stick differently than the number on the box.

And yes, your point about ISO in post - yeah - we never called it that - we always said push/pull +1 or +2, etc. and IT WOULD be helpful IMO if the post processing controls were renamed - I doubt RED will make that change now - but regardless - you have pointed out something I need to emphasize when teaching.

Again - really glad to have you posting here Adrian and I hope you will help me try to motivate RED to implement solid CDL and 3D LUT support because I think it's important - but let's save that for another day :)
 
I'd also suggest putting that in the camera setting instead of making people believe they have a variable ISO medium. ISO is related to captured density depending on sensitivity and they are not variable.

Except all the other cameras let you change ISO in the camera and it's how lot's of folks expect to work.

Base ISO > evenly distributed around a mid point,
+ ISO > more density in the highlights, less in the shadows,
- ISO > vice versa

Well ... this is a great, simple explanation that is easy to teach - and now it has me really liking the "Base ISO" definition :)

as long as someone can explain to me how we judge/define what is dynamic range at the bottom with respect to noise, etc. - that is what I'm still unsure of - please advise -
 
Adrian you have some excellent posts while I was sleeping :)

And I now think I really understand what David has been driving at this whole time.


Okay - you guys want ONE ISO "rating" for the camera - like the ISO on the film can. Then, based on user preference and testing - they rate it any way they want - and of course - it does change where 18% grey is relative to the total dynamic range - and sometimes that's a choice.

What I was trying to say - is that creatively - I would not want to use one ISO rating for my exposure method because I would not want to shoot all things with the dynamic range equally distributed over/under 18% middle-grey.

So ... my example posted earlier is better expressed as Dragon = one film stock. I rate it how I want it based on what I want driving my exposure method. So ... my three ISOs for one film example is not three "film stocks" - but one film stock "rated three different ways".

Now ... I'm pretty damn sure based on my tests (OLD OLPF) on Dragon that the ISO that has equal dynamic range above and below is over 800 but below 1280 - the BIG question I have if you and David - if we do it this way - what constitutes dynamic range at the bottom with respect to noise tolerance? Are we talking about "usable dynamic range" - and if so - what sets the definition of "usable"?

And yes, your point about ISO in post - yeah - we never called it that - we always said push/pull +1 or +2, etc. and IT WOULD be helpful IMO if the post processing controls were renamed - I doubt RED will make that change now - but

Mark,

I'm glad maybe my position, thoughts, ideas, are becoming more clear.

Evin's post earlier was a darn good example of how a manufacturer, in this case KODAK with TMAX100 film stock, came very close to there rating. You hand it to Evin (a young photography student at the time) and he does a hundred rolls of testing sensitivity and comes up with a rating of 125 (pretty darned close). SO it should be for anyone testing Dragon after RED has defined the baseline. It does not prevent anyone from chaining their methods based on scene requirements, it just gives a baseline.

Now what does that mean. It means KODAK felt confident in saying that this film would be (with slight deviation) pretty much correctly exposed if you metered and lit according to 100ISO. Could people eek more out of it? maybe, but the baseline for their terms of sensitive of black and white film was set. THEN, people over, under, pushed pulled, etc.

So, where is that for Dragon. It'd want it at the middle of the extremes probably favoring highlight protection (because its digital) by maybe having one stop more in the highlights over the shadows. Where that falls with DRAGON could be be anywhere from 640 to 1000 ISO but I would favor a less grainy image (my taste) SO maybe I would settle at 640 like you have.

I can't say for sure at this moment because I have not done my own testing in a wide variety of circumstances, but based on what I am seeing in R3D files, I'm thinking it might be a true 800 ISO sensor now.

I'm not talking about where RED puts the ISO as a default, but where it really sits. Maybe also rather than go with ISO, EI would be better.


Battistella

Here is a good KODAK link, not everything applies to digital but at least you can see the factors that go into rating a films EI
 
Sorry Adrian, but in the approach 1 you are talking about having two 18KW HMI and in the approach 2 you have a crew that forgets ND filters in the desert.. That's really not the cameras fault.. You can't ask the camera to solve every production problem and still look for creative possibilities.. it does what it does and it does it beautifully..

I get your point with 18% grey, but in our experience, in a country like Paraguay were we only have two seasons (the soccer one and summer), exposing to 800 or 2000 in exteriors is to condemn every chance of highlight detail.. or it means putting a buck load of filters in front of the lens, which we prefer not to do..

ISO is a static, reference value (or it should be... hint, hint RED). ISO doesn't dictate your exposure choices. You do.


Say you're shooting a high-key day exterior shot. Maybe something in the desert. 21mm lens. Sun clearly visible in your frame. Sand dunes in the distance. And your main character front and center. Maybe something like this but with the sun in the shot as well:


Lawrence-of-Arabia-600x362.jpg


Your incident meter tells you that proper exposure for your leading actor's face is T8. OK. You take a meter reading of the sun. Unsurprisingly it's 10 stops over "key" or your nominal scene referenced exposure based on subject matter (your actor) and ISO (800 via DRAGON). The bummer is you've only got 8 Stops over Key. What to do? Well you can easily close the lens down 2 stops to a T16. Problem is that now your Key or actor or scene referenced middle-grey/18% Grey is now 2 Stops underexposed. To get your Key back to proper exposure (creatively defined by you, the DP, not technically defined by ISO) you'll need to bring out a couple of 18K HMI's and punch in some fill light into your actor's face. Problem solved. You expose at T16. Your shot looks amazing.

Same scene, different approach: It's the desert. It's hot. Really hot. You're sweating. Your actor is sweating. You've just climbed up this stupid sand dune to get your incredible shot. It's gonna look amazing. But you'd really like a bottle of water. You take a meter reading of your actor. T8. OK. But you don't want to shoot with such a deep stop. You prefer shallow depth of field. You want to shoot at a T2. So you call to your trusty AC, "Throw in a N12!" Ooops. He left the filters back on the camera truck. It's gonna be 30min to get them. "Forget about it", you decide. My DRAGON is a 200-2000 ISO shooting machine! You'll just compensate for the exposure change in camera. Who wants to shoot day exteriors at 800 or 2000 ISO anyway? So you set your DRAGON to 200 ISO. That's only 2 Stops. Now according to your meter you should expose at T4. But you wanted to expose at a T2! Well, DRAGON has awesome dynamic range and it really has super nice highlight fall-off. You think to yourself, "I bet even if I overexpose by 2 whole stops it'll still be OK. After all DRAGON's got like 16+ Stops of DR!" If you're only left with 6 Stops over Key instead of 8 you think you'll still be fine. Maybe the sun does blow out a bit but the surrounding clouds should hold. You'll be fine. Problem is you've already shifted your DR via changing your camera and meter ISO. You don't have 6 Stops over Key, you probably have less than 3 or 4.

When you get the footage back home and pump it into RCX, approach 1 is perfect. You haven't clipped any highlight detail. You've got some range in the sun and surrounding clouds. And your actor's face is perfectly exposed. You can shift the developmental ISO from 200-2000 and it still looks great. It's all about how you want the scene to play: bright and hot or a bit more silhouette-y. It's another creative decision.

Approach 2 doesn't turn out so well. You realize you totally forgot to pump in 2 more stops of light into your actor's face. But it's cool cause you can just change your development ISO in RCX. Go from 200 back to 800. Though this helps your actor's exposure you also notice that the sun is completely blown out. As are most of the surrounding clouds. Totally clipped. Completely white. Zero detail. You take development ISO back down to 200. It's a compromise. Your actor is a bit too dark. You can probably help that out a bit later with a proper grade in Resolve. But surprisingly, the sun and surrounding clouds are still blown out. Still clipped. You see a bit more detail there but nowhere near enough to call your shot properly exposed. Worst of all is when your actor turns back into the sun to walk off into the distance. When his face hits the sun it goes completely nuclear. No hope.


This is just one example where ISO ranges like 200-2000 can be more confusing than helpful when one is learning how to expose properly in digital cinema.
 
Back
Top